| On this page |
Overview 
Houdini provides a wide range of nodes and tools for generating realistic terrains through heightfields. A heightfield doesn’t consist of traditional geometry like vertices and polygons. You can think of a heightfield as 2-dimensional grid with cells. The intersecting points of that grid contain the terrain’s height information.
This approach lets you combine and stack different types of terrain, e.g. a bedrock with a layer of soil on top. These elements are called height layers, while the base layer - here it’s the bedrock - is always named height. Layers play an important role with heightfields in general and it’s all about stacking and manipulating layers to achieve the results you're looking for. The advantage with this technique is that you keep full artistic control, because you can turn on and off layers temporarily, work on each layer individually or add new layers at any point of your network.
Most terrain nodes take a second input that can contain a mask layer to control, which parts of the terrain the node will modify. The default mask layer is named mask. As with height layers, it’s possible to have multiple, differently named mask layers in a geometry stream. Then you can specify which mask layer you want to use, e.g. for applying erosion or terraces.
The Houdini viewport is capable of visualizing the 2D height field as a 3D surface, and the mask field as a red tint on the surface. Heightfields aren’t limited to huge terrains, but you can also create smaller landscapes, riverbeds, seabeds, deserts, and many other geological structures. It’s also possible to paint your own map and use it as a basis for a complex and highly-detailed terrain. The perhaps most realistic approach is to load a displacement map from a real landscape and turn it into a heightfield.
Note
A special form of heightfield is the Shallow Water Solver that lets you quickly flood large areas or make water run over rocks and cracks.
Limitations 
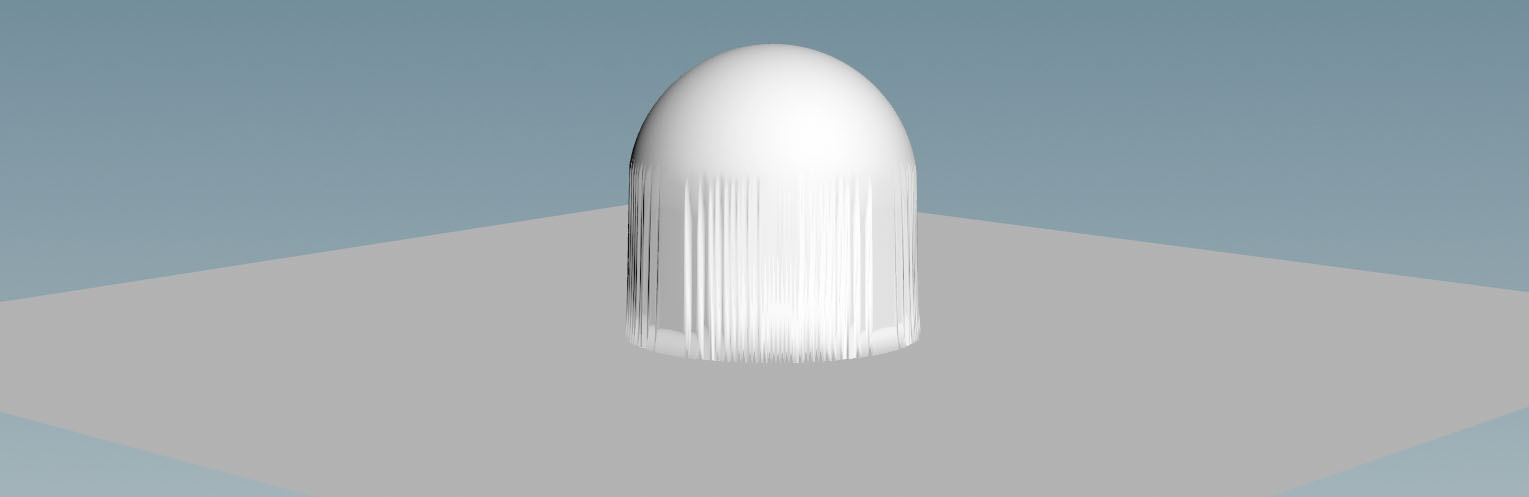
As mentioned before, heightfields are flat 2D grids and all height information is stored in the grid’s points. For this reason it’s not possible to work on a terrain’s vertical areas. A good example are the vertical parts you get from a ![]() HeightField Project SOP. This nodes takes regular geometry and projects it onto the 2D grid. Masks can also create very similar effects. The image below shows a sphere that is projected onto an empty heightfield. The vertical parts are just stretched along the Y axis.
HeightField Project SOP. This nodes takes regular geometry and projects it onto the 2D grid. Masks can also create very similar effects. The image below shows a sphere that is projected onto an empty heightfield. The vertical parts are just stretched along the Y axis.
If you want to add detail to the vertical parts, you can erode the terrain or convert the heightfield into actual geometry. Another possibility is to scatter objects over those areas to create structures.
Of course, Houdini’s Karma CPU and Karma XPU render engines support heightfields. Anyway, before you can render a heightfield you should convert it into polygons. This step is not absolutely necessary, because Houdini will convert the terrain automatically when you import it to Solaris. However, you have more control over the resulting geometry with manual conversion, for example if you want to you bake colors and layers to the terrain.
Noise types 
Different noise types are one of the centerpieces in conjunction with heightfields and you can find them everywhere: terrain creation, masking, distortion, patterns, etc. Especially the various noise types on the ![]() HeightField Noise SOP are perfectly suited to quickly change the characteristics of a terrain. You can create landscapes with smooth hills or mountains with sharp ridges and steep slopes.
HeightField Noise SOP are perfectly suited to quickly change the characteristics of a terrain. You can create landscapes with smooth hills or mountains with sharp ridges and steep slopes.
On the first look, some noise types like Chebyshev Cellular F2-F1 might create strange patterns. With appropriate distortion and stacked noise types you can create highly-detailed terrains. Then you apply erosion to the mountains to get a realistic look.
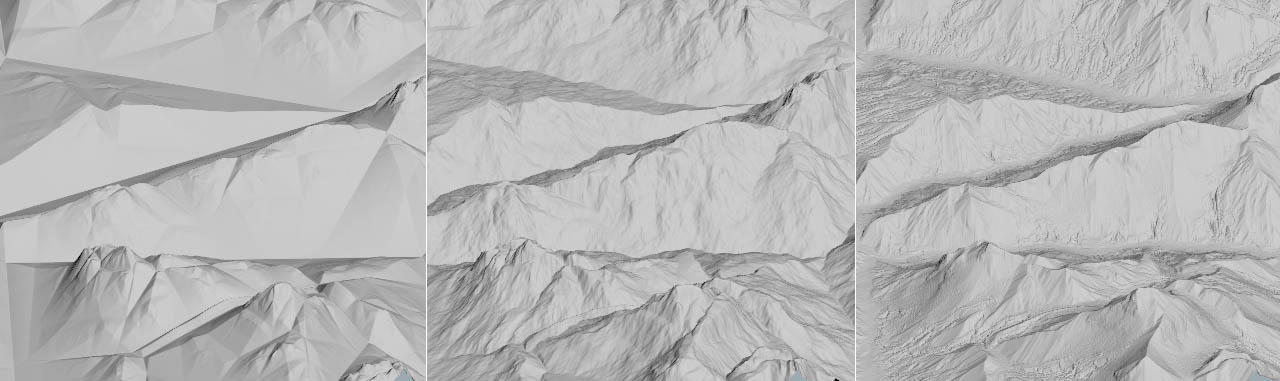
The noise settings of different nodes also share several common parameters. The most important are probably Amplitude and Element Size. Amplitude defines the maximum height of the terrain. Element Size, however, refers to the noise pattern. In terms of heightfields you add more spikes and irregularities with small values, while higher settings create a smoother surface.
The ratio between Amplitude and Element Size is also relevant.
-
When Element Size is small, you normally decrease Amplitude.
-
With large Element Size, the terrain becomes flatter and you’ll most probably increase Amplitude.
The image below shows that you can achieve different types of terrain just by varying Element Size and Amplitude.
Generating a height field from scratch 
To create a basic heightfield, you need only a couple of nodes. The nodes' parameters let you precisely shape the landscape and you can create distant hills with a reduced level of detail or high-resolution ground object for scattering. You normally only have to alter very few parameters to get a completely different look.
Heightfields are created through geometry SOP nodes, so everything starts on Houdini’s obj level, where you press ⇥ Tab to open the tab menu. From there, create a ![]() Geometry OBJ that will serve as container for your landscape. Double-click the node to dive inside.
Geometry OBJ that will serve as container for your landscape. Double-click the node to dive inside.
Heightfield base 
-
Lay down a
 HeightField SOP. This node generates a large, flat plane in ZX direction that is centered to the scene’s origin.
The most important parameters are Size and Grid Spacing. The first parameters determines the terrain’s global scale.
The default size is 1000 by 1000 meters - that’s one square kilometer. Grid Spacing, however, defines the heightfield’s resolution. You can also think of this value as a voxel’s size. With the standard value of 2, the distance between two grid points is two meters. This results in 500 by 500 voxels for a base heightfield.
You can also change Division Mode to By Axis and directly set the number of grid points.
Heightfield noise 
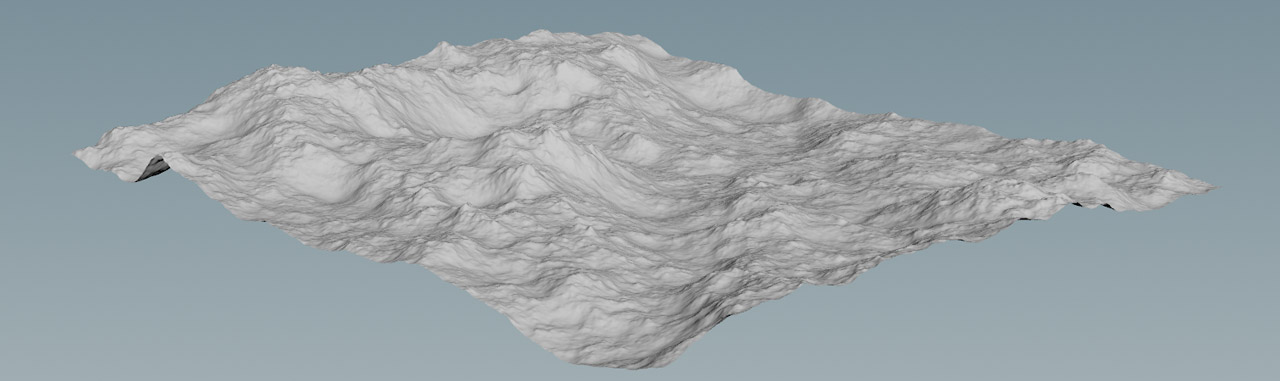
A HeightField node followed by a ![]() HeightField Noise SOP is the primary way to start with some random terrain. From the tab menu, add a HeightField Noise SOP and connect its first input with the output of the HeightField SOP. What you can see now is a rocky terrain with several hills. If you need more detail, you can decrease the aforementioned Grid Spacing parameter on the HeightField SOP. On the noise node, you change the look of the landscape.
HeightField Noise SOP is the primary way to start with some random terrain. From the tab menu, add a HeightField Noise SOP and connect its first input with the output of the HeightField SOP. What you can see now is a rocky terrain with several hills. If you need more detail, you can decrease the aforementioned Grid Spacing parameter on the HeightField SOP. On the noise node, you change the look of the landscape.
Note
The noise parameters, described below, are an important part of Houdini’s heightfield technology in general. You’ll therefore see most of the settings in other nodes and their mode of operation is always the same.
With Amplitude you change the maximum height of the terrain. Note that the value is not given in meters and the standard value of 500 doesn’t create hills with an appropriate height. Amplitude is a scale factor that’s applied to each grid point’s displacement value. When Center Noise is turned on, the factor will be applied in both positive and negative Y direction (assuming that the heightfield is oriented along the XZ plane).
Element Size determines the size of the noise pattern. With smaller values you’ll get a more noisy surface with lots of spikes. Higher settings, however, create a smoother surface with less detail. Element Size is the inverse of the noise’s frequency.
The Scale parameters let you stretch the noise along its orientation: in most cases this is probably X and Z. The height axis, however isn’t considered, because height is controlled through Amplitude.
It’s also interesting to experiment with different Combine Mode settings. Maximum, for example, clips all values below 0 and creates a sea level with islands and coast lines. Minimum, on the other hand, can create eroded, canyon-like structures.
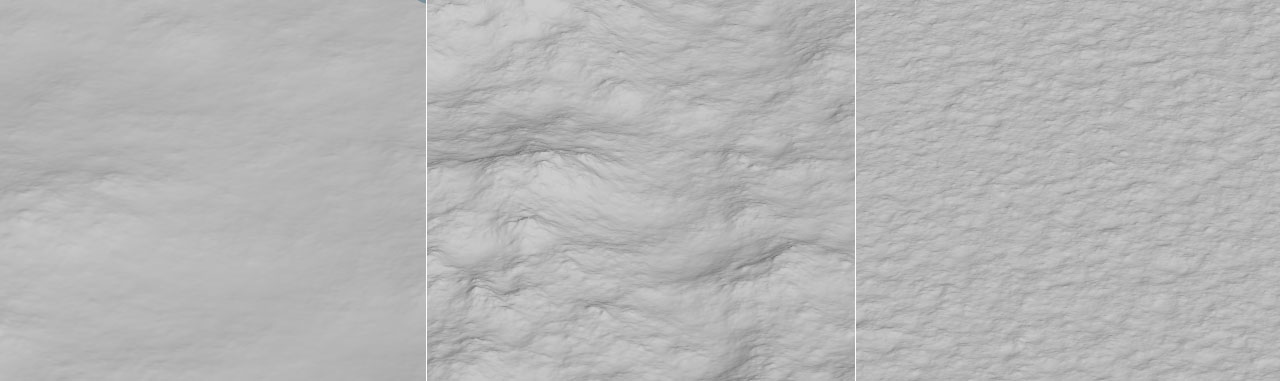
The Noise Settings section provides the Roughness parameter. With higher settings you create more micro-spikes and this results in a more noisy surface. You should change Roughness in small steps of 0.05, because it’s very sensitive.
There also many different Noise Types available. The Perlin, sparse and simplex types add detail to the terrain. The cellular types and Alligator, however, are perfectly suited for defining a terrain’s main structure. Then you refine those with sparse noise and/or distortion. If you need more detail and finer structures on your terrain, plase consider increasing the Lacunarity value.
Heightfield mask 
A mask restricts an effect to a certain area. In conjunction with heightfields you can define, where the terrain should appear, while areas outside the mask will remain flat. When you press ⇥ Tab to open the tab menu and enter hfmask, you’ll see a long list of nodes for the creation and manipulation of masks. To illustrate the basic concept, lets start with a noise mask.
Tip
For more information on masks, please read the HeightField masking page.
If you've already created a basic heightfield, you can proceed with the existing network. Scale and look of your heightfield don’t matter. Here’s a preview of the network you're going to create.

-
From the tab menu, put down a
 HeightField Mask Noise SOP.
 -
You must place the new node between the already existing HeightField SOP and HeightField Noise SOP nodes to see an effect. Connect the mask node’s
-
first input with the output of the heightfield
-
output with the second input of the heightfield noise.
-
-
When you look at the mask node’s parameters, you’ll recognize the same parameters as with the HeightField Noise SOP: Amplitude, Element Size, and the Noise Settings section. Play with the parameters to achieve different looks. Amplitude, by the way, acts like a like a multiplier for the height values.
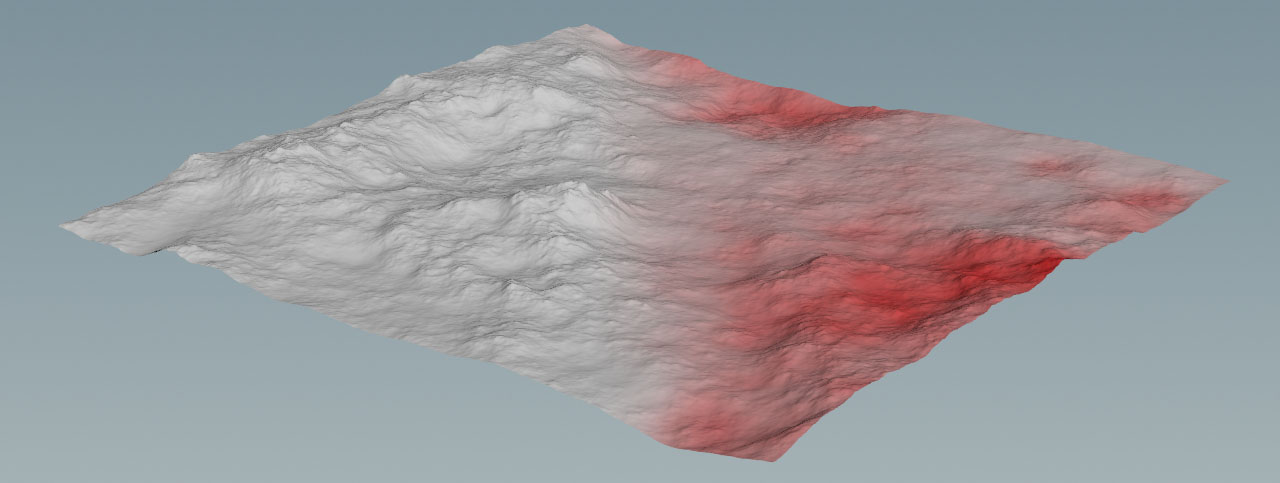
To control the mask’s actual look, turn on the mask node’s blue Display/Render flag. Now you’ll see a red and white pattern, and mountains are only created in the red areas.
Tips and notes 
-
The Terrain desktop has a specialized shelf set, a radial menu, and its own pane layout designed for your work with terrains.
-
You can take advantage of the ⇥ Tab menu’s smart completion when type
heightor justhfinstead ofheight fieldwhen searching for appropriate nodes. For example, you can typehfnoiseto get a list of all available heightfield noise nodes. -
Heightfields and masks are regular Houdini volumes and you can use any geometry (SOP) node that works with volumes to edit heightfields and masks.
Subtopics 
Creation 
-
Fundamental workflows with Houdini’s heightfields.
-
Create detailed terrains from maps.
-
Create custom hills and mountains where you need them.
-
Add realism by stacking layers and applying masks.
-
Step by step closer to the top.
-
Shape your terrains and make them look natural.
-
Be an artist and paint your landscapes.
-
Make any geometry part of a heightfield.
-
Assemble terrains with patches and cutouts.
-
Create realism from basic geometric patterns.
-
Increase terrain resolution step by step.
-
Convert, export and spice up your terrains.
Scattering 
-
Turn terrains into landscapes.
-
Get full control over scatter points.
-
Use attributes for controlling scattering instances.
-
Import your heightfields to Solaris and render them in Karma.
Masking 
-
Define zones of interest and detail.
-
Create masks from the sunlit areas on a terrain.
Natural effects 
-
Turn mountains into dust.
-
When mountains crumble to rocks.
-
Let it flow (down the mountain).
VEX 
-
Customize terrains, masks, and layers through VEX.
-
Shape terrains with wind and sand.
-
Erode heightfields with sand.
-
Erode heightfields with sand and wind.
-
3D fractals for entertainment.
Texturing 
-
Bring terrains to life with colors.
-
Stack textures with layers and masks.
Shallow Water Solver 
-
Shallow Water Solver: Introduction
Flooding heightfields.
-
Create mesmerizing effects with the Shallow Water Solver.
-
Shallow Water Solver: Optimization
Configure and optimize shallow water simulations.
-
Save and convert shallow water simulations.