The ![]() HeightField Patch SOP lets you stitch different heightfields together and create something entirely new. You translate and rotate the patch to place it exactly where you need it. Patches are a convenient method to create terrains that are difficult to achieve with a single heightfield, e.g. if you want to have valleys or plain areas in certain regions. You can also create a solitary mountain and place it where you want it to exist. Patching is perhaps the best way to achieve full control over a terrain.
HeightField Patch SOP lets you stitch different heightfields together and create something entirely new. You translate and rotate the patch to place it exactly where you need it. Patches are a convenient method to create terrains that are difficult to achieve with a single heightfield, e.g. if you want to have valleys or plain areas in certain regions. You can also create a solitary mountain and place it where you want it to exist. Patching is perhaps the best way to achieve full control over a terrain.
You need a mask to define the area you want to use as a patch. Te mask’s shape and properties also control how the patch will be added to the base terrain. A blurred mask cares for a smooth transition between base and patch terrain.
Of course you can “stack” several patches to create extremely complex heightfields that are impossible or at least very difficult to achieve with masks. You can apply erosion or slump, and use maps to the patches and distort to modify the patched landscape.
Another thing to consider is that all layers from patches are deleted - except height and mask. If you, for example, add erosion to the patch, the node will also create a wide range of layers like sediment or water. These layers are no longer available on the patch node.
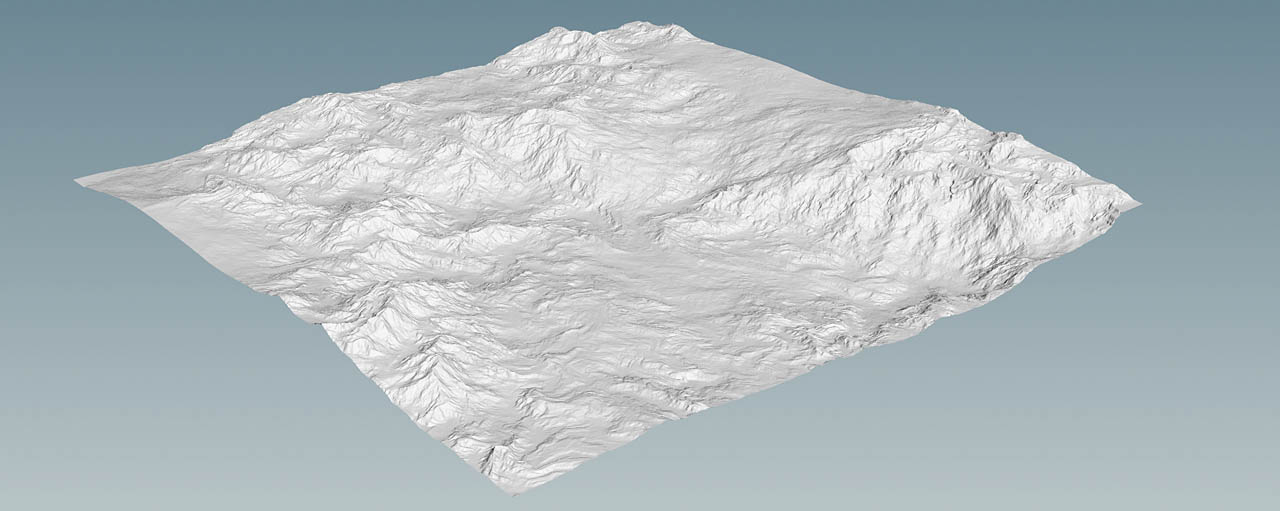
Example: Landscape 
In this example you’ll combine two basic heightfields. The result is a feature-rich with flat areas and eroded parts with many small structures that blend into each other. Erosion and distortion create the terrain’s final look.
Heightfields 
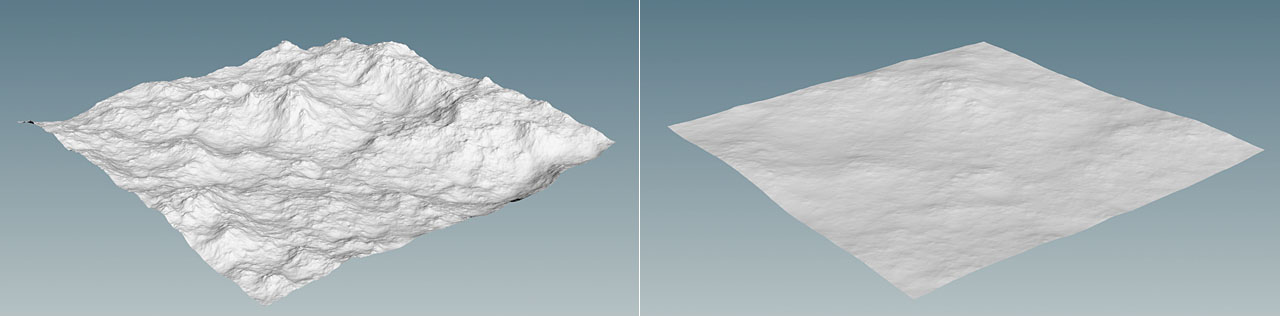
The introduction says that you’ll combine two heightfields, but both terrains are derived from a single ![]() HeightField SOP. To reveal more details, decrease Grid Spacing to
HeightField SOP. To reveal more details, decrease Grid Spacing to 1. For the image above, Grid Spacing was even lowered to 0.5.
To create different landscapes, you need two ![]() HeightField Noise SOPs. Rename the nodes to
HeightField Noise SOPs. Rename the nodes to noise_base and noise_patch. Connect the first input of each noise to the heightfield grid node’s output. You only need to adjust noise_patch.
-
Change Amplitude to
225to get slightly higher mountains. -
With Element Size you control the size of the noise pattern. A value of
1000removes the high-frequency noise and creates a rather flat area with just a few hills. -
For Offset.X, enter
-80to shift the mountains along the negative X direction.
Here you can see the two noise types in action.
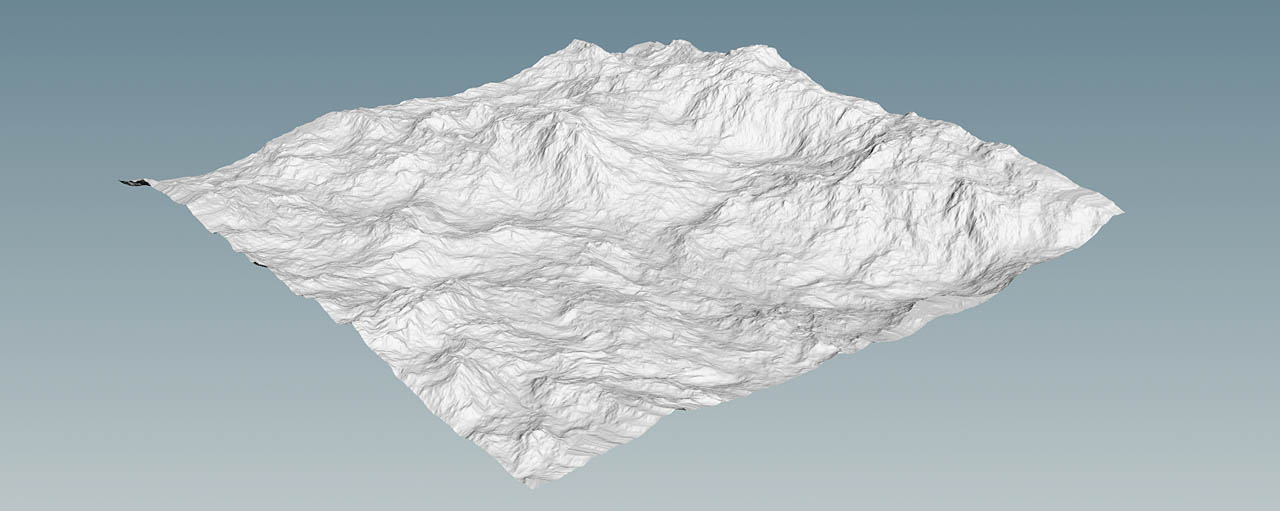
Base distortion 
Distortion is one of the most effective means for adding detail to a terrain and get more structures.
-
Lay down a
 HeightField Distort by Noise SOP and connect its first input to the output of the
 noise_basenode. -
To add some nice structures, change Amplitude to
60and Element Size to450.
What you get is a terrain with lots of ridges and small features.
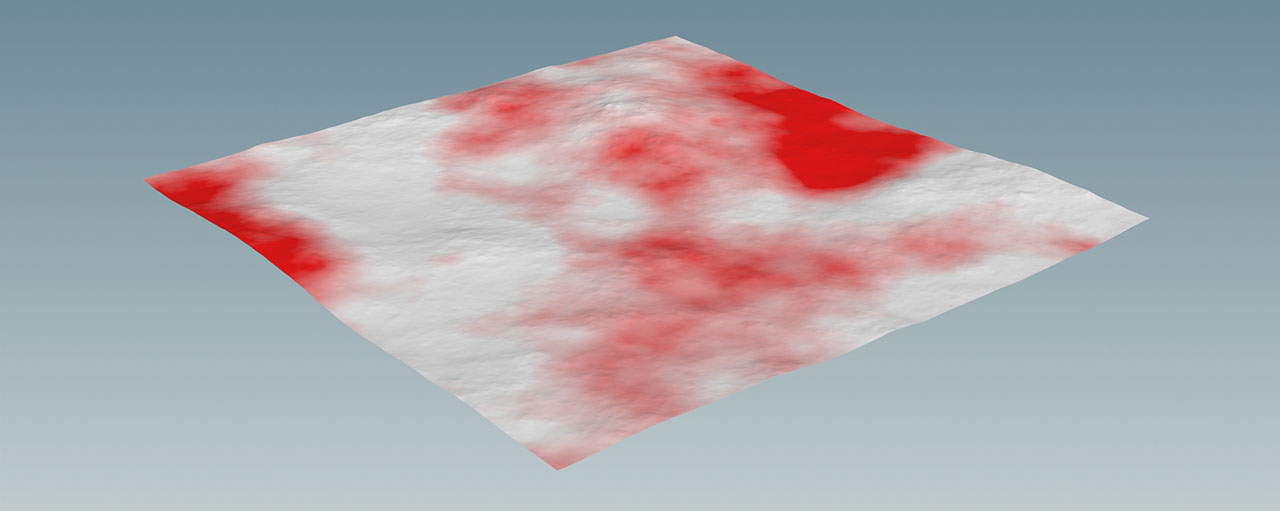
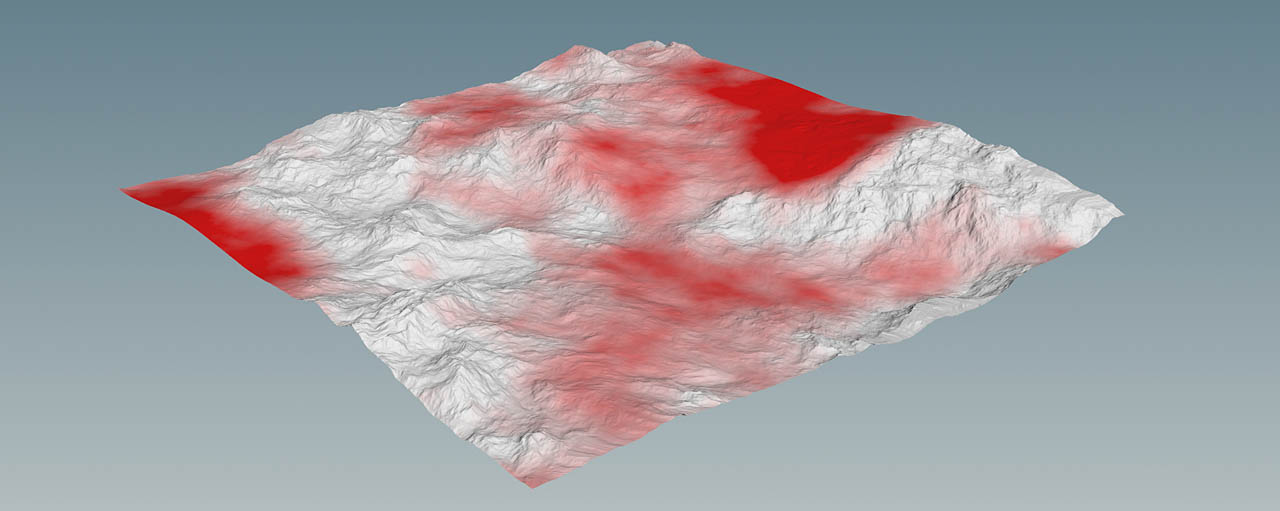
Patch mask 
A mask defines where the patch will be added to the base terrain. This will finally create the flat areas between the mountains. The mask is already blurred by default and creates a smooth transition. As always with heightfield masks, red determines the areas where something happens. This means that the patch (= the flat terrain) will appear in the red areas. You can adjust the mask to your liking and there’s no wrong or right.
Add a ![]() HeightField Mask Noise SOP and connect its first input with the output of the
HeightField Mask Noise SOP and connect its first input with the output of the noise_patch node. What you get should look similar as in this image.
Patching 
The HeightField Patch node brings the two network streams together and uses the noise/patch mask to determine where the heightfields are merged.
-
Add a HeightField Patch SOP to the network. Connect the
-
first input with the output of base network’s HeightField Distort SOP
-
second input with the output of the patch network’s HeightField Mask Blur SOP.
-
-
To balance height differences, set Height Scale to
0.5. This will scale down the height values of the patch terrain even more.
If you're not happy with the position of the patch, you can use patch node’s Positioning parameters. Here you can even rotate the patch. Below you can see the raw patches with the overlying mask.
Erosion 
Right now, the landscape really looks as if it was patched or stitched together. Even the mask’s smooth borders can’t remove this slightly artificial look completely. Erosion helps to “connect” the two terrains. To protect the plain areas, erosion will only happen in the rocky parts and again, the mask’s blurred edges will create a smooth transition.
-
For the erosion mask, you can use an inverted version of the already existing patch mask. Add a
 HeightField Mask Invert SOP and connect its input with the output of the HeightField Mask Noise SOP.
 -
Now, lay down a
 Heightfield Erode SOP and connect its first input with the output of the
 noise_patchnode. The second input goes to the invert node’s output.
You can proceed with the default settings or play with the erosion parameters. That’s totally up to you. In order to get a more natural look, it’s a good idea to add another HeightField Distort SOP. Some moderate Amplitude and Element Size values will create another level of detail and maintain the look of the plain areas.
Finally, add a ![]() HeightField Mask Clear SOP to set all mask values to
HeightField Mask Clear SOP to set all mask values to 0 and make the mask invisible.