CG Forge 提供の Shading Theory with Karma によって、Houdini でリアルなマテリアルを作成する方法を学びましょう。このチュートリアルでは、現実世界の素材を定義する概念、Houdini での作成方法と Principled シェーダ上での適切な設定、そして望ましい結果を得る方法を学びます。
ここでのレッスンはすべて、特別にデザインされたシェーダボットを使用し、マテリアルの作成と探求を手助けします。このシェーダボットは、レッスンを進めていく上で役立つように、下記からダウンロード可能です。これらのレッスンでは、Houdini のSolaris/LOPsコンテキストと SideFX Karma レンダラを使用して画像を生成します。
各ムービーで CC ボタンより日本語字幕をオンにしてご覧ください。
概要
レッスンの紹介から始めて、マテリアル作成に使用するシェーダボットのシーンファイルを探ってみましょう。シェーダボットには、異なる背景、HDRI、キーライトのセットアップの選択のための一連のスイッチノードが含まれており、各マテリアルのルックががどのよう変化するか簡単に調べることができます。
再生時間: 4分1秒
PART 1: Diffuse Reflection
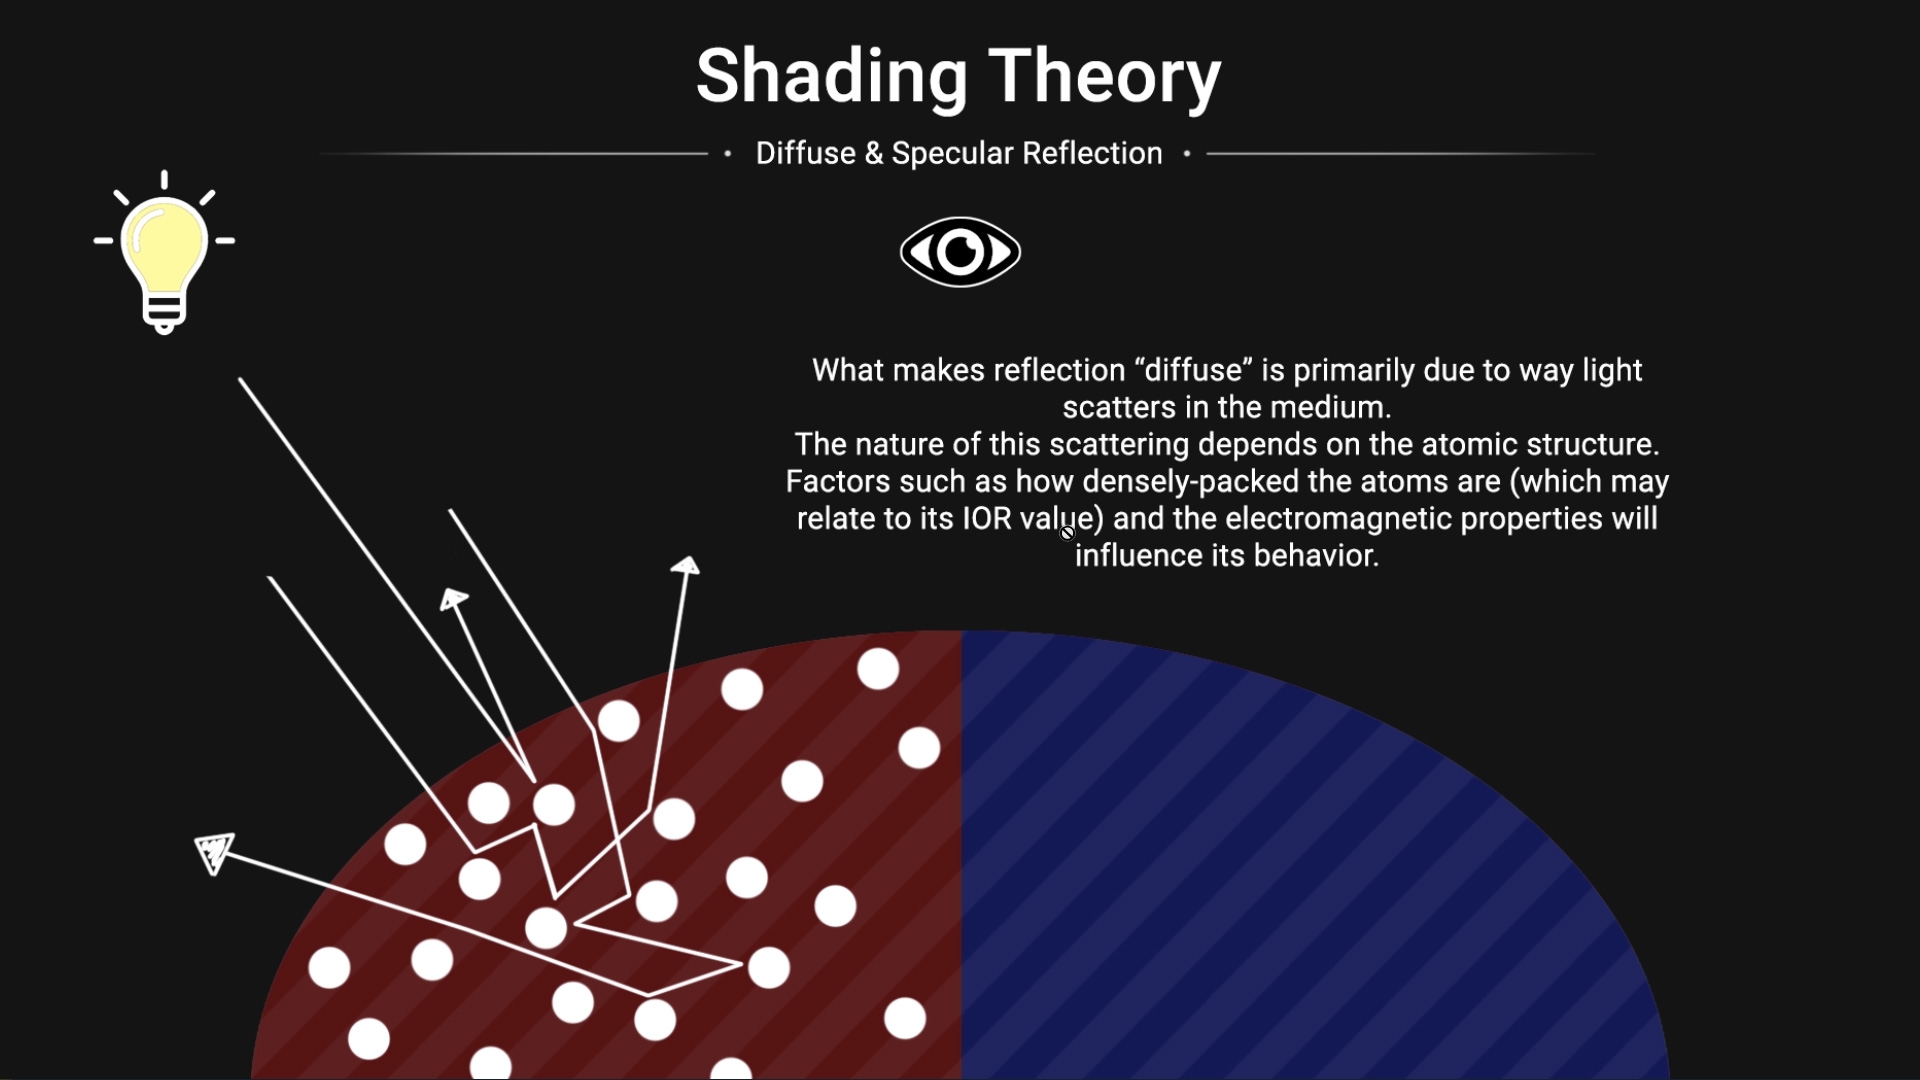
このレッスンでは、Diffuse Reflection (拡散反射) について学び、この概念が通常どのように教えられているかと、分子レベルでの実際の動作を比較します。その後、Karmaを使ってレンダリングする際に、Principled マテリアルがどのように拡散反射を処理するかを学びます。
再生時間: 8分23秒
PART 2: Specular Reflection
このレッスンでは、実世界での反射、特に dielectrics (絶縁体)、semiconductors (半導体)、mentals (金属) での反射について学びます。このレッスンでは、metallic (金属) および fresnel (フレネル) 効果を伴うスペキュラ反射についての理解を深めます。
再生時間: 10分45秒
PART 3: Roughness & Absorbtion
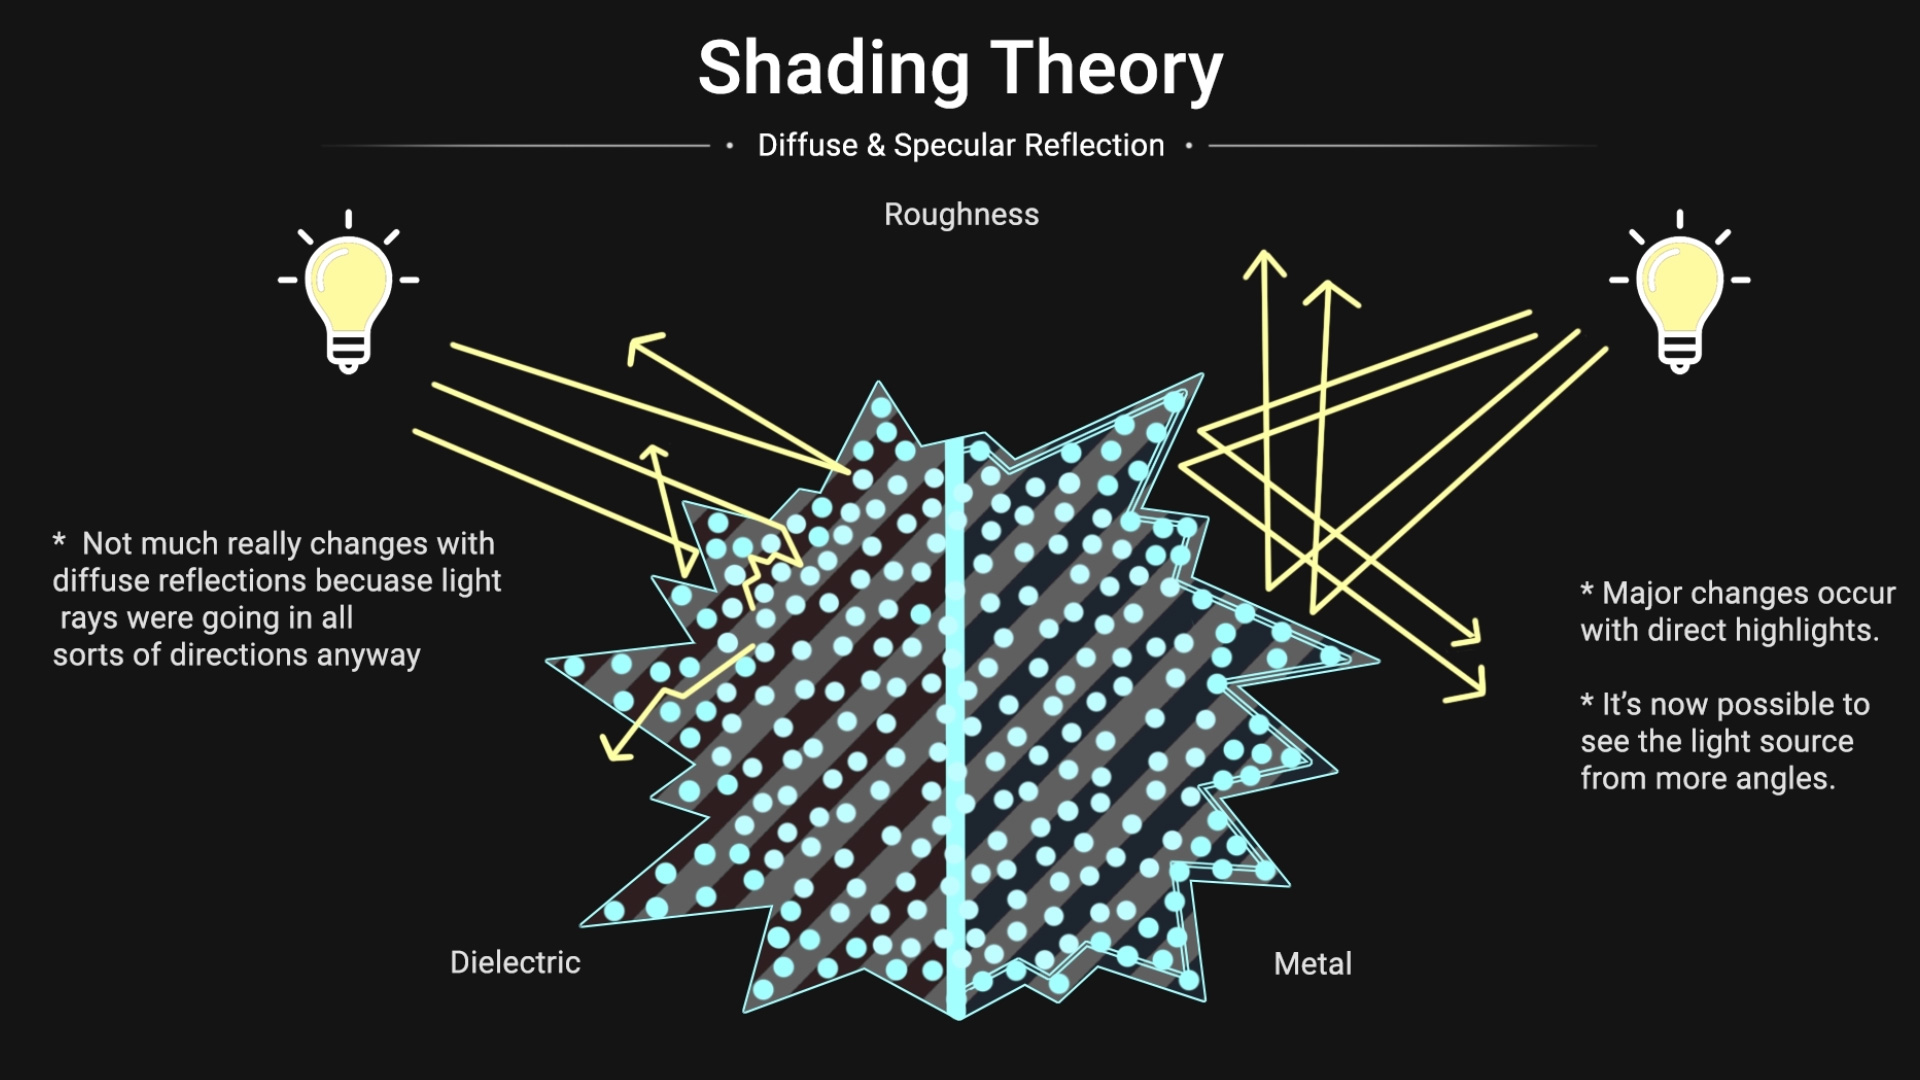
Roughness (ラフネス) が Diffuse Reflection (拡散反射) にとって何を意味するのか、またRoughness が specular lobes (スペキュラローブ) をどのように変化させるかを学びます。Fresnel と Roughness の関係を探り、Albedo (アルベド)とAbsorption (吸収) パラメータの最良の実践例について学びます。これらの概念は、シェーダーボットを使って Principled マテリアル上でテストされます。
再生時間: 10分47秒

PART 4: Shading Exercises
画像集を元に各リファレンスから色を選択する方法、Metallic パラメータを使用するタイミング、ウェブ上で金属の IOR を見つける場所などを学びます。リファレンスを調べ分析することで、各素材に必要なルックの実現が可能です。このレッスンでは、スムーズな dielectrics と金属のサンプル方法についても説明します。
再生時間: 11分59秒
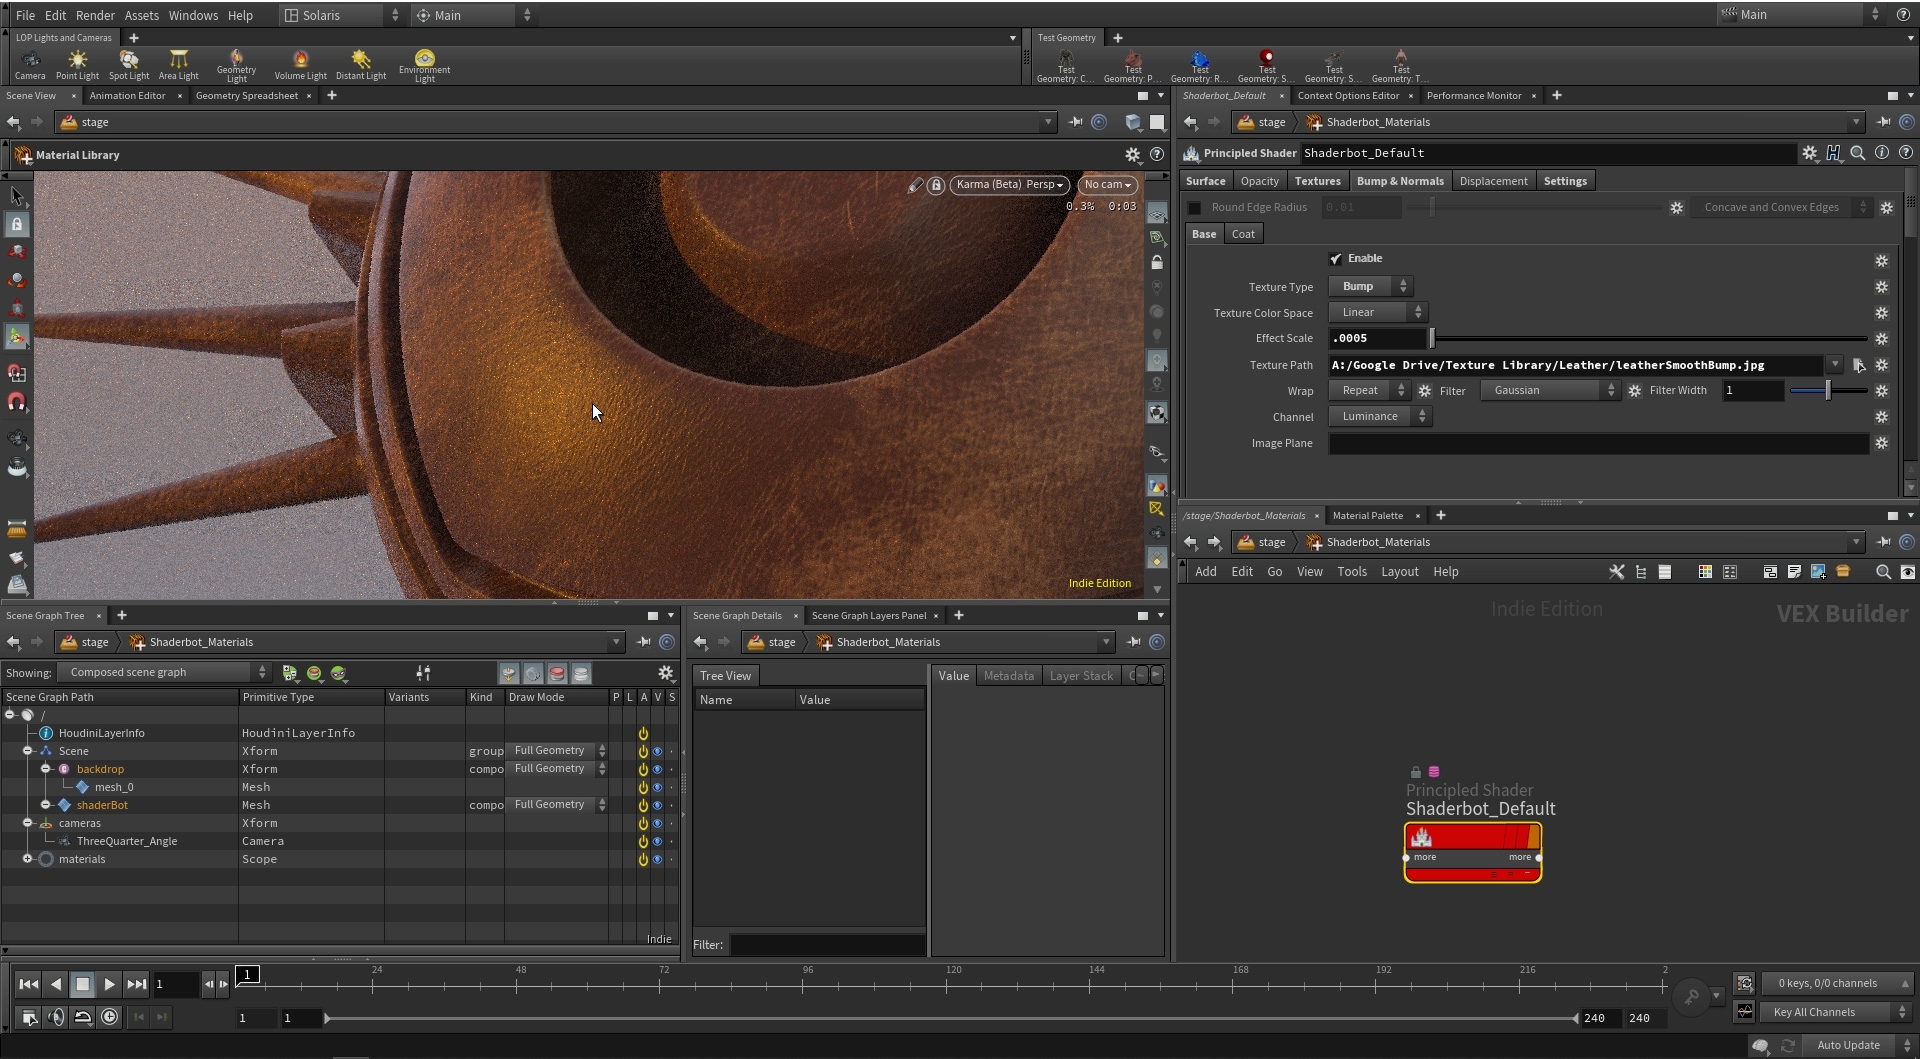
PART 5: Texture Maps, Anisotropy, Sheen and Clear Coat
このレッスンでは、Principled マテリアル作成の続きを行い、テクスチャマップの使い方、バンプマップを使うための実践例、そして、Anisotropy (異方性)、Sheen (光沢)、Coat (コート) 設定の基本を学びます。
再生時間: 13分59秒
PART 6: Transparency
リアルな Transparency (透明度) を実現する方法を学びます。これには、モデルに合った適切な Refraction Limit (屈折最大数)と Reflection Limit (反射最大数) の設定が必要です。光が Transmission (透過)で曲がる理由、IOR [index of refraction (屈折率)]が 3D アーティストに何をもたらすのかを学びます。また、Dispersion (散乱) によるシェーダの透明度への影響についても説明しますが、Karma ではこの機能および nested dielectrics は未対応です。
再生時間: 13:41
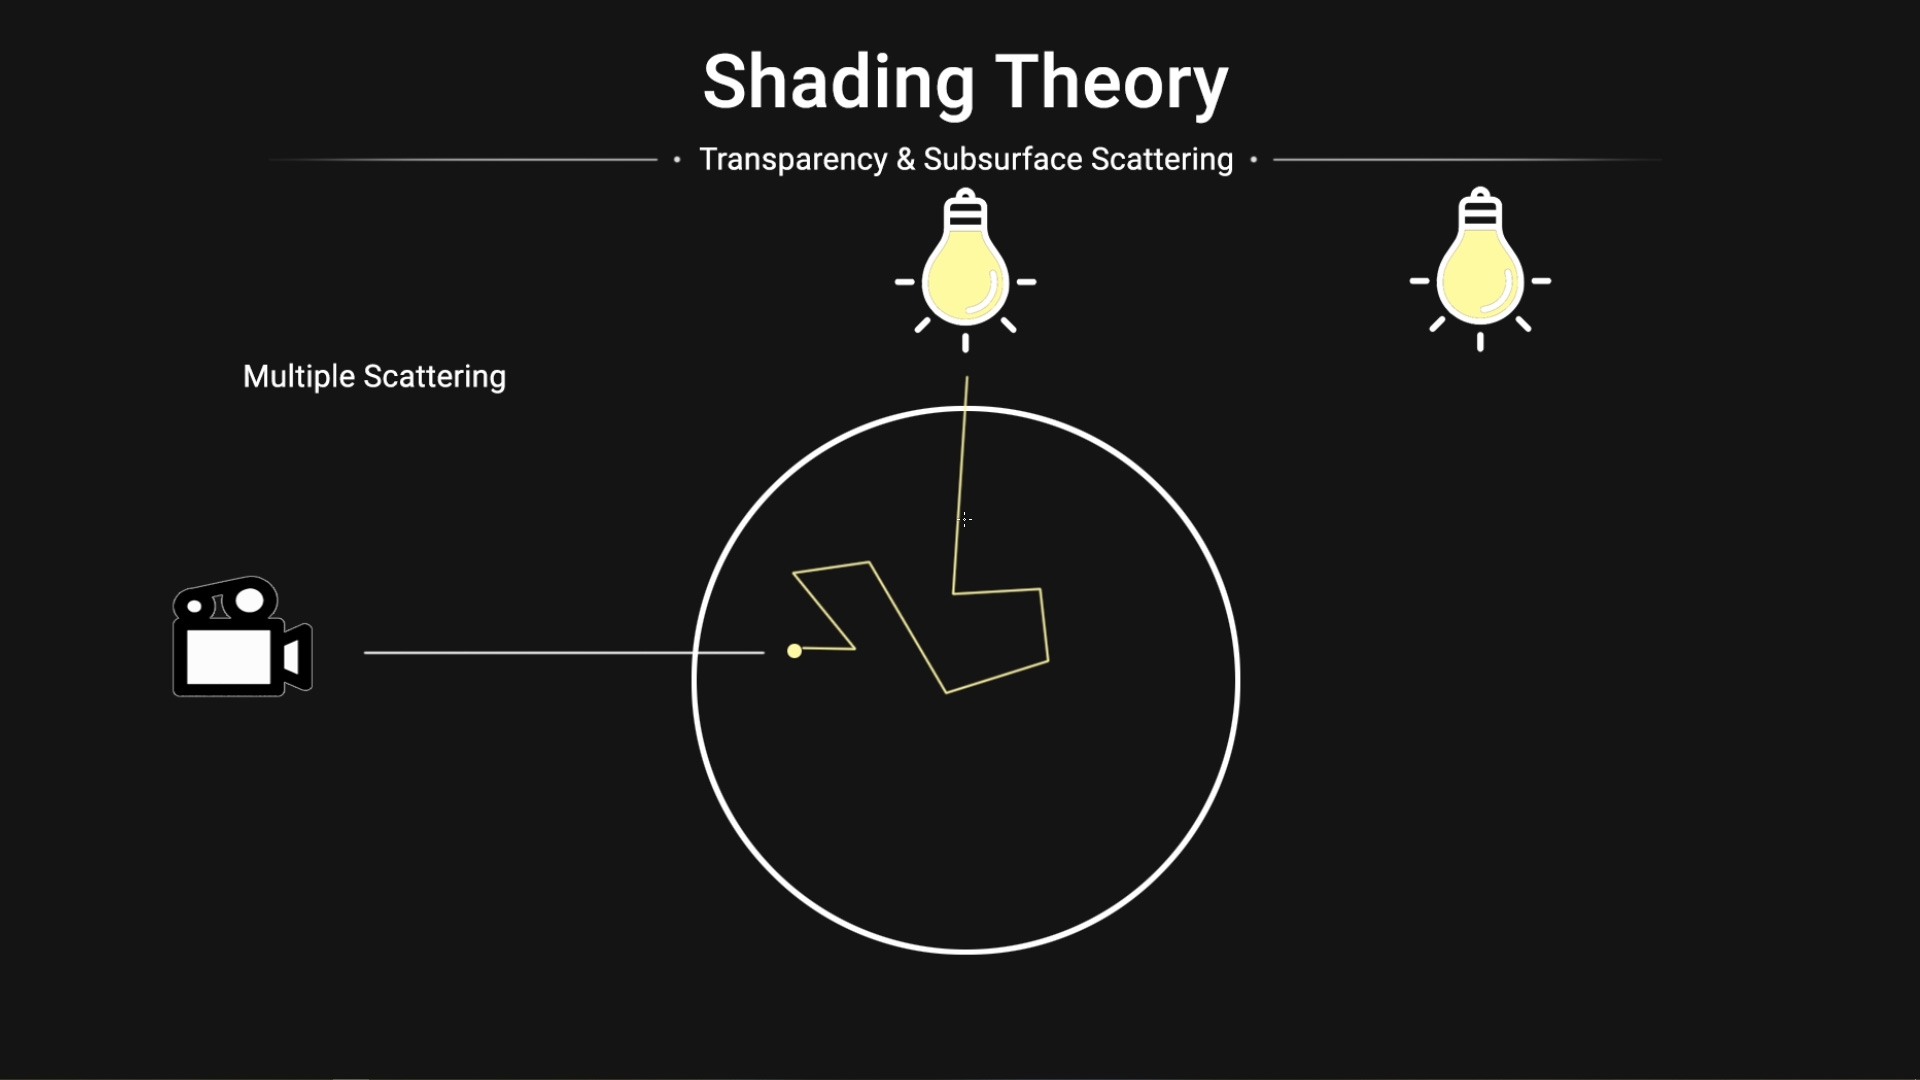
PART 7: Subsurface Scattering
ここでは、diffuse (拡散反射) と subsurface reflection (サブサーフェス反射) の違いについて学びます。実世界にあるサブサーフェス/拡散オブジェクトの分析から始まり、CG で必要な外観を得るために Single Scattering またはMulti-Scattering のどちらを使うかについて学習します。このレッスンでは、透明なシェーダの Transmission Color (透過色) オプションを使用して、色付きガラス効果を実現する方法についても学びます。
再生時間: 09分48秒
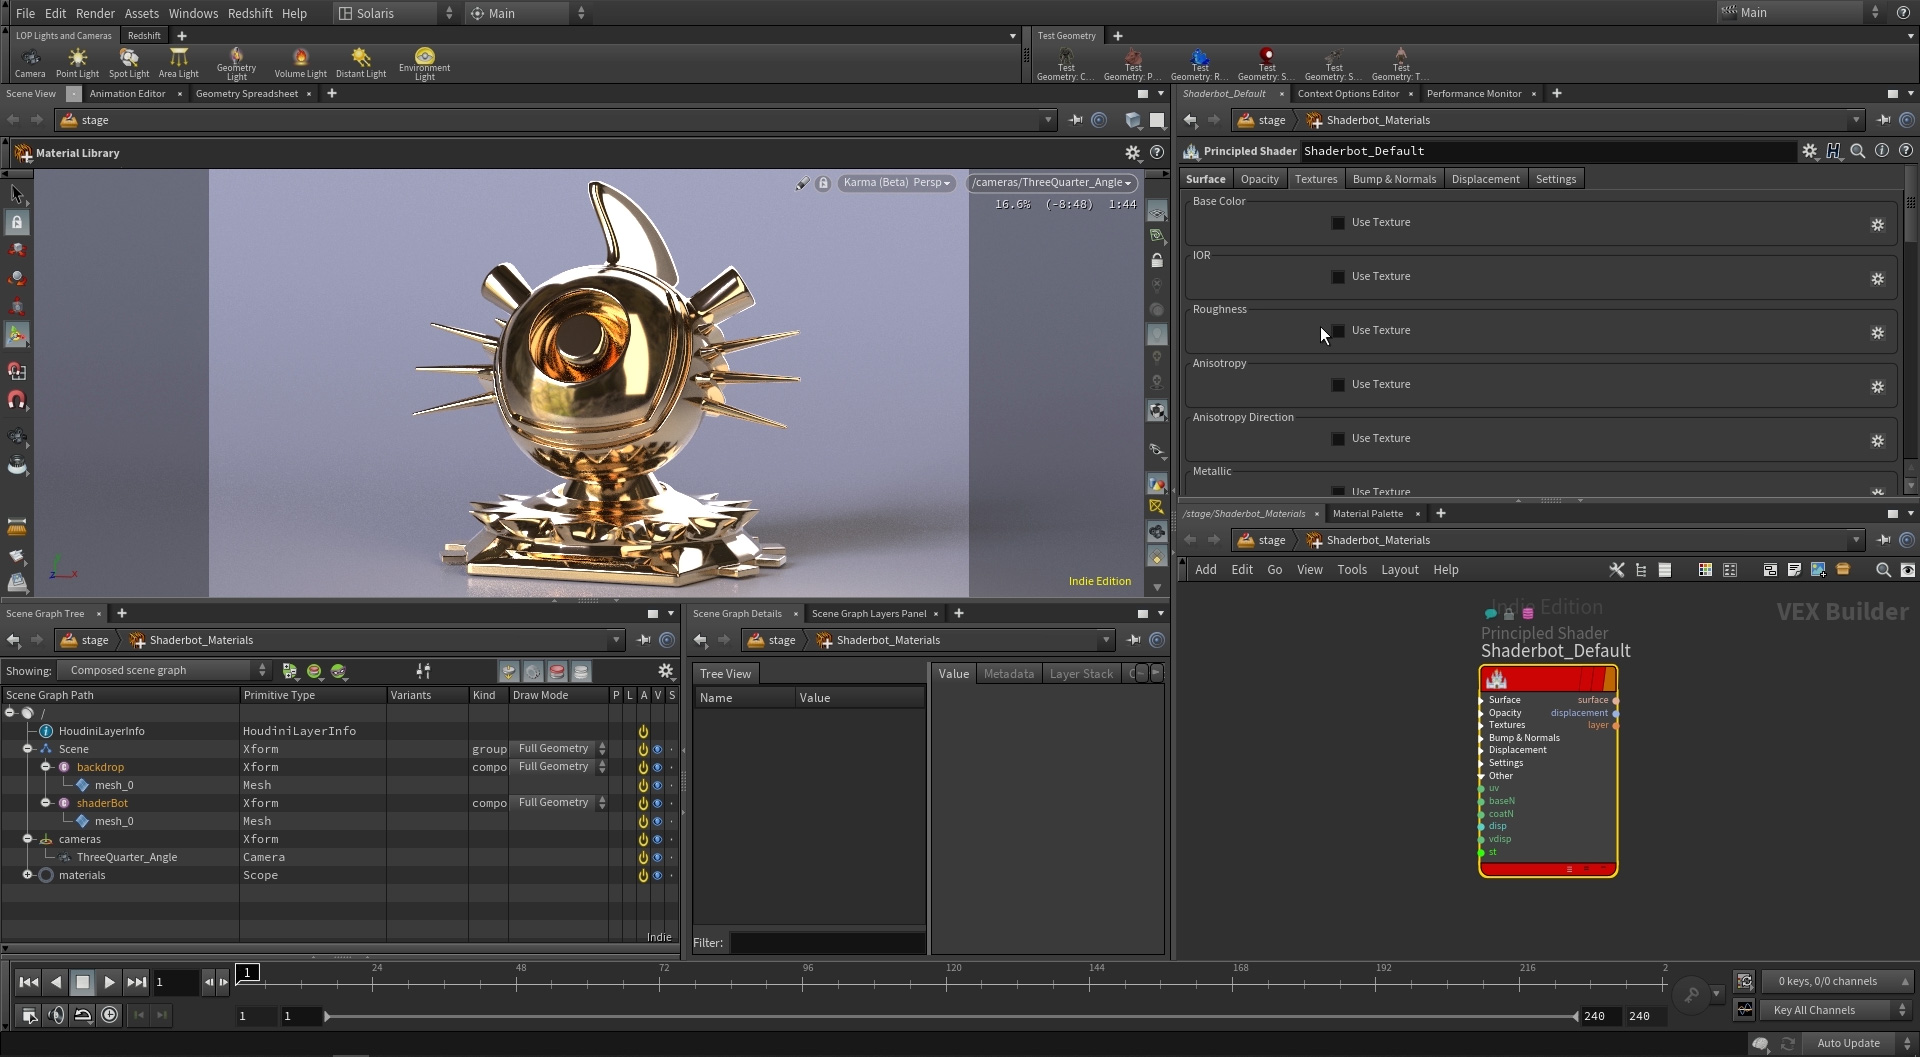
PART 8: The Golden Challenge
Principled マテリアルを使って様々なルックの実現方法が分かったので、学んだテクニックを使って写実的なゴールドの作成に挑戦してみましょう。ヒントとして、基本的な金色のパラメータ確立のために、正確な RGB 値を生成する方法を説明しています。
再生時間: 07分23秒
CREATED BY

コメント
BabaJ 5年, 8ヶ月 前 |
Thanks very much for this. I don't have good shading skills/knowledge and like working in Lops with Karma. So very very useful. Looking forward to setting time aside and go through this.
Mohamed_Mohsen 5年, 8ヶ月 前 |
this is amazing
belkinserge 5年, 8ヶ月 前 |
fantastic!
ogwin95 5年, 8ヶ月 前 |
wow, this is great!
quinniusmaximus 5年, 7ヶ月 前 |
love the walkthrough of all of this... not seeing the image with the duck and frying pan though.
rmagee 5年, 7ヶ月 前 |
The image has been added above next to the video.
3dman 5年, 7ヶ月 前 |
Fantastic Tyler! This is awesome!!!
Merci ;-)
Scara 5年, 7ヶ月 前 |
Nice one.
Scara 5年, 7ヶ月 前 |
Wanted to add, your explanations are wonderfully clear and despite thsi being a hobby for over 22 years, I was always a little unclear. Your diagrams and explanations re a general view of what is happening at an atomic atomic level let me have my ....ah ha moments.
digitalwu 5年, 7ヶ月 前 |
excellent!
rav3nclaw 5年, 7ヶ月 前 |
Nice, learned a few new stuff :) thanks
anon_user_75466869 5年, 7ヶ月 前 |
I am liking Karma more and more importing Nulls easily, thanks for these tutorials to study.
BabaJ 5年, 7ヶ月 前 |
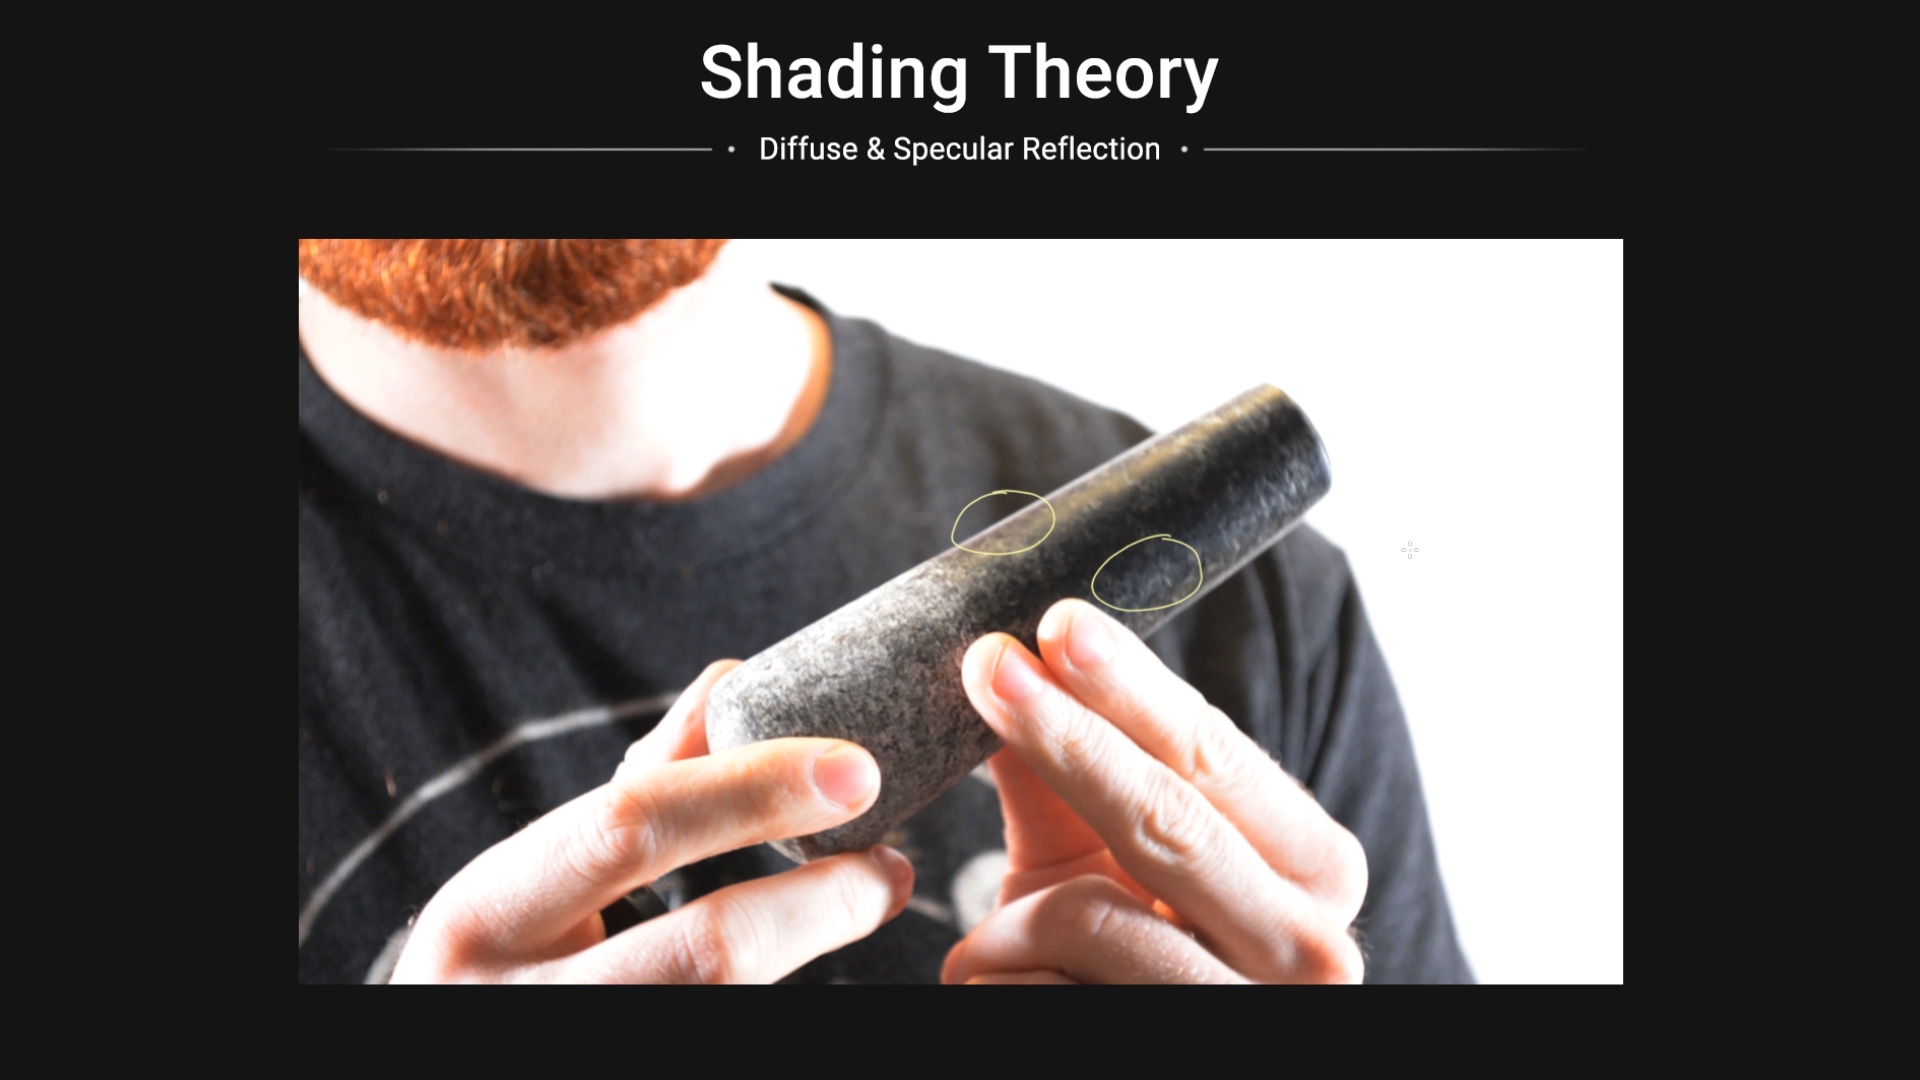
In your teapot example you were wondering what the coating might be. Ceramics with coatings like that are called glazes. They can have a number of elements in their composition to give textures and colors for desired results after firings. However, the main component is silica (not the elemental silicon). In the pixelandpoly web site you gave it's ior is under 'Glass, Fused Silica' with an IOR of 1.459 - not much different than the the 1.4 you use which is why it works well.
BabaJ 5年, 7ヶ月 前 |
Might want to add the texture file used in Part 5 so people can get the same results when following along?
tbay312 5年, 7ヶ月 前 |
Hi BabaJ,
If you're looking for texture maps, I'd recommend visiting textures.com, poliigon.com/, texturehaven.com/, or creating your own through a combination of photography and photoshop.
As I mentioned in the video, I prefer not to distribute texture maps due to copyright considerations. Thanks for watching, and have a nice day.
BabaJ 5年, 7ヶ月 前 |
Thanks Tyler.
Just wanted to let you know if you plan on doing a paid tutorial that expands upon the topics you covered in this tut series - you've got a willing to pay customer here.
Maybe like making custom shaders and examples of why one might want to do so - Situations where a principal shader just isn't enough?
I believe SideFX had a MasterClass on such a topic for around H16/17 and is likely still relevant, but I don't remember it giving an example of why one would to venture into that with examples.
As a side note I was trying to understand what the heck is Random Walk SSS is about on a current SideFX forum thread and found someones hip on the topic, but found something related to your tuts here that could be useful to know for viewers of the tut.
You used the example of bringing up render properties for the Karma Viewport Renders of being able to set Refraction Limit('D' with mouse over viewport) - and that it is a setting not available on the Karma node itself.
There is however a 'Render Geometry Settings' node where one can set Refraction Limit(amongst other settings) for the Karma render node to get renders that work for ip or to disk.
tbay312 5年, 7ヶ月 前 |
That's great to know that you can find those limitations in the render geo settings as well. Thanks for the tip! Right now I'm developing a course called "Shading Theory" as a followup, and those videos will be designed to take the ideas in "Shading Theory" a step further by comparing various workflows, specific situations, and topics that are universal to all render engines.
Cheers BabaJ
BabaJ 5年, 7ヶ月 前 |
Looking forward to that tut. Thanks.
Anonymous 5年, 7ヶ月 前 |
First, I really appreciate this series! As a student it really helped me to strenghten my understanding of Shading in general, not only in Houdini!
And now my questions :D
Is it still correct to have the Alebdo Multiplier at 0.7 with Gold? You explained the Albedo Mult at 0.7 as that 30% of the Light turns into Heat on Dielectric Materials because of Absorption. How is it with Metals? You said dense objects create that "barrier" and therefore less light goes into the object and if, it gets totally absorpted --> no diffuse reflection --> metals. So with metals also 30% of the light is turned into heat?
Were the values you picked from refractiveindex.info the "raw" reflection values without the absorpted part and therefore the Albedo Mult is not on 1.0? But then, why did you also have the Albedo Mult on 0.75 when matching the iron pan, when you took the RGB-Values from the image, so the values are the real world reflection values and the Absorption of the light already "happened"? Am I getting something wrong or going waaaay to scientific?
tbay312 5年, 7ヶ月 前 |
Hey David,
Thanks for checking out the course! Those are great questions, so here is what I would say in general: There's a couple of main reasons why I mentioned setting the albedo multiplier to 0.7.
For one, in the real-world, we often times forget that some of the light is converted to heat. For metals, this also applies to a very small degree. Metals have very different electro-magnetic properties than di-electrics though. Because of this, the absorption has to do more with cross-cancellation of the light wavelength rather than heat absorption, (from my understanding). This is why - for example - metallic foil is used to insulate spacecraft instruments in outer space. The intense radiation found in outer-space is cross-canceled or reflected rather than converted into heat.
What that means for us as 3D artists, is that you should never pick a value of 1 (pure white) on R, G, or B. That general advice also applies to a value of 0 (pure black) for your Albedo values.
When you go to plug in those light wave values at refractiveindex.info, you're right that we are starting with the full radiance (which is a value of 1). For di-electrics, as I mentioned before, you should see about 30 to 40 percent of that light converted to heat, and the non polarized reflection values reach a maximum value of around 0.7. For metals, it's possible to have values that are very close to the full amount of 1.
But anyway, the second reason why I do this - and more importantly - is because it offers a practical advantage when shading a whole scene. By setting everything to 0.7, it will improve the way that light affects objects. You'll find that this generally decreases the contrast between objects and makes it easier to prevent clipping highlights without underexposing the diffuse portions of your scene. So even if - lets say - the frying pan was sampled from a color, it still makes sense to do a value of 0.7 for practical purposes. You're right though in that the absorption has already taken place in the image. So, yes, technically an albedo multiplier of 0.75 is inaccurate at that point. However, it's still a practical thing to do for the reasons I mentioned above.
Just remember though that at the end of the day, it's up to you on whatever you want to do. Trust your eyes before your brain when it comes to making artistic judgement. These are just good things to ponder about.
Have a nice day,
- Tyler
andrewjhaugen 5年, 7ヶ月 前 |
Hey Tyler!
Thanks for posting this super informative series!
I was trying to recreate your startup scene from scratch because I thought it was a cool setup and wanted to see if I could do it but I was having a hard time figuring out the bit where you stopped the shadows being visible on the backdrop. It appears you have a parameter called Render Visibility on your Render Geometry Settings node that I can't seem to find. Did you add it custom from like a script or something?
Thanks!
Andrew
tbay312 5年, 7ヶ月 前 |
Hi Andrew,
Thanks for following along. All you need to do is use a render geometry settings node, select the backdrop primitive, and set the render visibility to "-shadow"
Cheers,
- Tyler
harryabreu 5年, 1ヶ月 前 |
Wonderful I learned a lot, you blow away a lot of question I had about shading in Houdini.
As soon as I can I go to your site to learn more thanks.
gulfen 5年 前 |
Awesome really hard stuff made simple, thank you for that.
Anonymous 3年, 5ヶ月 前 |
Thank you! Finally I have a better understanding of all these terms!
kuszi 1年, 11ヶ月 前 |
Hi Tyler!
First of all, thank you this series, it is fantastic.
I use materialX in Karma, but I think this is the same.
I have question about the IOR.
In the video, at 1:00 you copied the IOR value 0.27035 (which depends the wavelength value).
You can see it at 2:17 where the IOR is 0.65663, the gold is still selected, only the wavelength has changed.
So I have checked at https://pixelandpoly.com/ior.html and gold IOR is 0.470
I have tried a lot of IOR values, copy the rendered images to photoshop and subtract. I always got black.
Does IOR really affect the metal materials?
thank you
Csaba
Please log in to leave a comment.