HOUDINI FOUNDATIONS | NODES, NETWORKS & DIGITAL ASSETS
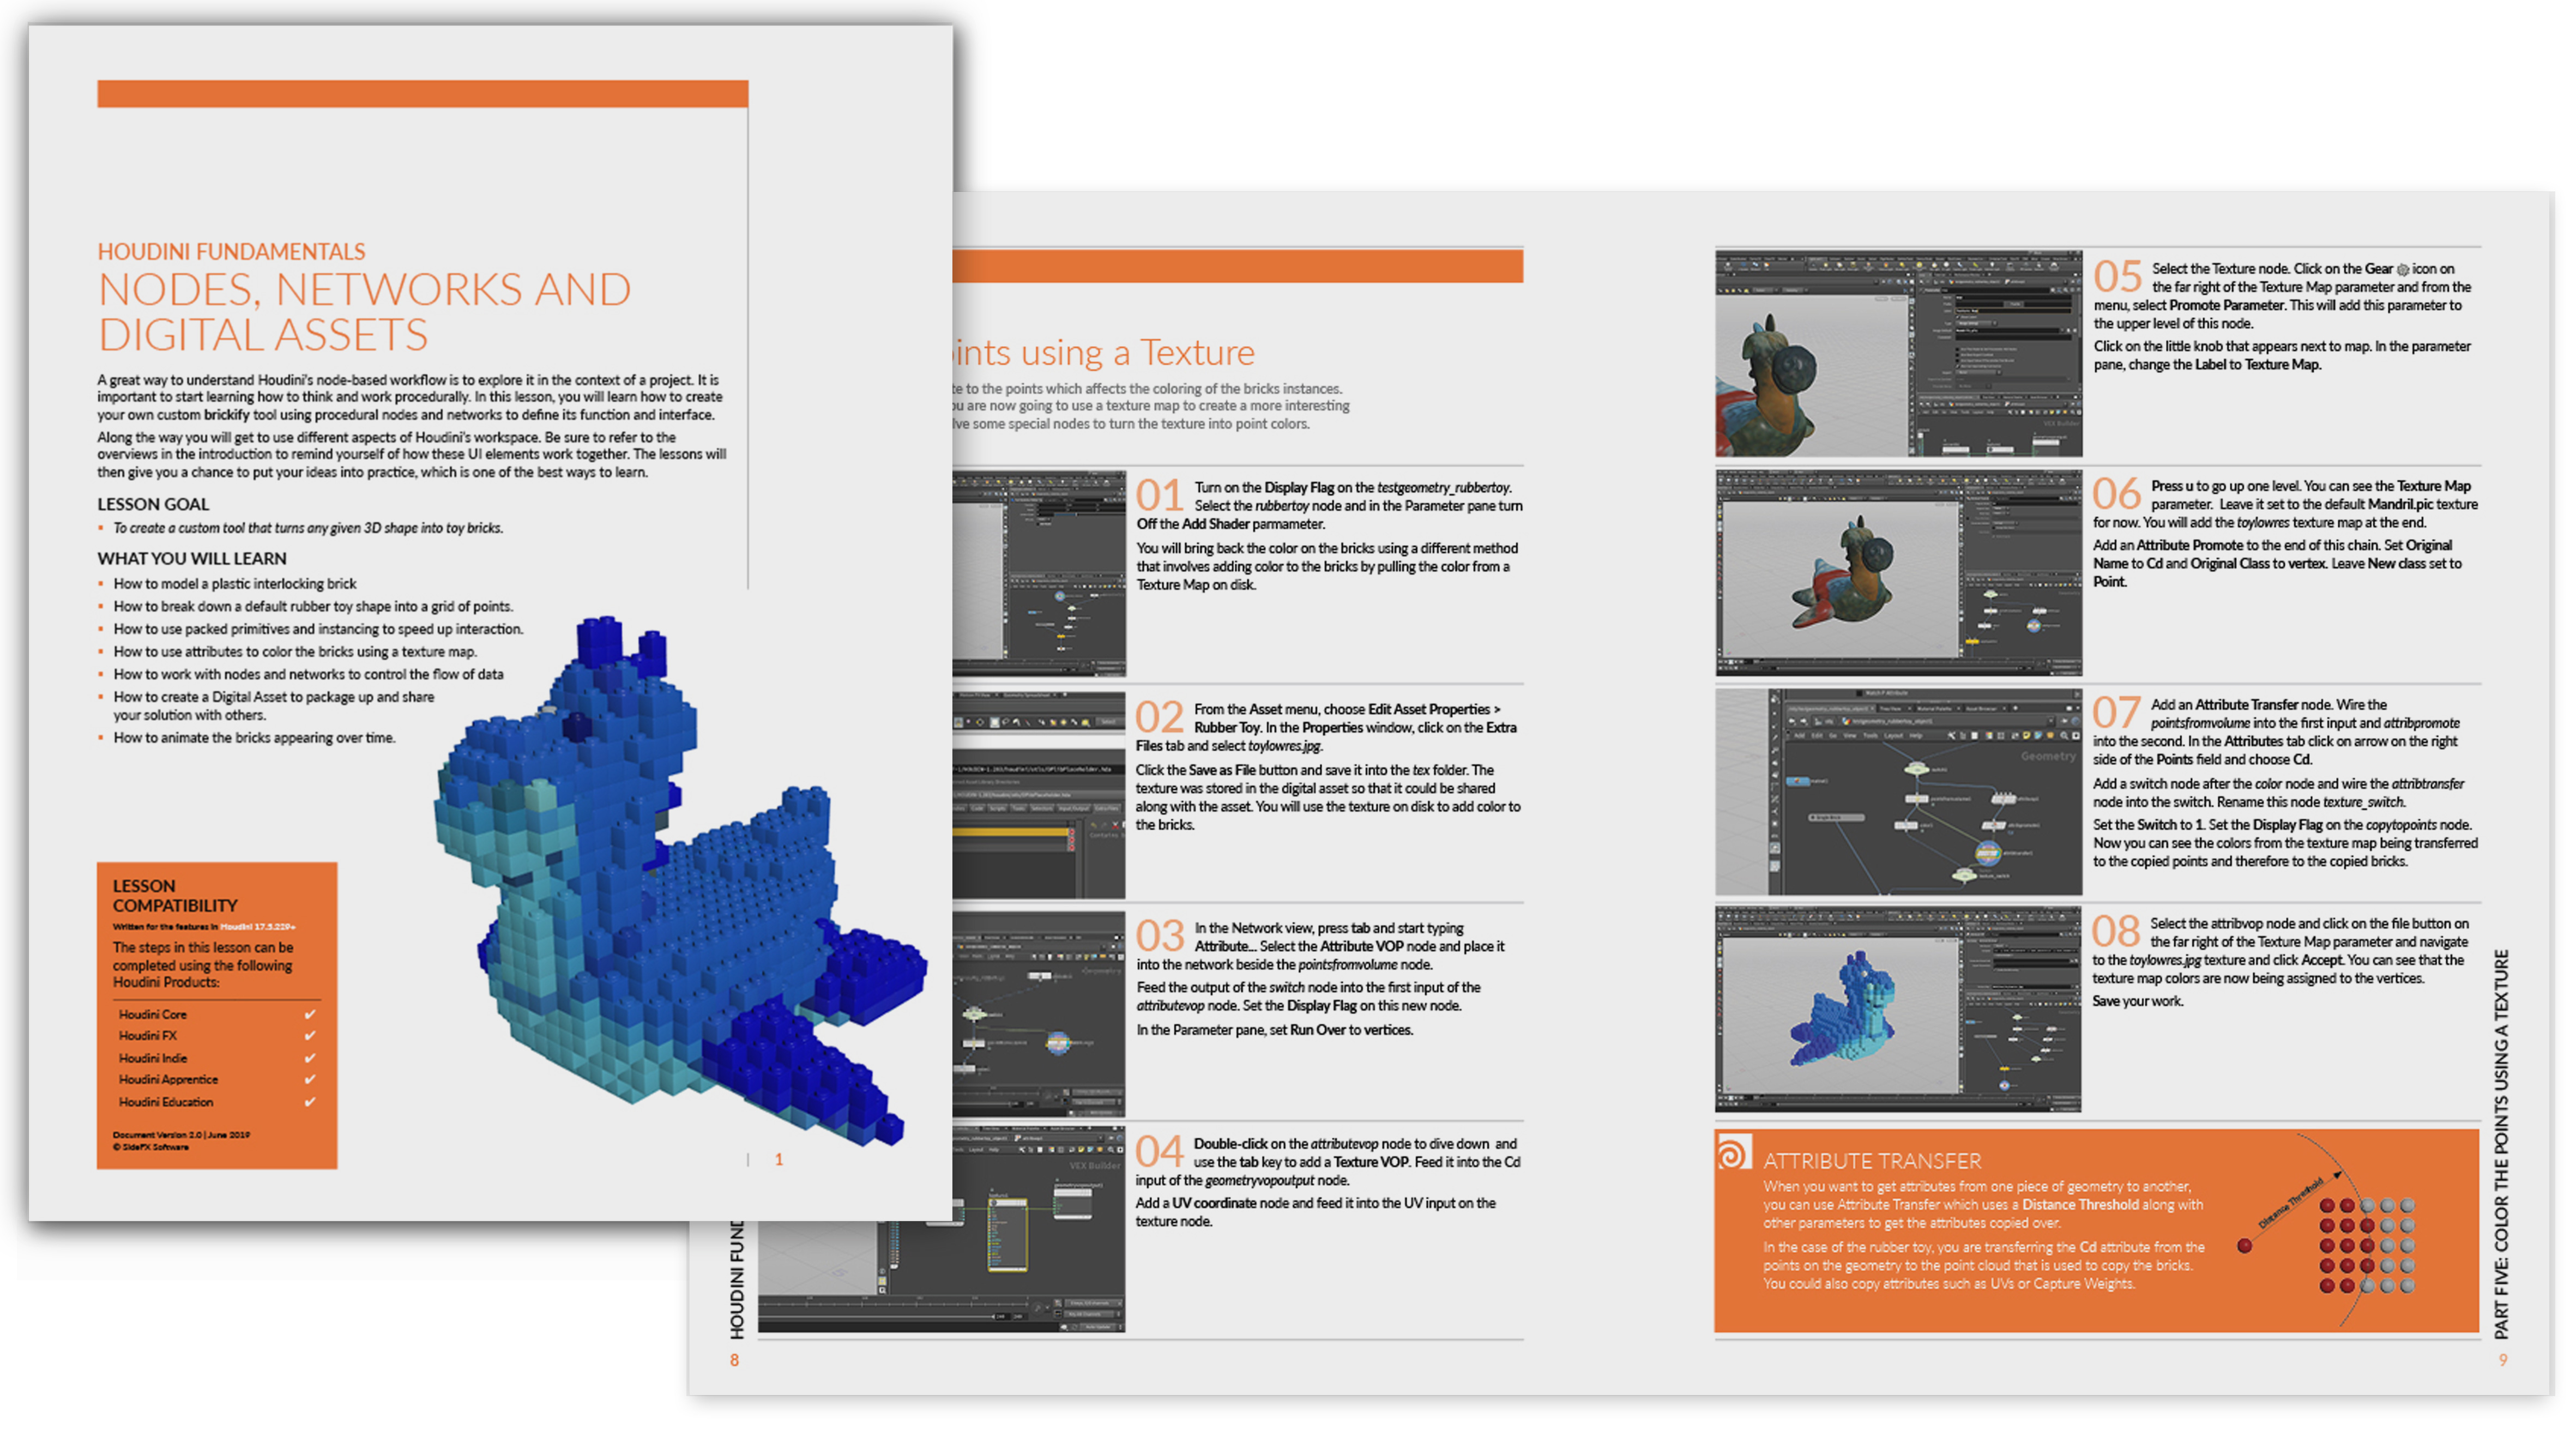
A great way to understand Houdini’s node-based workflow is to explore it in the context of a project. It is important to start learning how to think and work procedurally. In this lesson, you will learn how to create your own custom brickify tool using procedural nodes and networks to define its function and interface.
Along the way you will get to use different aspects of Houdini’s workspace. Be sure to refer to the overviews in the introduction to remind yourself of how these UI elements work together. The lessons will then give you a chance to put your ideas into practice, which is one of the best ways to learn.
LESSON GOAL
To create a custom tool that turns any given 3D shape into toy bricks.
WHAT YOU WILL LEARN
- How to model a plastic interlocking brick
- How to break down a default rubber toy shape into a grid of points.
- How to use packed primitives and instancing to speed up interaction.
- How to use attributes to color the bricks using a texture map.
- How to work with nodes and networks to control the flow of data
- How to create a Digital Asset to package up and share your solution with others.
- How to animate the bricks appearing over time.
Pipeline in a Box
The following presentation from SIGGRAPH 2019, includes the steps from this lesson along with video of the brickify asset being used in Autodesk Maya and Unreal Engine. There is also an added section where this asset is used in PDG to automate the brickification of a collection of models.
CREATED BY

COMMENTS
andrevalle 7 years ago |
Thanks Robert.
I'm from Brazil, and I work with CG since 1987. I began with PictureMaker Cubicomp, after that I worked with 3D Studio since the first version.
I bought a SGI running Alias/Wavefront, and then Maya, but I'm so glad to learn Houdini, because now I can make anything the right way.
I always learned CG alone. No courses, no college. I'm a generalist, but I know that I need to specialise.
I have a great Game Project, and I want to make all the assets in Houdini, and I will.
I will buy an Indie subscription soon.
I wish you and all the SideFx team an enlightened life.
rmagee 7 years ago |
Thank you and good luck.
Goldwaters 7 years ago |
Thanks Robert - your in-depth project tutorials with accompanying PDF handouts are invaluable
rmagee 7 years ago |
Thank you. I am glad that the lessons are helpful.
fiddybux3d 6 years, 11 months ago |
Hi Robert,
Thank you for this tutorial. It has been invaluable in getting me started.
However, I came across a significant issue in Part 5 - Section 7. Working out the problem for myself has actually been of great value to my learning (which I was able to do by comparing the images), but it was very confusing, especially, if like me, readers take your words literally (word for word).
You forgot to mention that the color1 node needs to be disconnected from the copytopoints1 node, and that the texture_switch node output needs wiring into the 2nd input of the copytopoints1 node. Once this is done, it works perfectly.
I expect this is a very easy thing to overlook as you probably performed it 'automatically', but as a complete novice it compeltely caught me off guard.
Just wanted to take the time to share this, so that others who may read my post can benefit from it.
Many thanks!
NarimanSafarov 6 years, 10 months ago |
a little slower narration and action would be great.
nique.devereaux 6 years, 10 months ago |
Greetings Robert,
Is it possible to use Houdini with Epic Games's free art assets? https://www.unrealengine.com/en-US/tech-blog/animation-blueprint-setup-walkthrough-stream-recap
Which tutorial would I watch to see how?
Thank you!
lightworkermusic 6 years, 8 months ago |
lol I was stuck on part 5 section 5
"Select the Texture node. Click on the Gear icon on
the far right of the Texture Map parameter and from the
menu, select Promote Parameter. This will add this parameter to
the upper level of this node." ( Gear Icon changes to a sort of "Volume Knob" you would see on a sound mixer)
"Click on the little KNOB that appears next to map. In the parameter
pane, change the Label to Texture Map." (haha stuck 1 hour on this because I thought he meant the "Volume knob" that used to be a Gear icon, but no. It is the little tic tac shape knob that sticks out of the texture1 node next to map. In case anyone else was stuck there too.)
AliaK 5 years, 1 month ago |
thank you, this was a great overview. am excited to see what I'll be able to create
ppx301292 4 years, 8 months ago |
not a very good tutorial he goes on and does things without explaining or telling us which shortcuts he has used, he needs to go on a teachers course
rmagee 4 years, 8 months ago |
Did you download the PDF document? It explains things more and should have all the mouse clicks and hotkeys represented. It has also been updated for Houdini 19 while the video is a few years old.
Please log in to leave a comment.