Lessons
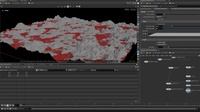
How to Generate Heightfield Masks Using Copernicus
Learn how to set up heightfield masks using the COPs context in Houdini 21. This tutorial explains how to generate and control masks using COPs as it doesn't just work out of the box. This video covers how to setup volumes and their names and attributes in a way that allows you to preview the masks generated directly in the viewport.
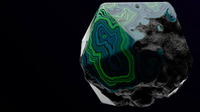
PBR Texturing in Copernicus
Create the so called “Detroid Agate” which is not actually a rock, but paint scraps created by car paint. COPs is perfect for this case and since Houdini 21, it is easier than ever to create unique textures like these.
0:18:07
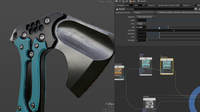
Axe Texturing: full breakdown of COPs texturing
In this video you will learn more about texturing an asset for games using COPs in Houdini 21. This will be a full overview with a PBR workflow in mind. This means it will tackle Color, Roughness, Metal and Normal maps.
This video is based on my Axe modelling video, then you will have a full breakdown on making an asset.
https://www.youtube.com/watch?v=bIGOF5nvPtA
The approach will be something close to Substance. Building a setup that feel great to use and easy to add on top of it. This video can only be the beginning of a more complex asset setup.
First will be baking, this means getting all the useful maps. Such as a Normal, AO, World Normal, Position,... This is a standard start but important as all maps will be used to create the final result.
A color ID mask will be generated to mask and blend materials together.
For creating materials you will see how to make a custom HDA that outputs a material. This will make it easy for us to add more materials quickly over time. Rather then setting up each map and material manually.
Get Axe file
https://siver.gumroad.com/l/lrnut
1:04:35

Creating Quartz! - With COPS!
In this tutorial, we will model, surface, and light a Quartz model using cops and Solaris.
We will start in the COPs context, generate our textures, then model the rock's shape, create the shaders, and light the scene. We will also add a fun bioluminescent glow to the rock for added fun!

Project Elderwood | Texturing with Copernicus
In this beginner tutorial series, learn how to create tiling materials from raw highpoly photogrammetry meshes. Using your own photos, generate a scan, and then bring the result into houdini, where we will bake a patch to a square texture, and then process it into a tiling texture. Learn how to build your own "make it tile" function, as well as your own "hsv equalize", "clone stamp" and more. Discover for yourself just how easy it is to get started with copernicus for material creation, and if you are feeling brave - peek under the hood and learn how to setup your own texture baker.
1:10:33

How to Create Organic Textures
Learn how to create organic textures using the new Copernicus context. Learn how to generate rock features using noise then how to rasterize Scattered Geometry to generate Dirt and finally how to scatter and Point Stamp Grass. In these lessons you will learn how to work back and forth between COPS and SOPS and how to render your textures with Karma XPU.
1:04:36
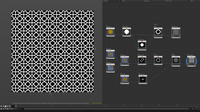
Getting Started with Copernicus | SDF Shapes & Patterns
In this video, we start exploring Copernicus in Houdini 20.5 by working with SDF shapes and assembling them into more complex forms and patterns.
We’ll wrap up by creating 2 tiling patterns inspired by Arabic culture!
Key topics include:
🧊 Working with SDF primitive shapes
🧠 Combining SDFs to build complex forms
🔁 Creating tileable patterns
🚀 A beginner-friendly intro to Copernicus
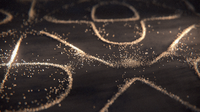
The Ultimate Copernicus Guide
Copernicus is Houdini's new context for processing images. It can be used to generate textures or to create slap comps of your renderings. This tutorial is designed as a reference/documentation guide for every COPS node as of Houdini 20.5.

Realistic Shading using COPS and Karma XPU
Learn how to create realistic textures using similar workflows as in substance painter/designer.
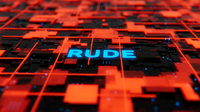
Sci-fi texture using Copernicus
How to design a greeble sci-fi looking texture in COPernicus and how to render it in solaris using karma xpu.
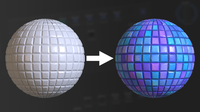
Full PBR Material in Copernicus in Under 10 Minutes! | Complete Beginner Workflow
In this episode, we dive into the full material workflow in Copernicus — from scratch to PBR-ready in under 10 minutes! 🎨
Perfect for beginners, we start by generating the Height, the Base Color and then create all the essential maps for a complete material setup.
Key topics include:
🗺 Creating height maps from scratch
🧪 Generating roughness, normals, and AO
⚙️ Full Copernicus material workflow, step by step
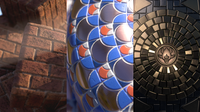
How To Create Tile-Based Textures
Learn how to make use of the Tile Pattern COP node in various ways to create a range of tile-based effects. You will learn how to add detail and variation on a per-tile basis by using the per-tile UVs that are generated by the Tile Pattern node, how to isolate particular features of a tile pattern based on area, how to create useful masks for layering, and how to work with your own custom UVs for more advanced texture sampling.
0:57:19
Houdini Content