AN INTRODUCTION TO VELLUM SOFT BODIES
INTRODUCTION
In essence, Vellum is a simulation framework that uses an Extended Position Based Dynamics approach; this makes it a highly diverse tool that can adapt to many different functions. It can be applied to a breadth of shot production phases including Cloth, Hair, Wires and Soft Bodies. The main advantage of a Position Based Approach is its controllability, stability, and its ability to produce believable results quickly.
Though, in some cases, FEM may be the favorable method for creating a Soft Body simulation with its real-world accuracy and behavior, the advantage to using Vellum is that it is very quick, it works very well with multiple constraint types and its results should be visibly plausible and realistic. The method chosen will depend on your scene and the type of Soft Body you want to make.
Houdini 18 introduces some significant new features to Vellum that have been developed with an artist-friendly ease of use in mind. In this tutorial, I will be guiding you through an example for creating a rolling dough using Vellum Soft Bodies and its Plasticity feature.
The Plasticity feature for Vellum allows for an object to adopt a new rest shape once deformed either by a specified force, or an external collision object. As a general rule, you would usually want to avoid using Plasticity with regular Vellum Cloth Constraints, because there are very few real world examples where cloth has Plasticity properties. The new Soft Body Constraints in Vellum, however, such as the Tetrahedral Stretch Constraints, work very well with Plasticity.

There are a few key Plasticity parameters that allow for greater control over the behavior of your Soft Body object; and when used in conjunction with a Vellum Constraints Property node inside a dopnet, you can achieve some very interesting results. It is useful to understand the plasticity parameters and how their values may be used:
- Plasticity Threshold: Once deformed past this value, the geometry will begin to take its new configuration.
- Plasticity Rate: This value determines the speed at which the geometry will adopt its new shape.
- Plasticity Hardening: The geometry will harden post-deformation when given values greater than 1, and will become softer post-deformation when given values less than 1.
So, let’s get started!
The Three Dough States
This method, while maintaining a relatively straightforward and simple scene, also gives greater control over each dough state. The three parts can then be seamlessly combined post-sim.
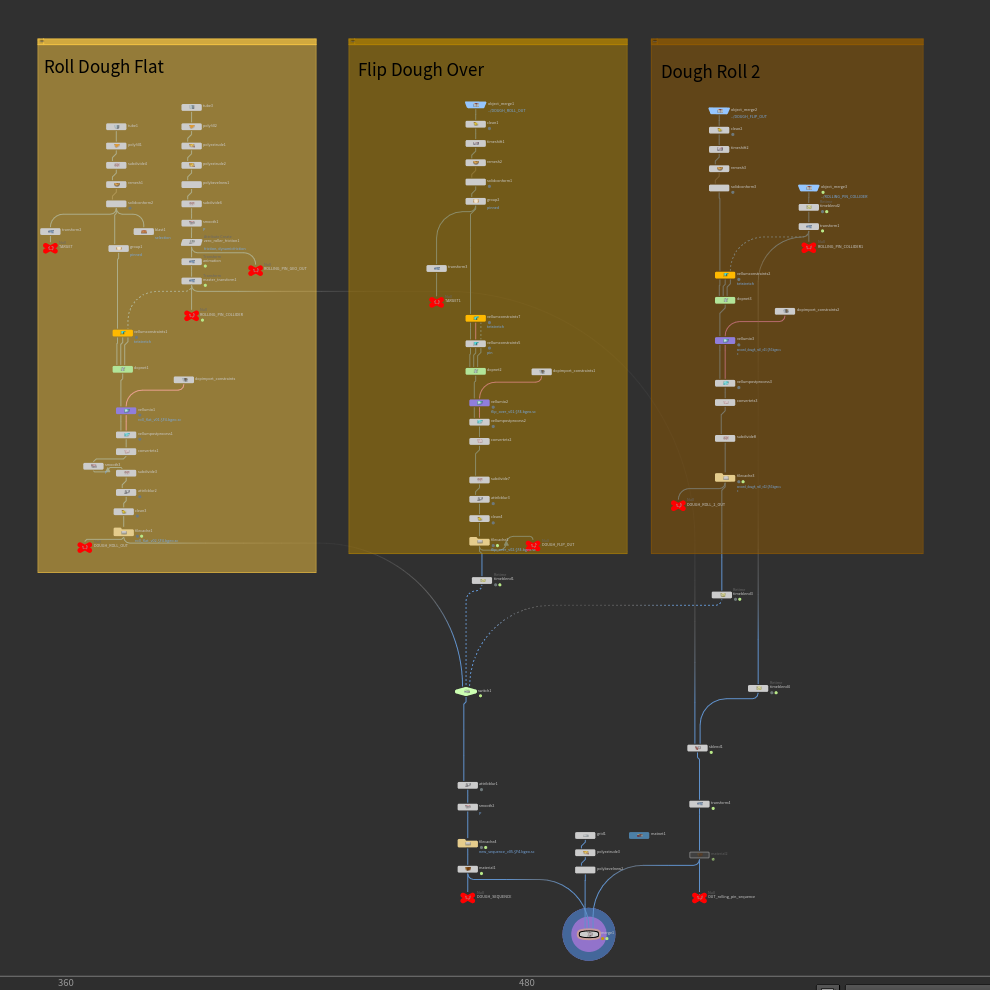
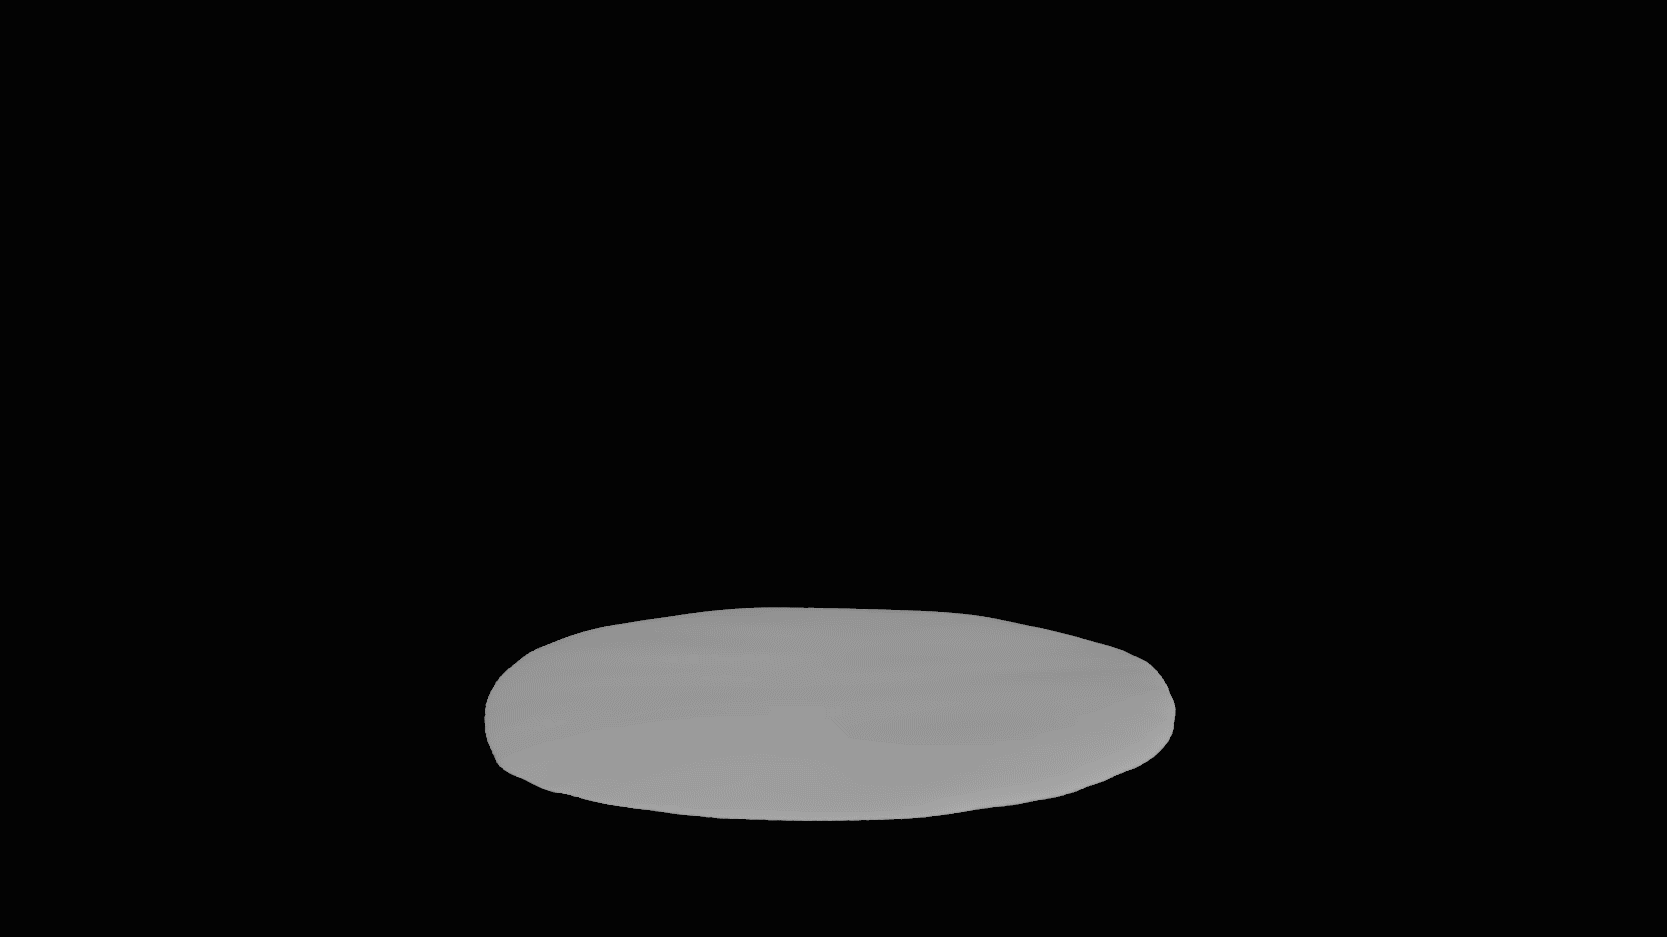
FIRST STATE:
ROLLING DOUGH FLAT AND DETERMINING ITS INPUT GEOMETRY
Before we begin, it is useful to understand which geometry types work best for the different constraint types, depending on what you want to make.
When looking at a real-life reference for rolling dough, for instance, we can observe a few key properties that will need to be maintained to achieve a realistic looking dough sim. These properties are:
- Fairly extreme stretching
- Volume preservation
- Molding into a new configuration once deformed
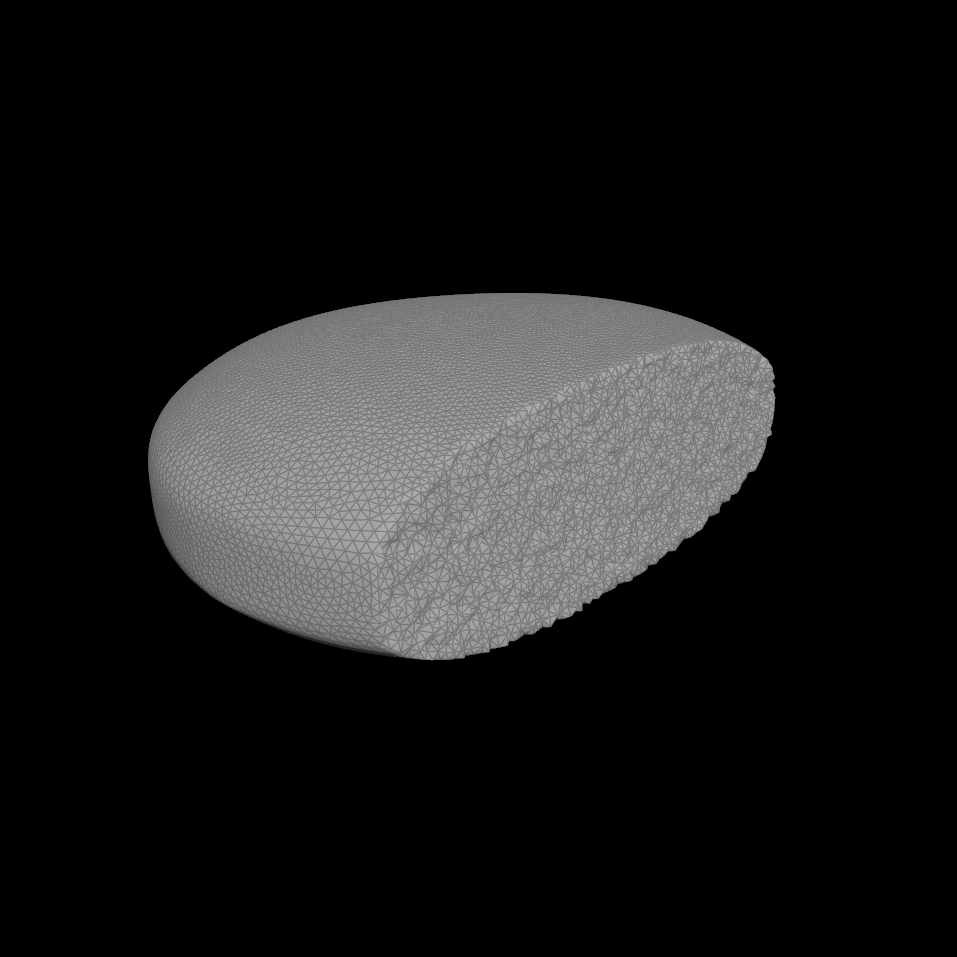
These properties suggest that a ‘Tetrahedral Stretch’ Constraint type, new to Houdini 18, will be the best choice. This constraint type works well for preserving volume from tetrahedrals, while modifying stretchiness. This means that its input geometry will need to be a tetrahedral volume, which can be created using a Solid Conform SOP.
Note
It is important to note that the newly tetrahedralized interior geometry should be a similar resolution to the exterior mesh resolution, else this could later create problems for the sim.
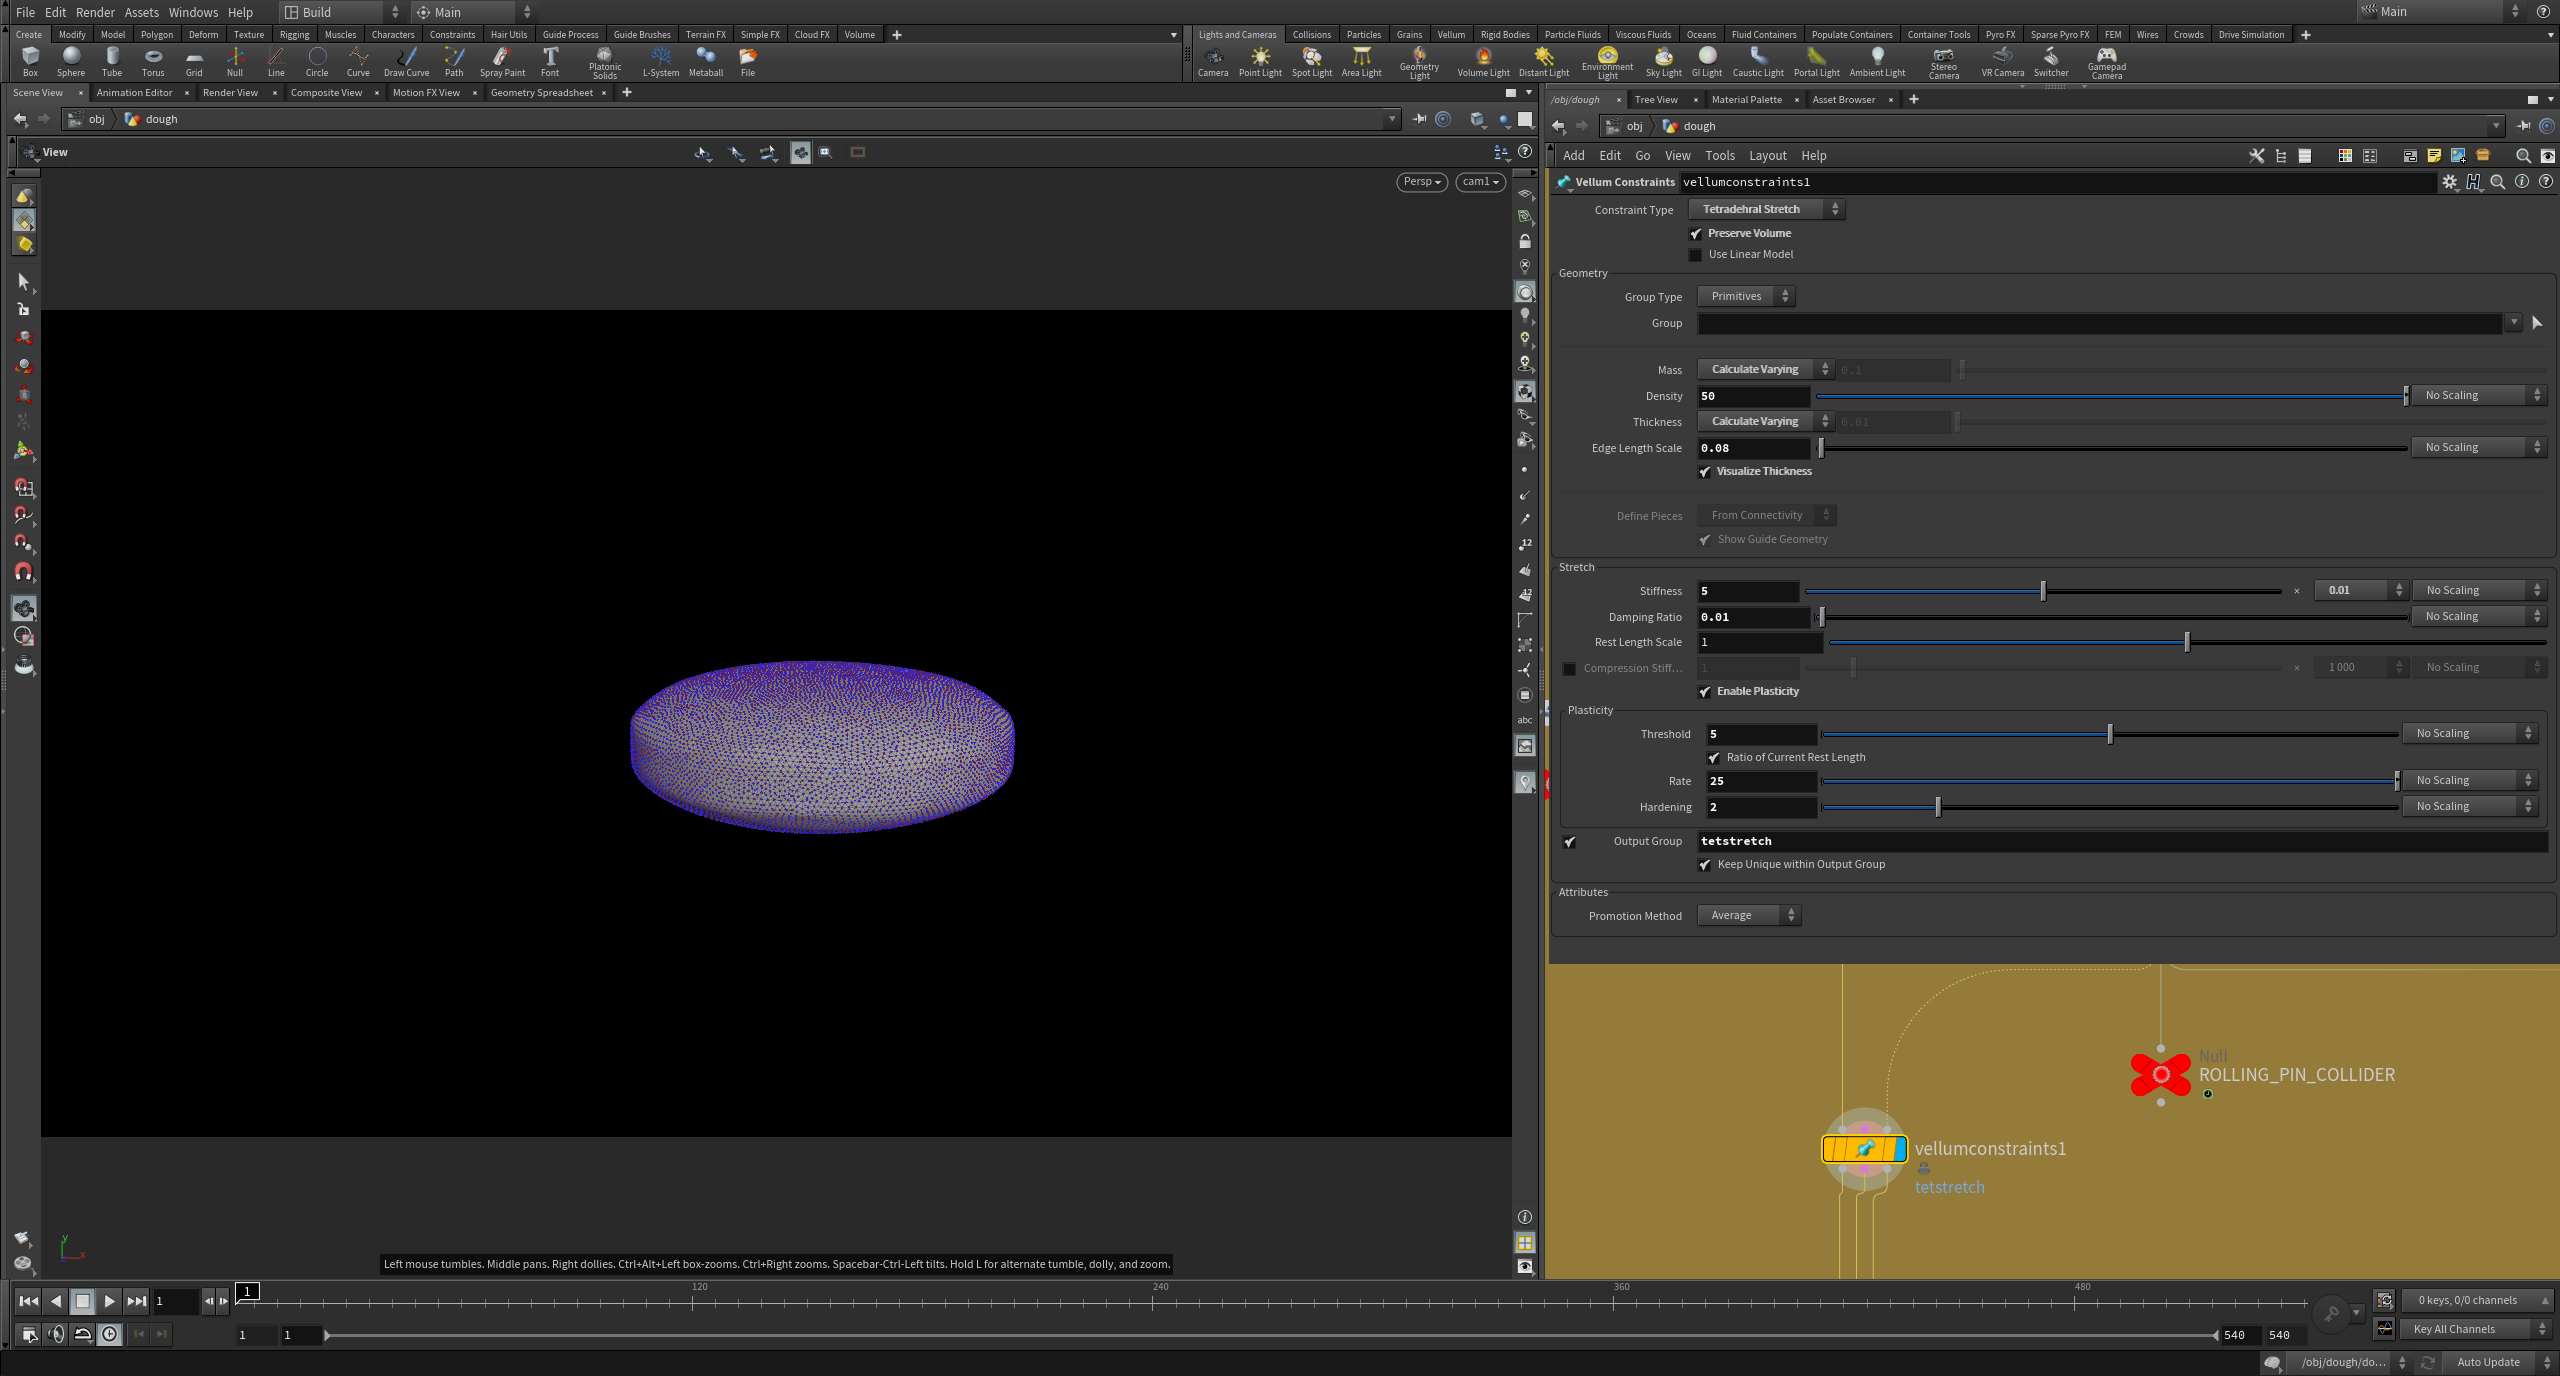
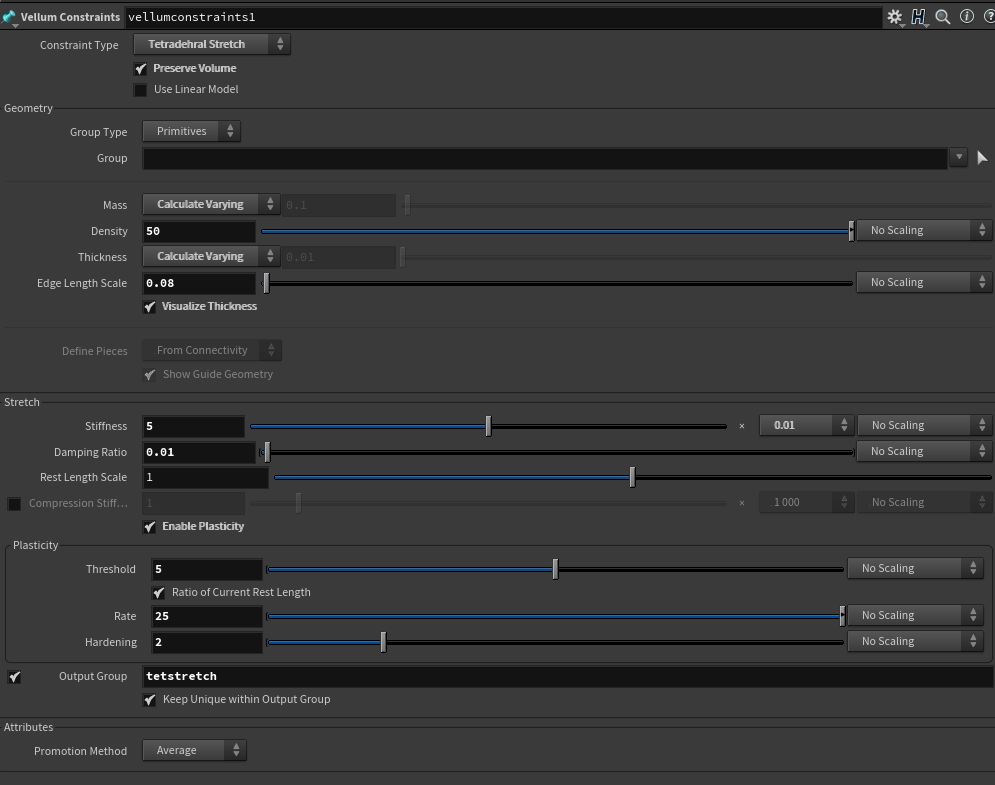
TETRAHEDRAL STRETCH CONSTRAINTS
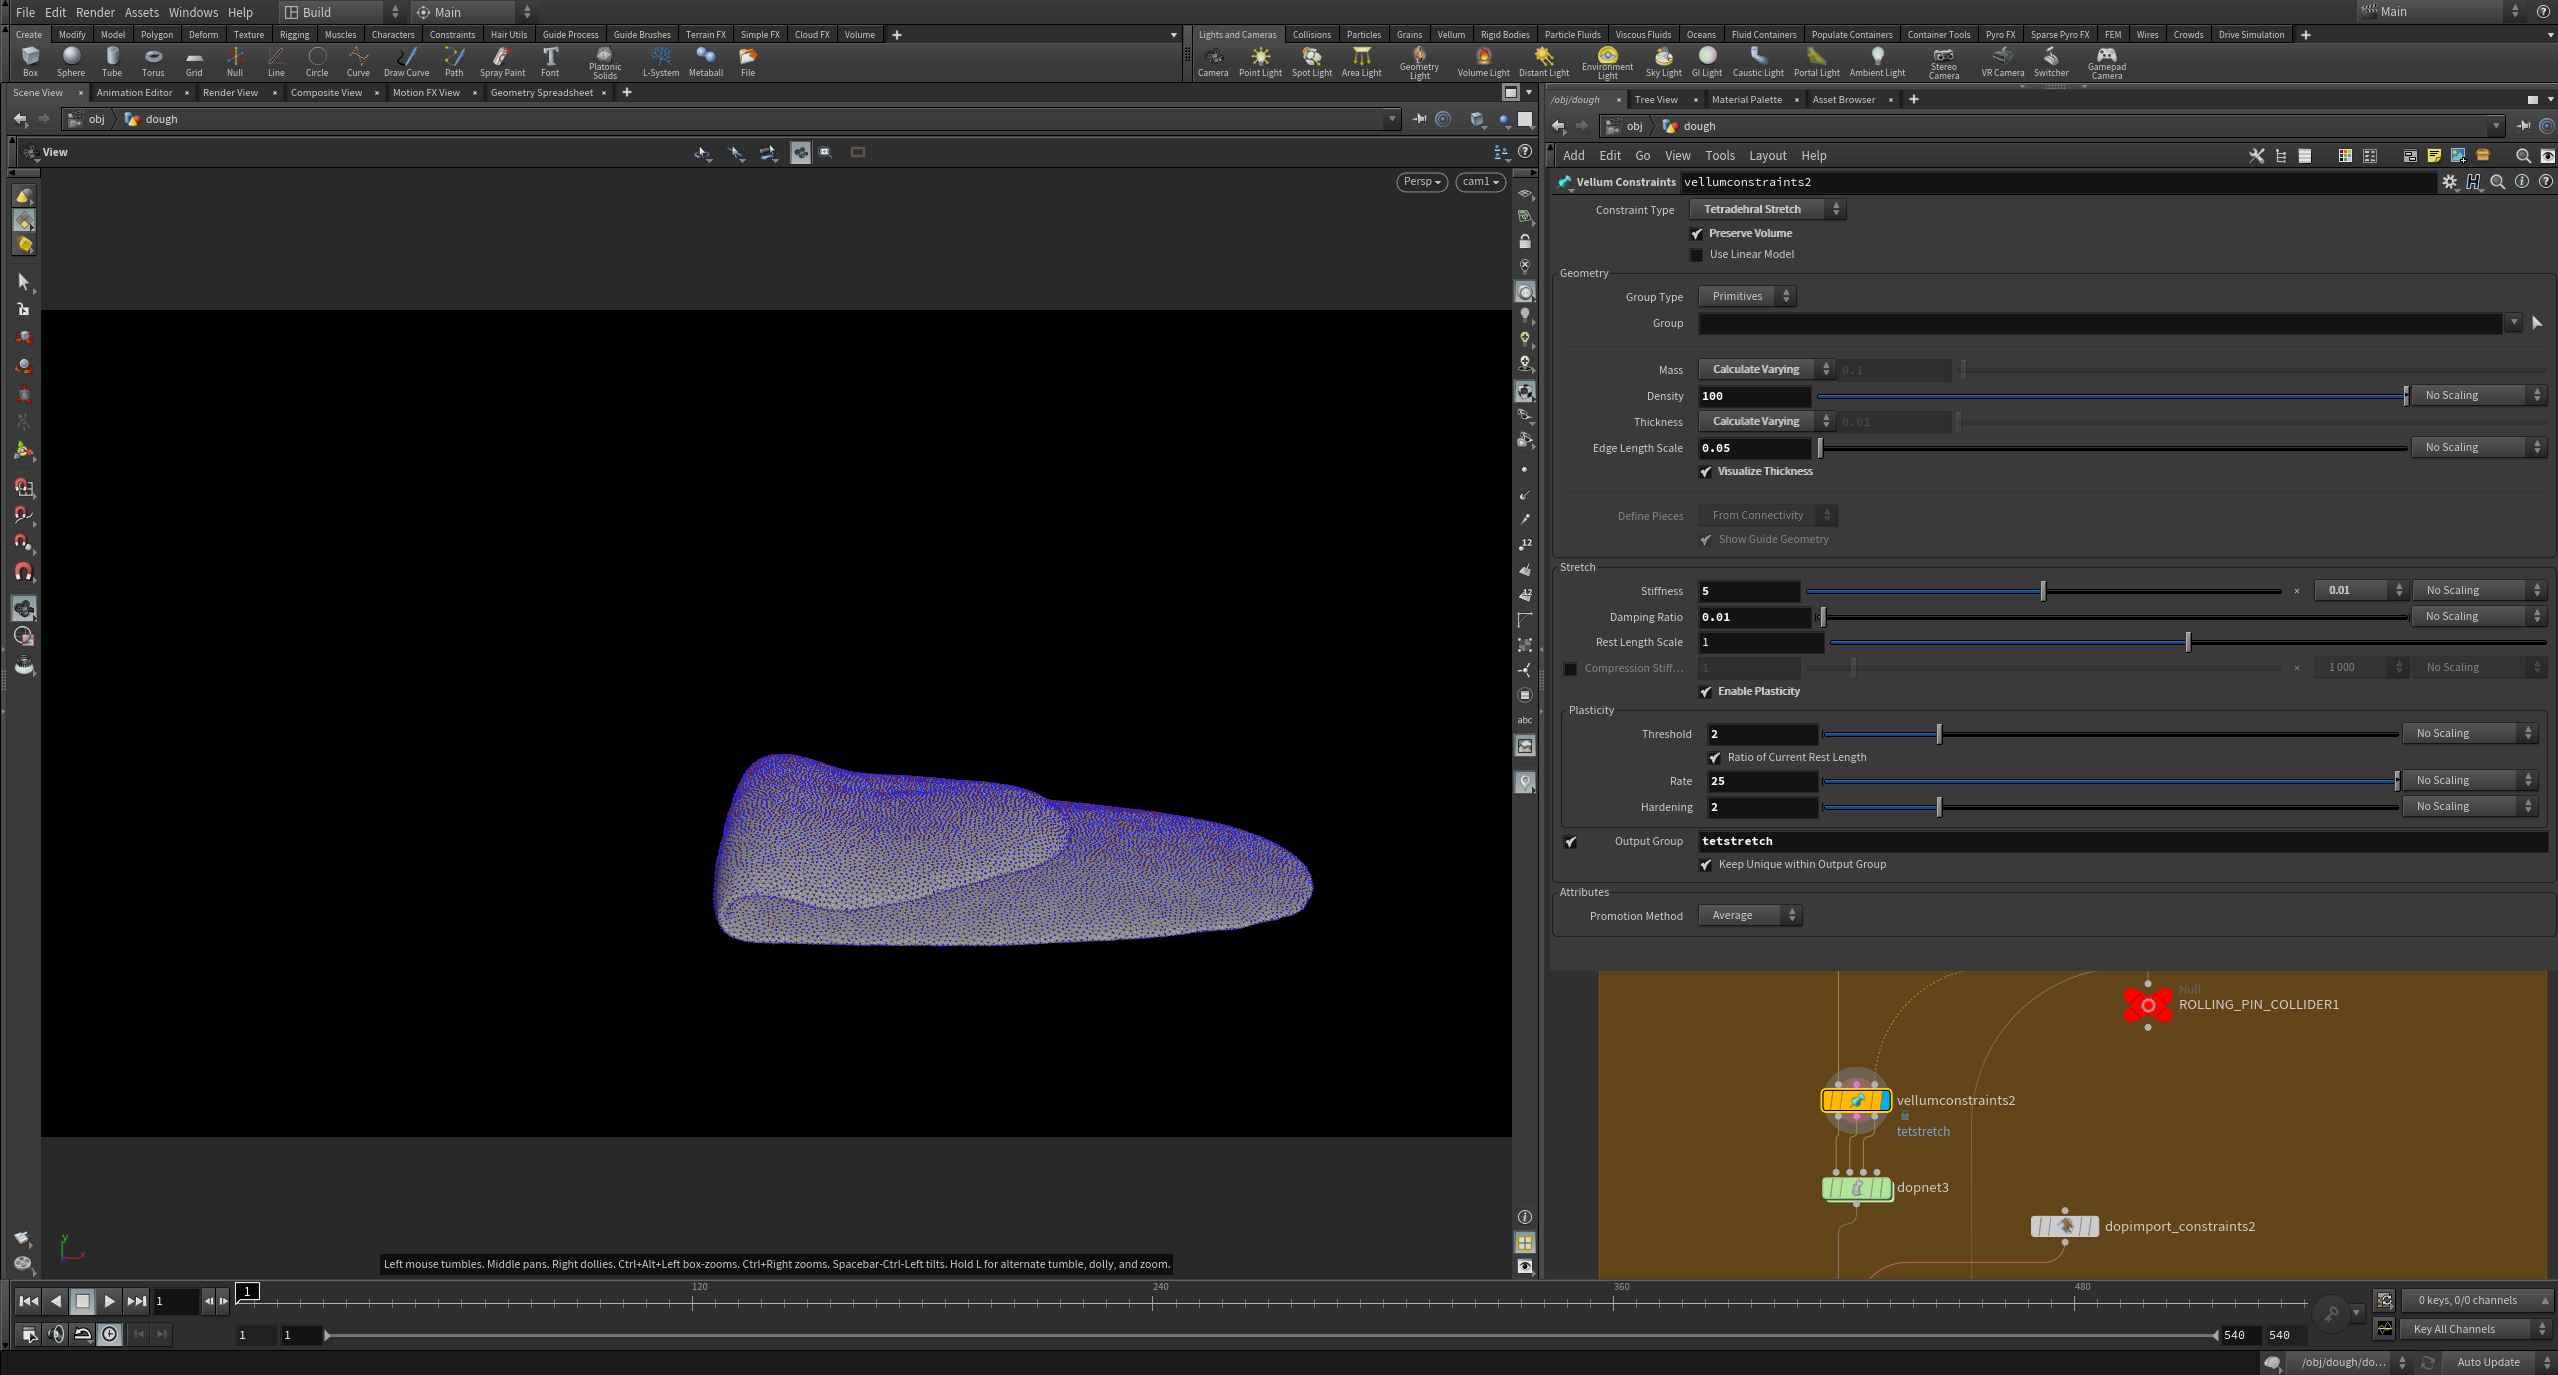
Append a Vellum Configure Constraints to the new tetrahedralized mesh and select ‘Tetrahedral Stretch’ from the Constraint Type drop down menu. Check ‘Preserve Volume’.
The Mass value will affect how the points interact with forces and collision geometry, and determines how strong the constraints are. In this example, we can set the Mass type to Calculate Varying, and specify a Density value of 50. This means that that each point can have a different mass depending on how much area it represents, while the mass sum of the points will equal to 50.
The Edge Length value will determine the thickness of the points stored in pscale. In this example, we can dial a relatively low value of 0.08.
Note
While there are no magic values, and values chosen will most likely differ depending on the size of your incoming geometry and the type of Soft Body you want to make, you can use PDG wedging to narrow down the value range you are working with.
As we want the dough to keep its new configuration once it’s squished by the external collision geometry, we can check ‘Enable Plasticity’. You can again use PDG to determine the values you want. Here, the combination of values for the Threshold (5) Rate (25) and Hardening (2) gave the best results.
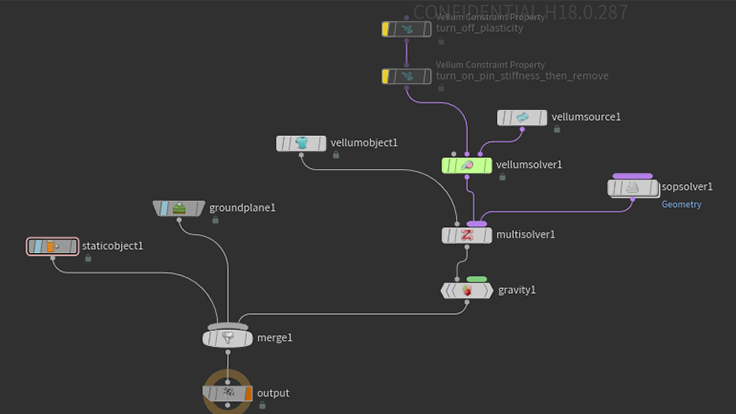
We can animate some external geometry which will act as the collider for the dough; in this case, a rolling pin. Using a DOP Network we can reference this animated geometry in a Static Object node. We will look at the DOP Network set-up in greater detail later in the second dough state.
Once the initial dough has been solved and rolled flat, we will need to convert the tetrahedral geometry back to a polygon mesh using the Convert Tets SOP. This will avoid any potential issues later, particularly with rendering. Once converted and cleaned, we can cache it out and move onto the next dough state; flipping it over.
SECOND STATE: FLIPPING THE DOUGH OVER
The input geometry for the next dough state can be taken from the last frame of the previous cache using an Object Merge and Time Shift SOP. We may prepare the new geometry using the exact same set-up and values as the dough state previous, so we can be sure to achieve the same material behavior as before. This time, though, we may use some additional features to get a different result.
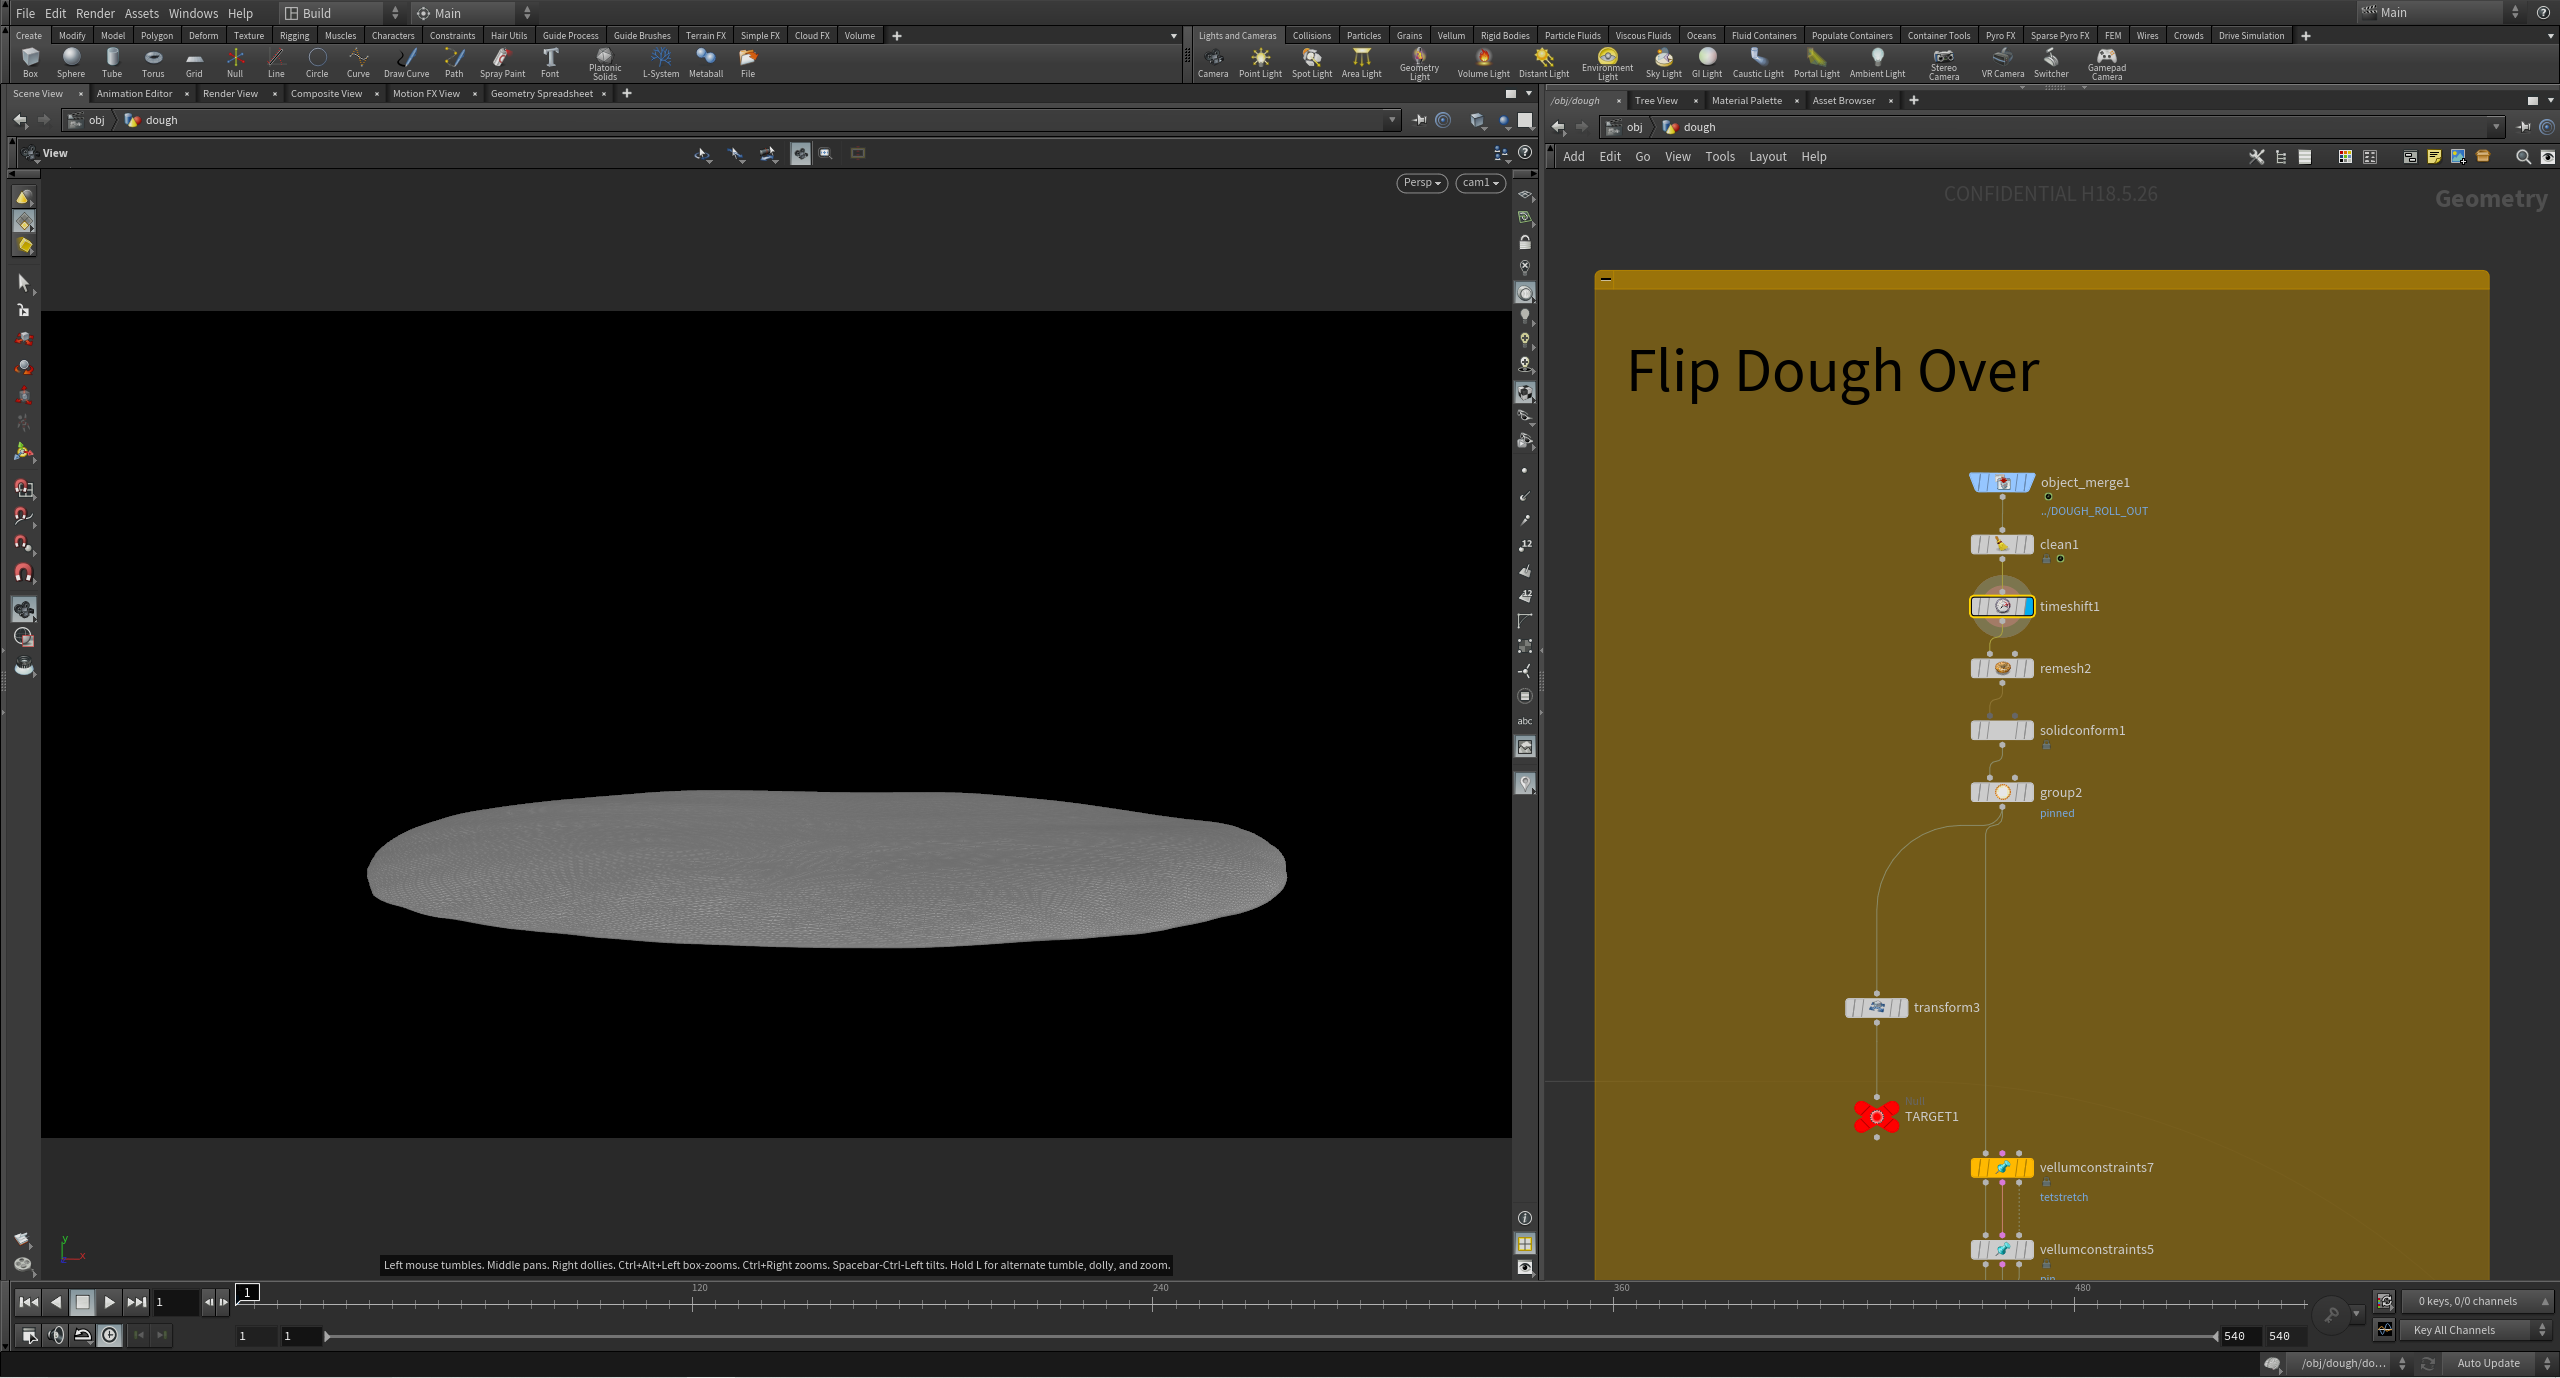
Preparing the primitive group
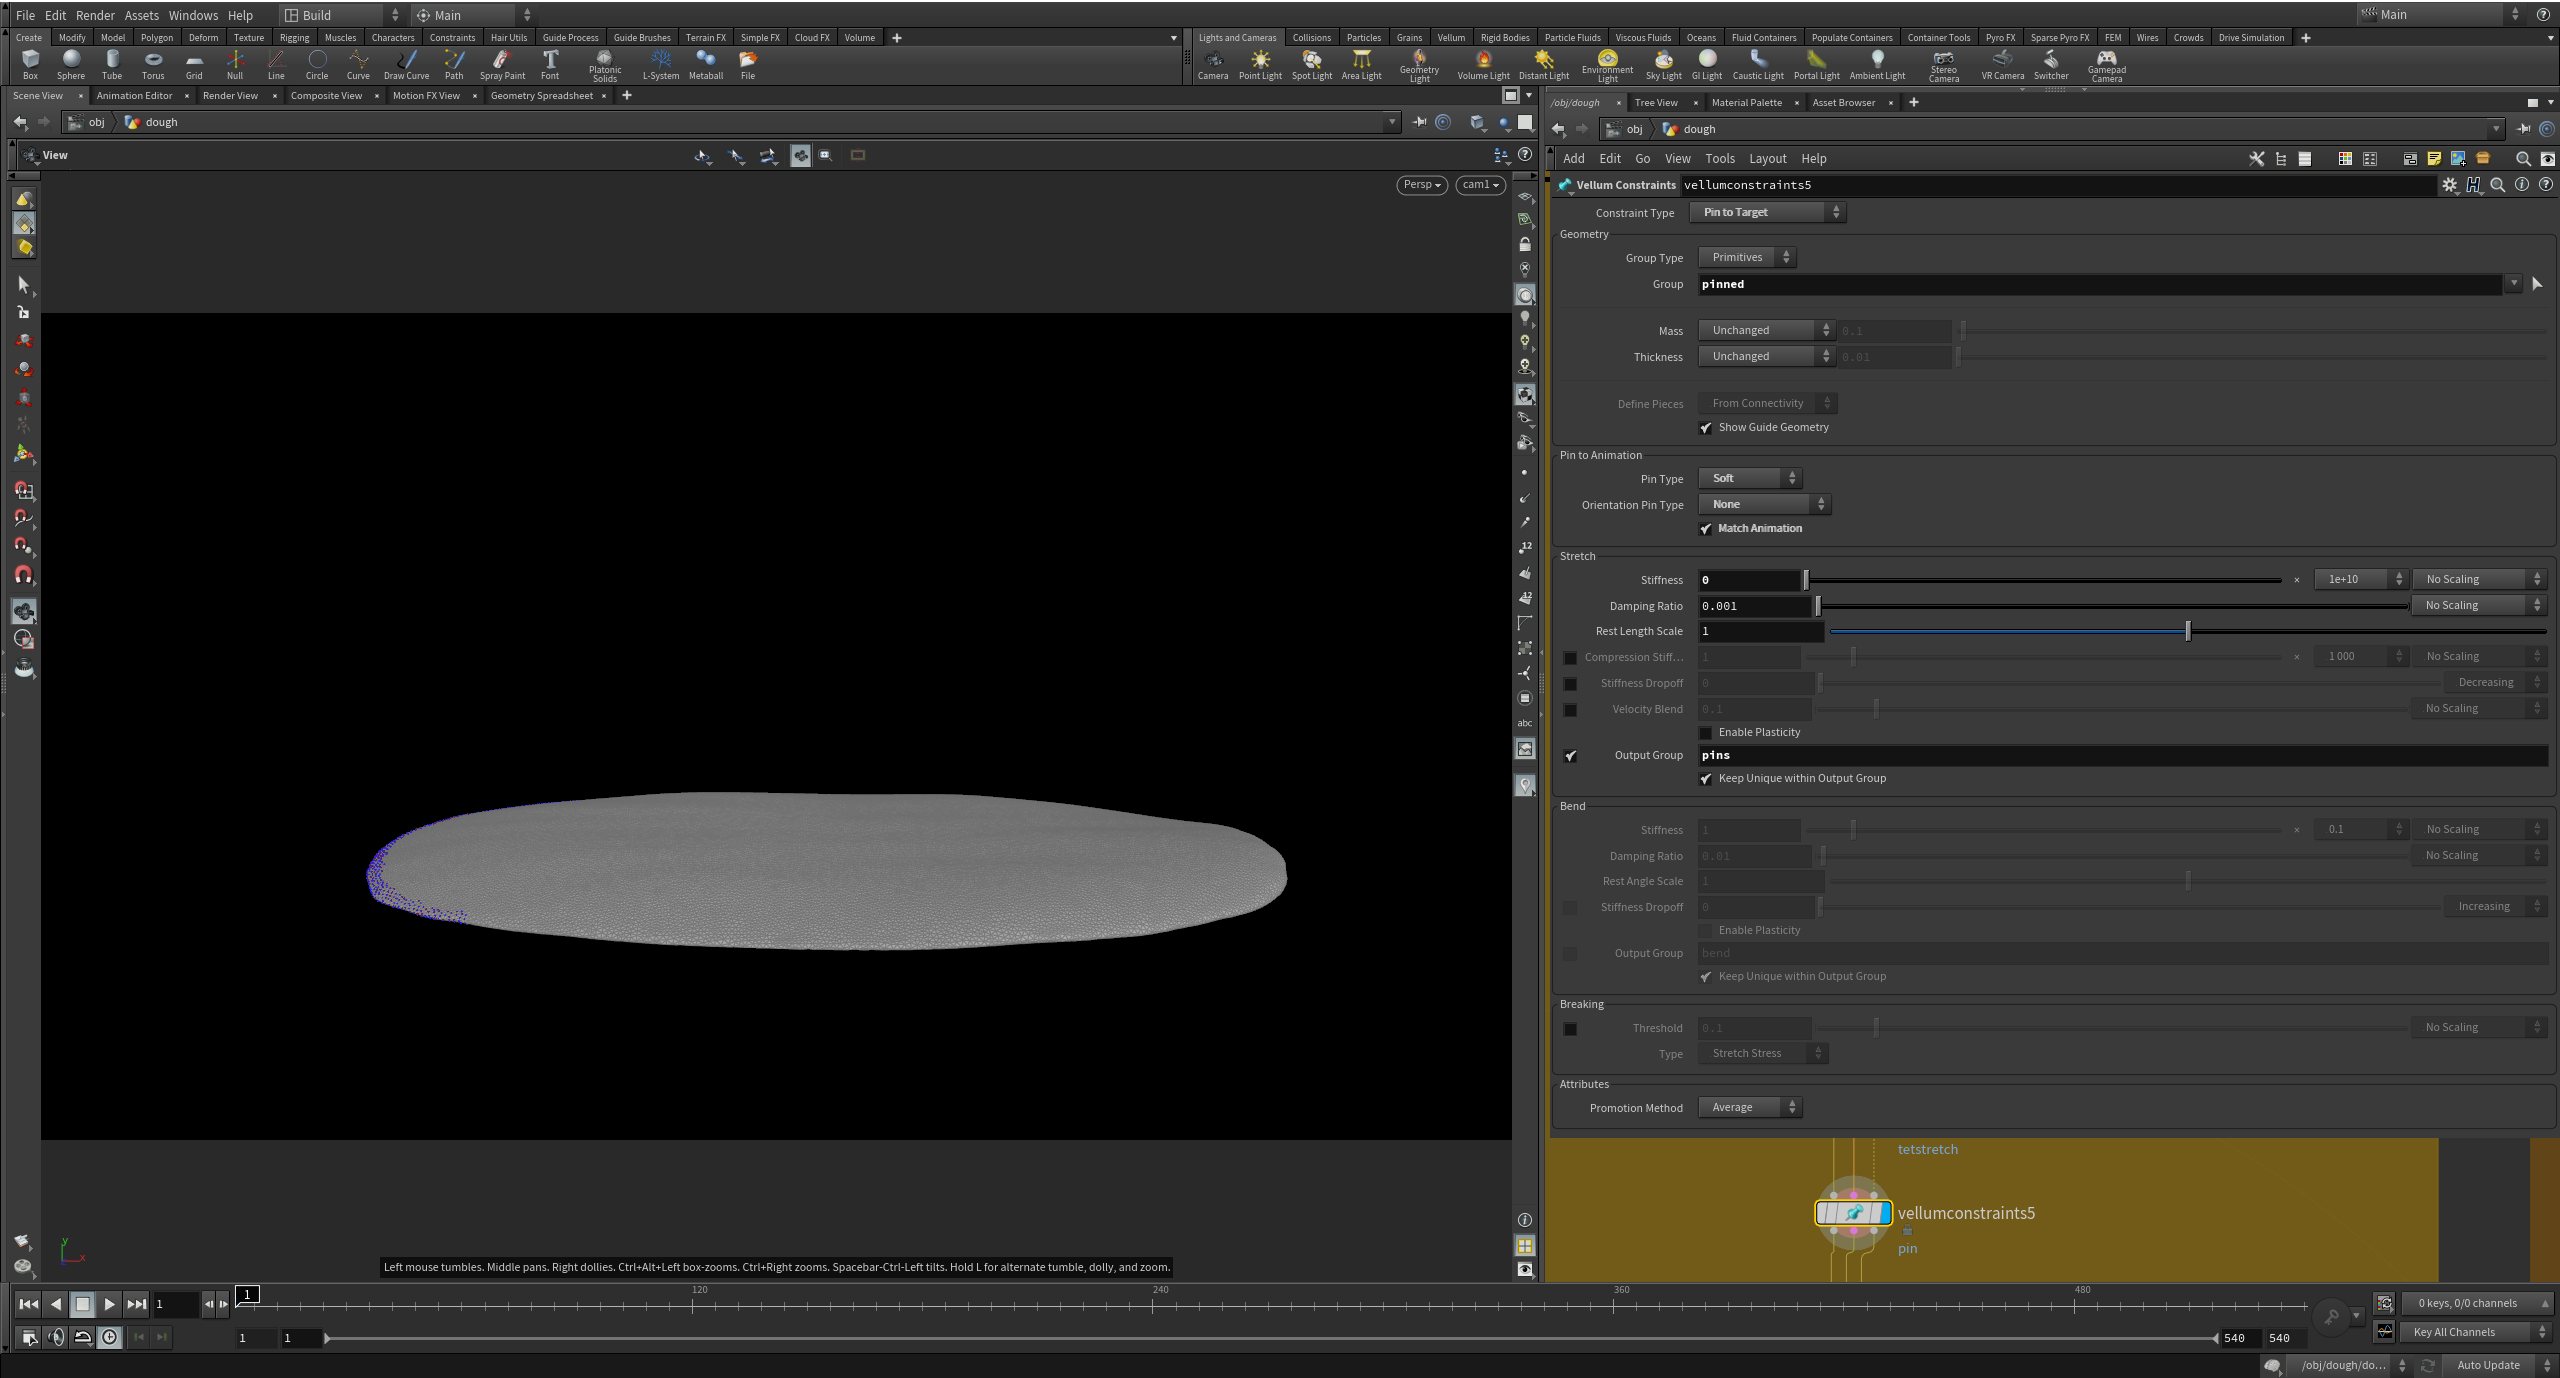
In preparation for the dough flip, we can create a Primitive Group ‘pinned’ towards one end of the geometry. This will later be used in a Pin to Target constraint type.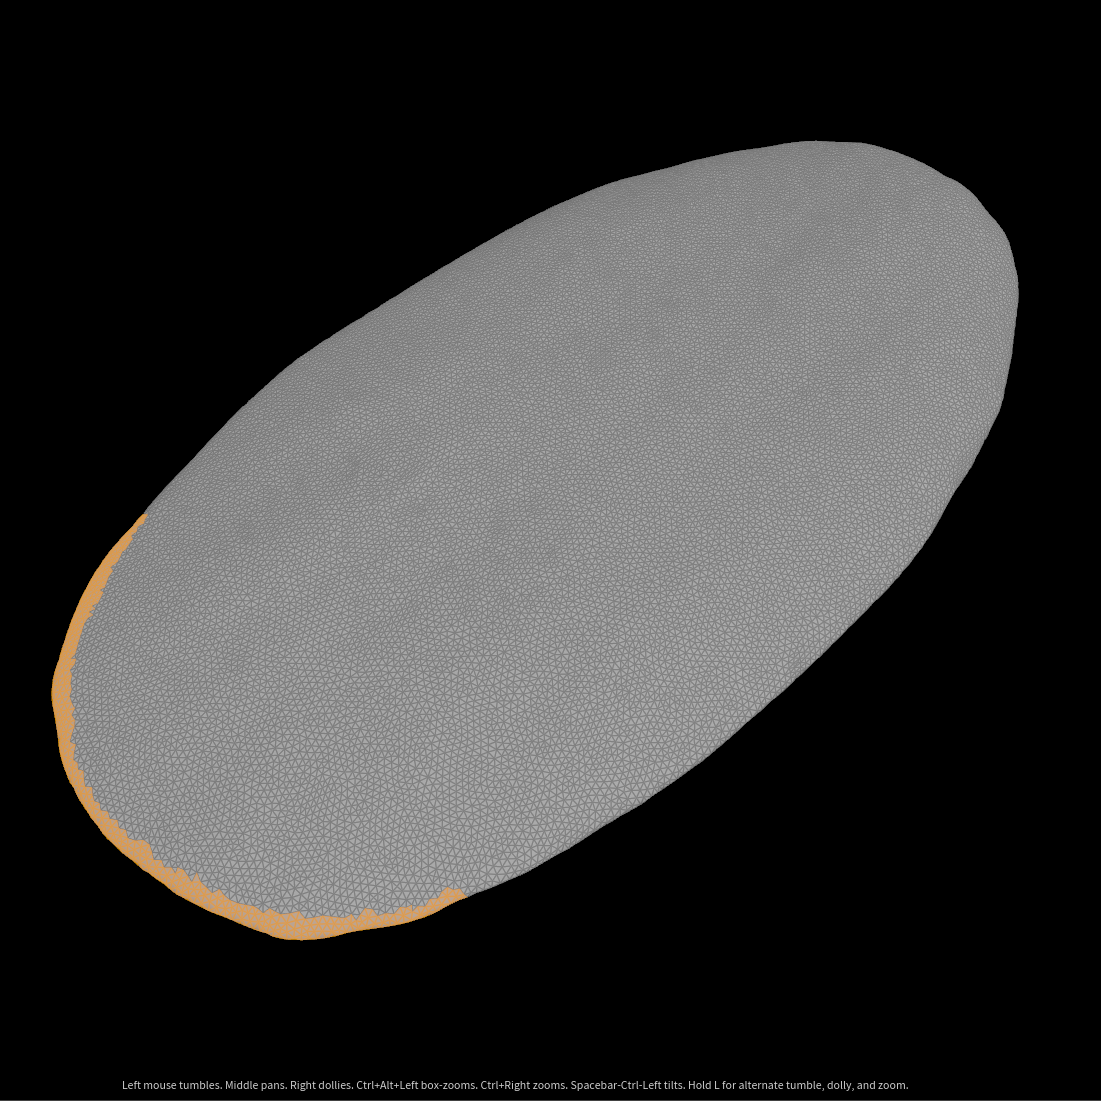
Pin points to an animated Target
In a separate stream, we can animate a transform that can later be used as a guide for the Pin to Target Constraints, and referenced in the Vellum Solver as the Target Path. Append a Null to the animated transform called ‘TARGET’.
In this dough state, we want to keep the dough nice and stretchy and so we can leave Plasticity at its default (disabled). All other Tetrahedral Stretch constraint values can be kept the same as the previous dough state; though, this time, increasing the Density value to 100 gave nicer results.
We can append a Vellum Configure Constraints SOP set to Pin to Target. In the Group parameter, select the ‘pinned’ primitive group we made earlier. The Mass and Thickness values can be left at their default ‘Unchanged’, as we specified these values earlier in the Tetrahedral Stretch constraint. Specify an Output Group called ‘pins’; this will later be used in the DOP Network.

The pin type in the Pin to Animation section can be set to three types:
- Permanent: The mass attribute is set to zero, making the point a hard constraint. However, as no original value of mass is stored, it isn’t possible to release this constraint later.
- Stopped: The stopped attribute is set to 1 to make the point a hard constraint. Mass is unaffected, so a POP operation can restore the dynamics of the point later by resetting stopped to zero.
- Soft: A zero length distance constraint is made between the point and its target location. The Stretch Stiffness and Damping Ratio values are used for this constraint.
In this instance, we want to use a Soft constraint type, as it will create a zero length distance constraint between the points and the target; and so the selected group should match the points of the animated target exactly.
Note
Note that for Vellum hair, the orientation may also be constrained using the ‘Same as Position’ or ‘Soft’ options in the Orientation Pin Type. For this example, though, we can set this option to ‘None’. Ensure that the ‘Match Animation’ box is checked.
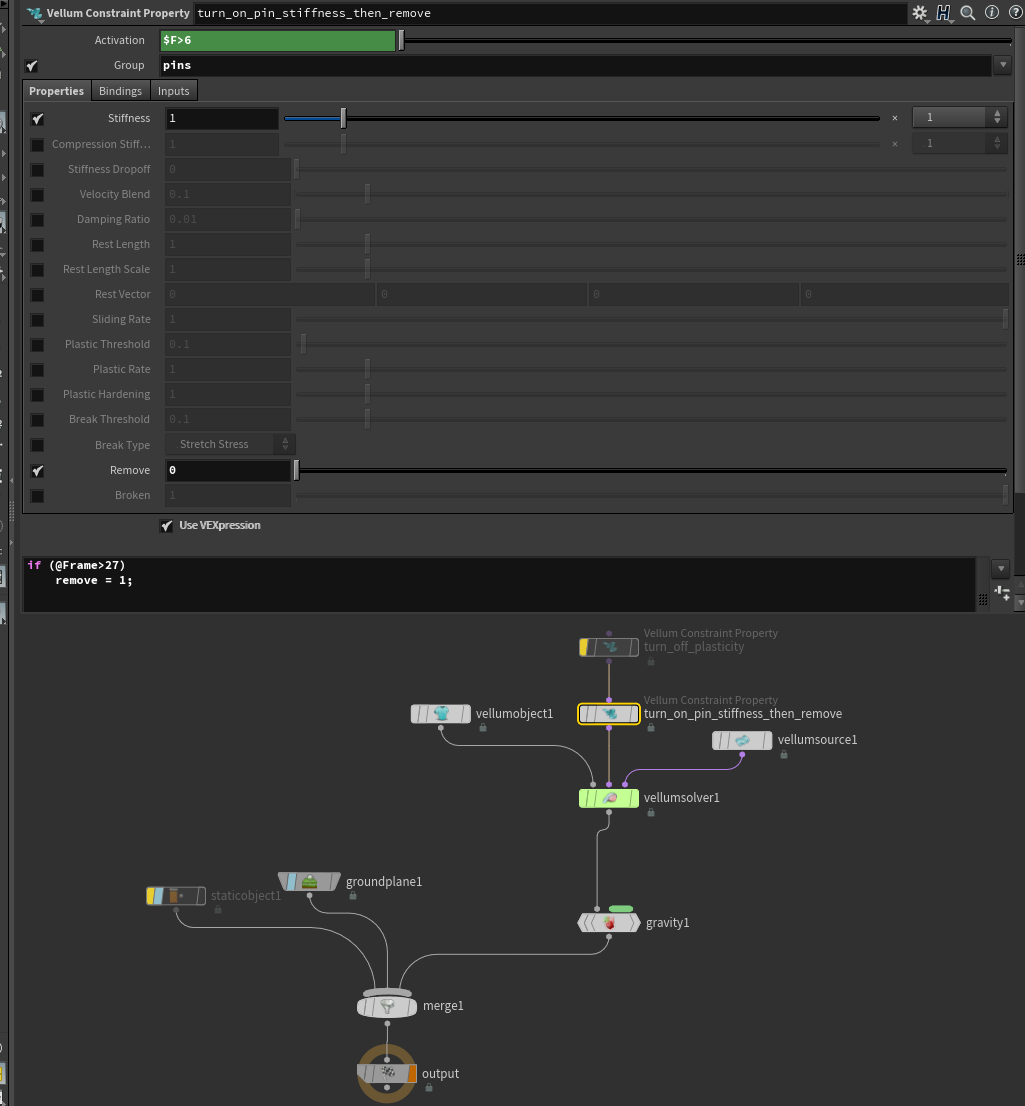
For this example, using a DOP Network as opposed to a regular Vellum SOP Solver allows for greater control by using the Vellum Constraints Property node to deactivate certain constraints.
In the Vellum Constraints Property node, we may activate the Pin to Target by specifying Activation: $F>6 (turn on constraints at frame 6).
Check the ‘Stiffness’ and ‘Remove’ options and enable the VEXpression box.
We can use a VEX expression to say that we want to remove the Pin constraints at frame 27.
In the vellumsource node, link the Target Path to the animated Target we made earlier by specifying: “../../TARGET”.
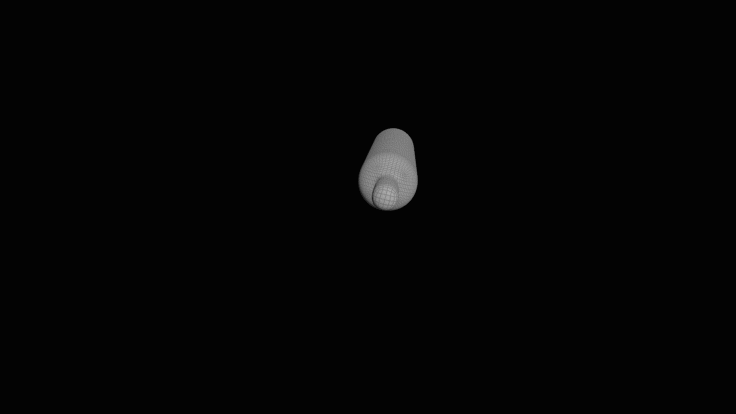
Once solved, the result will be a stretchy dough-like geometry, whose ‘pinned’ primitive group follows the TARGET path upwards, and falls to the ground once the ‘pinned’ group constraints are disabled at frame 27. We can clean, convert and cache the mesh in preparation for the third dough state.

THIRD STATE: ROLLING DOUGH SECOND TIME
The process may be repeated much the same for the third step; we can take the last frame of the second dough state cache and use a Time Shift SOP to use as the initial geometry.
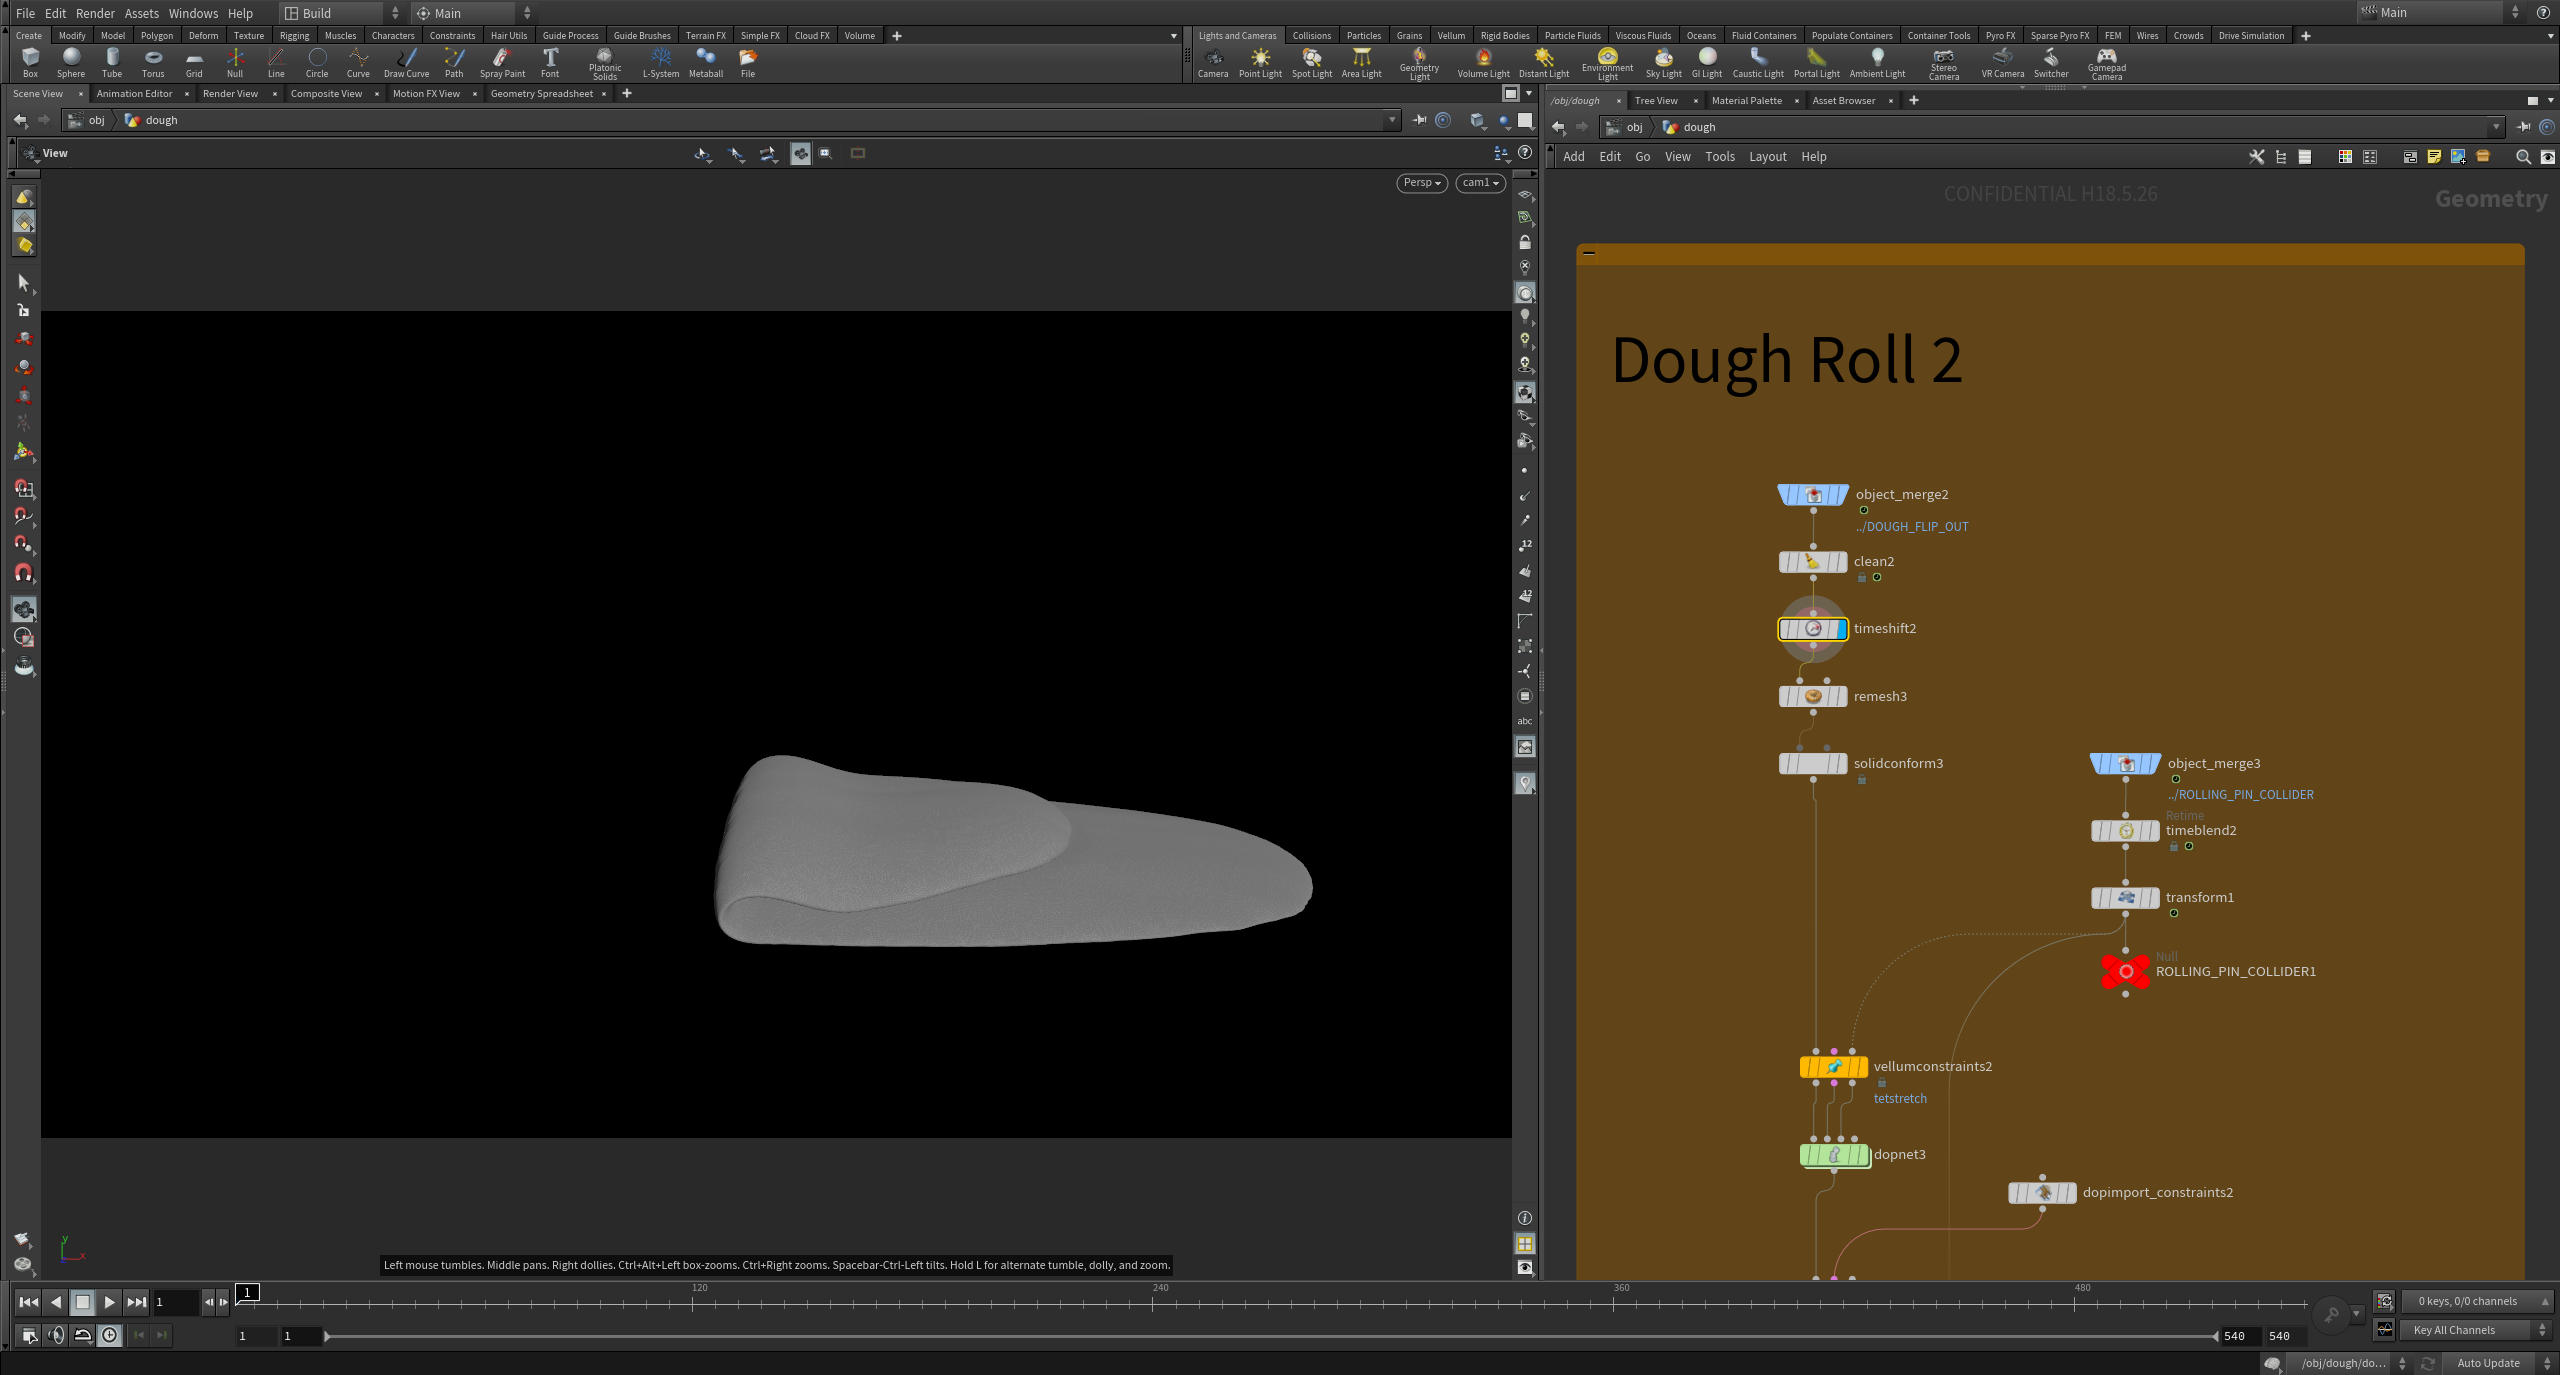
Much like the first dough state, we may enable Plasticity and keep the Tetrahedral Stretch constraint values relatively similar for a consistent material behavior. The rolling pin geometry can be again used as a collision object.
Much like before, once solved, we can convert the geometry to a polygon mesh using the Convert Tets SOP.

With the three dough states cleaned, converted and cached, we can combine them using a Time Blend and a Switch SOP. The result will be a seamless blending between the three dough states.
Thank you for reading this tutorial; I hope you found it useful and good luck for your Vellum Soft Body ventures!

Isabel Kokuti
About the Author
Former SideFX Intern and Masters graduate from Bournemouth University, Isabel is a Houdini Technical Artist currently working in Feature Films. She is from England and she specializes in Character FX.
CREATED BY

COMMENTS
eoyilmaz 5 years, 10 months ago |
I bet this is a very good tutorial, didn't go through it yet. But one thing that caught my eye is that the GIF on this page is 307 MB. I suggest you to use a proper video format like MP4 or MOV instead of GIF
Please log in to leave a comment.