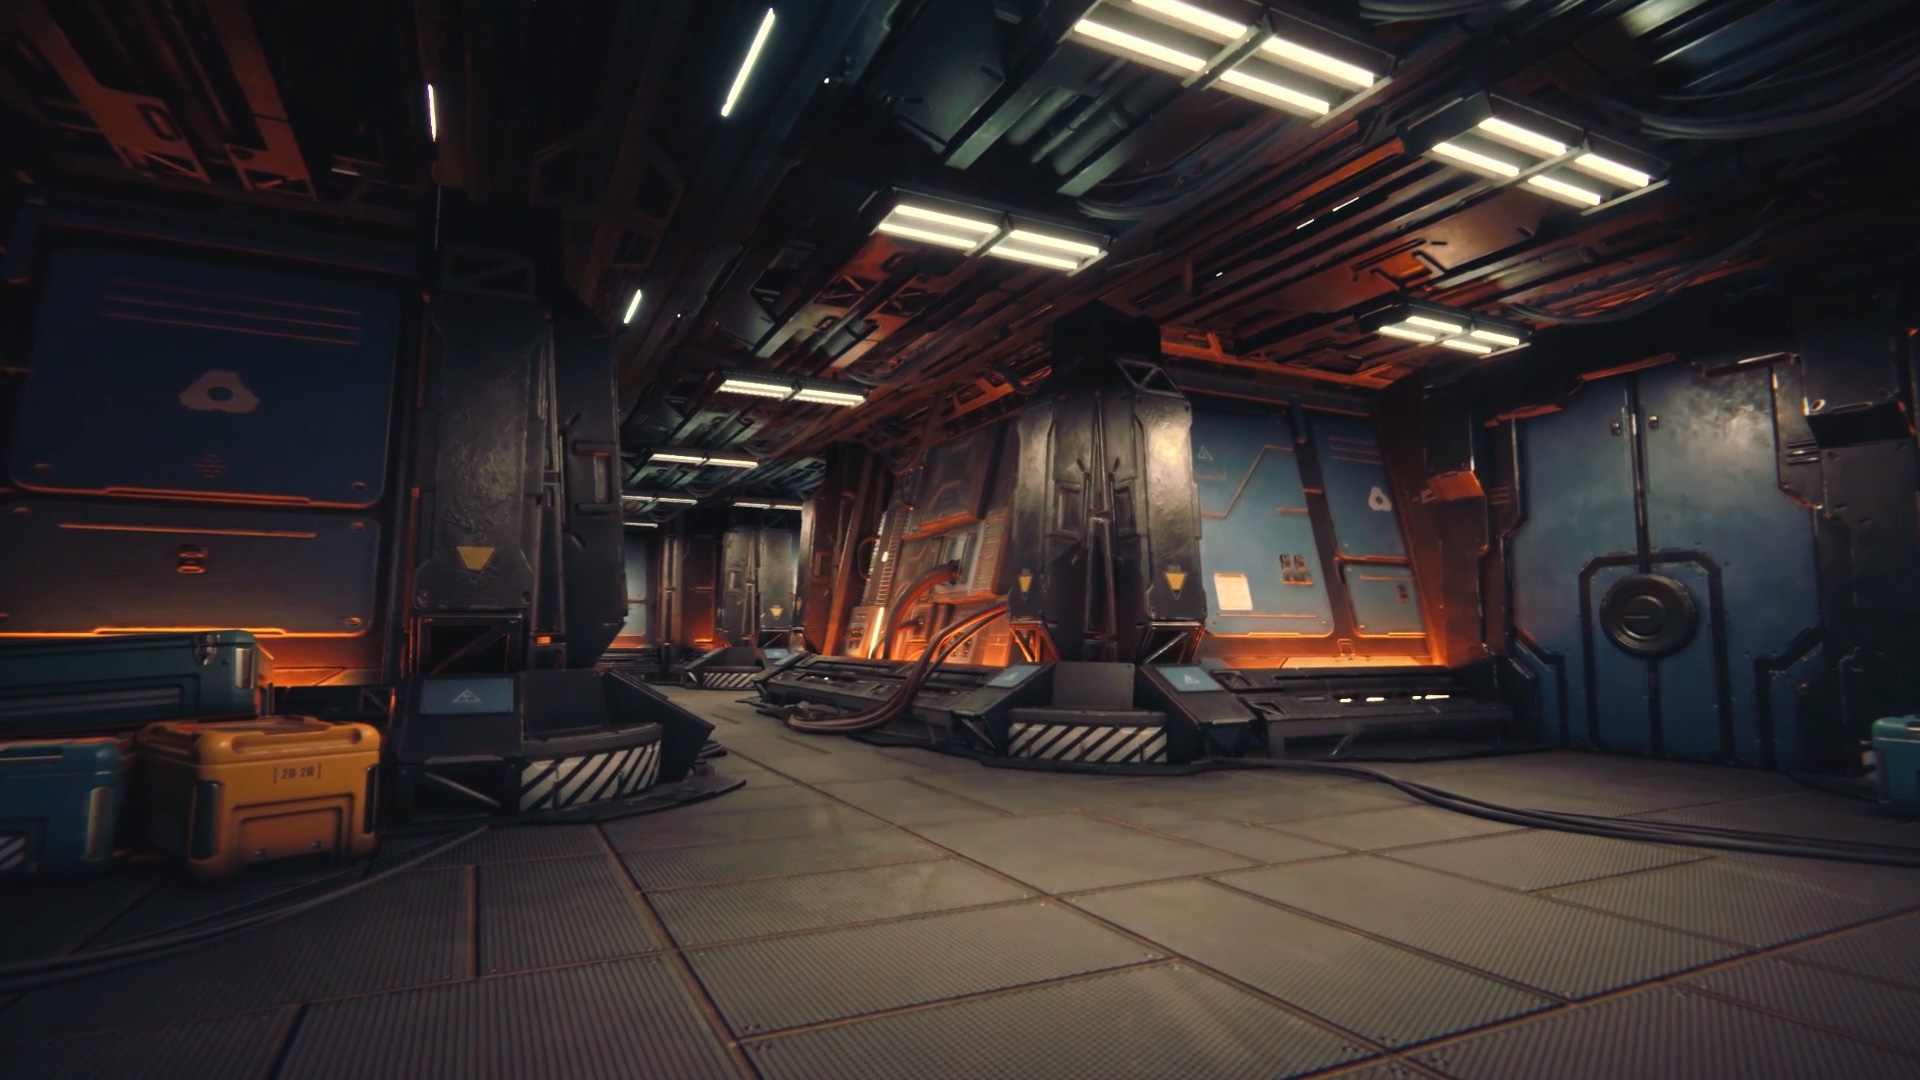
Learn how to create a procedural Level Builder that uses a single curve to create the walls, ceiling and floor along with doors and props. This lesson brings together Sci Fi panels, crates and tanks into a single tool that makes it easy to generate a complete level inside Unity. Follow along to learn all the steps needed to build this tool then use the Houdini Engine for Unity plug-in to bring the resulting digital asset into the game editor for direct manipulation and assignment of prefabs and materials.
NOTE: These lessons use the SideFX Labs tools. Make sure the latest release (non production build) is installed when doing this lesson.
INTRODUCTION
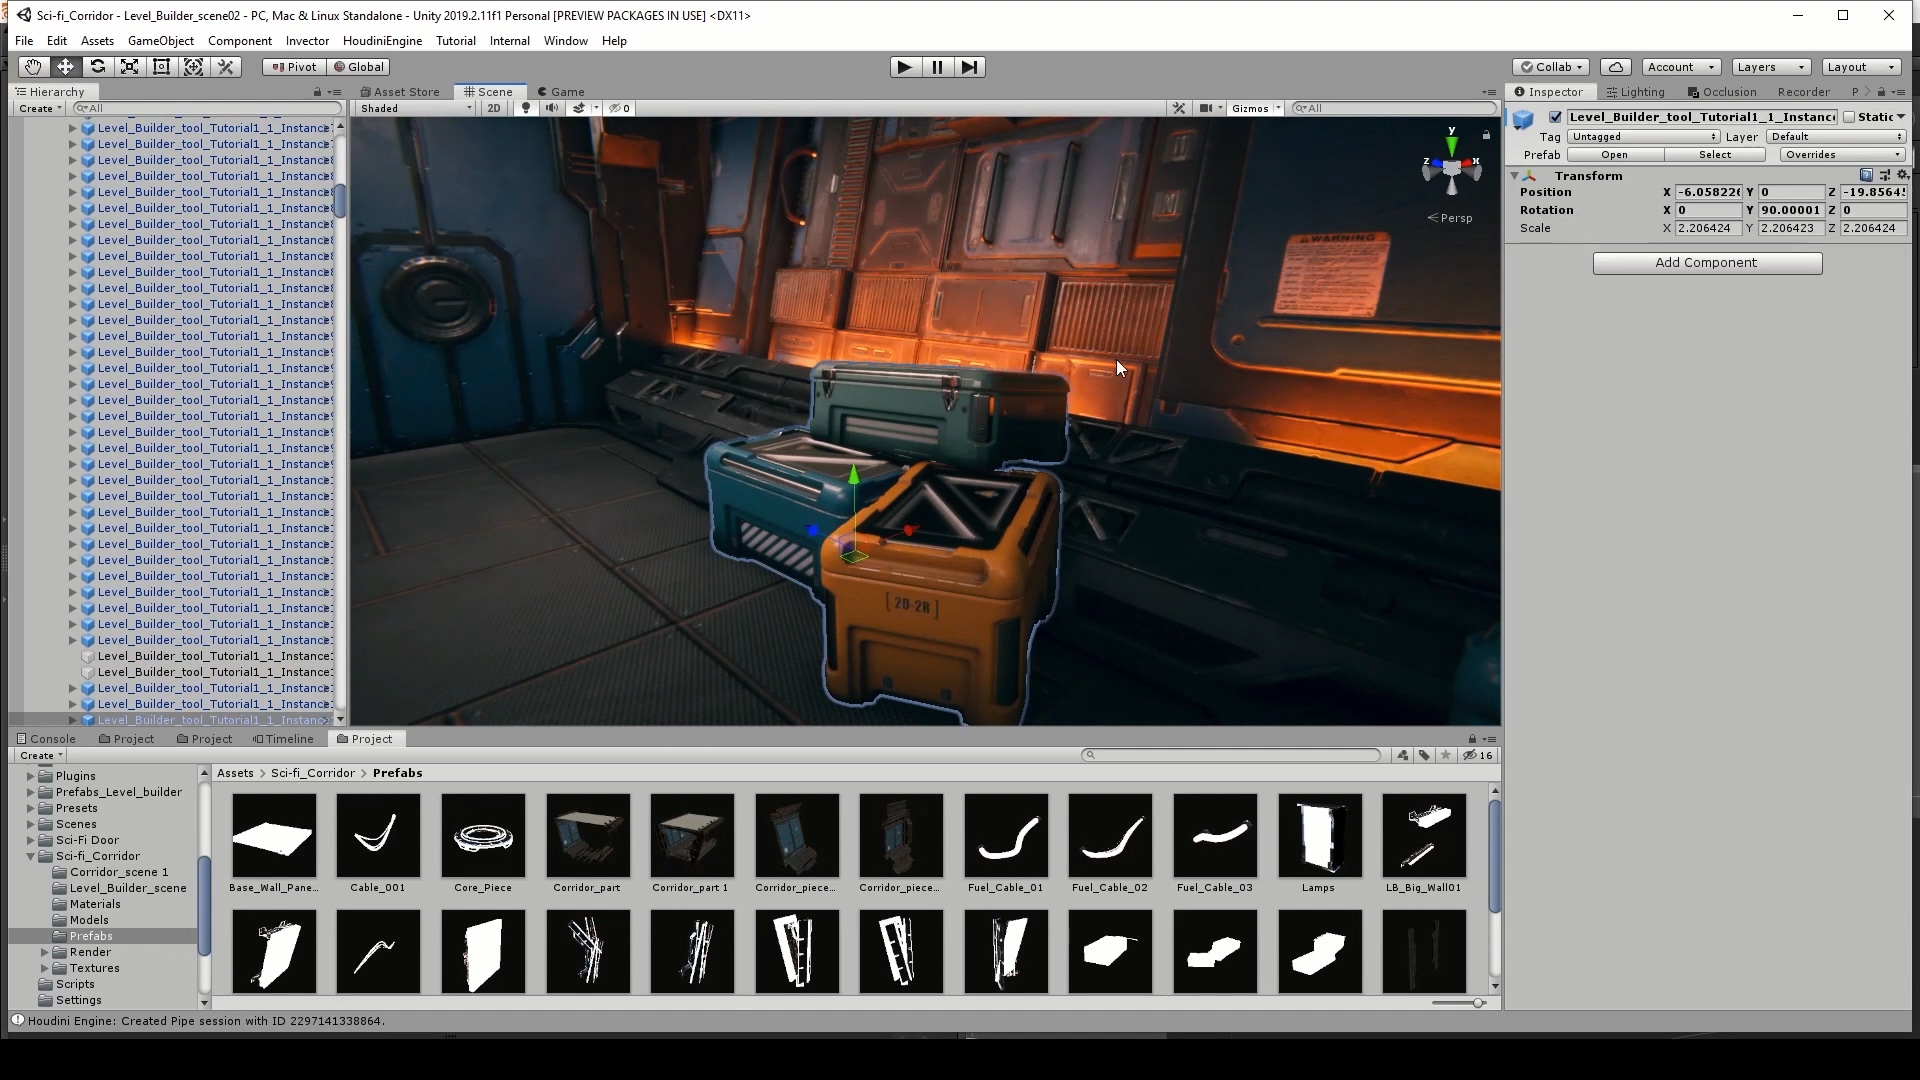
Explore the Level Builder asset and see how you can use it to create complete levels using a single curve. You can then peek into the tool to better understand how it works and how all of the pieces come together to create a rich game environment.
Length: 05:52
PART 1 | The Corridor System
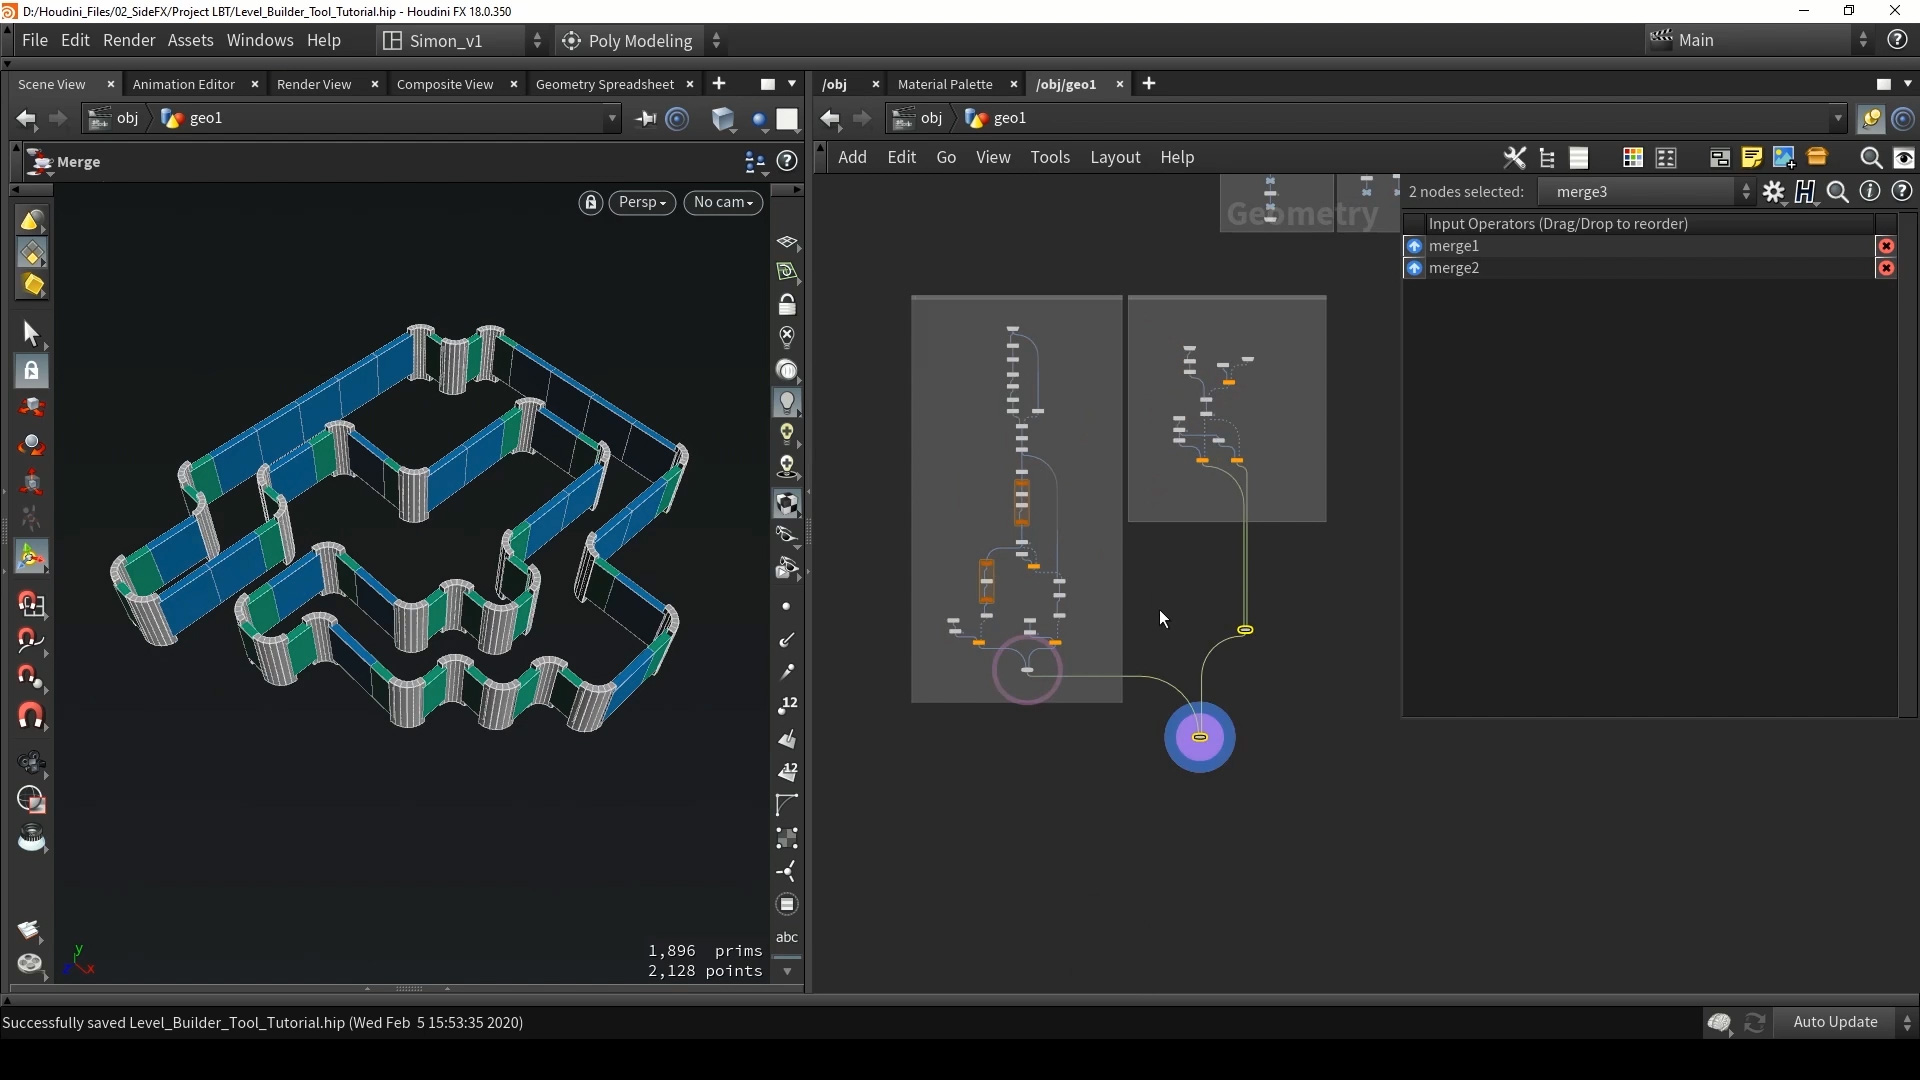
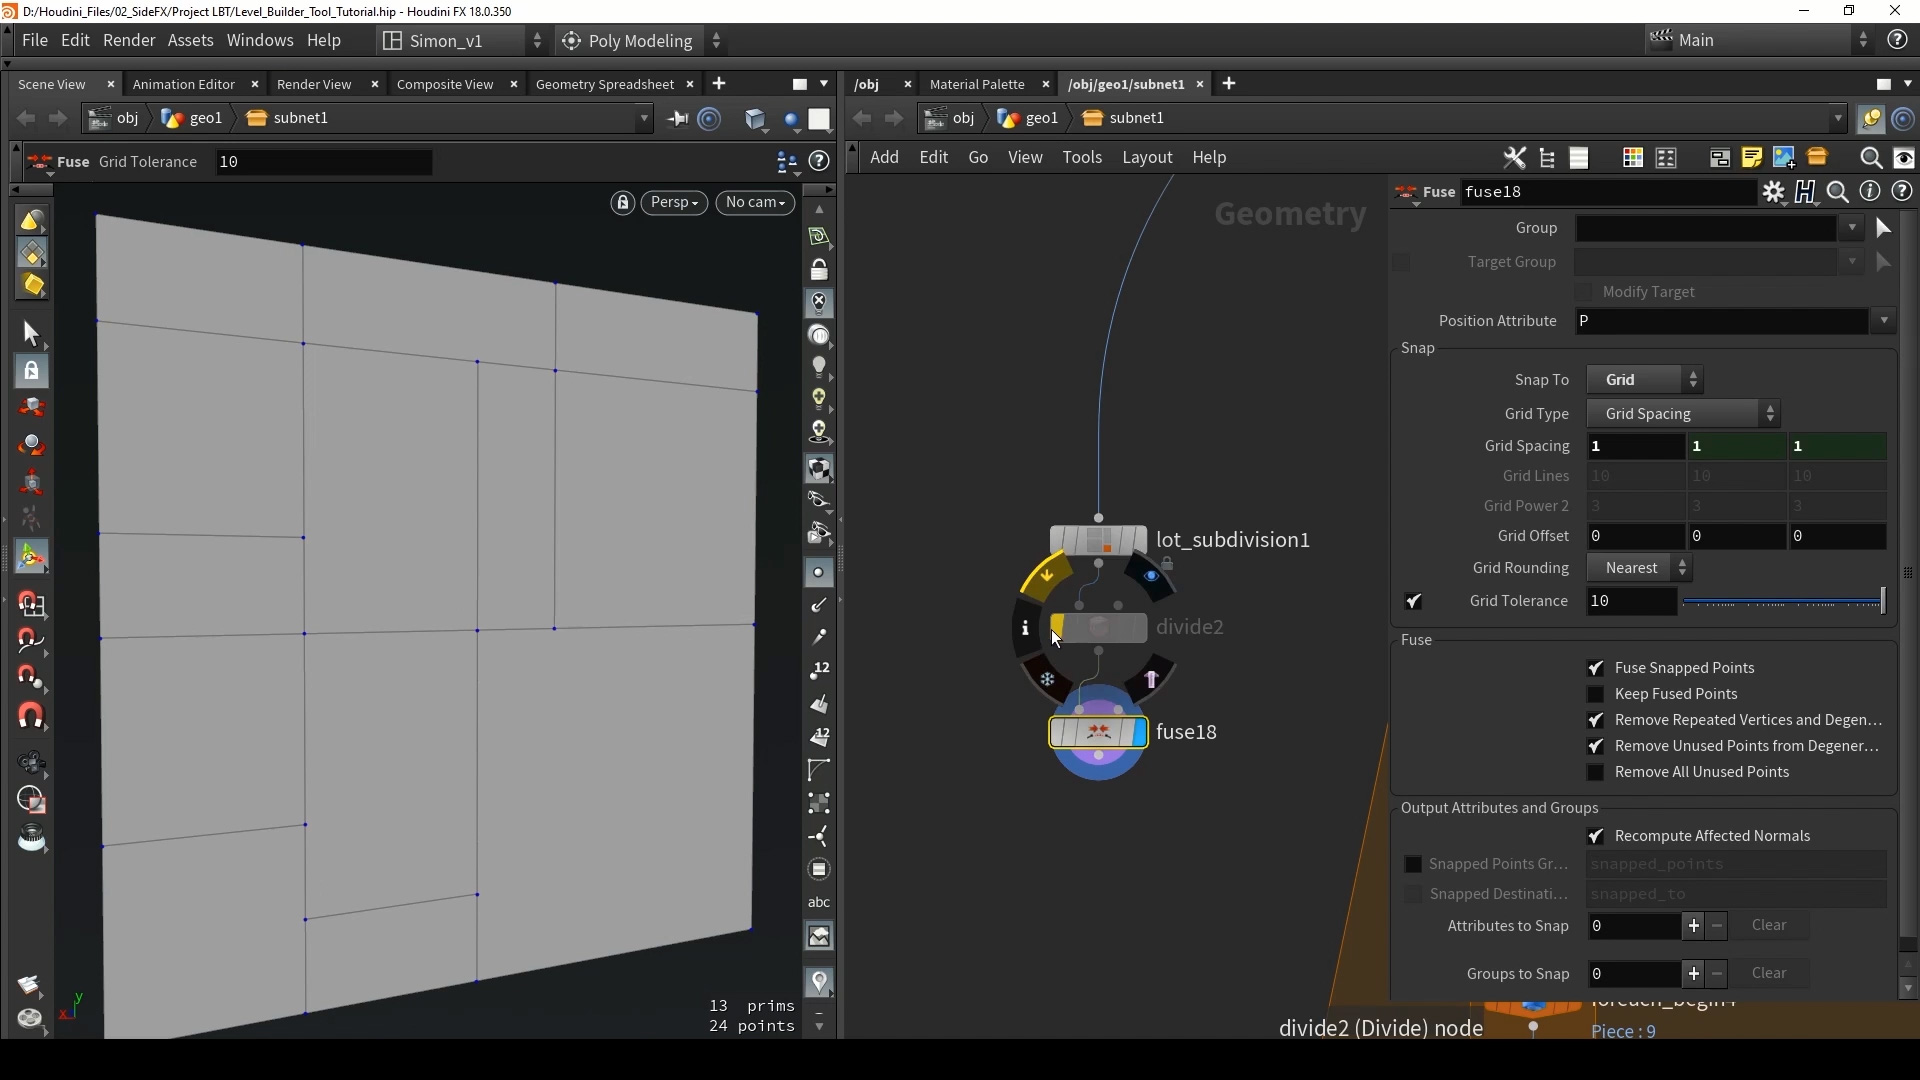
The first step in creating the Level Builder is organizing the system that lays out corridors using a grid. Using an input curve, you will generate interior spaces that connect when the curve overlaps. You will also figure out where the convex and concave corners are and apply appropriate corner geometry to each. At this stage, you will use simple geometry that will get replaced with game assets later on.
Length: 26:50
PART 2 | Create the Digital Asset
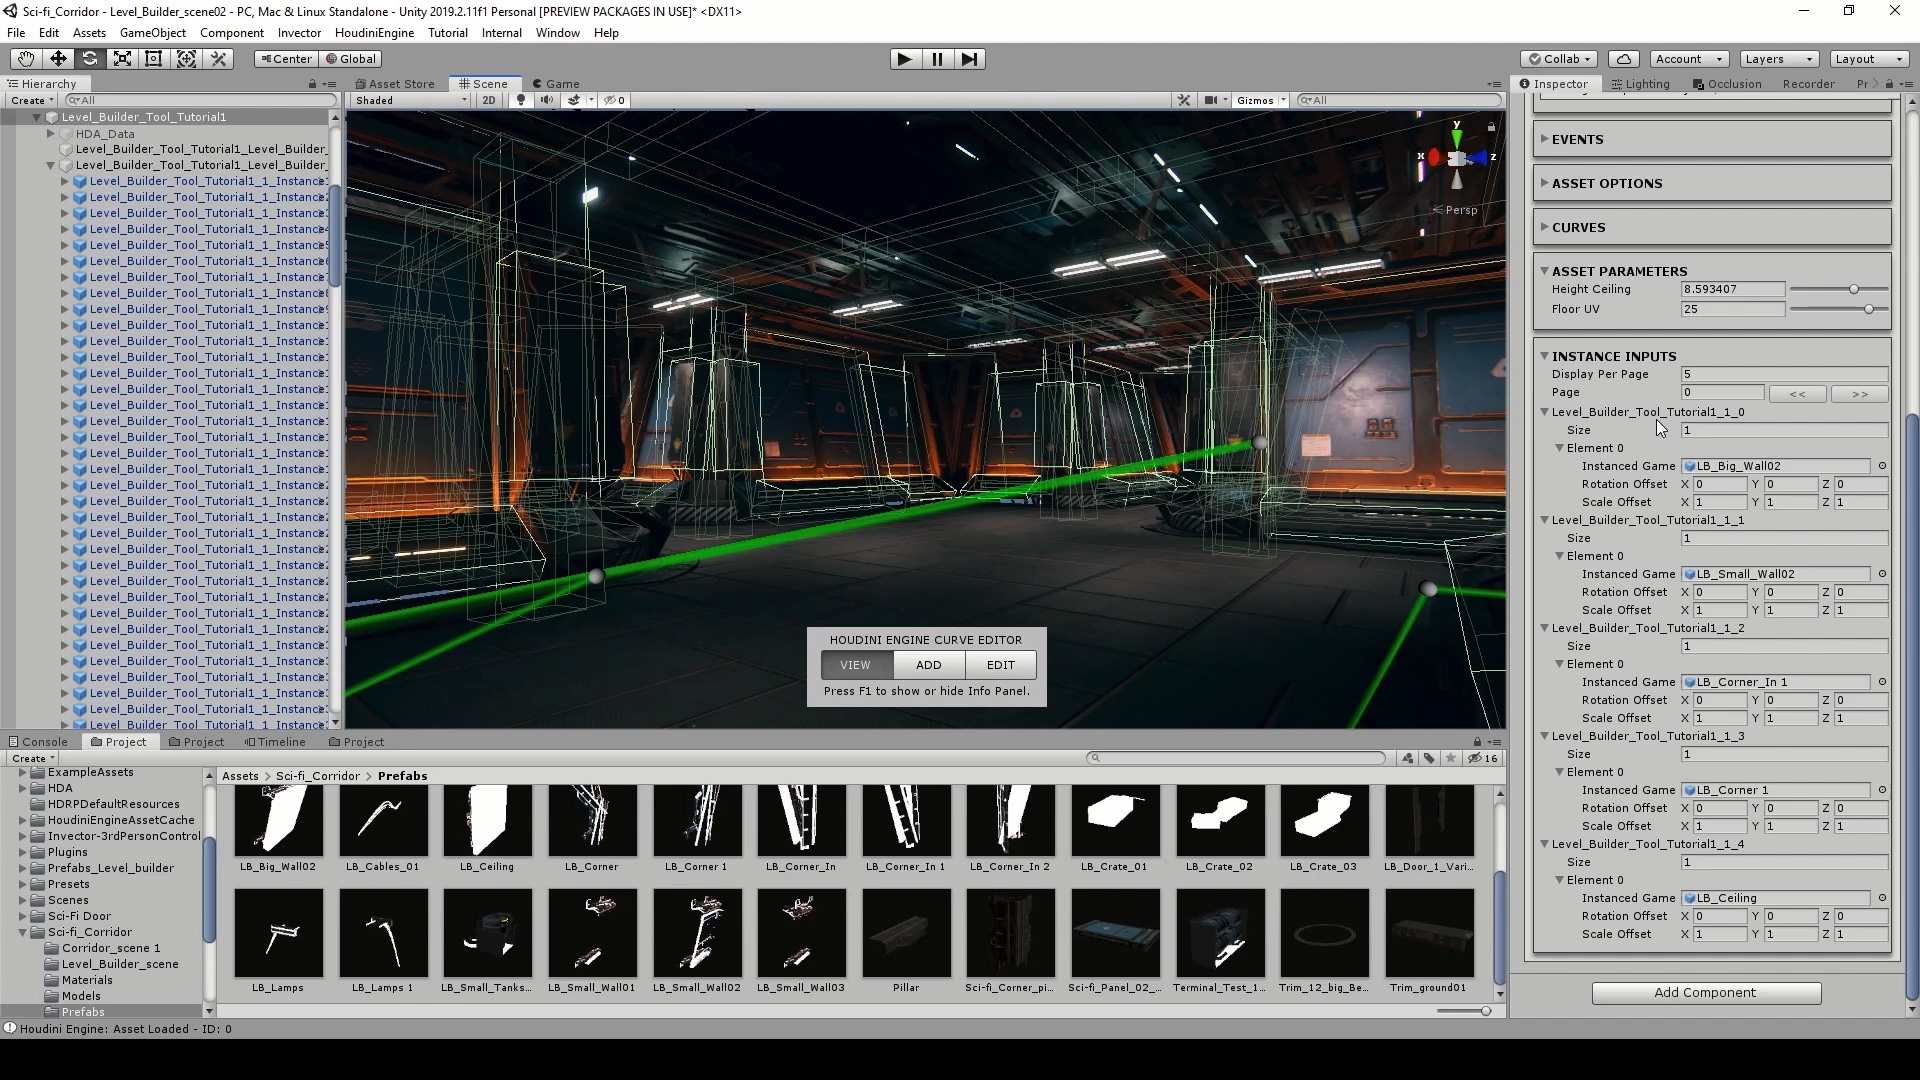
The next step is to wrap up the corridor system into a digital asset then simplify it into points with attributes. These attributes will reference prefabs inside your Unity project that will be assigned to the level automatically. The key is to organize the points so that the right prefabs are being grabbed and then to make sure the normals are oriented in the right direction. You will also add the floor, ceiling and lights to the level.
Length: 27:32
PART 3 | Modular Wall System
To enhance the level builder tool, you will create new wall panels using a modular system that evaluates different primitive sizes then assigns an appropriate prefab to match. Each prefab will be rotated or scaled into place and will create a more interesting look for the corridor.
Length: 39:47
PART 4 | Decorate the Level
To add detail to the level, you will procedurally place crates, tanks and doors throughout the level. By establishing placement rules, you can make sure that these items appear where you need them to complete your level with only the one curve as the input.
Length: 31:15
CREATED BY

COMMENTS
AnandaDivine 6 years, 3 months ago |
Amazing tutorials. Thank you so much. Please keep them coming :)
McKormick 6 years, 3 months ago |
Fantastic tutorial, very solid and complete. ..And yes, please keep them coming
braddish 6 years, 3 months ago |
Hi Simon, thank you for all the great tutorials!
I have one issue that I am hitting in this one. At 11:45 in the second video you create an Add Node with "Delete Geometry But Keep the Points" checkbox turned on. When I use this checkbox in my own scene, my points loose their normals. In your video they do not. I have also opened your example file and they your file works as expected in your video. This makes absolutely no sense to me. My end result is that I end up with all my walls facing the same direction :/
I am using Houdini Apprentice 18.0.348
Not sure if you'll ever read this, but its worth a try :)
Thanks
braddish 6 years, 3 months ago |
Never mind, just found my error... after hours of searching, and I find it within minutes of posting. Figures... :P
I had a Normal node adding normals to vertices instead of points earlier in the chain. This was messing up everything downstream.
Simon_V 6 years, 3 months ago |
Thanks! Happy you found the issue :)
jsealy 6 years, 3 months ago |
Hik been loving the tutorials so far, just a question about this one. Is one able to create the build scene in Houdini to use as a set instead of a level to practice fx in?
steveh47 6 years, 1 month ago |
Loving this tutorial.....Quick question: How do you get your boxes in part 1 at 16:20 to align the right way when i add those temp boxes they all face in the Z direction
Simon_V 6 years, 1 month ago |
Thanks!
These are the default boxes from Houdini but tweak the size and rotation. What is also very important is that the input points of the copy to points have the correct normal. The normal on the points will control the direction of the copies in the copy to points.
jmgomez 6 years ago |
As Simon pointed out, it's a normal issue. Make sure you have the normals after the resample set to Points (I think by default it's Vertices).
sascha 6 years ago |
I cannot load Energy_Core_Procedural_Tex.sbsar with the latest Houdini, it crashes. Similar in Substance Designer, the latest version can't open the file.
sascha 6 years ago |
Sorry, wrong tutorial. ;)
renderlux 5 years, 9 months ago |
Videos are not playing!
MaxFaro 5 years, 6 months ago |
On Part 1 at 26.46 there is a moment when he copies the corners into the points. But the process is not there. I got to copy the corners to the points but they are faced the wrong way. They are not using the normal orientation on the point. Before that at 21.16 he saves the Normal direction but its never used. Does somebody knows how to solve this?
Simon_V 5 years, 6 months ago |
You can see that at 25:00 min I add a transform on the corner models and rotate them in the direction for the corners. Also at 23:00 min the normals are set for the copy to points nodes, check if these are facing the right way.
MaxFaro 5 years, 6 months ago |
I followed the steps and when I extrude at min 23:00 I get two diferent normals on each corner point on the x and z axis. not the 45 degrees normal that I should be getting. Also at min 6:05 I get 4 normal lines for each point on the grid, maybe that could be affecting the final result but it shouldn't since the OUT_Ground Plane has just one normal poiting upwards (y axis) on the corner points. When I do the following polyextrude I get these 2 different normal lines pointing x and z on the corner points.
On the other hand on min 25:00 the problem is that all inside corners are faceing the same way and all outside corners are facing another way so it doesn't matter how I rotate them using the transform, because all of them will rotate and face the same way.
Thanks for your time!
badb3nd3r 5 years, 6 months ago |
@MaxFaro, i just ran into the same Problem. For the Issue at 23:00 i added in PolyExtrude Vertex Normals with a Cusp Angle of 92. That give the Normal the correct direction. BUT, at 25:00 the same Problem occurs, the Walls are not facing in the correct direction. It seems as the Normals just where ignored from the copy to Points Node. I tried several changes, but i guess this is a Bug. @Simon, maybe it is a problem with 18.5 Version?
Simon_V 5 years, 6 months ago |
@badb3nd3r @MaxFaro It seems that the extrude node is not setting any point normal. You need to add a normal node and set it to points, and then the blast for the frontseam. That should work. Tutorial is made is H18 and I use 18.5.385 but I check in both and the extrude node is not adding normal by default
MaxFaro 5 years, 6 months ago |
Using the normal node works but only if the normal node has a Cusp Angle of 90 or more. Despite that the node copyToPoints (with sorce type points selected) does not orient the corners to the normal direction of the points. If you use the normal node as sourde for the copytopPoints it does orient it the right way. I did the test to assign all nodes to the copytopoints from the split node back to the normal node and after blasting the extrudeFrontSeam the copyToPoints ignore the normals orientation despite I'm able to see that a blue line that should represent the normals poiting the right way. One thing I noticed is that before blastic normals have two different lines, blue and green and after the blast just the blue normal indicator remains there.
Simon_V 5 years, 6 months ago |
Not sure what it is. By default the copy to points will look at the point normal to orient the model, but if you have an orient attribute then this will take priority over the normals in the copy to points. Also make sure "transform Using Target Point orientation" is on in the copy to points.
I can recommend checking out the project files (here at the top), I tried them as well in H18.5 and work. In frame "3.Corners" the normals face the correct angle when coping a model on it.
badb3nd3r 5 years, 6 months ago |
Uhh now it works. I checked the initial normal Node (before the Null OUT_Ground_Division) and there i missed to set the normals to point. Then it seems like it would not rotate either, but i have to disable the Add Vertex Normal with Cusp Angle at the PolyExtrude Node before the Blast. Now it is working. I realy dont understand why copy to points didnt used the normals whe adding normals in Polyextrude but now it works. Thank you for your help Simon, appreciate it.
MaxFaro 5 years, 6 months ago |
I have redone it and the problem was at the blast node at some point. Don't know how but thanks! Really appreciate your help and commitment!
KieranLatham 5 years, 5 months ago |
Really enjoyed this course and learnt quite a lot of new techniques to help improve my work, and have had fun trying it out in Unreal Engine the last few weeks and playing around with what I can build.
I noticed, given that the tutorial is for a single floor to begin with, so we don't look into implementing the staircase as either an unreal/unity instance or maybe as a part of the larger level generator hda.
Any hints on where to start with implementing the staircase system or multiple levels that would allow for the staircase hda or baked assets to be used?
I have a few ideas i want to attempt, such as filtering out the points i want to use for a staricase like we did with the modular wall system, but so far has not worked well.
Cheers.
elrond07 5 years, 1 month ago |
I am having some trouble getting the assets to align correctly in unity. Can someone please send me their finished unity project as the project provided here does not have the final assets?
Igor Gorokhov 4 years, 9 months ago |
Hi Simon, thank you for all the great tutorials!
At 16:13, you create a box, and then at 16:14, it skips ahead several steps where you have added about 6 more nodes. I have tried replicating exactly what you put and when I implement the merge node, the boxes still look like cubes. Yours perfectly join together to form walls. Mine are not joined and are just cubes. What step am I missing here? I have gone back and followed every step leading up to that part and cannot figure it out.
Simon_V 4 years, 9 months ago |
You will need to scale the box by setting a size value in the box node, like if my width needs to be 2 set it to size 2. The idea here is that you can plug in your own meshes for the walls.
Igor Gorokhov 4 years, 9 months ago |
Oh! Thank you very much! Your advice helped a lot. Please excuse me for my inattention.
noumanriaz 3 years, 10 months ago |
Hi @Simon_V
I'm late to the party but just started learning Houdini (after watching your unreal stream) and started with your tutorial. I am having this issue. Kindly see attached image.
https://ibb.co/kc4W7D4
For some reason, these two and/or instances of these are always flipped and I don't know where to look. Can you help me?
Thank you in advance.
GuyBFrench 2 years, 4 months ago |
For anyone following this tutorial in later versions of Houdini:
In part 1 at about 22:00 he goes into a fix for overlapping edges using a polyextrude and then a blast node.
This fix did not work for me and the overlapping edges stayed, after some digging, I figured out that it's because the Labs dissolve flat edges node is different now.
I am not sure what a real fix would be but I solved it for myself by downloading the project files from this tutorial and copying the Labs dissolve flat edges from there into my project which is just between the null "OUT_Ground_Divisions" node and the null "OUT_Ground_Plane" node.
skadbone1 1 year, 10 months ago |
Hi despite being a newbie, I want to attempt to create this file; can this be achieved in H 20.0.653? I dont want to create a game asset, just for a scene to render in Houdini; Simon uses a software unfamiliar to tm, Thank you, Craig
Please log in to leave a comment.