
Hi there,
I just started modelling two cars in Houdini. I will use this thread for occuring questions. Just from the beginning I have one special question and two general questions ;-)
General question I will try to model starting with a little box or grid. Finally I want to do some clothes simulation as in the Crumpling and Tearing Tutorial. If I start to model with a box my cars surface will have a thickness in the end. That seems allright for me. If I start with a grid, the car will only have a cover with no thickness. What kind of body should the car have to work best in a simulation like the mentioned above?
Second general question would be In the mentioned tutorial the simulation is made with a low poly model and then transferred to the high poly model. Is it okay to model the car in detail and then work with a ‘poly reduce’d model in the simulation or should I stop in the modelling when it is rough, save it away for simulation and create the higher poly model from there in a new file?
The special question I run into the problem that this is the first time I do blueprint modelling in Houdini. I think thats not easy but i followed a tip in the odforce forum where somebody uses the trace node for three or for views that are used for the blueprint. Yesterday I tried it the first time, and I liked it a lot. But the system felt slow (Q9650, 8GB, Win64). So I started again today with the second car. I just imported one sideview (pixelimage with a linedraw abstract of the car, 9 pixel linewith, stored in rat format) with one trace node. Then I saw that it is made out of 100230 Points and edges. Much more accuracy than I need for a blueprint. I tried to play with the filter options, but it was not really satisfying because there was too much damage to the general geometry. Then I tried to add the resample node, but it was not much reduction to the amount of points. Poly reduced doesn't help, too.
So its clear, I am doing something fundamentally wrong ;-)) Any hint to this current problem?
- Frankie
Car Modelling Process
17850 16 2

-
- blindcat
- Member

- 28 posts
- Joined: Jan. 2008
- Offline
-

- old_school
- Staff

- 2540 posts
- Joined: July 2005
- Offline
blindcat
What kind of body should the car have to work best in a simulation like the mentioned above?
The Crumpling and Tearing masterclass is a good place to start. The houdini file carcrash.hip is the file of interest. The Car_HiRes object is the one that takes the low res car geometry and uses a custom VOP SOP deformer to deform the high res skin.
All you need is the shell of the car with no thickness. You paint stiffness in to the body as is covered in the masterclass.
blindcat
Is it okay to model the car in detail and then work with a ‘poly reduce’d model in the simulation or should I stop in the modelling when it is rough, save it away for simulation and create the higher poly model from there in a new file?
Model with the high resolution car to completion. You can then apply a Poly Reduce SOP and play with the various options to try to keep as many features as possible. Lots of options on this SOP. It usually does a good job in keeping the main feature detail. The masterclass takes the low resolution car then subdivides it but in practice it's the other way around. Model the high resolution car then poly reduce and clean up manually if necessary to create the deform mesh. Features will line up better.
blindcat
The special question: I think thats not easy but i followed a tip in the odforce forum where somebody uses the trace node for three or for views that are used for the blueprint.
….
Then I tried to add the resample node, but it was not much reduction to the amount of points.
The Trace SOP should be quite fast. I wonder how much detail your starting image has. It's best to trace images that have shapes with solid fills as you will then be tracing the shape. If it is just line work then the trace SOP has a tendency to trace the boundary of the line thickness and you end up with twice as many lines as you need. I wonder if that is the problem you are encountering.
The Resample Shapes option in the Trace SOP is the parameter to use to reduce the point count. If it removes too much detail then still adjust it down to the point where no substantial detail is lost.
Try following up with a Facet SOP which is a general purpose geometry node that has a few interesting options. Try the Remove Inline Points option. There is a value where it works real well and anything slightly over this value and it was too aggressive. The value 0.00025 worked well but 0.0005 was too aggressive.
There's at least one school like the old school!
-
- blindcat
- Member
- 28 posts
- Joined: Jan. 2008
- Offline
Thanks a lot for this answer.
I played around with some of the parameters before … but now it was easier to be straight forward.
First thing I did, was reducing the image size of the blueprints to a quarter. And you are right, the thick lines doubled the amount of points in the trace. I tried to make the lines thinner, but that had only medium success (it would be good if PS or the Trace Node could analyse line graphics to there skeleton minimum).
With this I reduced the point amount around by the half to 48.000. The Filter build in Resample parameter brought it down again by around the half. The Facet node was able to reduce it more, but then there where to less points left. But I ended up with a point count reduced from 100.000 to around 5.000 ;-)
Then I started my extrusions with a grid instead of a box. In fact it felt a lot faster to model. I am not sure if this speed has to to with the driver problems that are mentioned in another thread by a nvidia guy. I have a ati 4670 with the 9.10 driver in Windows 7 64 bit. I think it is allright now.
So now for the next time I will be in my cave and model the cars. And I watch the crumpling … masterclass some times more. And when I get stuck, I will come back to this thread again ;-)
- Frankie
-
- blindcat
- Member
- 28 posts
- Joined: Jan. 2008
- Offline
A stupid problem occured During extruding etc. two lines of extrusion are coming together again. Now there are two quads beside each other and between them is a gap. I want to select the four points, two from each quad, and want to tell houdini that this should be a polygon, so the gap is closed. I saw this once but I forgot where, and how to …
Thanks,
- Frankie
Thanks,
- Frankie
-
- old_school
- Staff
- 2540 posts
- Joined: July 2005
- Offline
-
- blindcat
- Member
- 28 posts
- Joined: Jan. 2008
- Offline
Thanks Jeff,
but I dont feel that fuse is the right node for me (I tried it before, the same as with join, stitch and the other one). Instead of creating a new quad it is combining the selected quads.
I am here:
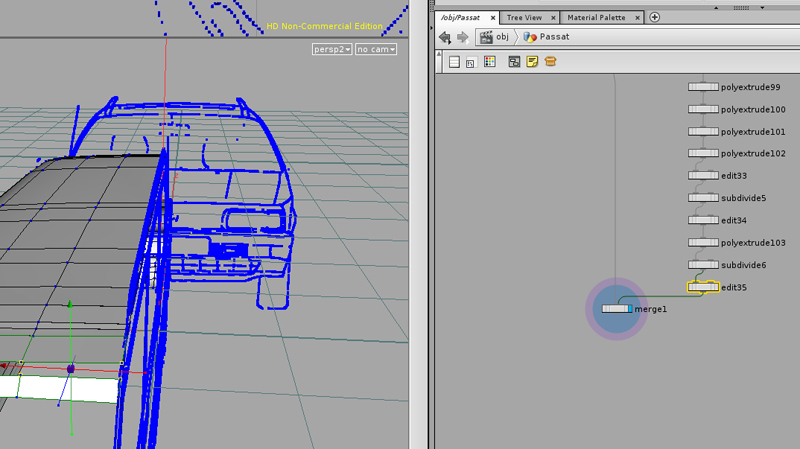
I need a quad in the gap.
I could extrude the lower geometry upwards to have a very small gap an then use fuse. But I am not sure if this is the right way. Is there no way to select three or four points and tell houdine to make a polygon out of them ?
- Frankie
but I dont feel that fuse is the right node for me (I tried it before, the same as with join, stitch and the other one). Instead of creating a new quad it is combining the selected quads.
I am here:
I need a quad in the gap.
I could extrude the lower geometry upwards to have a very small gap an then use fuse. But I am not sure if this is the right way. Is there no way to select three or four points and tell houdine to make a polygon out of them ?
- Frankie
-
- old_school
- Staff
- 2540 posts
- Joined: July 2005
- Offline
-
- blindcat
- Member
- 28 posts
- Joined: Jan. 2008
- Offline
Jeff,
you don't have to be sorry. I have to be sorry not beeing precise enough in explaining my problem ;-)
But you are a brilliant daysaver! Polyknit was the tool I was looking for! (Hard to find in the online help and the forum … I am shure that was told in the forum often enough … but the search word must be more precise/different).
- Frankie
-
- blindcat
- Member
- 28 posts
- Joined: Jan. 2008
- Offline
Unfortunatly I have to come back this early. This is where I am now:
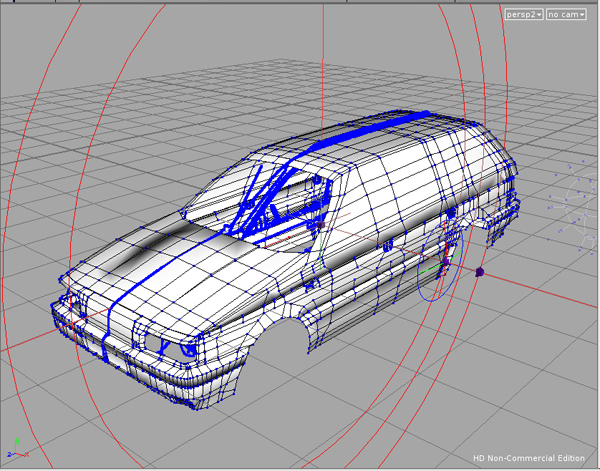
As far I modelled from a short nonHoudini Tutorial. It says model this way, and when it comes to the doors, just cut them out. I liked that idea to avoid the polyknit problems mentioned above. And I thougt the knife tool could do the job. But now when I am here I found out that the knife tool can only cut one line. Thats not what I need. In Viewport right I would like to cut out the door with a shape (painted on the tablet) instead of a line.
Is this somehow possible?
If not I will go into subdivisions and remodel the door stuff. In this particular case its not neccessary to open the doors.
BTW: I am satisfied with modelling a car in houdini ;-) This is the very first car i do, and it looks similar to the original one. Done just from photos. And its much faster than I was afraid of. Great ;-)))
- Frankie
-

- aiworks
- Member

- 130 posts
- Joined: April 2009
- Offline
-
- blindcat
- Member
- 28 posts
- Joined: Jan. 2008
- Offline
Thanks Greg!
I will try this out in my next model. Because I got stuck at this point, I worked the hole morning with some subdivision, dissolving and point moving things, and now the door shapes are in the original body model. I am just at the point to blast out the windows … and then have a little work left in the lower parts ;-)
I will try this out in my next model. Because I got stuck at this point, I worked the hole morning with some subdivision, dissolving and point moving things, and now the door shapes are in the original body model. I am just at the point to blast out the windows … and then have a little work left in the lower parts ;-)
-

- ragupasta
- Member

- 349 posts
- Joined: Aug. 2006
- Offline

-
- aiworks
- Member
- 130 posts
- Joined: April 2009
- Offline
Hi Ragupasta,
Thank you for the example file you attached! I've learned something new and good from it 8)
I have never figured out, how one should go about modeling something highly detailed (like a near-photorealistic car) in a procedural way? There ain't many modeling tutorials for Houdini, and virtually all that I found, deal with box-like models (e.g. bridge, elevator from 3dbuzz). Would you be able to point me (I'm sure more people would be highly interested, too) to some resources showing an example workflow?
Thanks,
Greg
-
- ragupasta
- Member
- 349 posts
- Joined: Aug. 2006
- Offline
Procedual modeling of high detailed models are not that far from the 3d-buzz things. Dont forget you can bevel and add details like that and still keep things procedural, as long as you add bevels and such as a last step, if you dont when point/prim numbers change things explode.
I have to say that procedurally modeling something organic-like shaped, smooth surfaces like a car would (for me) be a hard thing to acomplish. Last week at work, I started fiddling about in my spare time with trying to build a procedural APU from the Matrix films. Ive not put anymore time into it yet so its still the main toe atm, and weather it gets finished and uploaded to the Exchange is another matter.
The controls need dieluting somewhat, and replaced with scalings based on channel refs. But it is possible to create more complex shapes than boxes.
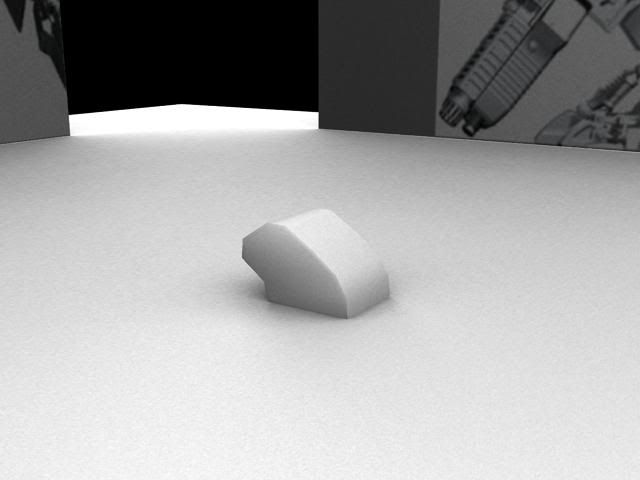
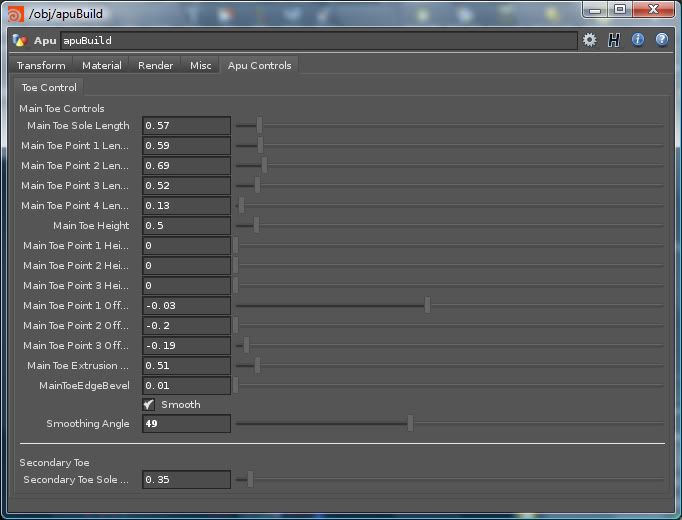
-
- blindcat
- Member
- 28 posts
- Joined: Jan. 2008
- Offline
I am really thankfull for the input from this thread. With all that input I tried to do a video tutorial how to model a car from a blueprint. But unfortuantly that went not that well I assumed. And since I am doing this for a project of mine, I decided to set priority on my project.
But here are some hints for people who look for some information.
First of all the way I integrate the blueprints to my process. This is taken from
http//forums.odforce.net/index.php?/topic/6650-fa-18c-hornet/page__hl__blueprint__fromsearch__1
Next some aid on car modelling by a blueprint. I did it nearly right the way that is described there
http//www.3dm3.com/tutorials/car3/
With this information I started modelling with a grid with 2x2 rows/colums. I extruded the edges and did it like in the tut mentioned above. Extruding and point editing where on my way. It is not really procedural, its more classic. But it works well in houdini. Sometimes you have to close holes in this process. How to is mentioned above in this thread. In the end houdine tries to create rounded shapes what you not always like on a car. But you can select all primitives that should have clean edgy shapes and use the edge cusp node to make them sharp in rendering.
With that, it should be not a big problem to modell a car in the classic way in houdini.
If I find the time after finishing my project in early summer, I maybe try to do a video tutorial again.
Thanks,
- Frankie
-
- ragupasta
- Member
- 349 posts
- Joined: Aug. 2006
- Offline
-

- itriix
- Member

- 152 posts
- Joined: June 2008
- Online
-
- Quick Links