Intro to Crowds
Learn how to set up crowds in Houdini using agents. Explore features such as ragdoll dynamics and agent layering.
10 Tutorials 0:50:42
Lessons
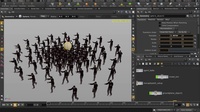
Crowd Intro
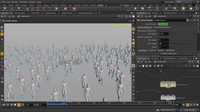
This video will demonstrate how you can quickly generate a crowd inside Houdini. We will go over how to use Paint Density to distribute our crowd agents and then simulate them afterwards, using a few of the Crowds Shelf Tools.
0:05:00
Crowds | Terrain
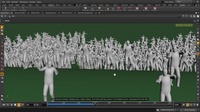
This video will be looking at the Terrain tool inside the Crowds Shelf Set. First we populate some ground geometry with agents (zombies), and then change their Default State from 'stand' to 'zombie', use the Simulate tool and then the Terrain tool to get the zombie agents to walk up on a sloped terrain surface.
0:05:00
Crowds Path
In this video, we're going to be looking at the Path tool inside the Crowd Shelf set. We'll start by putting down a mocapbiped character from the Character self set, then use Populate tool to place more agents and randomize them by size. Then we're going to use Simulate tool to make the necessary nodes and networks so that our crowd agents can run. And then finally we'll draw a path using the Curve tool, and use the Path tool to drive the agents to move along that curve. Tweaking the Weight and Force Scale values will determine how far or close you want the agents to stay on the path/curve.
0:05:00
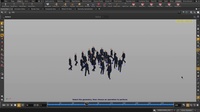
Crowd Ragdolls
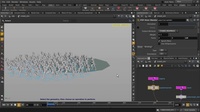
This video will cover how to set up a crowd scene in which we will later activate rag doll functionality on. This is done from within the Crowd Transition node and changing the Input/Output State. We make our agents go from stand to walk state, and then from walk to ragdoll (where they collapse on the ground). Some of our agents end up floating in the air when we increase the number of them, so we just select and delete them to get them out of the scene.
0:05:00
Crowds RBD Ragdoll
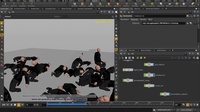
In this video we're going to smack a crowd of zombies with a giant ball using the rag dolls and the Bullet solver for crowds inside Houdini. First we put down a mocapbiped 1, click on Bake Agent tool, then Collision Layer, Configure Joints, Populate and finally Simulate to generate a crowd of agents. Once we have a crowd and ground plane set up, we're going to make a sphere and turn it into an RBD object. Inside the crowd_sim node network, in the Crowd Trigger node, we put the name of our sphere object into the DOP Impact Objects and change type to RBD Inpact Data. After that, within the Crowd State node, we need to change the RBD Ragdoll from Ignore to Animated Static. And finally, we have to change the Input/Output State from zombie to ragdoll.
0:05:00
Crowd Attract
In this video we're going to look at the Target Position tool inside the Crowds shelf set. Turning on the Points display allows us to see that each agent particle has a unique point number. This will be useful when we pick a point number and make it a target for the agents to move towards, after we set the Attraction Type to Particles. From Point Group, we can individually select the mocapbiped agent number (particle number) and set it as the target. Changing the Weight value will increase or decrease the attraction force.
0:05:00
Crowd Agent Layering
This video will demonstrate how we can use the Agent Layering node to assign objects to our crowd agents - specifically some hand axes and crowbars. Using the mocapbiped and then a few Crowds tools, we will assign an Agent Layer node which will allow us to create as many layers (and therefore objects for the mocapbiped) as we'd like.
0:05:00
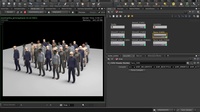
Material Stylesheets
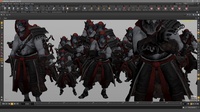
In this video, we're going to apply randomized materials on crowd agents, or zombies, using the Material Style Sheets in Houdini. We start by making a new Style Sheet Parameter, then add an override (this is the material that we're going to do the override on and then randomize different materials with). We can also use Set Target from Viewport Selection to pick which zombie we want to do the override on, or apply the override to all agents. We'll also plug in some CVEX scripts that were prepared earlier, which will randomize our textures.
0:05:00
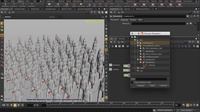
Crowds 15.5 | Workflow Update
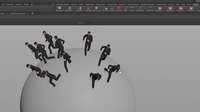
This video goes over some of the workflow updates for Crowds in Houdini 15.5. We begin by baking out 2 animation clips with the Mocap Biped 3 character, populating the scene with crowds, using Paint Density to control our agent placement, projecting those agents to walk on a globe by turning on Enable Terrain Project with Up Attribute, and setting the Adjust Up Vector option to Set to Terrain Normal.
0:07:17
Houdini Crowd Agent | FBX Load
This lesson covers how to import an .fbx character file and set it to the clip you want to use. Then you can make a crowd with that character and break up the uniformity of the crowd by using Randomize Clip Time and Randomize Scale options to offset the start of the clip for each character, as well as their size.
0:03:25
Houdini Content
Category: Crowds