Modeling Tools
Learn about Houdini's modeling tools with these quickstart tutorials.From polyextrude to topobuild, these lessons offer a quick look into techniques for generating geometry.
25 Tutorials 1:52:00
Lessons
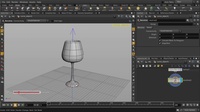
Revolve a Curve
This video will explore how to create geometry using curves. We'll create a NURBS profile curve in the orthographic view and then use the Revolve Shelf tool to make a wine glass. Then we will output the geometry initially as a NURBS surface and then convert to polys. Afterwards, we'll look at using the Crease SOP to harden some edges and then see how to apply subdivision on the geometry at render time.
0:05:00
PolyExtrude
This video will demonstrate how to use the PolyExtrude tool in Houdini. We look at a few options within PolyExtrude, like Output Back and Extrusion Mode (Primitive/Edge Normal and Point Normal). And don't forget that the Q key can be used to recall the last action/tool used!
0:05:00
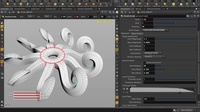
Polyextrude | Curve Input
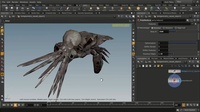
In this video, we're going to look at the polyExtrude tool with Curve Input inside Houdini. Let's put down a spiraly curve which we will use as our spline to extrude along. We then see how we can extrude a singular face on a box with that curve, then extrude the curve using all 6 sides/faces of the box and then swapping the box with a torus and using Divide Intro “Connected Components” and choosing select edges in the Split Group option, we can get some cool octopussy extrudes using the curve we made at the beginning of the video.
0:05:00
Edit Geometry
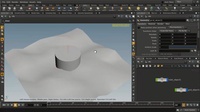
In this video, we're going to look at some tools we can use to edit and tweak geometry with inside Houdini. We will enable Use Mirror, to get symmetrical editing, go into tweak mode to edit geometry without the use of a transform handle, using Soft Edit Radius to get a nice falloff and switching to the Peak Handle to get the (surface) normal direction when editing. We also learn the hotkey for toggling Subdivision display!
0:05:00

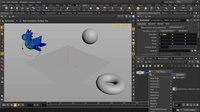
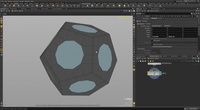
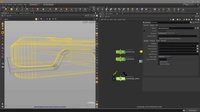
For-Each Loop
In this lesson, we are going to create a soccer ball using the for-each loop in Houdini. We begin by creating a platonic solid and then adding a subdivide node on it. Then we use a Ray SOP to ensure a round shape, and put on a PolyExtrude which will push out the patches on the soccer ball. In order to not do an overall surface extrude, we use an Attribute Create node to assign numbers to the patches, which we can then extrude in a For Each loop.
0:05:00
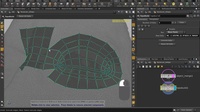
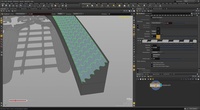
TopoBuild | Build/Split/Brush/Smooth
This video will go over the 4 modes within the TopoBuild tool – Build, Split, Brush and Smooth. By default, TopoBuild starts off in Build mode, which allows you to drop down geometry (guide points and then create polygons from them). There are additional controls within Build mode, which give you options to straighten your selection, evenly space points along an edge and convert selection to a circle. Split mode allows you to add a point along an edge, split edges manually from edge to edge and also holding down SHIFT key, drop down edge loops. Brush mode lets you move an area of geometry based on the size of your brush, while being “shrinkwrapped” to your templated surface (most likely your high res mesh that you are rebuilding a low resolution of). This is ideal for when you don't want to individually select a point/edge/face to move and edit, but wish to position a general area, for example. Smooth mode relaxes the interior geometry, while respecting the border edges (they remain locked in position).
0:05:00
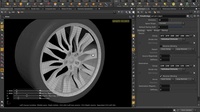
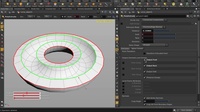
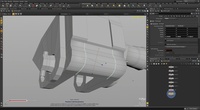
PolyBridge
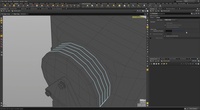
For this video, we'll be creating some rim spokes for a wheel using the PolyBridg tool. By selecting faces in a sequential order (and you can always easily re-select those faces), from both the inner and outer destination geometry, and changing the Destination/Divide Into "Individual Elements (from Connected Components), we can observe how it affects our polyBridge geometry. There are in addition, many options to tweak the polybridged geometry with, like Destination Magnitude, Spine Shape, Thickness Ramp and others.
0:05:00
Create Objects
This video is an overview into the various ways you can create objects in Houdini. You can do it via the Shelf Tools, hitting the TAB key and typing out the object you want – both within the 3D Scene View and in the Network Editor Pane.
0:05:00
Component Selection
This video will be an overview on how to do component selection in Houdini, using the different selection modes. We set up a side-by-side view to see the difference between having Select Visible Geometry Only enabled/disabled. In addition to Box selection, we look at Brush, Lasso and Laser and where it would be helpful to use which selection mode. And of course, because we love hotkeys, we see how Spacebar+Z hotkey will allow you to focus the camera to the position of your cursor, which not only zooms in on the spot but also tumbles on/around that position.
0:05:00

Edit Points
In this video, we're going to be looking at how to edit points inside Houdini. We look at making selections with Select Visible Geometry Only toggled on/off, and use Soft Edit Radius to get a falloff in our selection when we move the points. In the edit SOP, you can enable Use Mirror to select and do symmetrical edits to your geometry. Additionally, there are Handle options that give you access to the different orientation of the transform gizmo (World/Object/View/Component) so that you can move and rotate your selections accordingly. There is also the Toggle Peak Handle option, which allows you to move your selections on their respective normals. Oh yes, for the last thing, we use the Brush Handle in the Deform and Smooth mode, to relax some geometry.
0:05:00
Edge Loop Selection
This video is a demonstration on how you can make selections in Houdini. You can do edge loops/face loops (aka primitive loops), partial loop selections, edge rings, convert selections and adding additional loop selections.
0:05:00

Snapping
This video will cover the snapping tools in Houdini. You can enable grid snap which uses the ortho grid, point snap which allows you to snap to any point on a geometry, and additional Multi-Snapping options via the Handles & Selector controls tab on the left side of your Houdini UI.
0:05:00
PolyReduce
Learn how to reduce the number of polygons, to better prepare it for LOD use in a game. We'll do so using the PolyReduce SOP and explore the Keep % slider, Optimization, Equalize Edges and additional options that are available.
0:05:00
Edge Smoothness
Learn how to work with edge smoothness, for example, when preparing for soft and hard edges for your geometry, that can be exported to game engines. We'll look at using the Normal SOP on various surfaces to observe the amount of smoothness/cusping angle values and how it affects the surface smoothness.
0:05:00
Edge Loops
This video will look at the Edge Loop tool inside Houdini. We will be inserting some edge loops, but more importantly, we'll be seeing how to activate Edge Snap which lets us essentially have divisions (e.g. midpoint of an edge, or however many divisions lie across an edge you want to split). There's also controls like Edge Loop – Number of Loops and Edge Percentage.
0:05:00
Edit Circle
The Edit SOP has an function that allows you convert a selection into an evenly divided, perfect circle shape (or the closest it can get to it, depending on your geometry selection). Just make your selection – points, edges or faces – hit the T key and using right-mouse button to select “Make Circle” or SHIFT+C hotkey.
0:05:00
Edit Straighten
We will be looking at how to straighten and evenly space your geometry using the edit SOP. We'll select a series of partial edge loops and straighten them by hitting T key and using either the right-mouse button to select “Straighten selection” or the SHIFT+S hotkey. Then we select some other partial edge loops and hit the T key and RMB to select “Evenly space selection” or use the SHIFT+E hotkey.
0:05:00
PolyBevel
This video will demonstrate the PolyBevel tool and the number of option controls that exist inside. You can apply PolyBevel on either an entire geometry or on a grouped selection that has been made previously (you can just select the geometry you want, hit TAB key and type Group to assign them into a grouped selection). Once that is done, it's just a matter of tweaking Offset (Fixed Distance/Fixed Width), Fillet Shape (Solid/Crease/Chamfer/Round/Profile), number of Divisions and Vertex Splitting (Allow Vertex Splits/Split Miterable Joints/Split over All Incident Edges). Keep in mind that based on what your selections are (for example, face loop vs edge loop), you will get different results – with the same settings. So don't be shy to try out all those options!
0:05:00
PolySplit
PolySplit allows you to split polygon surfaces a la “free-hand”, which means drawing along edges, from points etc. There are additional options like Close Path, which closes the edge path for you; and Quad Autocompletion, which creates additional edges to ensure quad geometry output when you split your geometry. Middle-mouse button scrolling will activate and control the number of divisions that are shown as a guide, and allows you to split an edge in specific amounts (for example, the midpoint of an edge).
0:05:00
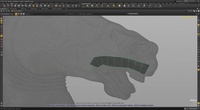
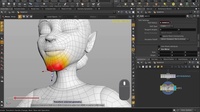
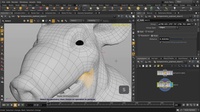
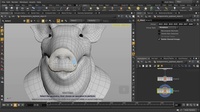
TopoBuild Horse Model
In this video, we're going to look at how to re-topologize using the TopoBuild tool inside Houdini. We import a highres scanned mesh geometry and then using the TopoBuild tool, turn it into a templated mesh that we can “draw” live on. We change the display options to Hidden Line Ghost to see the new topobuild mesh more clearly. TopoBuild allows us to place guide points, which we then use to create geometry from. Additionally, we can pull out faces by clicking on an edge
0:05:00
Boolean Shatter
This lesson shows how to use the Shatter option in Houdini's Boolean tool.
0:05:00
Point Beveling
This video will show how you can use PolyBevel on points to create essentially a fillet, on a curve, as well as beveling points on geometry (e.g. chamfer points). The option to bevel points was added in the 15.5.565 production build, so you should make sure that you are using at least this build version and onwards.
0:07:00

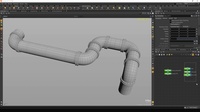
Bend
This quickstart tutorial shows how you can use the Bend SOP, to bend, twist, taper, adjust length scale, and create shapes which would otherwise require significant effort when manually modeled as a starting initial position. This video will show how you can bend a plain tube geometry into a more interesting shape, with little effort.

Local Transform
This quickstart tutorial shows how you can access and use Local Transform, as well as how to set hotkeys to your most commonly used tools. Using Local Transforms will allow you to make correct geometry edits, which respect connected geometry selections and gives you the ability to properly scale, translate and rotate in their respective spaces.
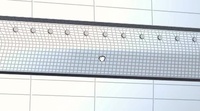
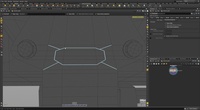
Circle from Edges
This quickstart tutorial shows how you can use the Circle from Edges SOP to automate and generate convenient circular geometry - in this case, a panel of rivets. Circle from Edges is different than the Make Circle option in the Edit SOP, as it allows you to make multiple geometry selections from a Group field and convert them all to circles, with specified radii.
Houdini Content
Category: Modeling