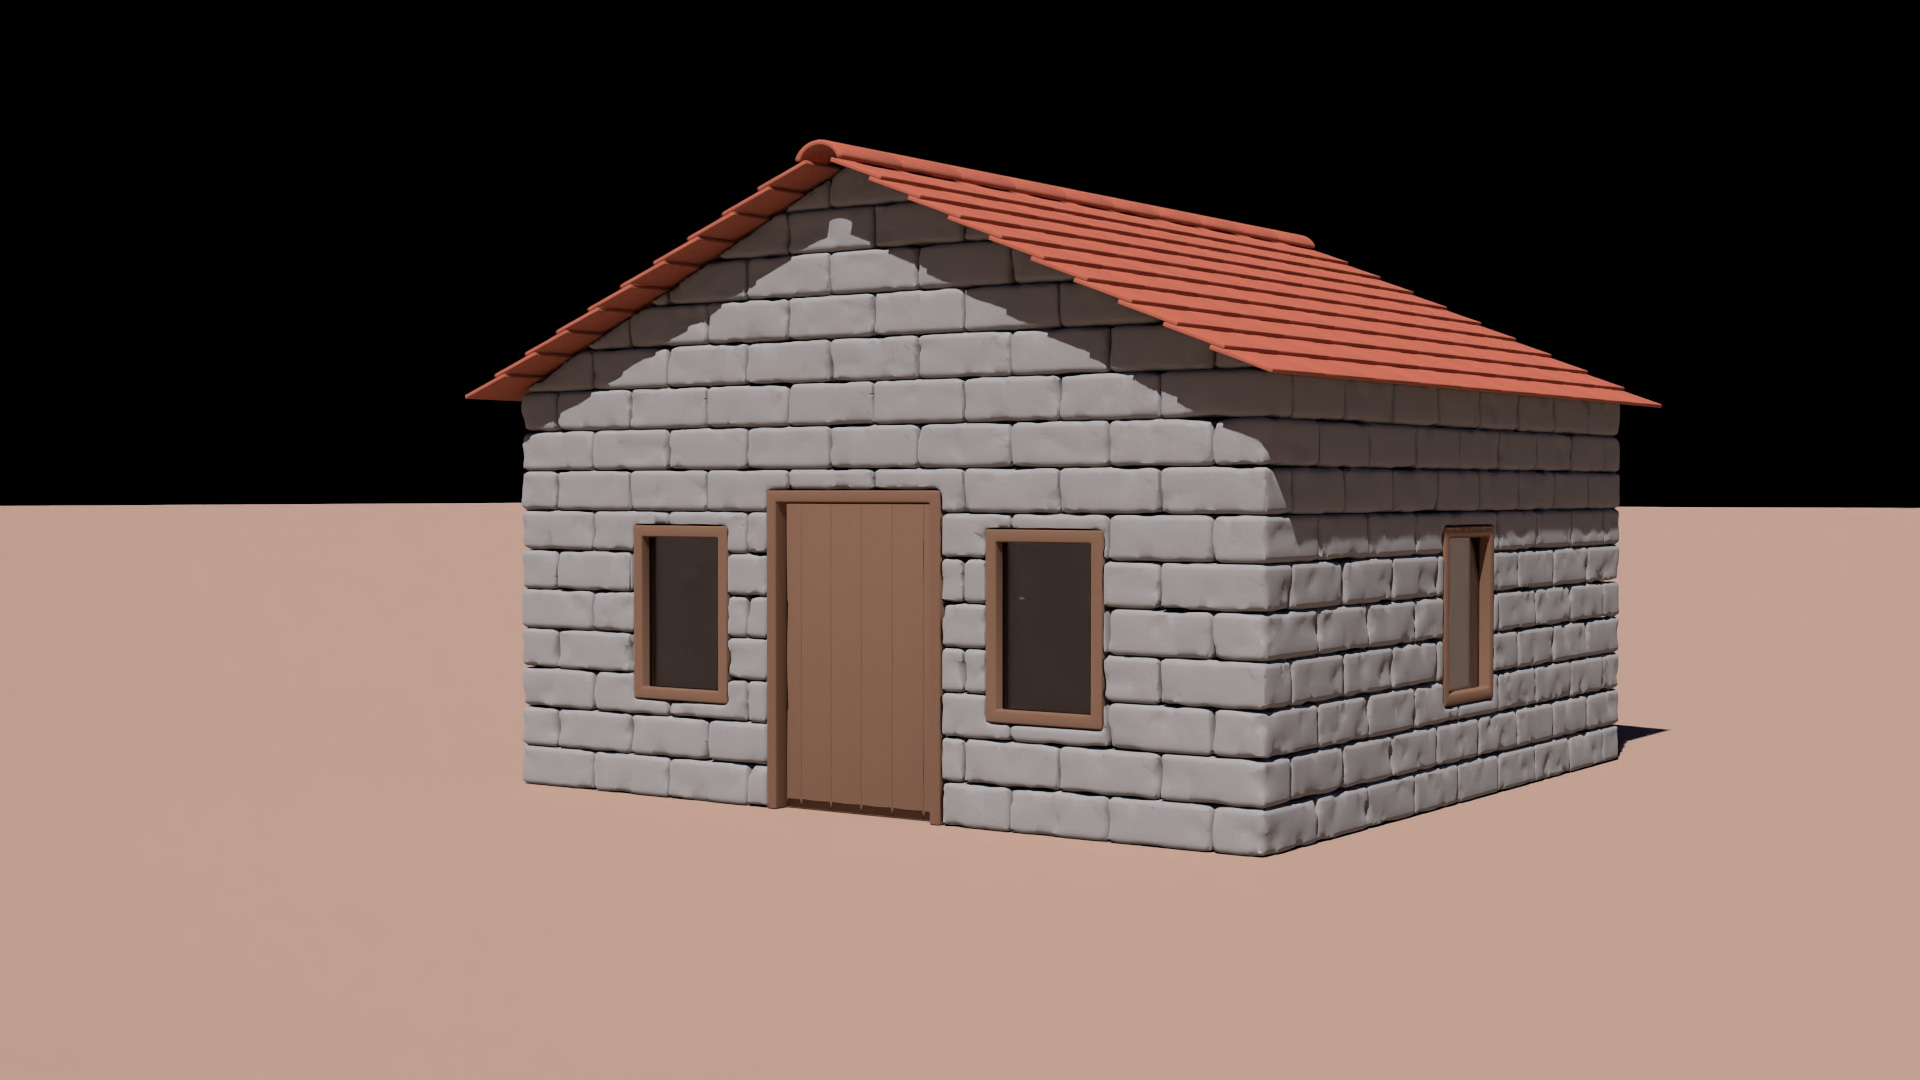
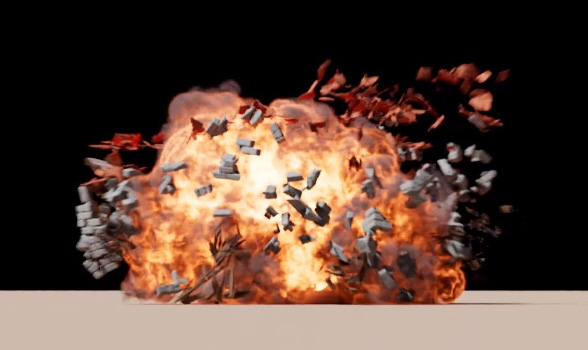
DESTRUCTION FX IN SOPS
Tools for creating RBD and PryoFX simulations are now available at the SOP level in Houdini. This creates a perfect environment for preparing and directing the look of your simulations. Learn how to take a house model that has been prepped for destruction, start by fracturing the parts then build up constraint networks to hold the pieces together. Learn about all the nodes needed to set up and run both an RBD and PyroFX simulations. There are some places where you can choose to dive into DOPS to refine the results. You will also learn how to render these effects using both Mantra and Solaris/Karma.
Note: With most of this lesson taking place at the SOP level, many of these techniques can be used in Houdini CORE. To dive into DOPS to add secondary effects, Houdini FX would be needed.
CONNECTED LESSON:
INTRODUCTION
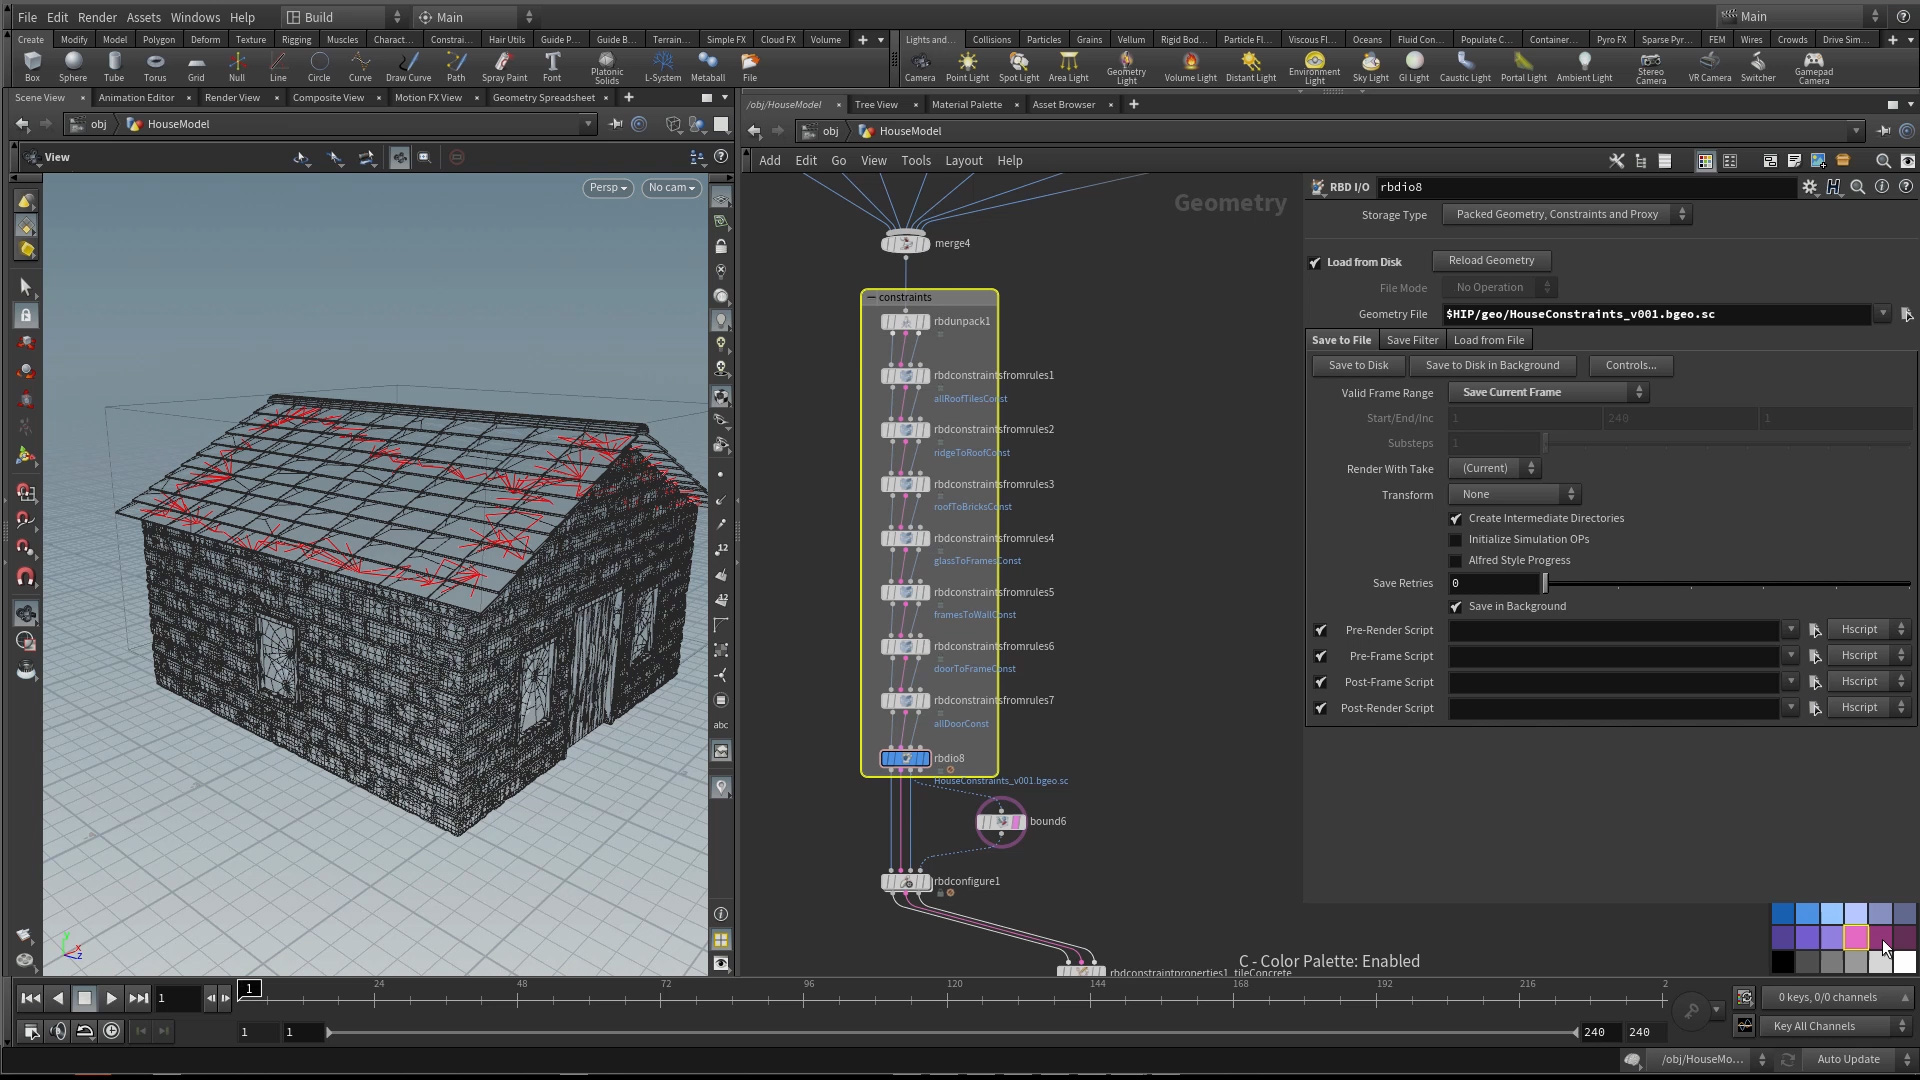
1 | Fracture the Geometry
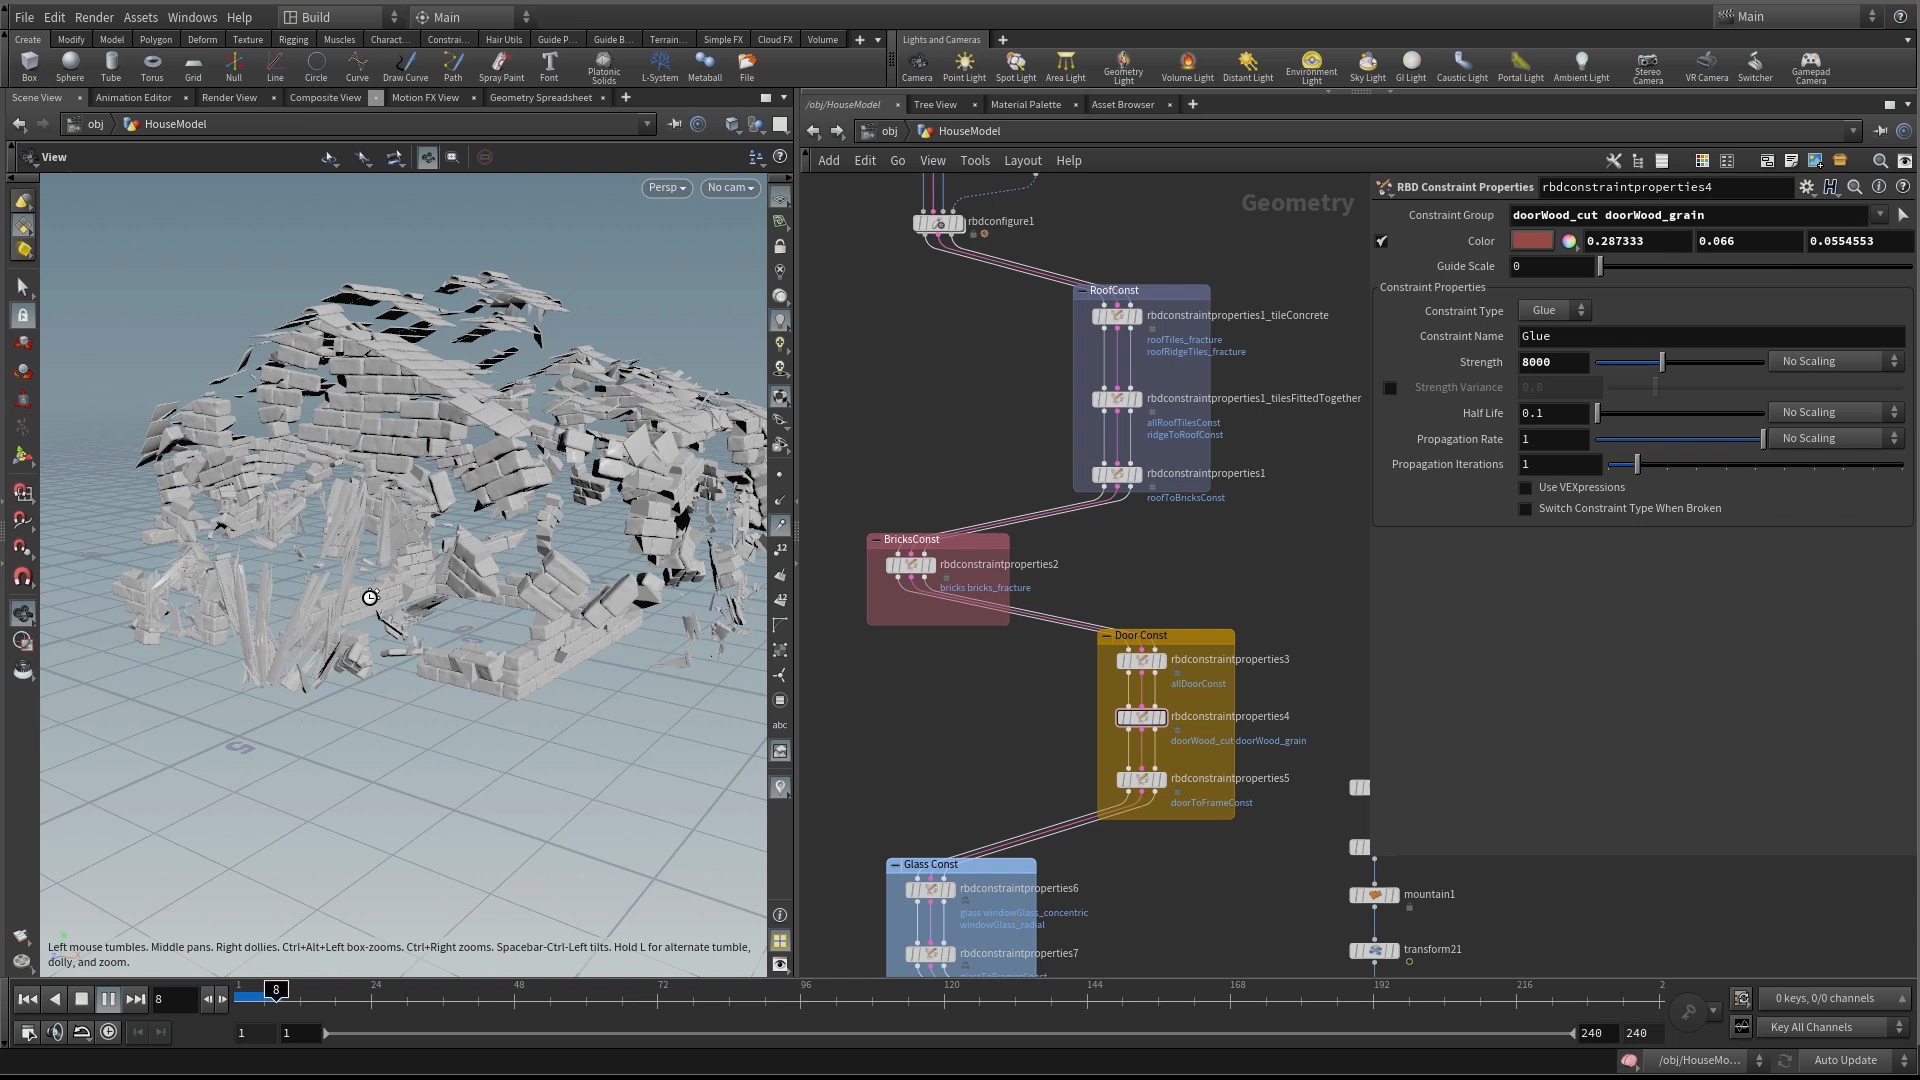
2 | RBD Simulation
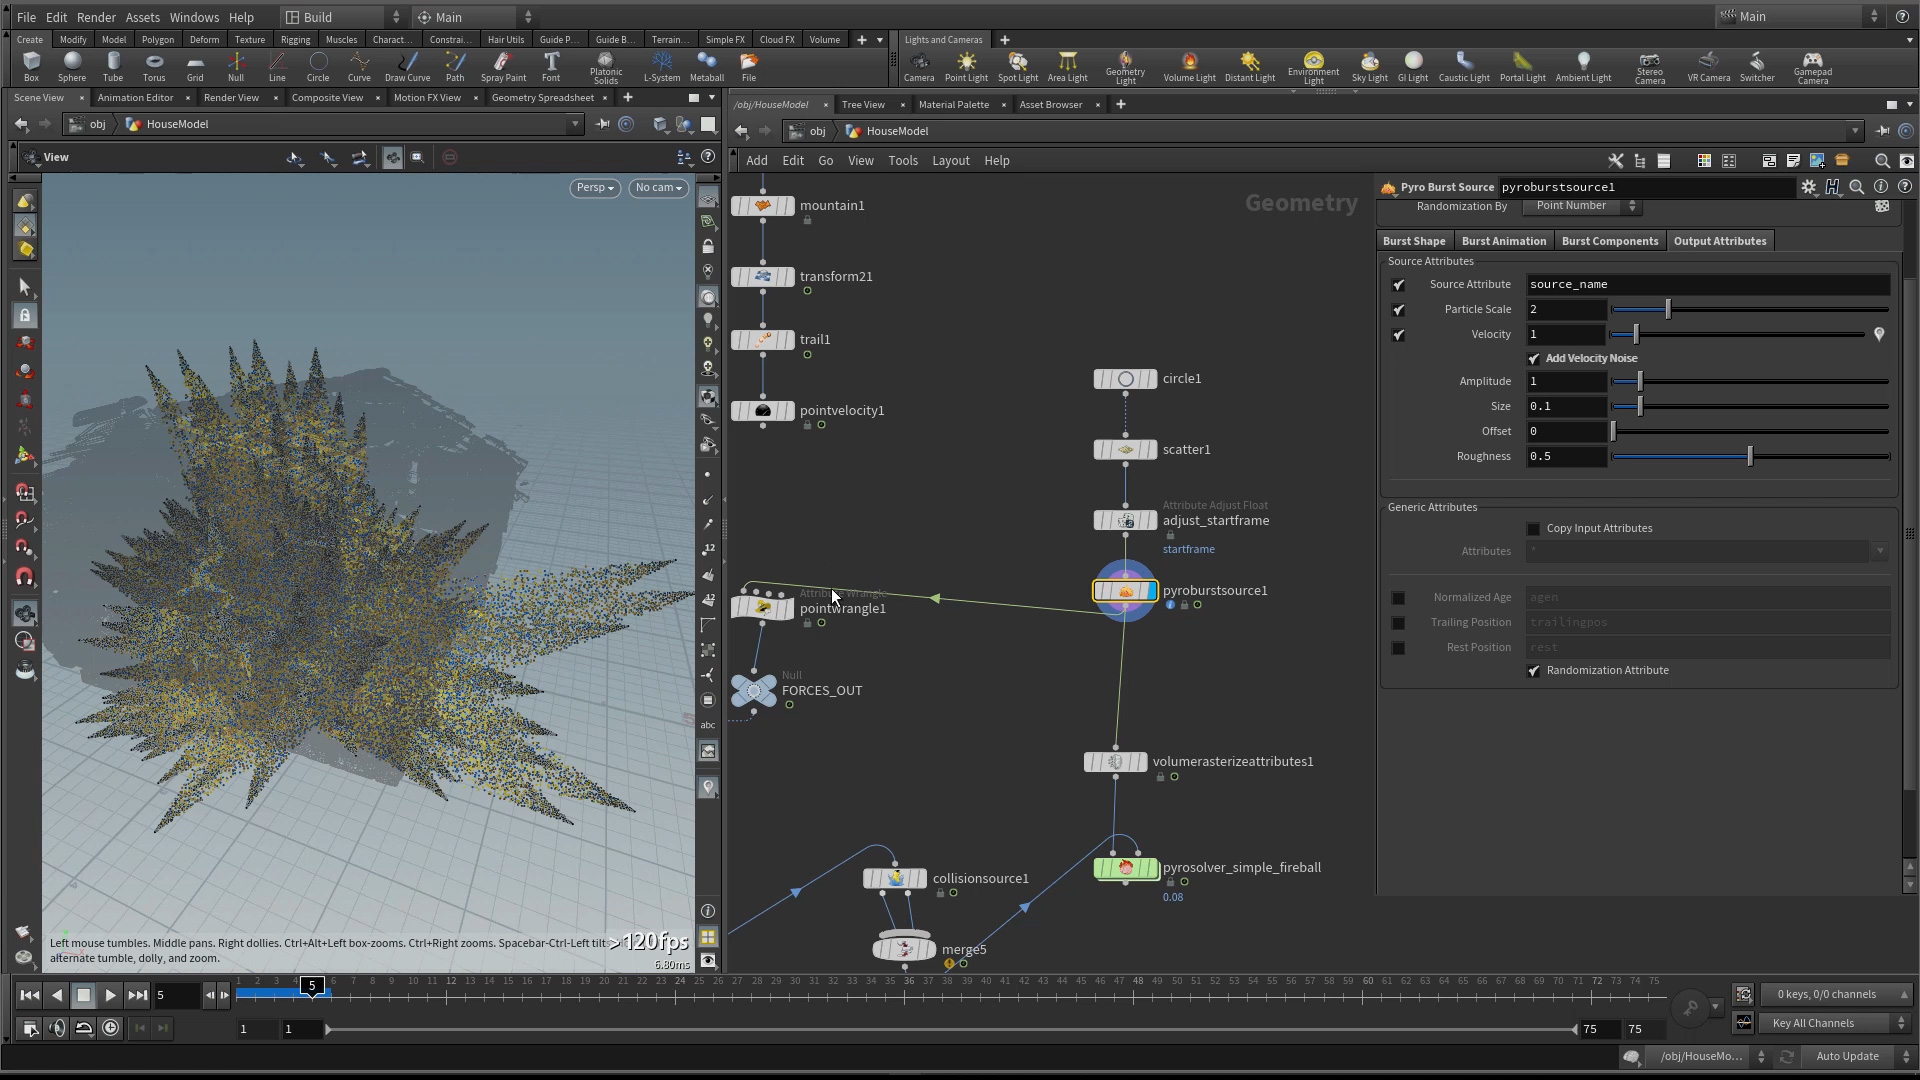
3 | Pyro FX | Burst Source & Solver
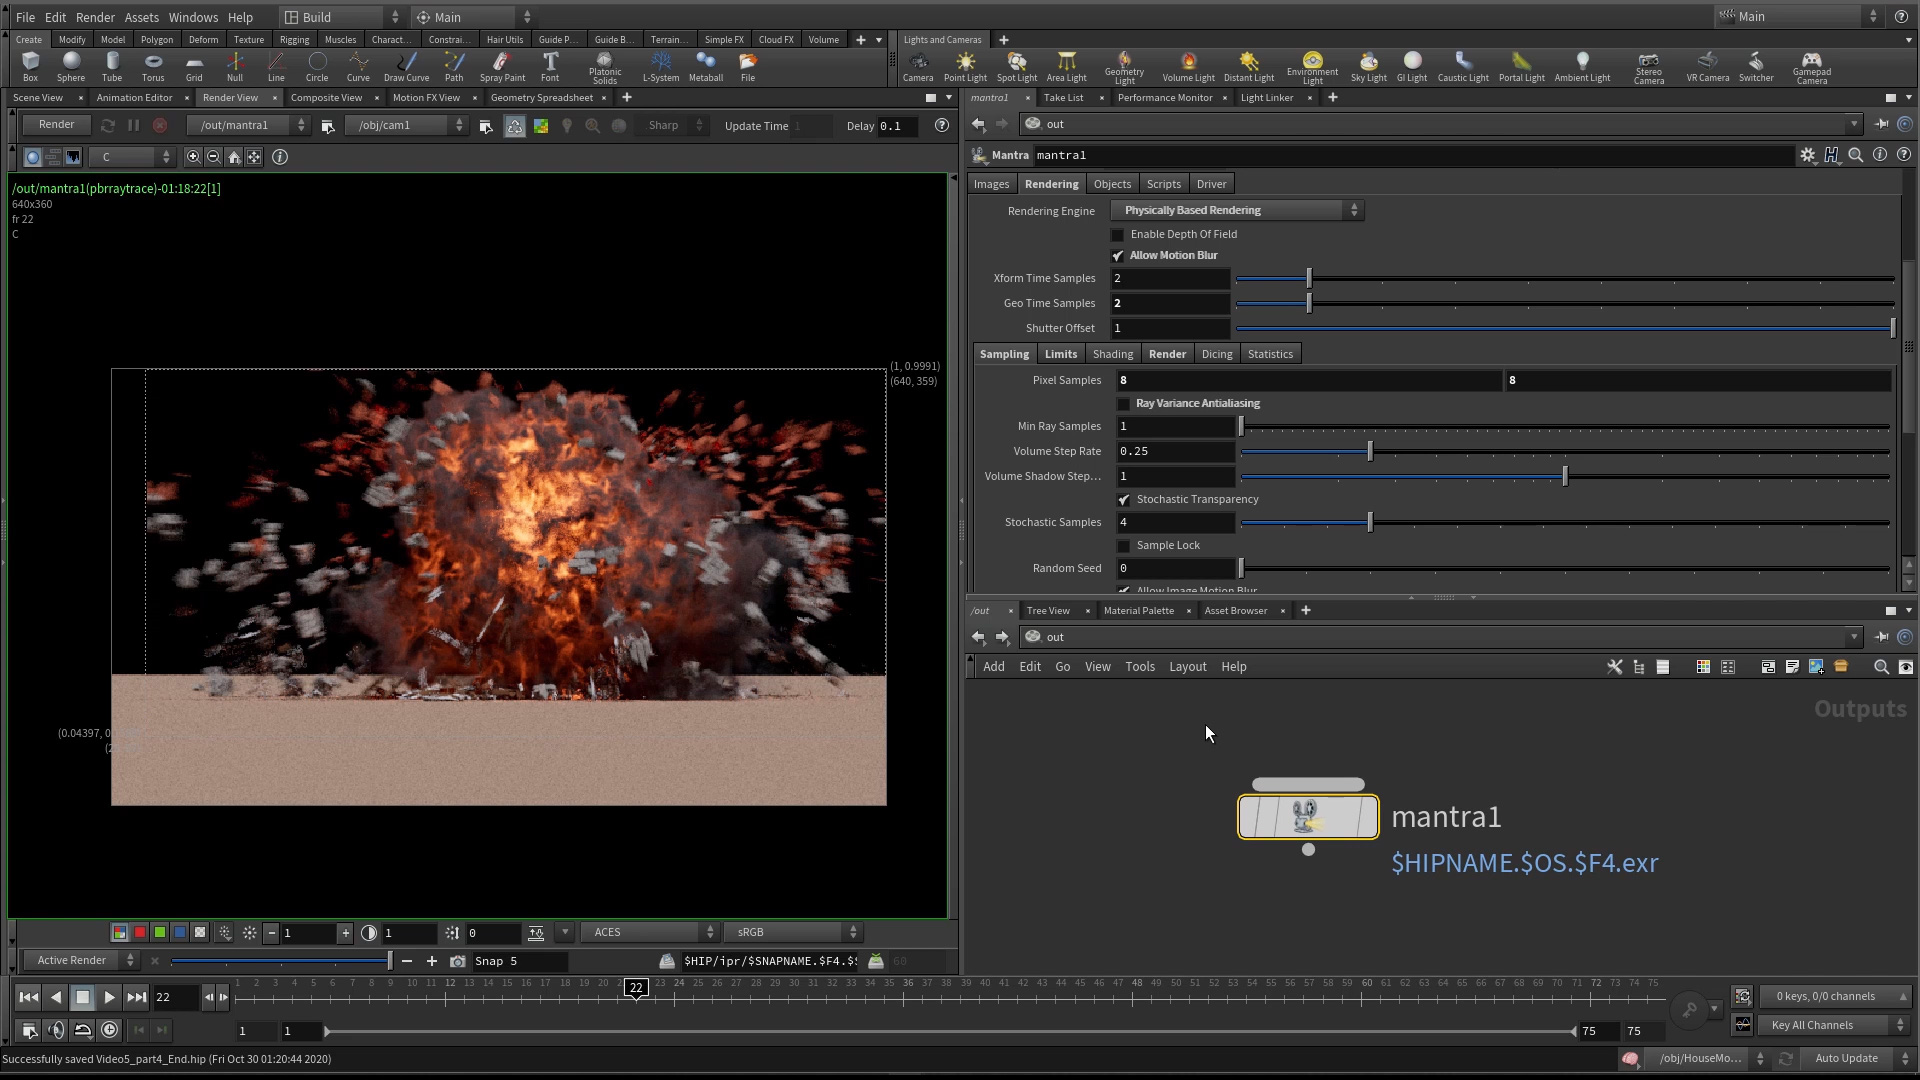
4 | Mantra Render | Shaders & ACES
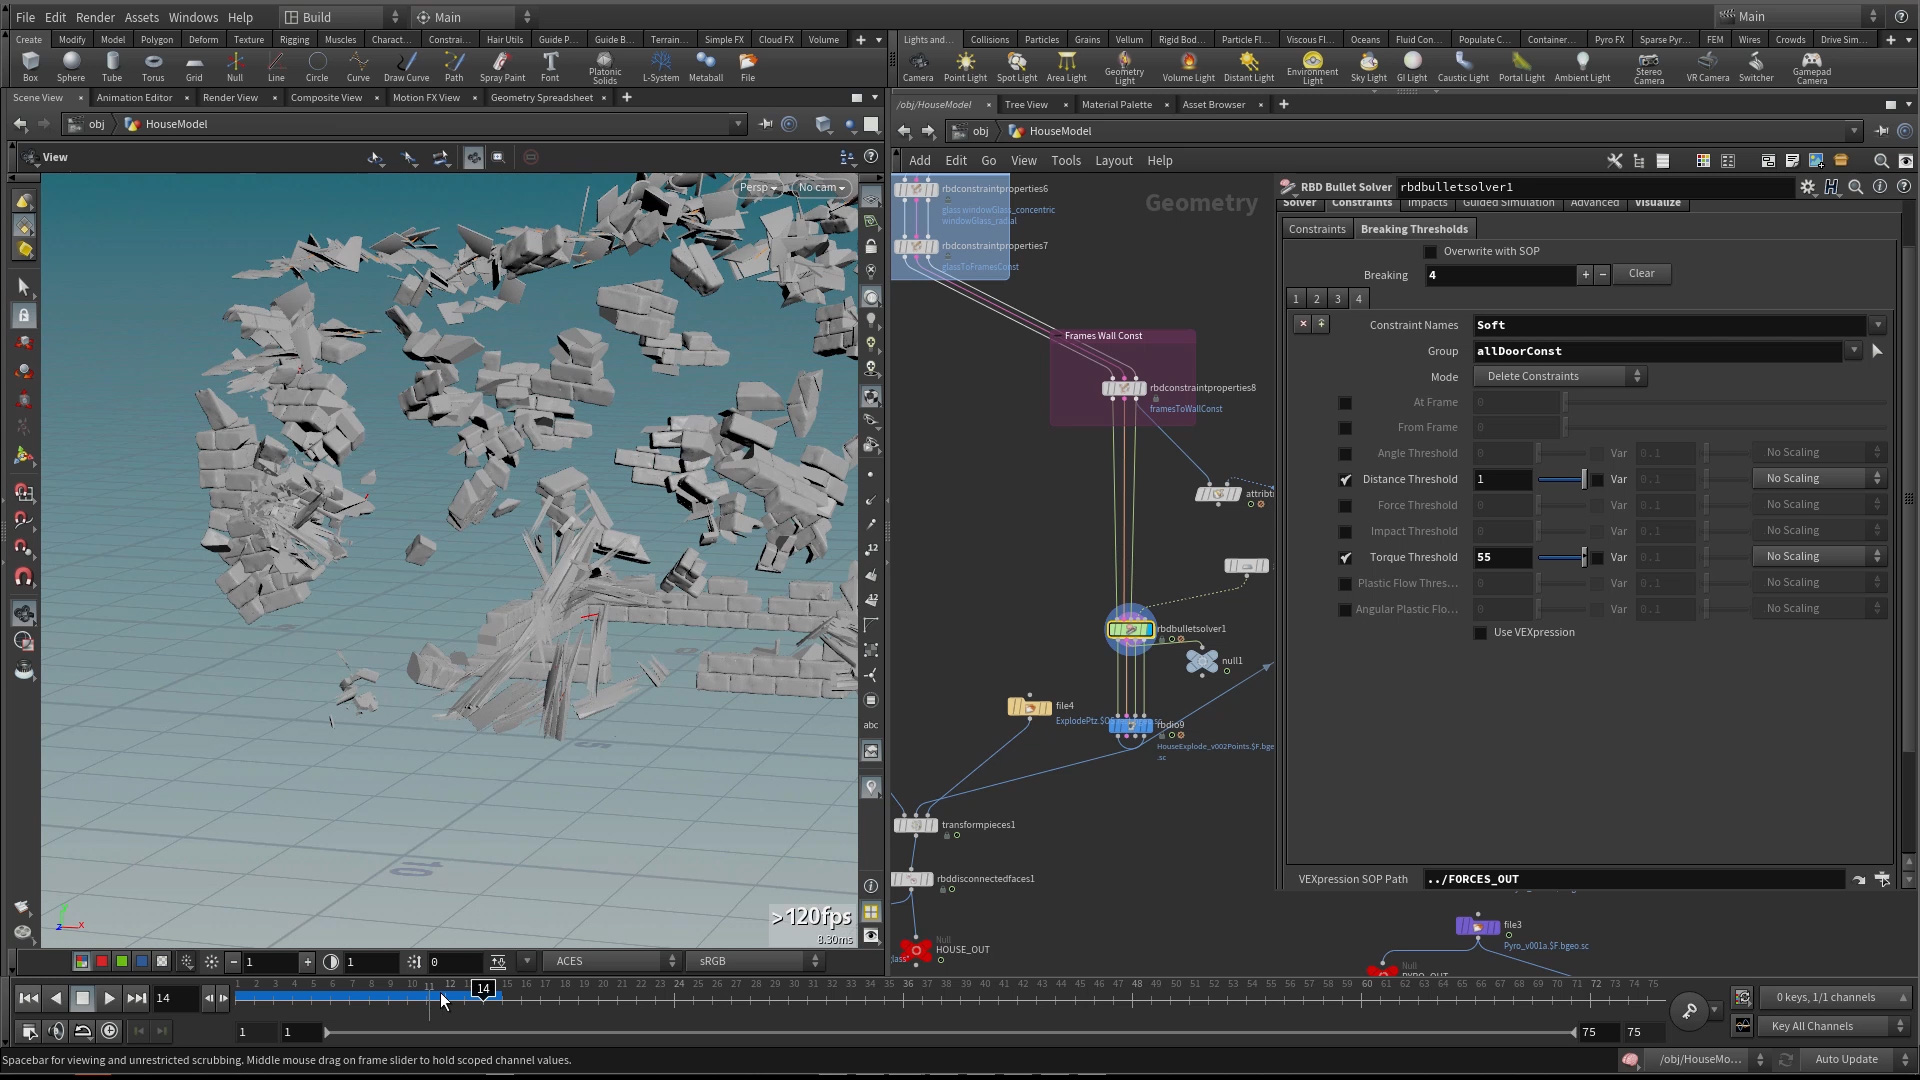
5 | Add Soft Constraints in DOPS
6 | Tweak Microsolvers in DOPS
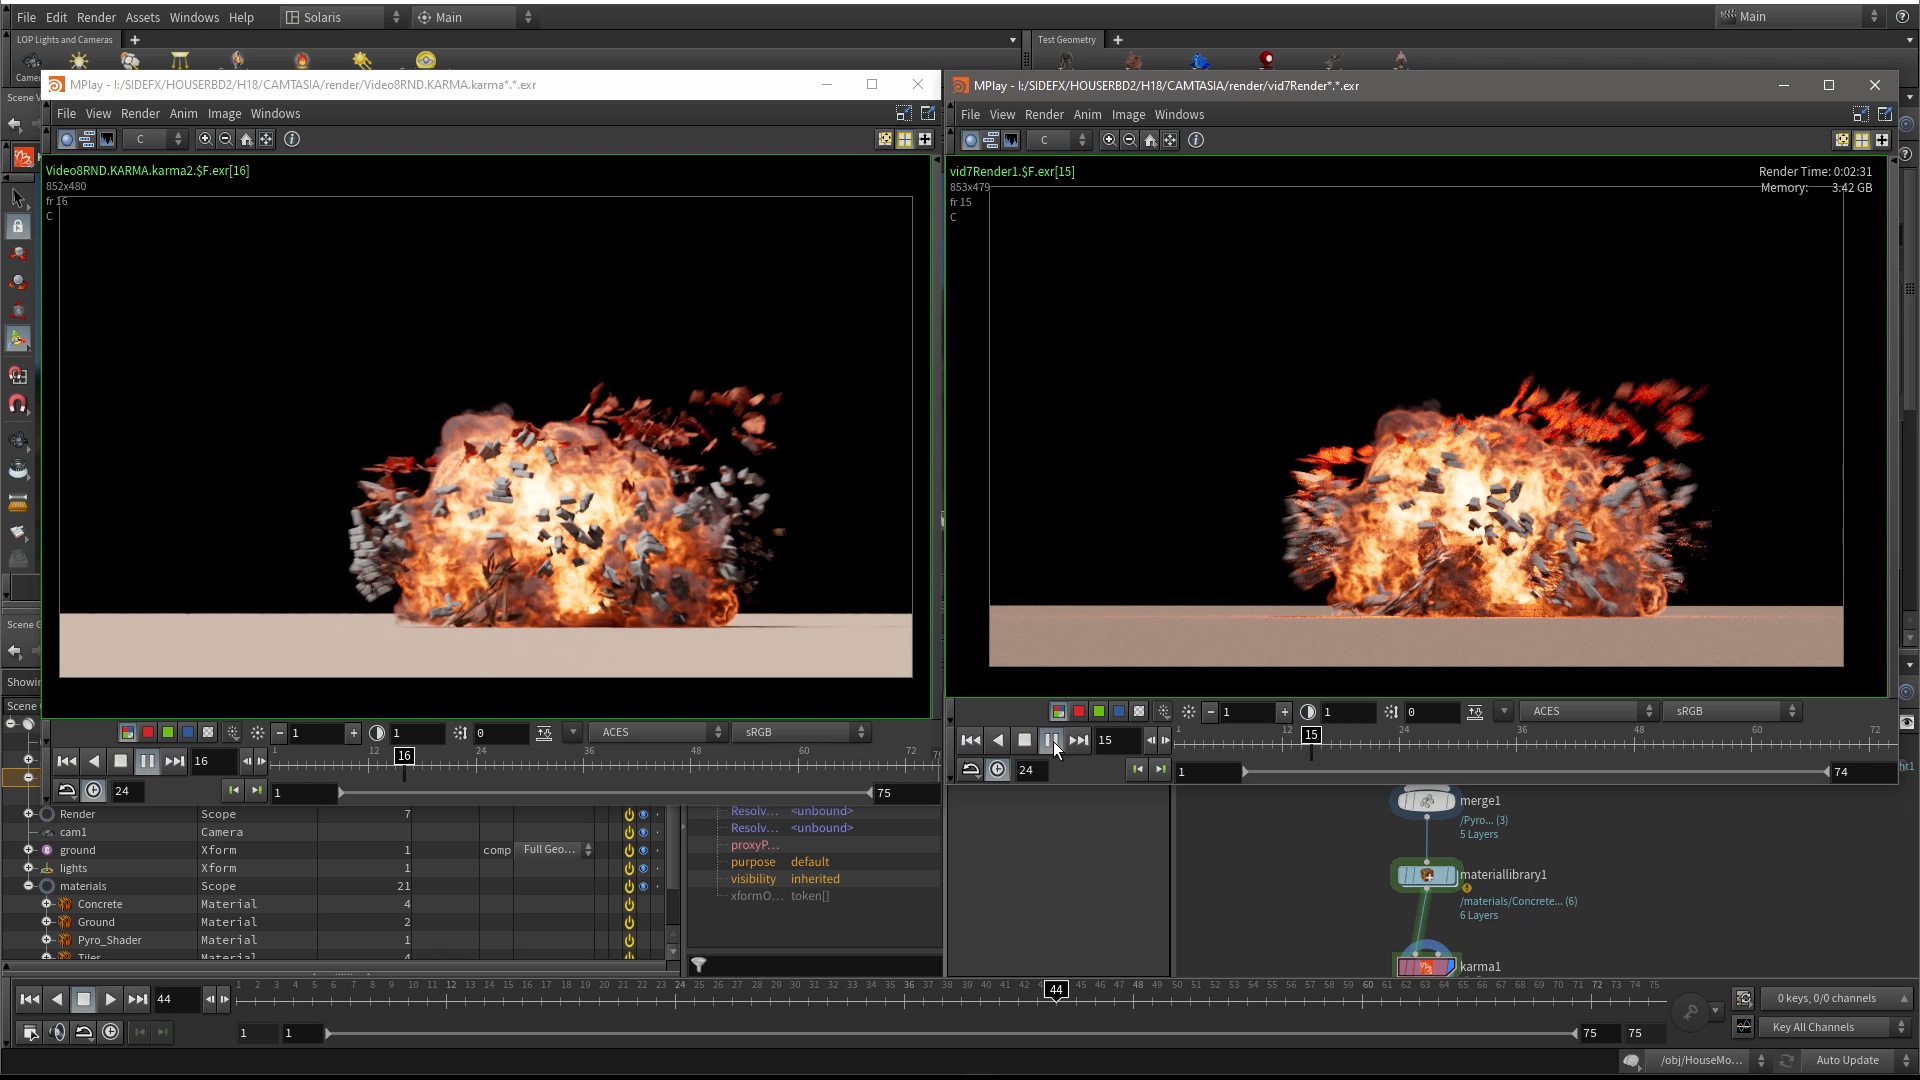
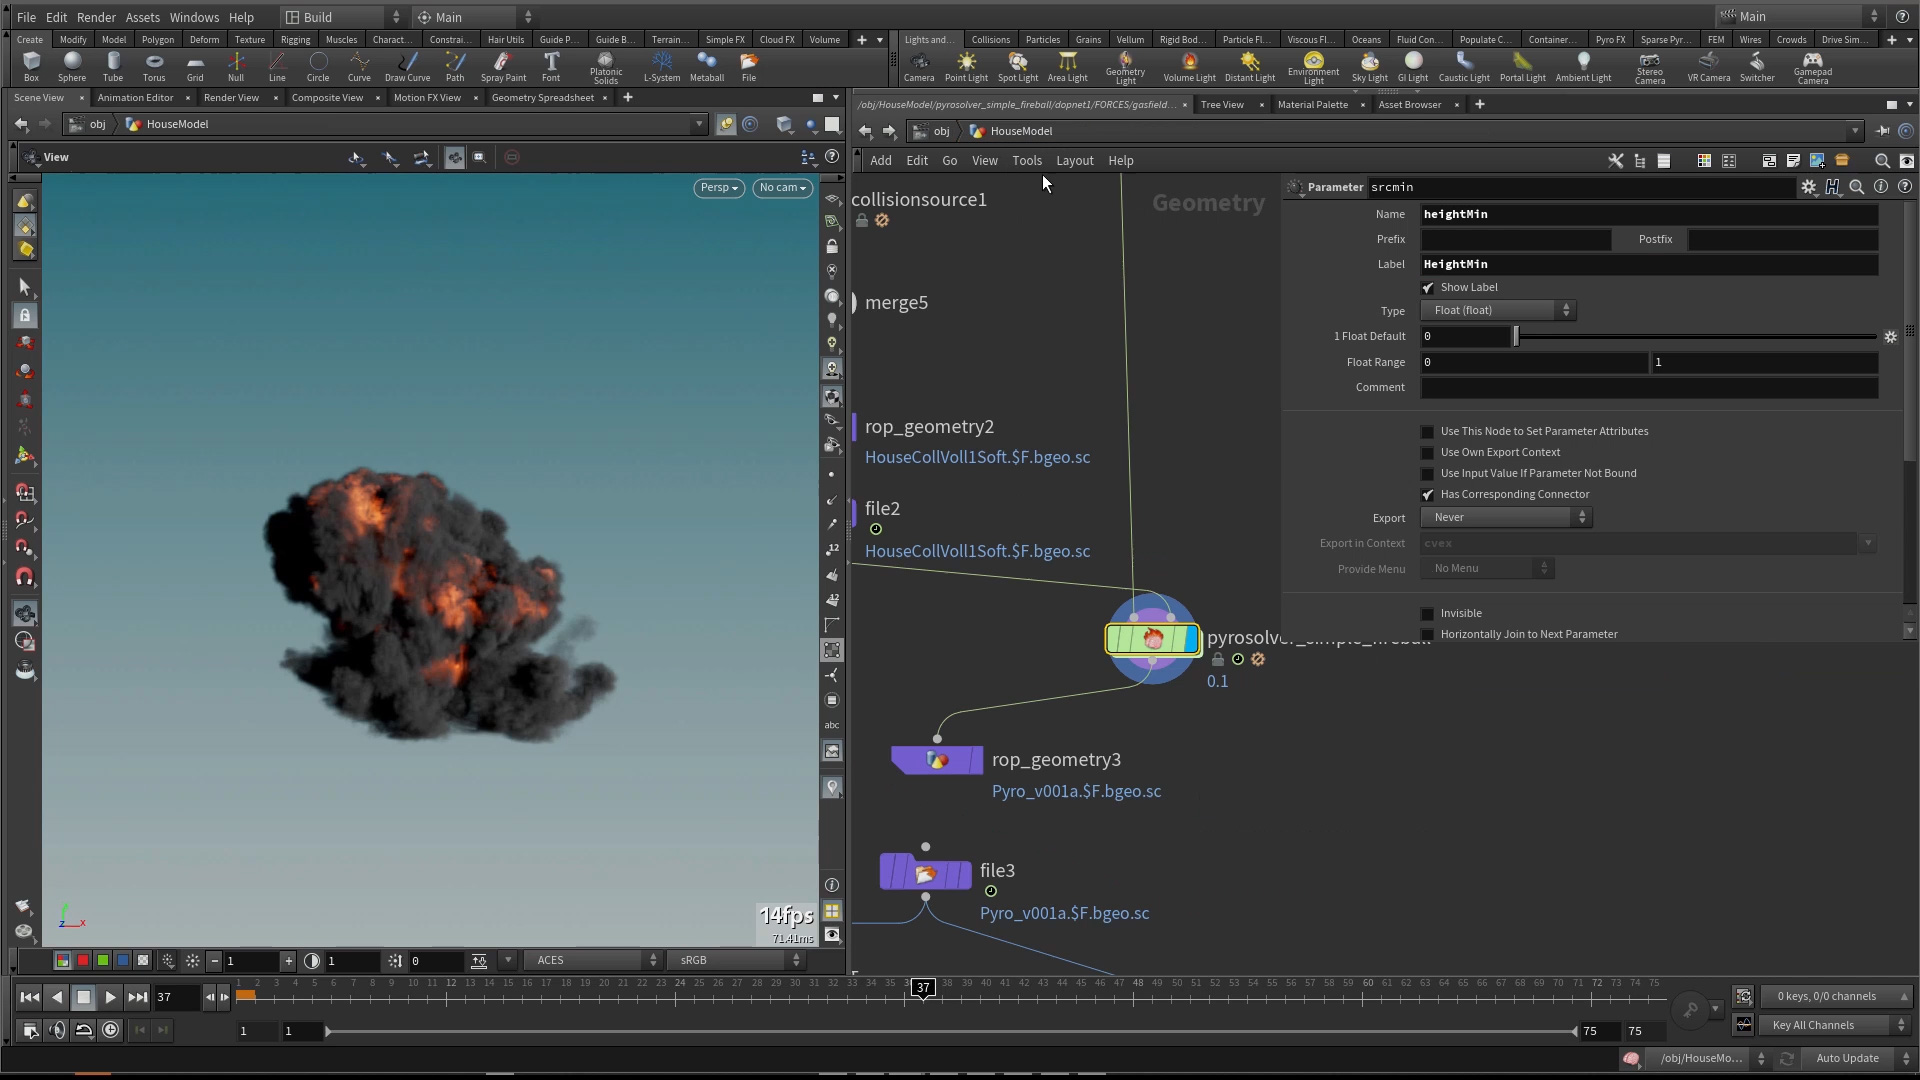
7 | Solaris | Karma Render
CREATED BY

COMMENTS
melong8608 5 years, 6 months ago |
all explanation was so detailed and neat. thanks for the amazing tutorials! it helped me alot
svc_sidefx 5 years, 6 months ago |
Hi Mark. By using this method of RBD simulation are you limited to just the initial point velocity acting on the sim? Since we keyframe the "overwrite attributes in SOP" for the blast. Is there a way to do multiples instead of just one? Like several small bursts breaking the geo at different times. If you turn the overwrite back on for another burst like you said everything stops in the air. Is there a way around this using this method? Thanks.
spev 5 years, 5 months ago |
Hi jag80
Not at all..for proper interaction use a full dop network. This lesson was designed to use only core license. This is why it is done this way.
I would go into dops for more options.
nmerves 5 years, 5 months ago |
Hey mark
I'm just learning more about Houdini so this may be an easy fix or I just missed a step and not realizing it, but I got the point in video 3 trying to connect the burst source to the rbd solver. but for some reason when I switch the point wrangler input from the point velocity node to the burst source my rbd no longer functions right. a few bricks fly away but the rest of the building just starts to fall due to gravity. https://imgur.com/a/Ypy7jrg has two screenshots of the setup and the spreadsheets. there is the impact attribute visibly changes and is there in the Force Out null. I'm stuck and can't figure out how to fix this.
thanks in advance for your help
nmerves 5 years, 5 months ago |
I got it to work I think. I had to expand the keyframes on the overwrite attribute from frames 5-6 to frames5-8 to gett it o explode from the burst source. I'm not sure what caused that difference between my project an dyours
ihatecheez 5 years, 5 months ago |
Amazing, long and detailed tutorial. Thank you for taking the time and effort to do all of this. really helped me out understand a good workflow.
gnomer 5 years, 3 months ago |
Volume light at the end in Solaris... there is no such option in Solaris light menu. How to get the fire illuminate objects?
Parpa 4 years, 10 months ago |
Anyone got this to work in Apprentice version? Is it FX license really required for DOPS? I've gotten to Ep 5 but when I try and change the constraints I get the the warnings:
Warning
rbd_object - /obj/HouseModel/rbdbulletsolver2/dopnet/bulletrbdsolver1/bulletrbdsolver: Required point attribute "name" not found
Warning
rbd_object - /obj/HouseModel/rbdbulletsolver2/dopnet/bulletrbdsolver1/bulletrbdsolver: Geometry does not contain any primitive types supported by the solver.
When I compare apprentice and FX both tings include RBD and pyro-stuff. https://www.sidefx.com/products/compare/
I'm going to go over the VODS and nodes again and see if I missed something.
Stanley00 4 years, 2 months ago |
Hello. I am stuck at the third video. I cannot see impact data in the constraints output. I could not find too much info about it
Please log in to leave a comment.