BUILDING GENERATOR
Building Generator
A tool that when given a basic ‘block out’ shape, and a named set of building components, can generate detailed buildings.
QUICKSTART
The building generator is a Gamedev tool. Here is a high level summary to explain what the tool is capable of.
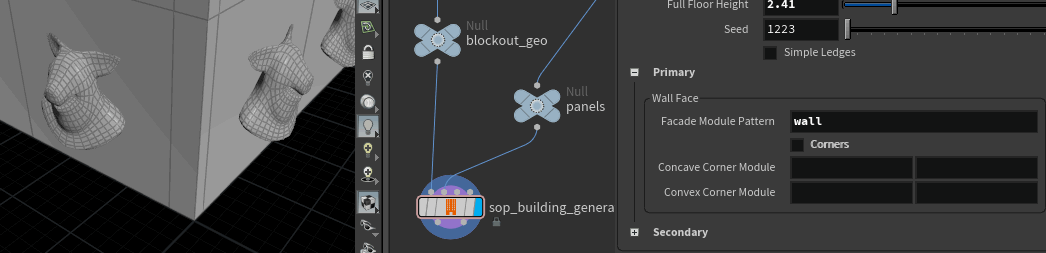
Modules
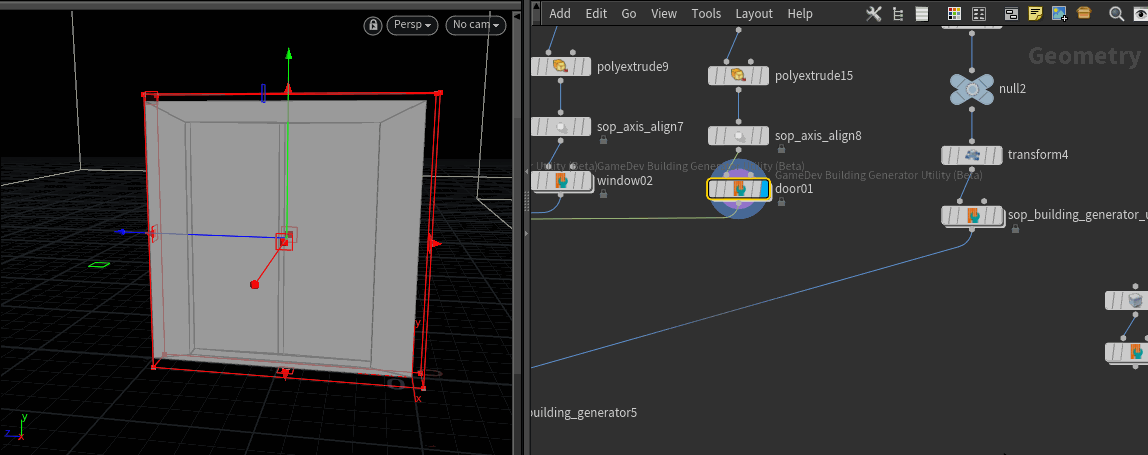
Modules represent building components; windows, doors, ledges etc
Modules sit on the YZ plane, front lower right corner at origin (see image)
As a rough guide, I start with a wall module of about 4x4 units (ie 4 pigheads)
Module primitives need a @name attribute to be identified, eg ‘wall’
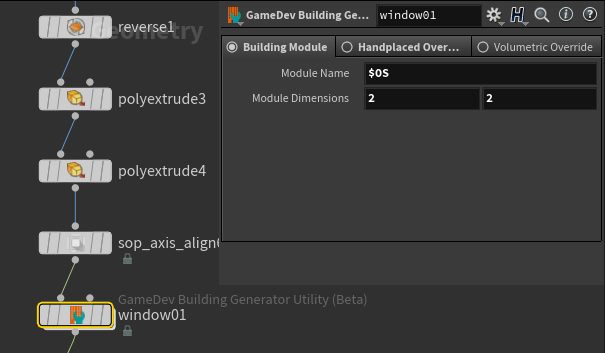
The gamdev building generator utility is a single node to set module dimensions and @name for you.
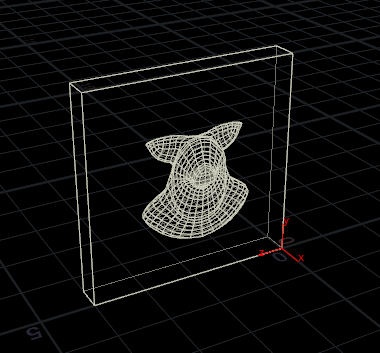
Flat of wall on YZ plane, front lower right corner at origin.
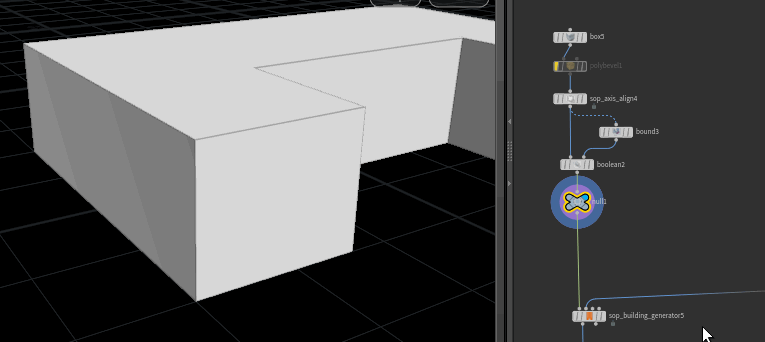
Block out geo
Should sit on the ground plane
Prefers right-angle geometry (but not essential)
Prefers non-twisting not overly complex shapes (but still creates interesting useful shapes if you try)
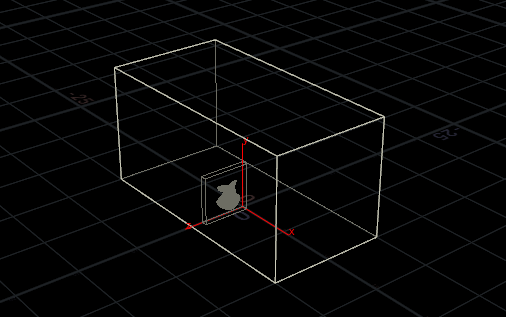
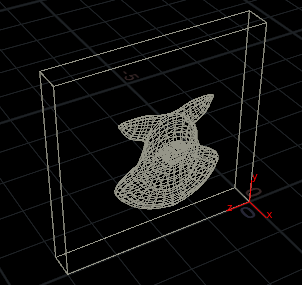
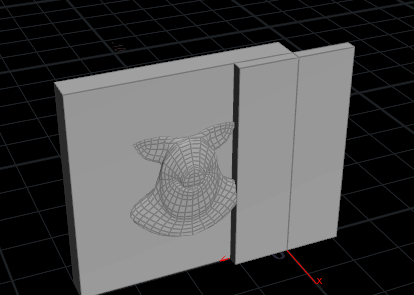
A ‘building’, with panel for size comparison.
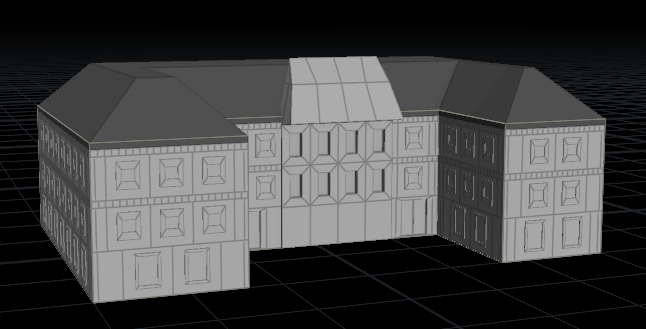
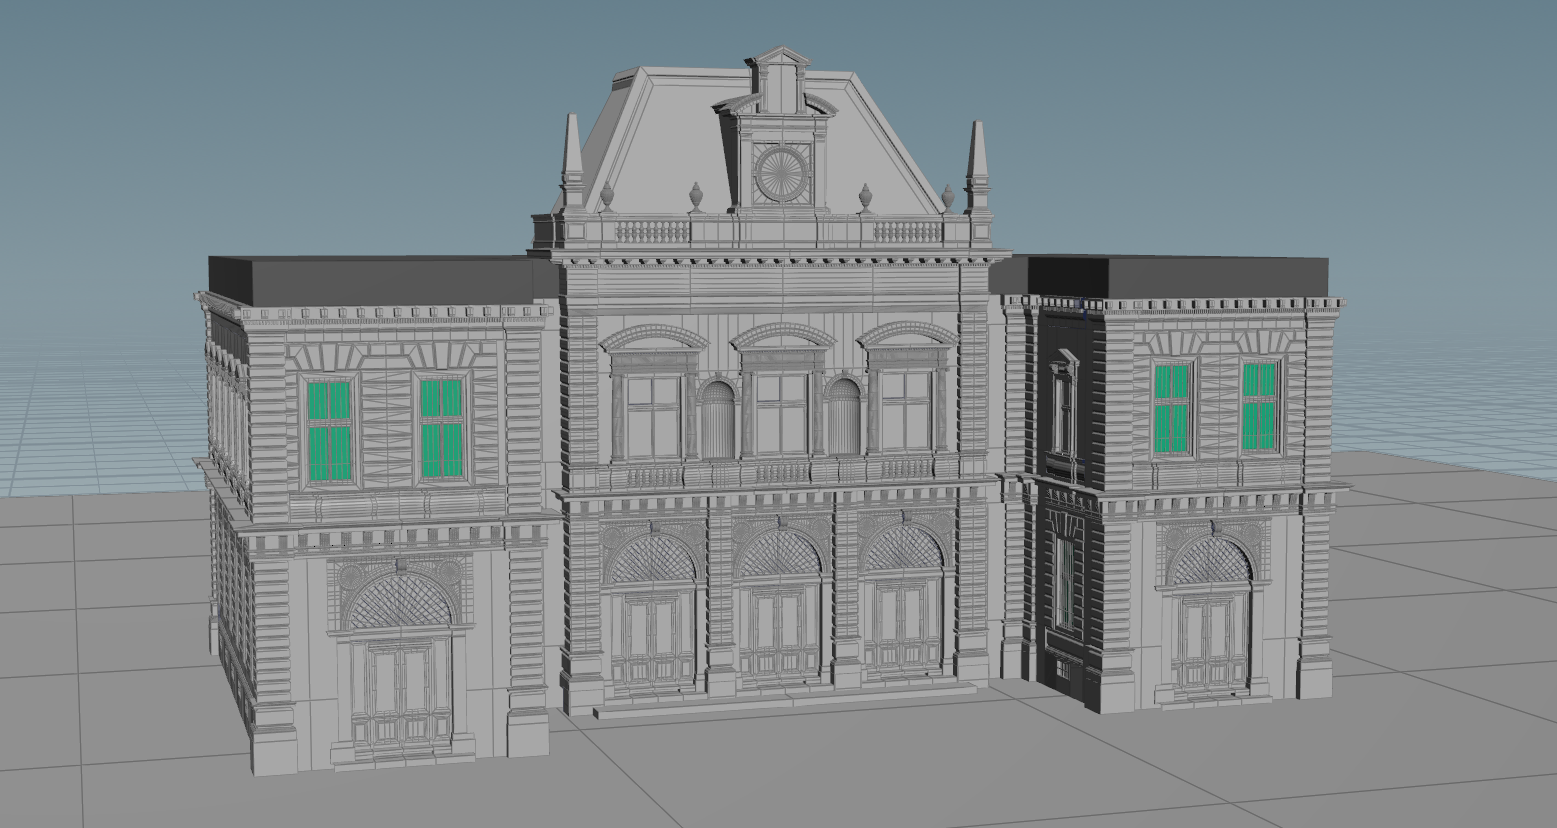
A simple building
Behold a building that would make the finest architect weep with jealousy (don’t worry, we’ll work up a better one after covering the basics):
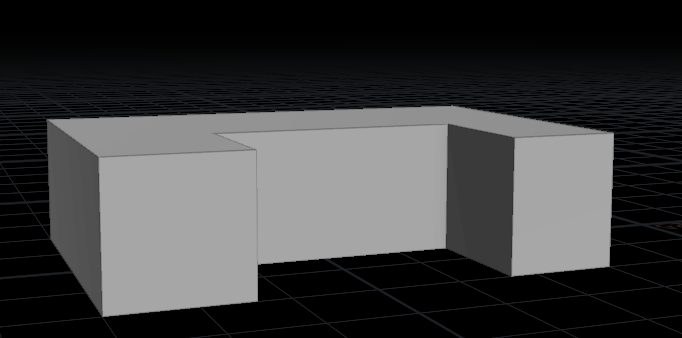
This was generated from this blockout shape:
How? Read on!
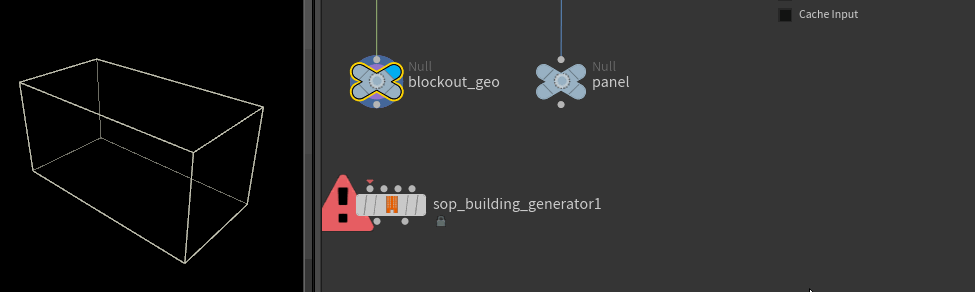
Example File
After going through the getting started section, you may want to explore this example file which shows the Building Generator being used with Pre-Made building modules. The example demonstrates Facade Pattern Syntax, Handplaced Overrides and Volumetric Overrides to show you how to maximize the ability to art-direct your generated building. The modules have been extracted from "Poste Model", courtesy of maito78.
GETTING STARTED
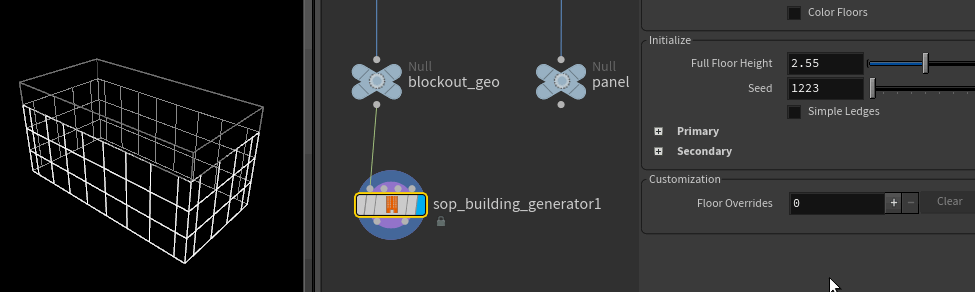
Here I’ve made a 30x10x30 box, and connected it to the building generator sop with all the options disabled. The walls get divided into panels. Changing ‘full floor height’ changes the size of the panels:
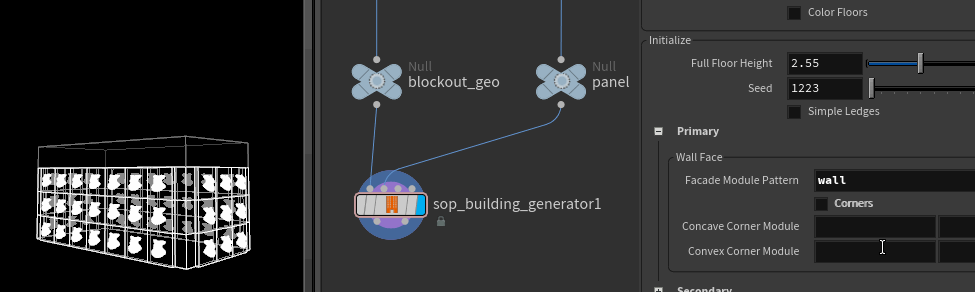
Connecting the panel to the second input and setting the name (‘wall’ in my case), the placeholder panels are replaced with the hero panel:
The logic here is simple in theory, but tricky to implement; panels are packed into each wall, trying to leave an even gap on the left and right sides, and for that gap to be as small as possible. Be thankful the gamedev team have worked out this logic for you. ;)
Enabling ledges in the secondary section will do as expected, with small placeholder flat panels that can be swapped with named modules later:
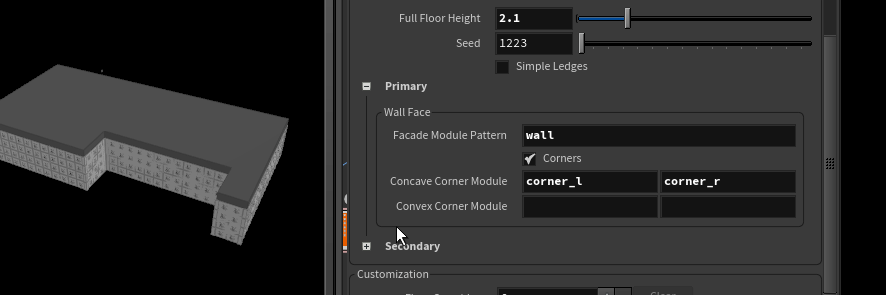
Corners
Corner ‘caps’ can be added for bonus detail:
To set these up is similar to a basic wall panel. Corners need a left and right panel defined. The left corner is defined like a basic panel, in fact lining it up against the base panel makes it clear to see the relationship; for these corners I want the corner to sit over the wall, so it has its lower right back corner at the origin. This piece is named corner_L. To make this panel available to the building generator, it and the original wall panel are connected to a merge sop, which is then connected to the second input of the building generator.
The right corner will be aligned from its lower left back corner, looking like its been mirrored across the x-axis:

Knowing that the origin is used as the alignment point, this means we can angle the face sitting on the XY axis to make a clean corner chamfer:
To handle convex as well as concave corners, we’ll need 2 more corner pieces with their XY face angled the other way (I’ve named them corner_l_cvex and corner_r_cvex):

Adding those to the concave corner parameters gives us clean corners in all cases:
Building generator utility node
So far the pig panel has just sized itself to fit into the building, but what if we had explicit measurements to conform to? Also, we have to make sure to add @name to every panel. Feels like someone should make an HDA to do these things.
Guess what? They have! The building generator utility node covers both these needs (and a few more). I replace the name sop with the utility node, specify the name there (using $OS so I can be lazy), and specify the width and height of this panel (2x2), so it won’t be resized in unexpected ways.
Floor overrides
In this example I’ve modelled 2 panels, window01 and window02. The default setup uses window1 for all panels, and I’ve turned off corners and ledges for now:
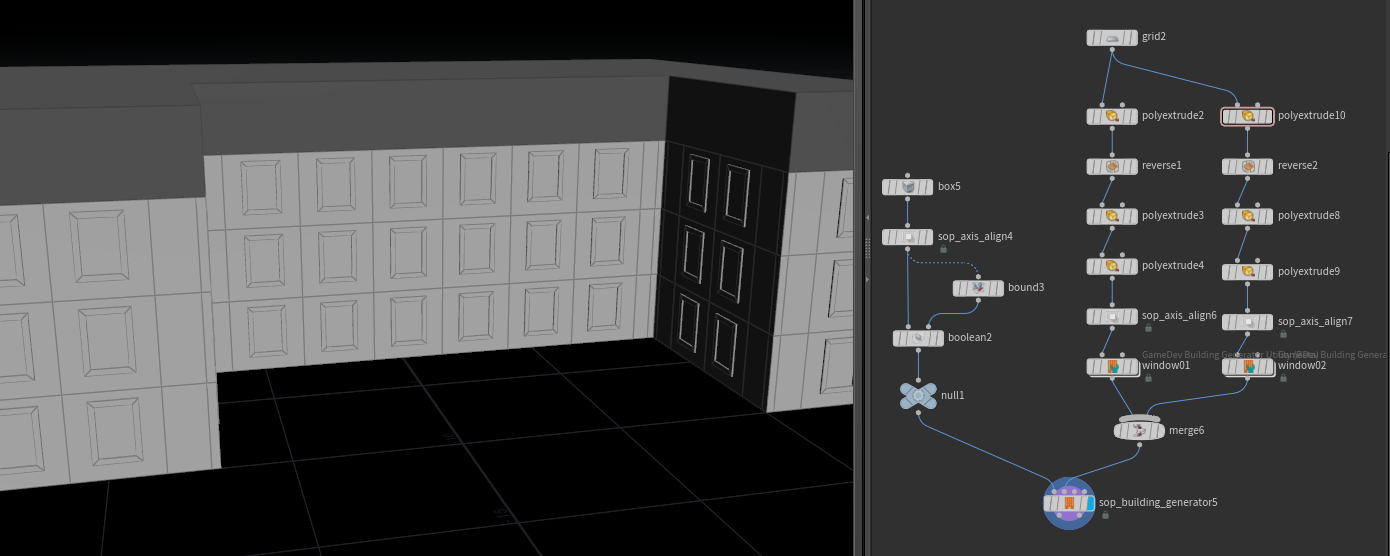
At this point I want to use window02 for the first and second floors. The customisation/floor overrides section allows this. When I create a new entry under the floor overrides, the settings from the primary and secondary parameters are copied, ready for me to modify. Here I swap window01 for window02, and can see the first floor gets updated:
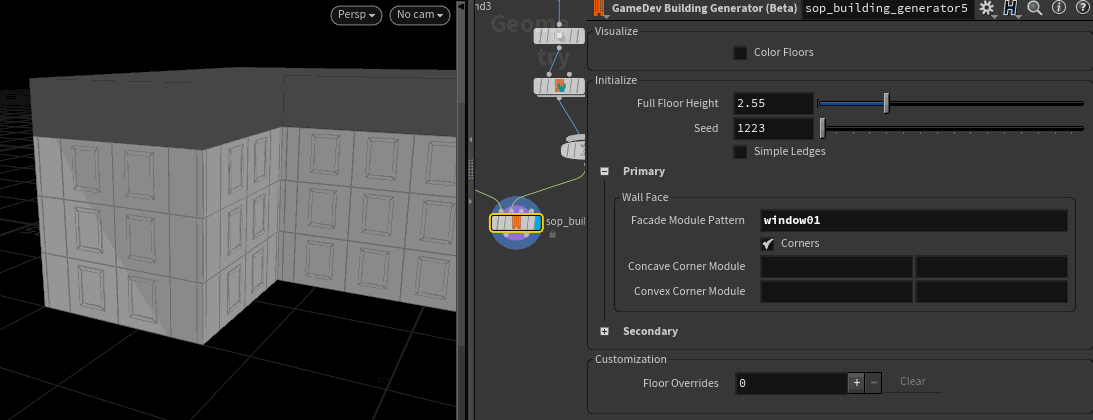
This process can be repeated and customized for each floor.
Hand placed overrides
If you have hero facades or sides to your building, you can place them where required in world-space. The building generator can be made aware of this, and won’t try and put modules in that region..
This is done via the building generator utility node hand placed overrides tab. Here I place this exquisitely modelled section where it needs to be in the world, then with the building utility node updated the center and size sections. These values represent a bounding box to tell the building generator “Don’t put any modules here.”. When connected to the 3rd input of the building generator, this will clip out the panel sections and use this hand placed override instead: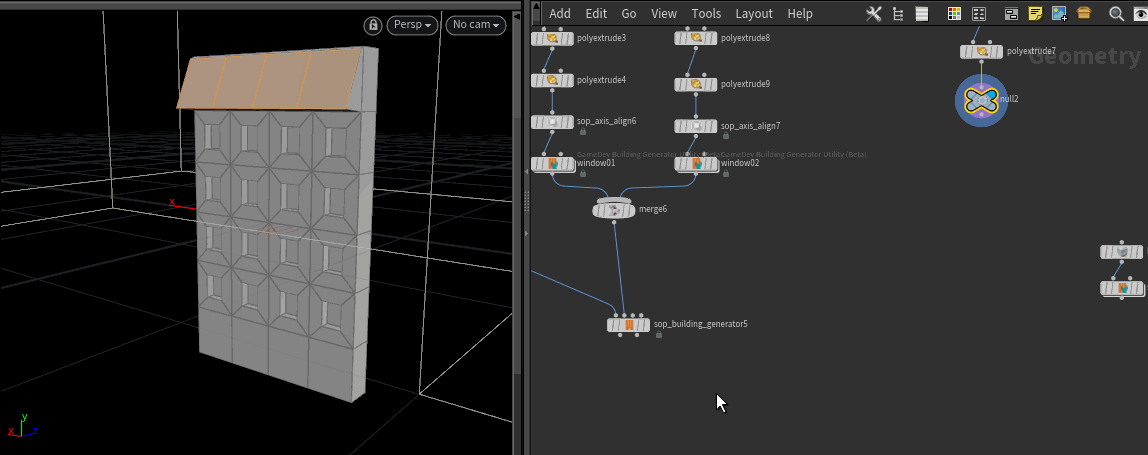
Volume overrides
As well as hand-placed overrides, you can define bounding boxes, and tell the generator ‘in this region, use these settings instead’. Here I’ve defined another section called door01, and place a box covering the entrance where I want doors to go. The box is connected to the building generator utility’s 4th input, and those panels are replaced:
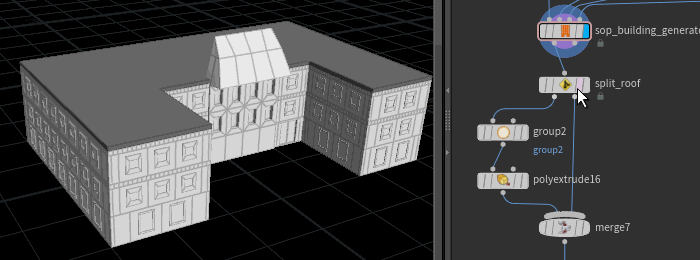
Finishing touches
To make the roof I:
split off the top section (all the primitives in the building get useful attributes like floorIndex, and several handy groups)
group the top face,
bevel and inset it,
merge with the rest of the building.
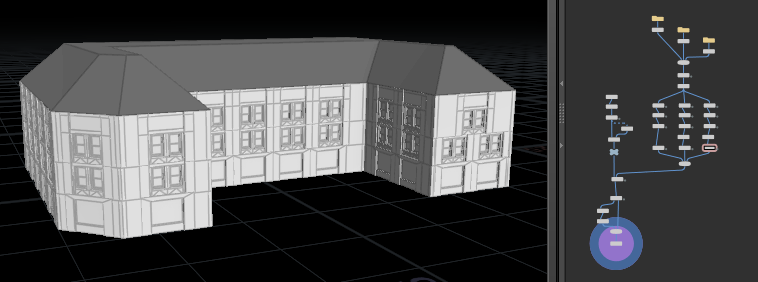
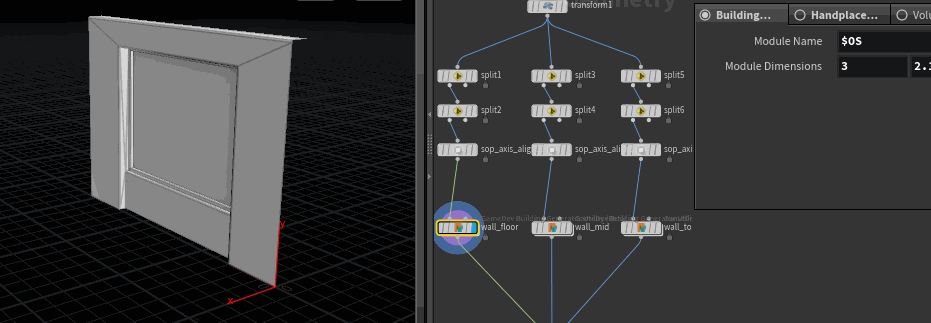
Building 2 - kitbashing from an existing model
Here’s a more presentable result, this time using elements from an already modelled building.
Most of the work was in finding a model, prepping the modules was pretty straightforward. Here’s the 3 obj’s I started with, aligned and stacked:
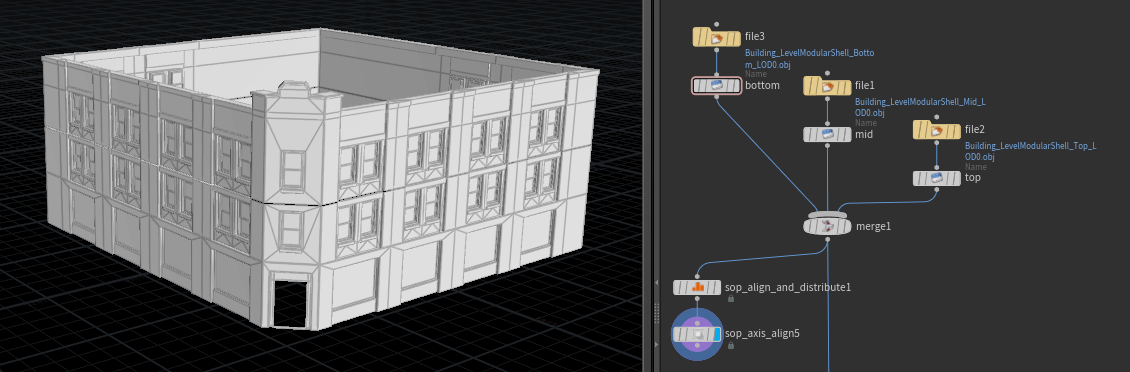
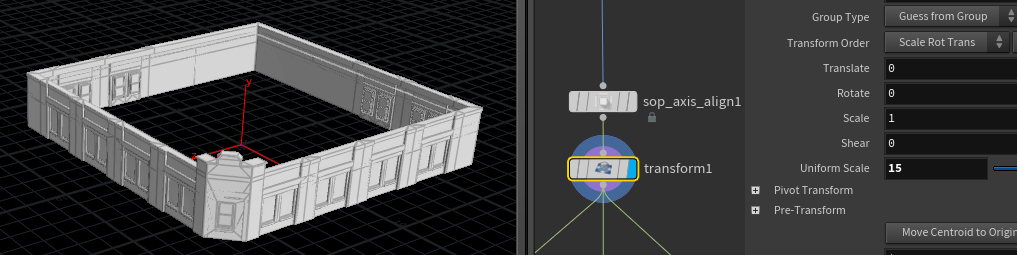
This obj was massive, so I used the gamedev align tools to first get them down to a unit size at the origin, then scaled up to be about 15 units across:
From here its a pretty easy task to isolate to each module I want. Here I show isolating one of the ground floor modules. The workflow is:
Use the 9 hotkey group lister to select the ground floor, split it
Select a window panel, split it
Axis align tool to move it to the origin, aligned to the YZ plane
Building utility to name and set its dimensions (which I get from looking in the geometry spreadsheet)
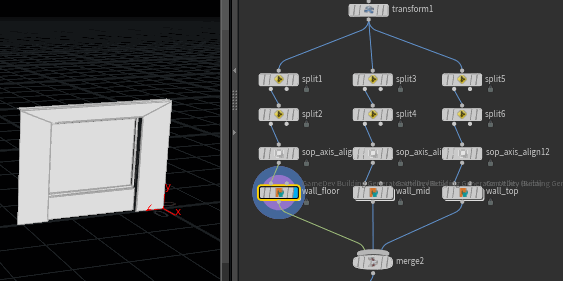
Working this way I can quickly define 3 modules for wall_floor, wall_mid, wall_top:
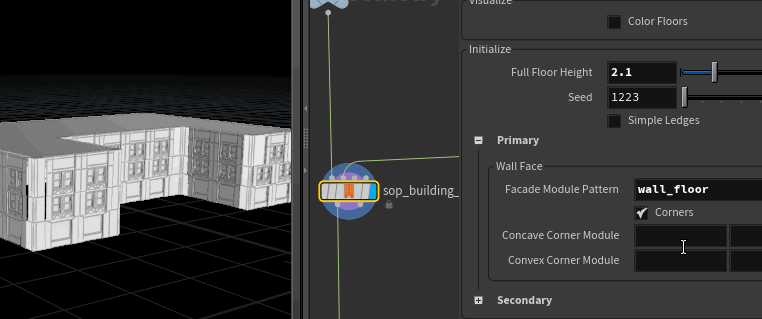
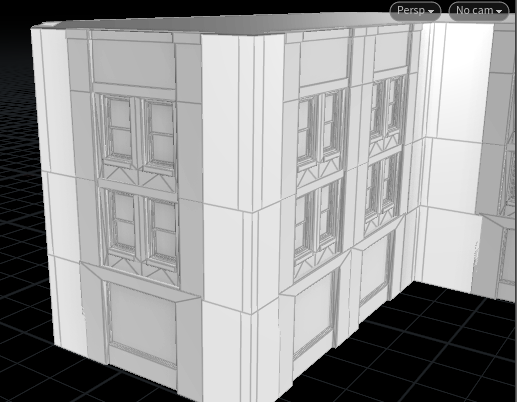
Feeding all this to the building generator sop, this time I was careful to match the floor heights to those I got from the geometry spreadsheet, that way everything behaved:
At this stage I tried a cheeky bevel on one corner of the blockout geo, it still behaves as you’d hope:
Look a little closer, there’s some gaps, why? It’s because I’ve been a little sloppy with the module alignment, the corner at the origin should match up between all 3 modules. I’ve used the axis align sop to push the max-X value to the origin, but these 3 modules have different ledges, so they get shifted to different depths. A transform sop for each module will fix this (make sure to apply this before the utility sop!):
No gaps!
COMMENTS
Goldwaters 7 years, 1 month ago |
Simply awesome. Definitely going to be putting this to work!
AeroAstroArts 7 years, 1 month ago |
Thank you for re-uploading this one, the first time it was posted it had a video along with it. Would you be so kind as to re-upload the video too? Thanks in advance, this is probably the most useful tutorial thus so far. :)
commedieu 7 years, 1 month ago |
Awesome thank you!
Is there any way to use GameDev shelf tools w/o internet connection? @ our office we only have a intranet.
Thank you!
For instance,
could I download it and install it manually?
commedieu 7 years, 1 month ago |
nevermind.. of course you guys provided thorough documentation on how to do it through github...
ty ty.
3dkeshaw 7 years ago |
epic
alex_martin2 6 years, 10 months ago |
Amazing tool!
shad0h 6 years, 9 months ago |
How would i create the interior?
Sulabi 6 years, 9 months ago |
Awesome tool ty! Is there any way to make modules following a spawn pattern?
MasterHipoly 6 years, 8 months ago |
Hi, I have massive amount of modular building meshes, How I can setup this building generator in HDA for using with existing static meshes in UE4/Unity (Priority to UE4)
Andrei_K 6 years, 8 months ago |
I am actually trying to do similar stuff as well. It's a bit tricky to get ledges to work right and to match the required style exactly.
MuhammadMadiHero 6 years, 7 months ago |
thanks dude
but how can we create the interior ?
3amsick 6 years, 6 months ago |
Amazing tool!
roof !!
Can't I have a roof in a procedural way?
Jisung 6 years, 6 months ago |
nice tut but i have some issue when i install my houdini asset built with this building generator it`s fine but, if i bring some geometry like(fbx,bgeo.sc) and plug in to some module pattern it`s give me warning in unreal engine (Unable to read file) and i can`t solve this problem give me some help
Mouzzer 6 years, 4 months ago |
Hello! And how to make several houses at the same time?
segomez 6 years, 3 months ago |
this is Awesome, i am working on a vr project, were all the town homes are basically the same architecture, and was looking into building my own house generator, this is going to help me a lot.
Sirgabriel 6 years, 1 month ago |
thankyou
JIn_ 5 years, 11 months ago |
so... if the basic shape is not located at the ground the building generator won't work???
Filanm 5 years, 9 months ago |
There are some goodies in there.
Yuri Serizawa 5 years, 8 months ago |
Looks like the link to the example file is expired.
izcho 5 years, 1 month ago |
Great stuff Matt, you singled out the roof by index, but what if we have multiple buildings and variying amount of levels, could I procedurally figure out the height of each and pick the top, and where would I do this? Thanks
fr_3D 4 years, 4 months ago |
Roof: Use a Split node to separate the SLOP group. For the SLOP branch you can add a transform node, scale Y for your individual fascia height, set Pivot Translate Y to -> $YMIN. Then add a Sort node, Primitive Sort -> By Y and Reverse. Add another Split node with 0 as Group, this separates the topmost primitive. Then you can add a Poly Extrude with Distance and Inset of your choice. Merge the non-zero primitives from the second Split node and then merge the non SLOP geometry from the first Split node.
DenialSmith701 4 years ago |
I think that good specialists could now sell their services on sites such as https://engre.co/services/modeling/architecture-building/ and do 3D modeling helping to create architectural projects. I saw there are many firms and companies that are looking for global projects
Please log in to leave a comment.