| On this page |
When you have finished retargeting your SOP animation skeletons and characters, you may need to use their data elsewhere in KineFX or SOPs, hand them off to a different artist, bring them to a different context in Houdini, or export them for use in another DCC.
To help you with this process, there are several ways to bundle, export, or import from your SOP characters, animation skeletons, or MotionClips.
Pack SOP characters or save to disk 
-
If you want to use your SOP character elsewhere in your network, in a different network, or in a different Geometry node, you can bundle it as a packed geometry primitive with the
 Character Pack SOP node.
 You can then use the packed primitive output directly from the Character Pack SOP, or use the nodes listed below to save off the data from the Character Pack SOP.
-
Use the
 Stash SOP node to stash off a single pose and its geometry from a Character Pack SOP.
 -
Use an
 Object Merge SOP node to bundle all the poses and geometry from a Character Pack SOP.
-
-
If you want to bundle your SOP character’s data stream, save it to disk, and then have the option of using the live stream or the sequence on disk, then you can use the
 Character I/O SOP node.
 -
If you want to save your SOP character straight to disk, then you can use a regular
 File SOP node.
Bring SOP character data into Crowds 
You can bring SOP characters and animation clips into Crowds for use with agents in the following ways:
-
Create a single agent primitive from a SOP animation skeleton with the
 Agent from Rig SOP node.
 -
Bulk import SOP rest geometry and create an agent shape out of each capture (skin) with the
 Agent Layer SOP node.
 -
Copy a SOP animation skeleton’s pose onto an agent with the
 Agent Pose from Rig SOP node.
 -
Import a SOP MotionClip as an agent animation clip with the
 Agent Clip SOP node.
Export SOP character data for use outside of Houdini 
You can export your SOP animation skeletons and characters for use outside of Houdini in the following ways:
-
Export them as FBX files that can be easily imported into game editors or other DCC packages.
-
Use the
 ROP FBX Animation Output SOP node to export an animation skeleton as an
 .fbxfile. -
Use the
 ROP FBX Character Output SOP node to export a character as an
 .fbxfile.
-
-
Export them as glTF files that are ideal for Web, Mobile, or AR/VR applications.
-
Use the
 ROP GLTF Character Output SOP node to export a character as a
 .gltfor.glbfile.
-
Bring SOP character data to the object-level 
You can export SOP animation from a skeleton or character to the /obj context in Houdini with the ![]()
![]() Scene Character Export SOP node.
Scene Character Export SOP node.
Bring SOP character data into Solaris 
You can bring SOP character data into LOPs by using the ![]() SOP Character Import LOP node to import characters into your stage.
SOP Character Import LOP node to import characters into your stage.
-
Use the Animated Pose parameter to specify the path to the SOP node that contains the animated skeleton geometry for your character. This would be the third input to the
 Joint Deform node in SOPs.
 -
(Optional) Use the Rest Geometry parameter to specify the path to the SOP node that contains the rest skin geometry for your character. This would be the first input to the
Joint Deform node or the  Character Blend Shapes node (if your character has blend shapes) in SOPs. If you leave this field empty, then only the skeleton and animation data for your character will be imported.
 -
(Optional) Use the Capture Pose parameter to specify the path to the SOP node that contains the capture pose you want to use for the Rest Geometry. This would be the second input to the
Joint Deform node in SOPs.
Control rigs in Unreal Editor with KineFX 
You can use the Houdini KineFX LiveLink plug-in for Unreal Engine to control rigs in Unreal Editor from KineFX in Houdini.
Houdini source requirements |
|
Unreal Editor target requirements |
|
How to 
-
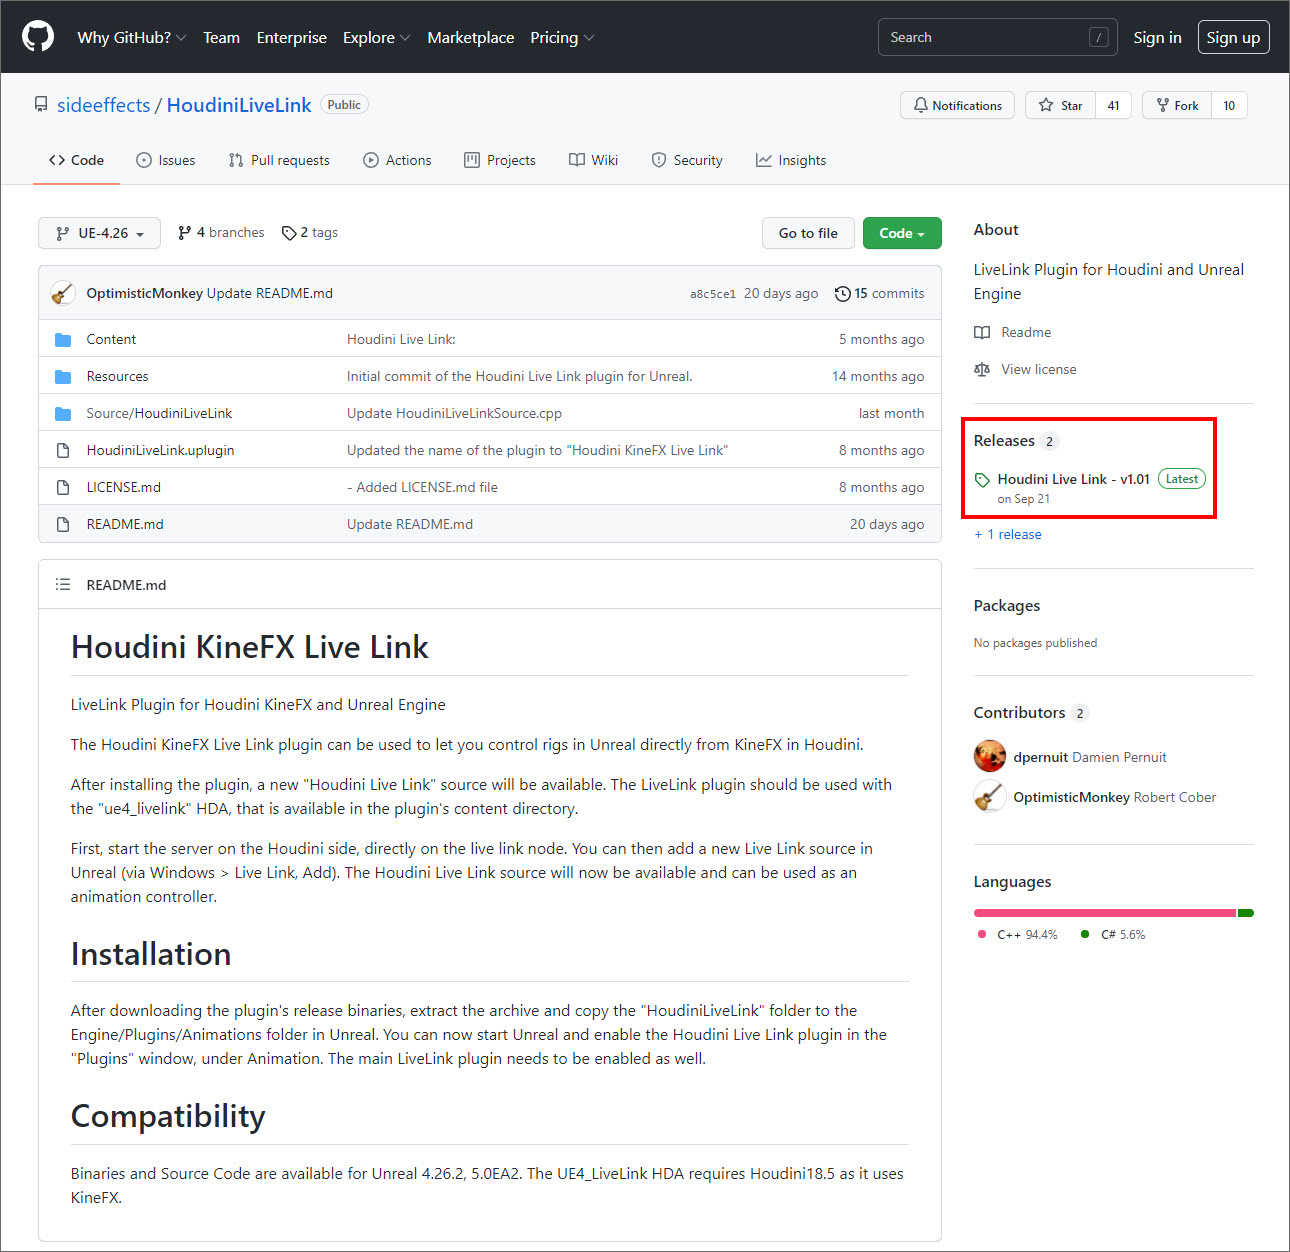
Open a web browser window and navigate to the Houdini LiveLink web page on github.
-
In the right-hand column, click the most recent release listed under Releases.
-
On the most recent Houdini Live Link release’s web page, scroll down to the Assets section and then click the HoudiniLiveLink
.zipthat matches the version of Unreal Editor you are running.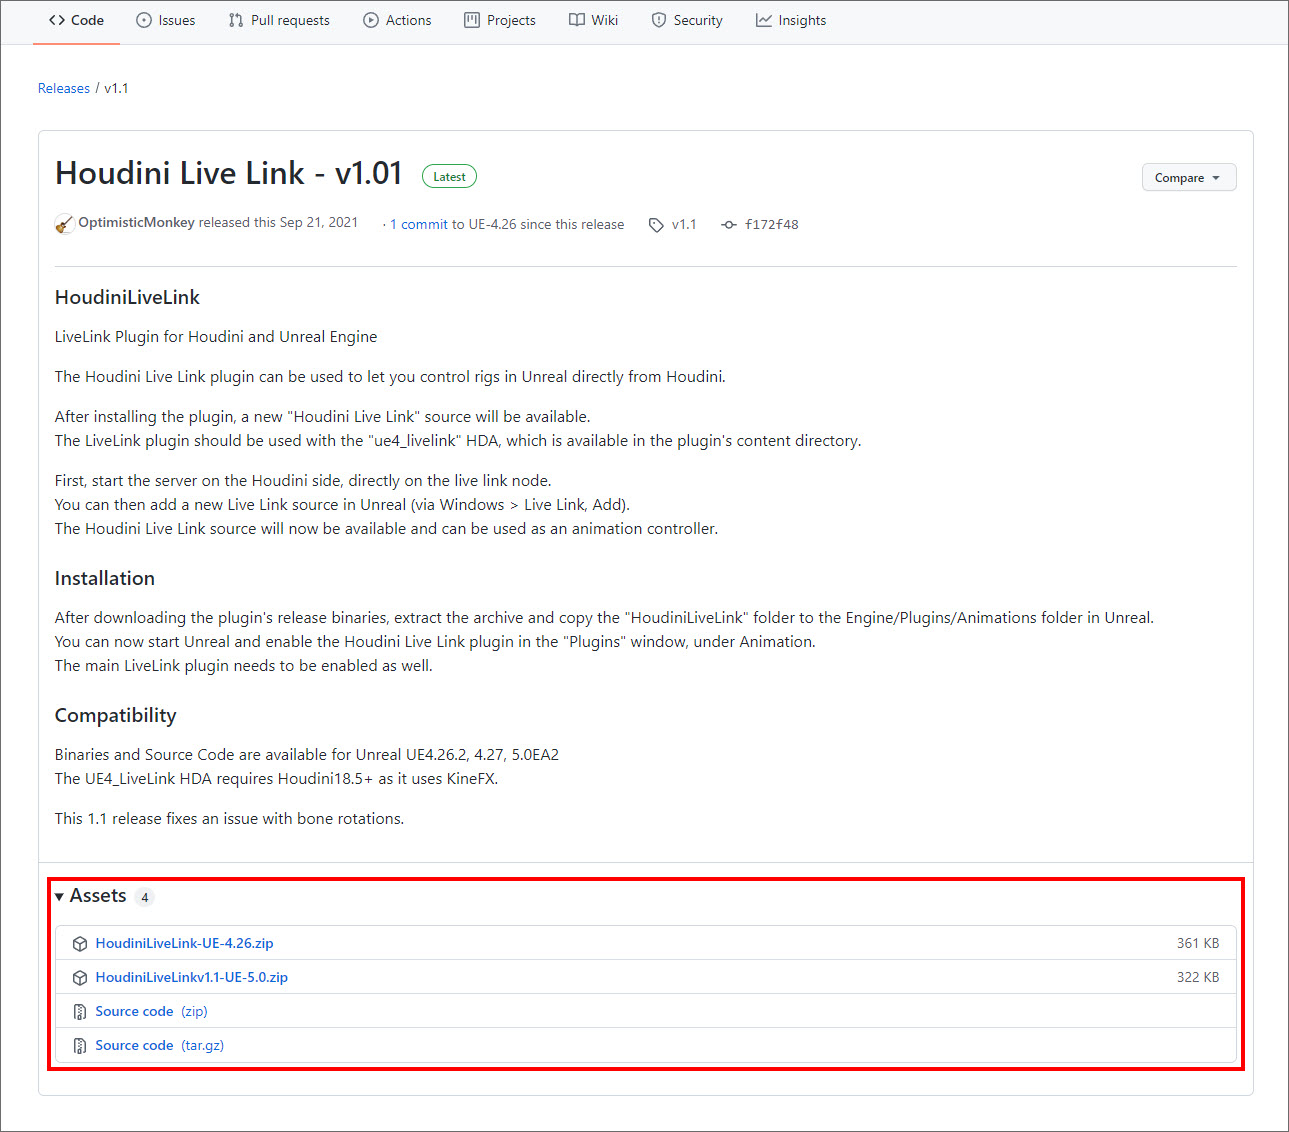
The
.ziparchive file automatically downloads to your local\Downloadsfolder. -
Extract the HoudiniLiveLink.zip archive you downloaded, dive into the unzipped folder, and then do the following:
-
Copy the HoudiniLiveLink folder (for example,
HoudiniLiveLink-UE-4.26) to the\Engine\Plugins\Animationfolder in your Unreal Editor install director. -
Navigate to the
\Contentfolder and then save theue4_livelink.hdafile to where you keep your HDAs for import into your scenes.
-
-
In Houdini, open the scene that contains the KineFX animated skeleton or character that you want to drive the skeleton or character in Unreal Editor.
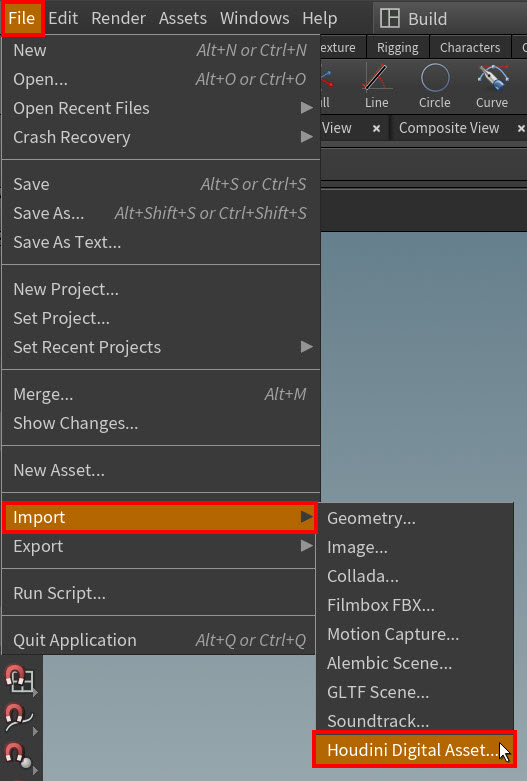
-
Select File ▸ Import ▸ Houdini Digital Asset.
-
In the Install Digital Asset Library window, use the Digital Asset Library option to browse for and select the
ue4_livelink.hdafile you downloaded, and then click Install and Create.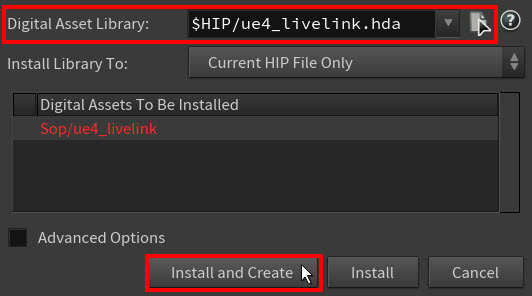
The
ue4_livelinkHDA appears in the Network Editor. -
In the Network Editor, connect the animated pose output of your animated skeleton or character to the input of the
ue4_livelinkHDA.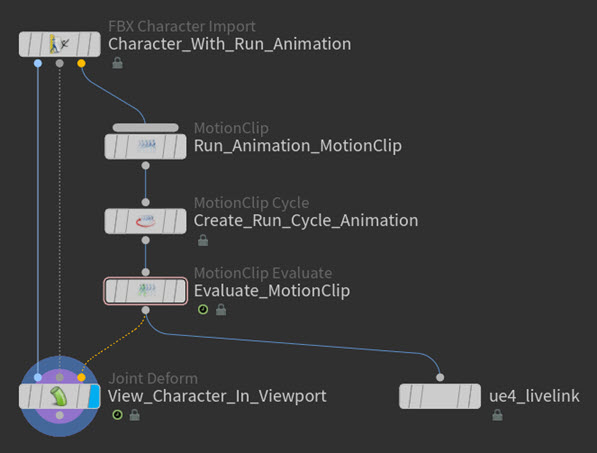
-
Select the
ue4_livelinkHDA and then open the Parameter Editor. -
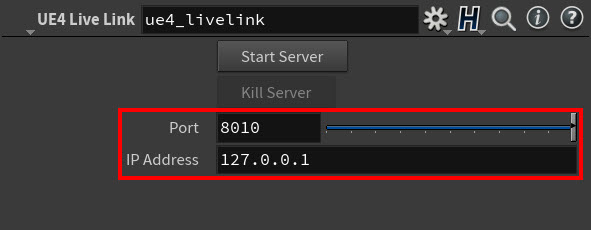
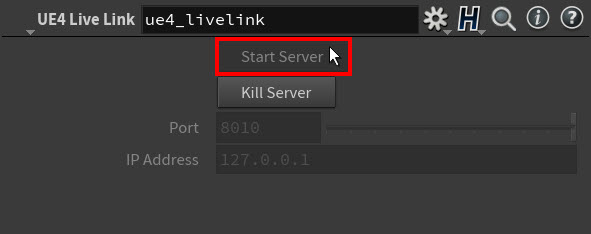
In the Parameter Editor, note the Port and IP Address for later in this procedure and then click Start Server.
-
Run Unreal Editor.
-
In Unreal Editor, select Edit ▸ Configuration ▸ Plugins from the main menu.
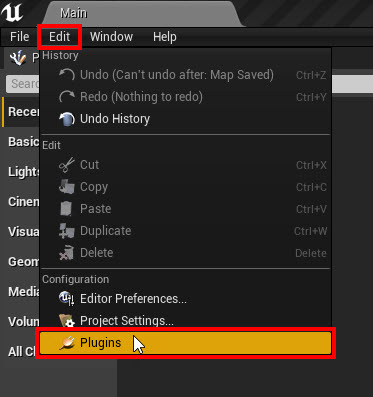
The Plugins configuration window appears.
-
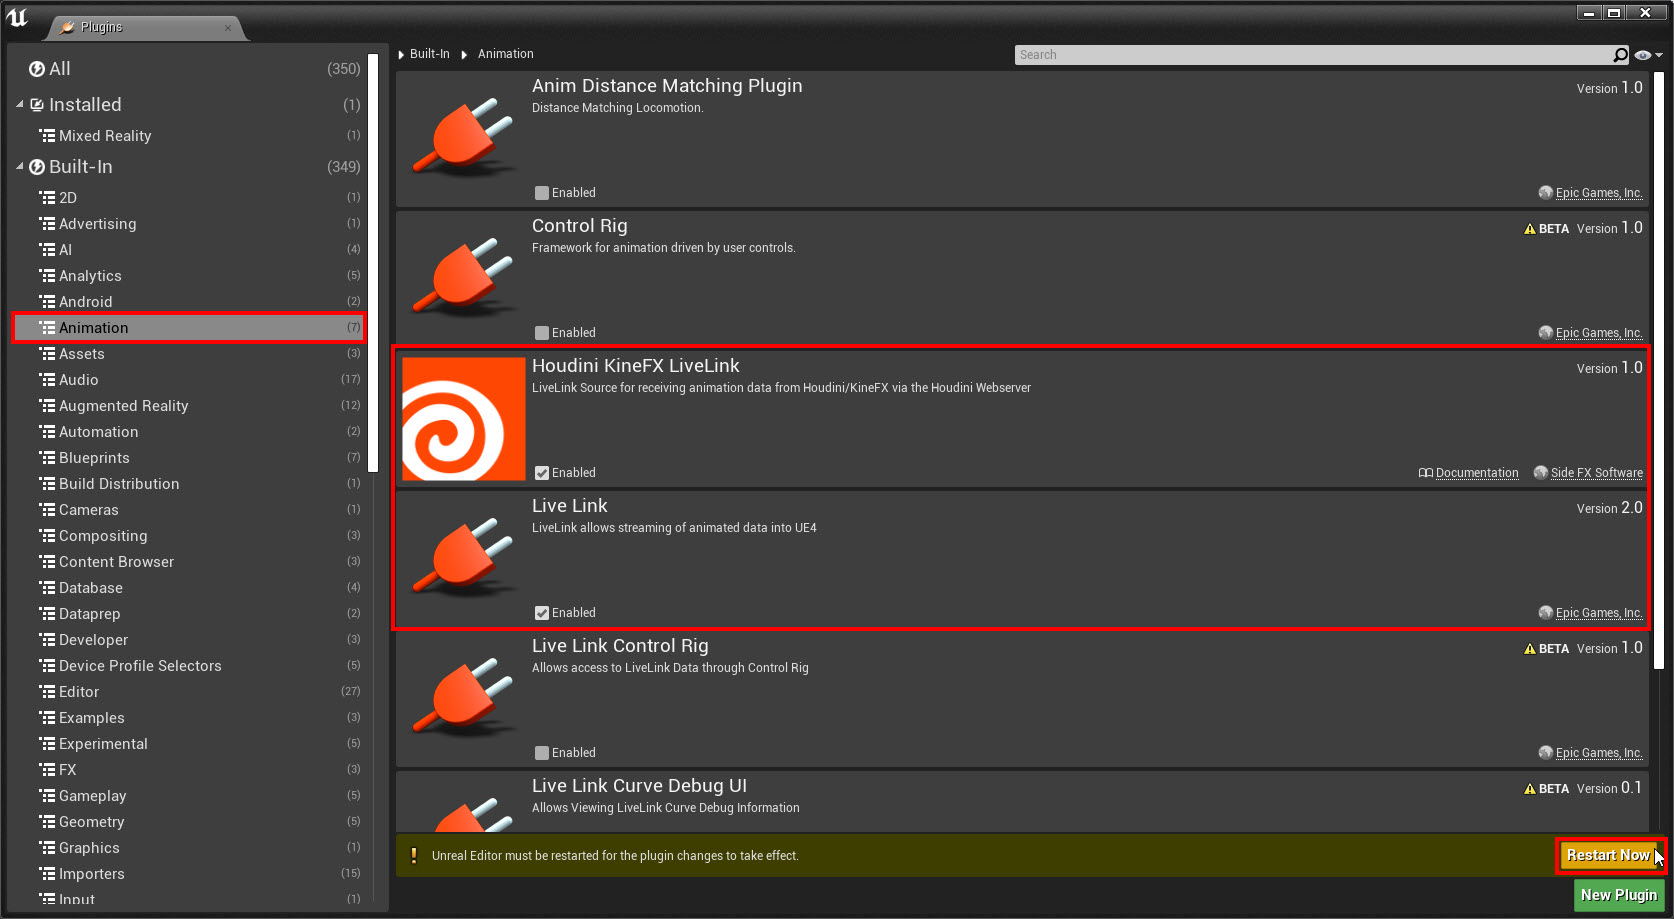
In the Plugins configuration window, navigate to the Animation section, turn on (enable) the LiveLink and Houdini KineFX LiveLink plugins, and then click Restart Now to restart your Unreal Editor session.
-
In Unreal Editor, load the Unreal skeleton or rigged character that you want to drive with your KineFX animated skeleton or character.
-
In the main menu, select Window ▸ LiveLink.
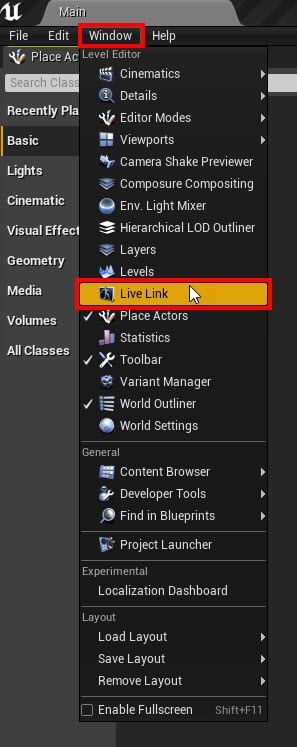
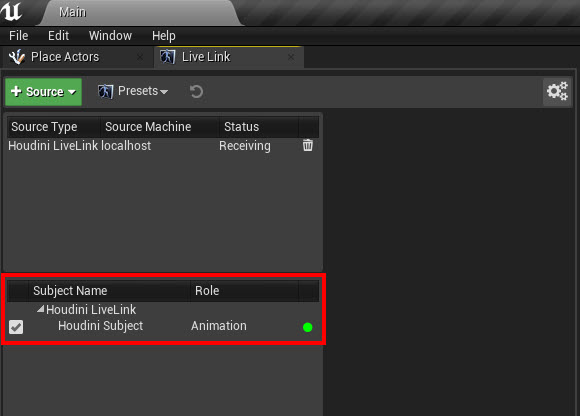
The LiveLink tab appears.
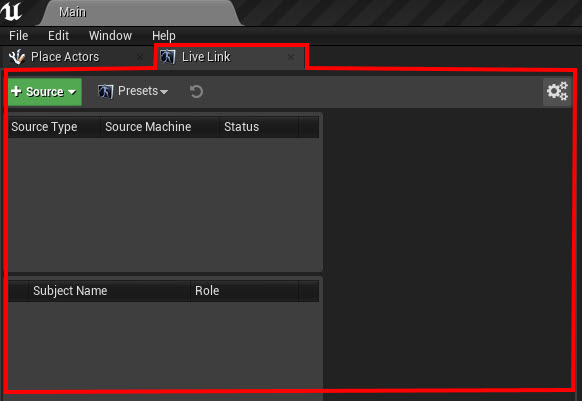
LiveLink tab in Unreal Editor -
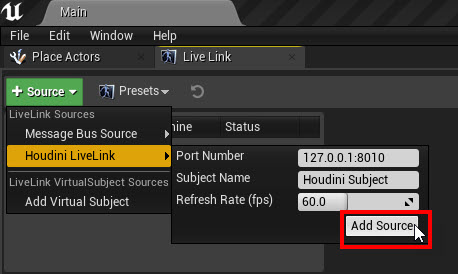
In the Live Link tab, click Source ▸ Houdini LiveLink.
-
In the Live Link information fly-out menu that appears, verify that the Port Number is a combination of the Port and IP Address on the
ue4_livelinkHDA. If it is not, replace it with the correct information.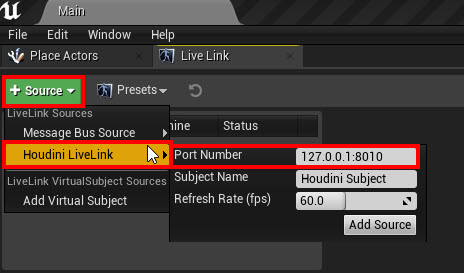
Example: LiveLink source Port Number in Unreal Editor
Example: ue4_livelink HDA Port and IP Address in Houdini -
Click Add Source.
If the subject appears below with a green dot next to it, then the connection between Houdini and Unreal was successfully established.
Note
The green dot may take a few moments to appear.
-
In the Preview Scene Settings tab, expand the Animation section and do the following:
-
Select Preview Controller ▸ Live Link Preview Controller.
-
Select Live Link Subject ▸ Houdini Subject.
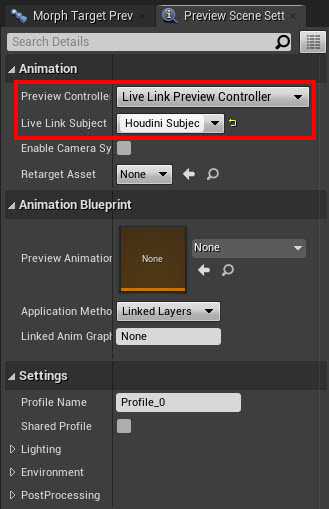
Preview Scene Settings tab in Unreal Editor The source animated skeleton or character in Houdini is now connected to the target Unreal skeleton or rigged character.
-
-
In Houdini, playback your animation.
The target skeleton or rigged character in Unreal is now driven by the source animated skeleton or animated character from Houdini.
Example: Houdini animated character driving the Erik’s animation in Unreal Editor. Character model courtesy of Christophe Desse.
Turn a SOP character into an HDA 
For an easy way to share your rigged KineFX character with other Houdini artists, you can turn your character’s node network into an easy-to-distribute custom node with its own set of parameters called an HDA.
This is useful when you need to hand off a rigged character to an Animator, but you want to make sure that the only part of the character’s rig that the Animator can access are its FK and IK control geometry.
How to 
-
In the Network Editor, add an

 Output SOP node to the end of each output stream in your KineFX character’s node network.
For example, if you have one set of controls for posing your character’s individual joints (FK) and one set of controls to pose your character’s limbs (IK), then add one Output node to the end of the FK controls network stream and another Output node to the end of the IK controls network stream.
This is not mandatory, but it is good style when preparing your network to become an HDA. The Output nodes make sure that the final output of your HDA’s network is shown in the viewport. Otherwise, your HDA may just show whatever node has the Display flag turned on in its network.
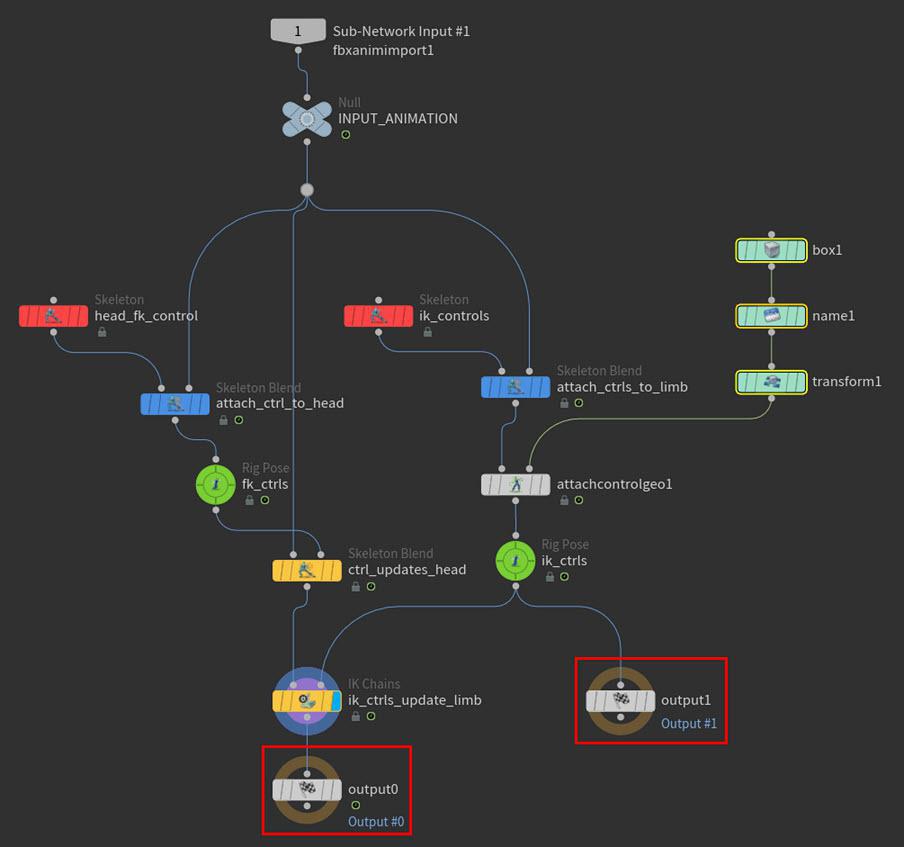
Example: Output nodes in KineFX character network -
For each controls stream in your KineFX character’s node network, select its
 Rig Pose SOP node, look at the node’s parameters, and make sure that there are Transformations multiparms for each of your character’s controls.
-
If there are any controls missing from the multiparms list, click the missing controls in the viewport. A Transformations multiparm is automatically created for each control you click.
-
For each multiparm, lock any of the transform parameters that you do not want the control geometry to affect.
Example: Creating a new Rig Pose node Transformation multiparm -
-
Select all the nodes for your KineFX character that you want to turn into an HDA and make them a subnet.
-
 -click the subnet and select Create Digital Asset from the context-sensitive menu that appears.
Your KineFX character’s subnet is now an HDA.
-
-click the HDA and then select Type Properties from the context-sensitive menu that appears.
The Edit Operator Type Properties window appears.
-
In the Edit Operator Type Properties window, select the Node tab, and then type
kinefx__rigposein the Default State property field.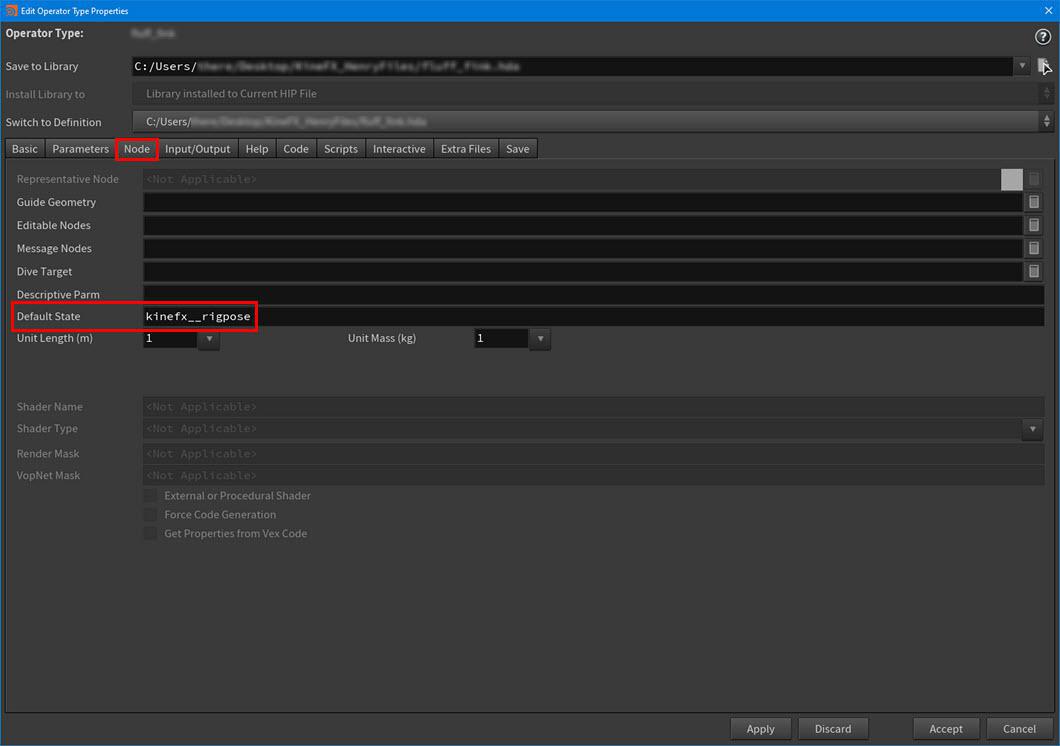
Example: Defining the Default State -
Select the Basic tab and then set the Maximum Outputs property to the number of Output SOP nodes in your HDA’s network.
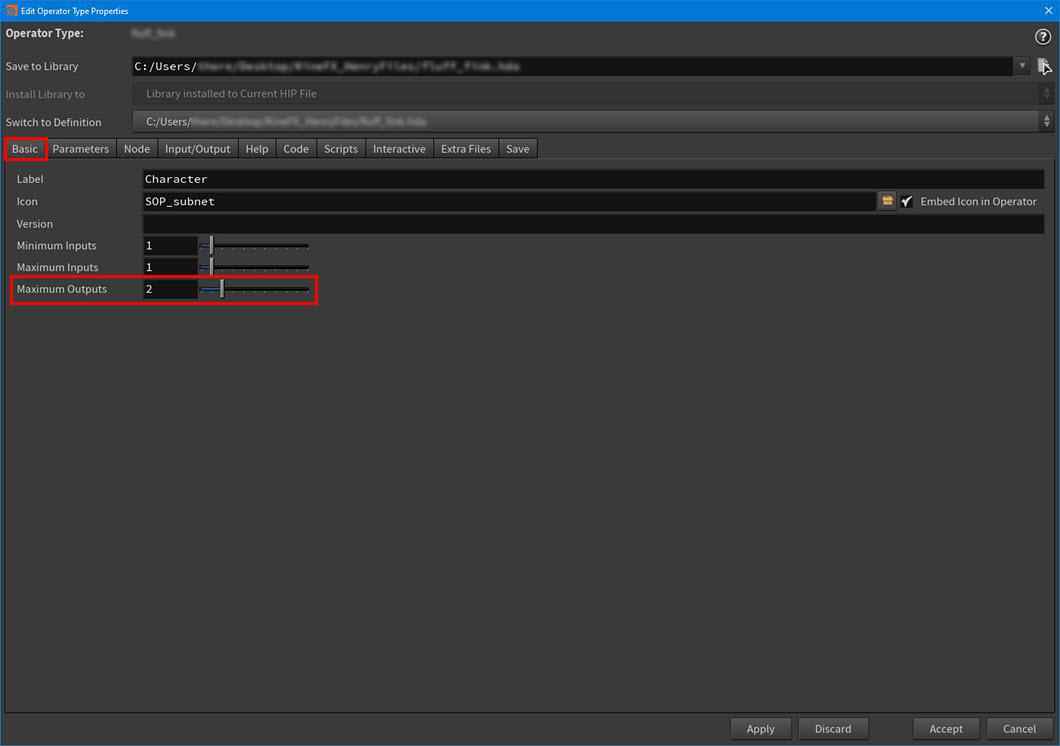
Example: Defining the Maximum Outputs -
Select the Parameters tab and then dive into your HDA.
-
For each
 Attach Joint Geometry SOP node’s downstream Rig Pose nodes, do the following:
-
 -drag the transform parameters that you want to manipulate with your controls to the Existing Parameters column in the Edit Operator Type Properties window.
 -
In the Parameter Descriptions area of the window, specify a meaningful Name and Label for the transform.
Example: Defining which character FK and IK controls are promoted to the HDA-level -
-
Click Apply and then click Accept.
-
-click your HDA and select Save Node Type from the context-sensitive menu that appears, and then -click your HDA again and select Match Current Definition from the menu.
-
Turn on the Display flag for your HDA’s subnet, click in the viewport, and then press Enter to enter the Rig Pose state.
You can now select and manipulate the controls for your HDA character and key its poses.
Example: Posing an HDA character with its control geometry