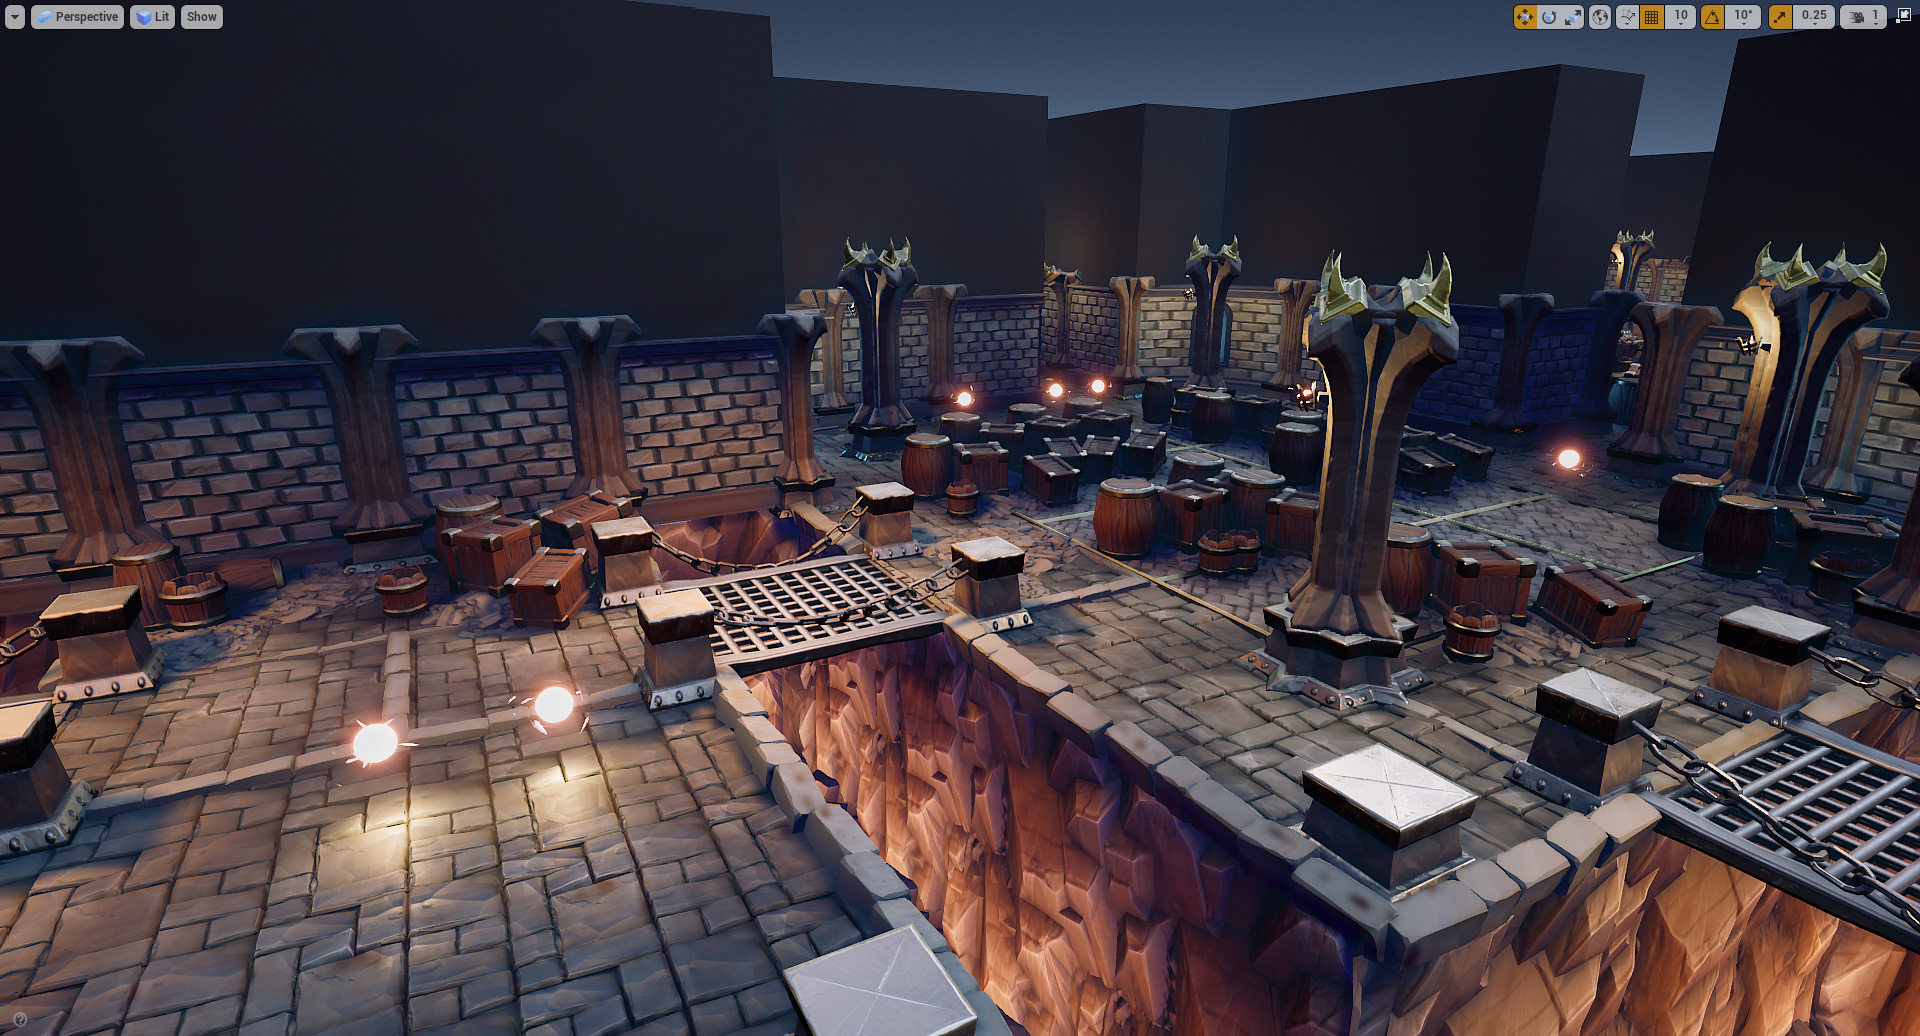
WFC DUNGEON GENERATOR
In this dungeon lesson, the WaveFunctionCollapse algorithm is used to define the base shapes of a game level then a Houdini Digital Asset is built to generate a variety of different dungeons in UE4. WFC technology can enhance your procedural level design by letting you drive the final output using a control setup to spawn a larger solution for your level. This control can be a bitmap image or attributes on points and both methods will be used in this lesson.
You can learn how to create some of the Dungeon Props in the following Tutorial.
NOTE: These lessons use the SideFX Labs tools. Make sure the latest release (non production build) is installed before doing this lesson.
The project files used for this lesson were created with Unreal 4.24
INTRODUCTION
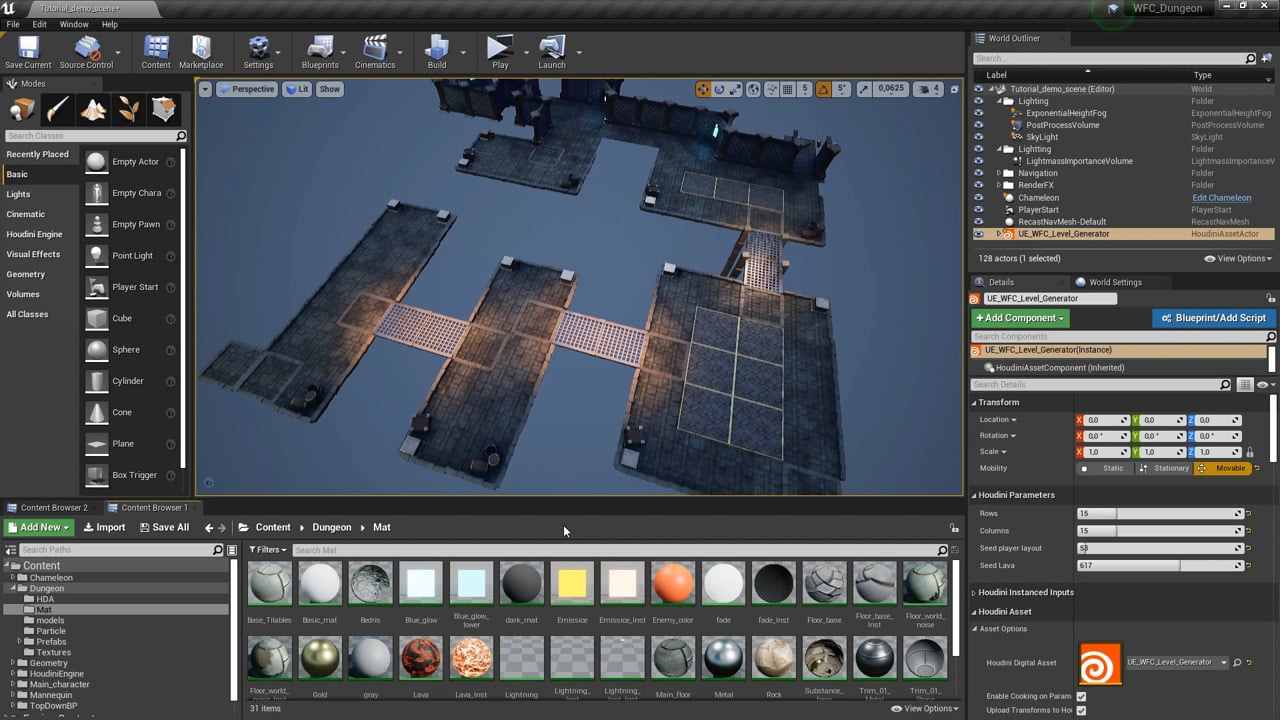
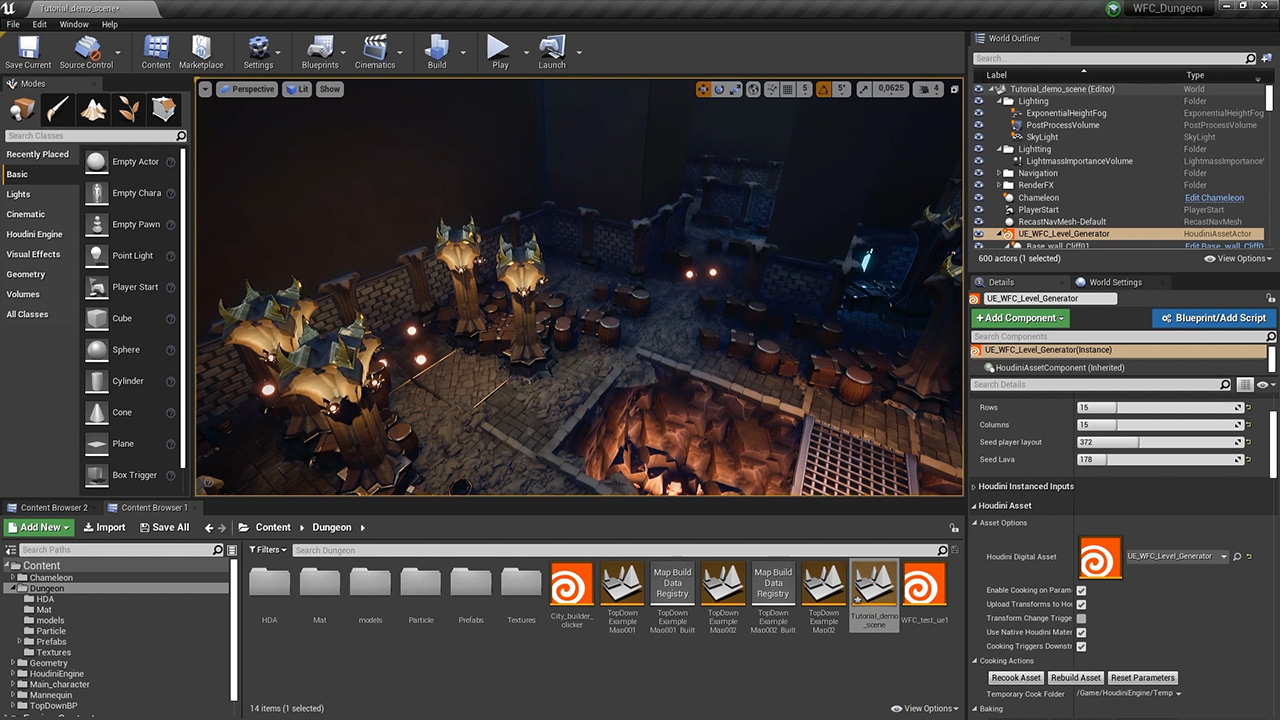
To start you will take a look at the completed asset in UE4 and explore some of its capabilities. You will then review how the tool is setup in Houdini to understand the techniques that will be taught in the following four lessons.
Length: 06:21
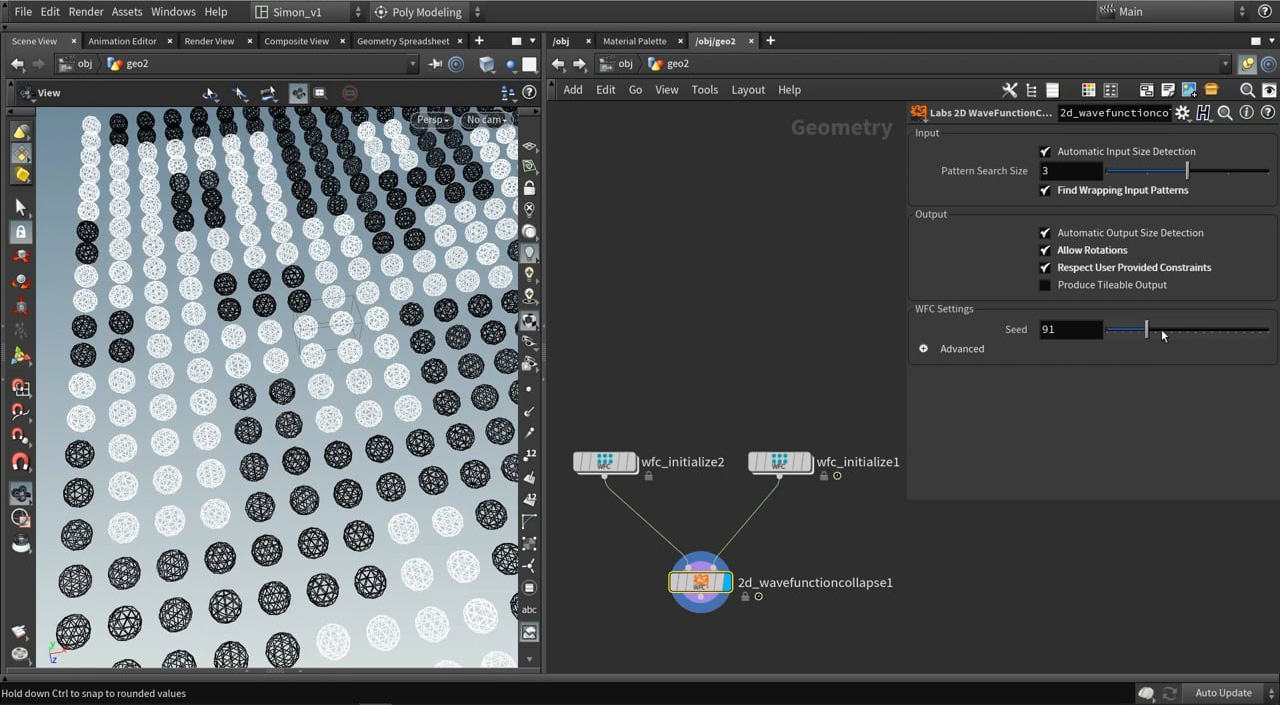
PART 1 | Wave Function Collapse Nodes
In this lesson, you will take a look at the WFC nodes available in SideFX Labs and how they work together to create patterns that can be used to generate a level. You will then use the Wang Tiles Sample node from SideFX Labs to populate the grid and create the basic shape of a finished level.
Length: 14:26
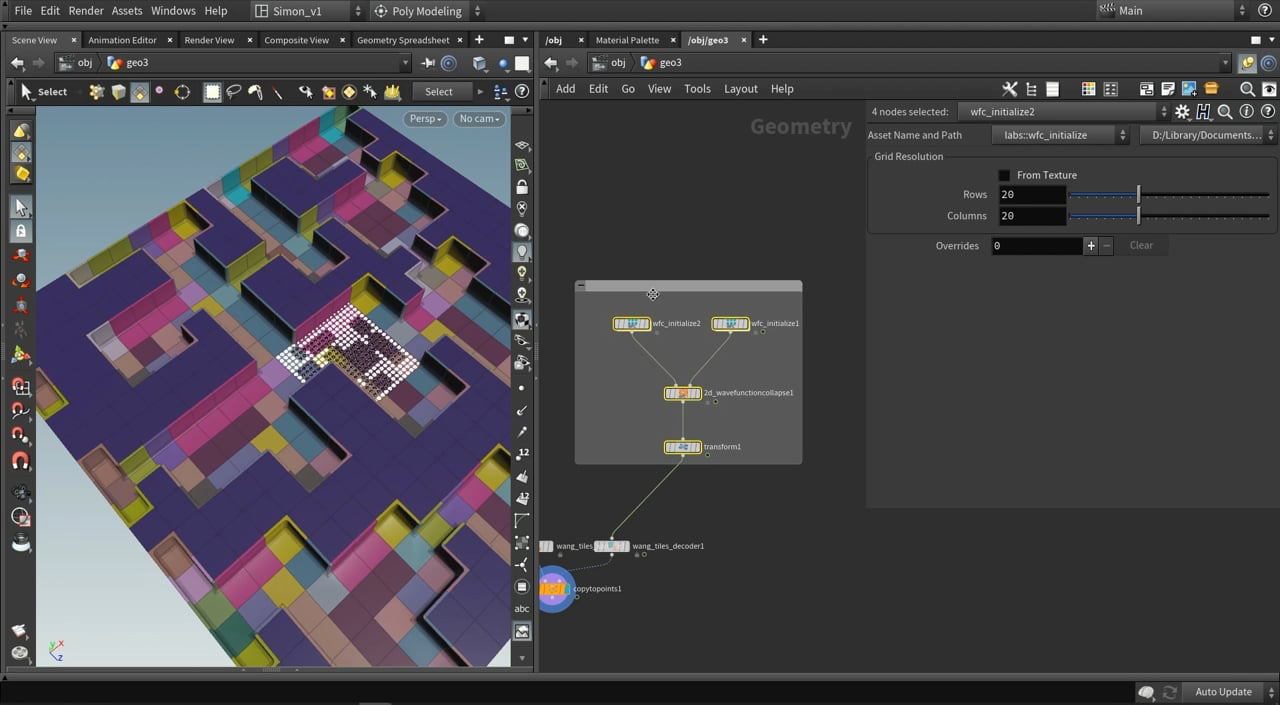
PART 2 | Basic Layout using WFC
Now that you have the points and can see the level taking shape, the next step is to start assigning references to geometry in UE4 so that the points can be populated with assets. This will involve tools such as the Attribute Value Replace node which allows you to more easily assign Blueprint references.
Length: 25:12
PART 3 | Add Walls and Cliffs
Because of their sideways orientation, the walls and cliff faces require a special setup. This involves creating points that have their normals aimed the right way and ensuring that these walls can be procedurally generated from the WFC level design.
Length: 18:39
PART 4 | Decorate the Rooms
To populate the level with columns, crates, debris and enemies, you will use the existing geometry and layer in a secondary WFC setup to procedurally generate the decorations. This demonstrates how WFC can be used in many different ways to create rich game levels that are ready for gameplay.
Length: 25:16
CREATED BY

COMMENTS
bazuka 6 years, 2 months ago |
Great tutorial my friend, thanks for sharing knowledge ;) with everyone
Cheers
BlissettDMB 6 years, 2 months ago |
Always Quality From SideFx and Seriously great quality work from #Simon Verstraete.
I've had a quick scan of this course, and I can definately see new quality tools and workflows that will aid My Pipeline.
Always top quality training.
Thanks Simon and Thanks SideFx.
affectreflect 6 years, 2 months ago |
Forever grateful Simon.Your lessons have helped so many artists all around the world.And thanks SideFx for the ever amazing Houdini.
AndreasNull 6 years, 2 months ago |
Great tutorial and tool!
For some reason, the WFC Initialize Grid does not have any kind of visualisation on my end.
I see only points.
Houdini Apprentice 18.0.416 + Lab 416 (local). Any advice?
dantarion 6 years, 2 months ago |
Click the eye thing at the bottom right of a viewport to go to Display Options. Go to the geometry tab, Particle section at bottom left, "Point Size" is what you want to adjust.
I was wondering this too, by default it was so small I couldn't tell if loading the texture worked right or not.
Simon_V 6 years, 2 months ago |
The visualization of the pattern should be there when used the latest version of Labs, non-production . Further these are guides coming from the HDA.
dantarion 6 years, 2 months ago |
I feel like I am doing something wrong. After the wavefunctioncollapse node, the Cd attribute no longer exists on my points. I can see that name gets assigned to 1_1_1 or 0_0_0 but it looks like the wang_tiles_decoder is expecting a Cd attribute.
I also had an issue where the sample image's jpg compression had some offwhite pixels in it? I'm not sure if user error but would love to finish this tutorial series!
dantarion 6 years, 2 months ago |
Fixed my issue by using an attribute copy node to copy the Cd attribute back to the points, matching with the name attribute :D
Kvale 6 years, 2 months ago |
If you download the latest "non production build" from github and install Labs manually, the WFC tools has been updated to include visualizer and Cd attrib.
Github:
github.com/sideeffects/SideFXLabs
Install guide:
www.sidefx.com/tutorials/sidefx-labs-installation/
gabhpe 6 years, 2 months ago |
Hello Simon.
Great tutorial!
Is it possible to use trace psd file, draw a bluepritn of a level, and use it with wang tiles decoder to detect the tiles?
I am trying to do so but without success.
Simon_V 6 years, 2 months ago |
Hey,
Yes that would be possible. I think you should look how the WFC_Initialize works as this does what you are looking for. It converts an image into points with colors that are used for the Wang decoder.
In general you can do a WFC_Initialize (this loads the image) then doing a Wang decoder then using the Wang samples to preview.
kuimig 6 years, 2 months ago |
GJ Simon
thx for share!
DirtPizza 6 years, 2 months ago |
Does anyone experience the WFC_Initilize from texture producing not whole numbers on the name attribute like "0.991_0.991_0.991"?
Simon_V 6 years, 2 months ago |
Yes, that can happen sometimes. I noticed it as well. What I often do is use the color adjustment node and use the contrast or other sliders to tweak it.
DirtPizza 6 years, 2 months ago |
Thanks!
DirtPizza 6 years, 2 months ago |
Is anyone experience Houdini crashes when trying to add Parameters to the HDA?
As soon as I add the Rows from the WFC_Initilize and hit Apply or Accept I get a crash.
30984: Fatal error: Segmentation fault
Saving application data to
DirtPizza 6 years, 2 months ago |
Caught signal 11
Traceback from 15056 ThreadId=0x00008b80
CURRENT THREAD 35712
+0x17628623 [GA_ATIString::setString] C:\Program Files\Side Effects Software\Houdini 18.0.287\bin\libGA.dll
+0x176209c4 [GA_ATIString::copyData] C:\Program Files\Side Effects Software\Houdini 18.0.287\bin\libGA.dll
+0x0d3fcf40 [SOP_AttribTransfer::xferAttribs] C:\Program Files\Side Effects Software\Houdini 18.0.287\bin\libSOP.dll
+0x0d3ff6df [SOP_AttribTransfer::xferGrpAttribs] C:\Program Files\Side Effects Software\Houdini 18.0.287\bin\libSOP.dll
+0x0d3f7478 [SOP_AttribTransfer::cookMySop] C:\Program Files\Side Effects Software\Houdini 18.0.287\bin\libSOP.dll
+0x0d94519d [SOP_Node::cookMe] C:\Program Files\Side Effects Software\Houdini 18.0.287\bin\libSOP.dll
+0x1807ee0a [OP_OTLOptions::operator!=] C:\Program Files\Side Effects Software\Houdini 18.0.287\bin\libOP.dll
+0x1808c0bf [OP_Node::cook] C:\Program Files\Side Effects Software\Houdini 18.0.287\bin\libOP.dll
+0x180aa01b [OP_Node::internalCookInput] C:\Program Files\Side Effects Software\Houdini 18.0.287\bin\libOP.dll
+0x180aebfa [OP_Node::lockInput] C:\Program Files\Side Effects Software\Houdini 18.0.287\bin\libOP.dll
+0x0d94ddb0 [SOP_Node::lockInput] C:\Program Files\Side Effects Software\Houdini 18.0.287\bin\libSOP.dll
+0x17f74f91 [OP_AutoLockInputs::lockInput] C:\Program Files\Side Effects Software\Houdini 18.0.287\bin\libOP.dll
+0x0d943702 [SOP_Node::cookGuide] C:\Program Files\Side Effects Software\Houdini 18.0.287\bin\libSOP.dll
+0x0d3480ce [SOP_NodeVerb::cookInputs] C:\Program Files\Side Effects Software\Houdini 18.0.287\bin\libSOP.dll
+0x0d9454ec [SOP_Node::cookMyselfAsVerb] C:\Program Files\Side Effects Software\Houdini 18.0.287\bin\libSOP.dll
+0x0d94519d [SOP_Node::cookMe] C:\Program Files\Side Effects Software\Houdini 18.0.287\bin\libSOP.dll
+0x1807ee0a [OP_OTLOptions::operator!=] C:\Program Files\Side Effects Software\Houdini 18.0.287\bin\libOP.dll
+0x1808c0bf [OP_Node::cook] C:\Program Files\Side Effects Software\Houdini 18.0.287\bin\libOP.dll
+0x180aa01b [OP_Node::internalCookInput] C:\Program Files\Side Effects Software\Houdini 18.0.287\bin\libOP.dll
+0x180aebfa [OP_Node::lockInput] C:\Program Files\Side Effects Software\Houdini 18.0.287\bin\libOP.dll
+0x0d94ddb0 [SOP_Node::lockInput] C:\Program Files\Side Effects Software\Houdini 18.0.287\bin\libSOP.dll
+0x0dd06b28 [SOP_Switch::cookMySop] C:\Program Files\Side Effects Software\Houdini 18.0.287\bin\libSOP.dll
+0x0d94519d [SOP_Node::cookMe] C:\Program Files\Side Effects Software\Houdini 18.0.287\bin\libSOP.dll
+0x1807ee0a [OP_OTLOptions::operator!=] C:\Program Files\Side Effects Software\Houdini 18.0.287\bin\libOP.dll
+0x1808c0bf [OP_Node::cook] C:\Program Files\Side Effects Software\Houdini 18.0.287\bin\libOP.dll
+0x180aa01b [OP_Node::internalCookInput] C:\Program Files\Side Effects Software\Houdini 18.0.287\bin\libOP.dll
DirtPizza 6 years, 2 months ago |
I narrowed this down to the attribute transfer node at 7:28 in Part 2 video.
If my display flag is set on that attribute transfer or lower the scene will crash when I click Apply or Accept on the HDA type properties.
Any ideas?
Simon_V 6 years, 2 months ago |
Update your Houdini to another version might help, if you still have a lot of issues contact support.
chris rogers2 6 years, 2 months ago |
i think the video uses houdini 18.0.391. Im trying to get it to work with 18.0.460, 18.0.416 had a lot of errors and showed nothing, .460 has errors but shows something.
If 460 doesnt work, ill download 391 and try.
chris rogers2 6 years, 2 months ago |
18.0.461 works for me (sidefx labs version 460).
earlier i did get errors but didnt follow the directions, so it might have been user error.
thanks for the tools and tutorials Simon!
DedRed 6 years ago |
It was broken in 18.0.460 (labs 460) for me as well. Specifically the wang tiles sample came in rotated incorrectly (and inconsistently) when they were copied to points. I updated to the lasted daily build (18.0.496) and it fixed it.
gabhpe 6 years, 1 month ago |
Hello Simon.
Is there a way to instance an actual HDA instead of a prefab?
Simon_V 6 years, 1 month ago |
Hey, There are some options to use another HDA as input but it is limited.
I recommend baking the hda and use that geometry in the other HDA.
dipaolo21 6 years, 1 month ago |
Hello Simon, How did you get the grid to display as Spheres?
Simon_V 6 years, 1 month ago |
Hey, Do you mean at the WFC nodes? They are now grids instead of spheres
anon_user_54997945 6 years, 1 month ago |
Hi Simon,
Thanks for the amazing tutorial !
I have started to have a look how it works and I ran into problems.
- I can see only the proxy dungeon tiles in houdini and unreal , where can I replace them and how with proper props ?
- Is there a way to see how the wang sample file content looks like (inside the stash node)? (naming convention / structure etc.)
If you could help with this that would be awesome !
Simon_V 6 years, 1 month ago |
Hey, The project uses the wang nodes as templates. This is a great way to check if the layout is working. Some of the models used in the videos have also a tutorial
https://www.sidefx.com/tutorials/dungeon-props/
The idea is that you can use this setup to plug in your own models.
The wang sample are all stored in the stash, so it loads fast. The wang models itself are controlled by the 'name' attribute found in the primitives attributes.
These are not random numbers stored in that attribute this is based on the blob tileset patterns. See image here to what each number reference to https://imgur.com/a/FtC68GM
Use this image as well in the first part of the video to explain a bit more about the wang tiles.
chloesun 6 years, 1 month ago |
Hey Simon, thanks for the awesome tutorial! I wonder what rules do you need to keep in mind when designing your own modules, especially when thinking about organic shape...also, for now, SideFX labs only have 2d_wfc node developed, is 3d_wfc node/tools WIP?
Simon_V 6 years, 1 month ago |
Hey, What I did to make my own tiles is to export the wang tiles and use that as my guides. From there I fill the wang tiles with modular models in game engine. (based on reference or what feel right)
Further for the 3D_WFC node, I'm not sure if this is currently in development. But definitely request it here https://www.sidefx.com/bugs/submit/ ! (you can submit bugs here or request features)
DedRed 6 years ago |
There seems to be a bug between the 2d_wavefunctioncollapse and wang_tiles_decoder nodes. When "Allow Rotations" is enabled on the wfc node by the time the wang tiles sample node gets copied to points they come in rotated incorrectly and inconsistently. The main changes I saw in the attributes when turning "Allow Rotations" on and off were in the transform attribute. As a work around I just deleted the transform attribute after the 2d_wavefunctioncollapse node. That seems to solve it, but I don't know if the transform attribute might be useful for anything else using this workflow. Using 18.0.496, labs 496-embedded
CYTE 5 years, 8 months ago |
Hey Simon, thank you for that great tutorial series! Do you know how one would set up a blueprint communication to the hda inside unreal? I want a new random seed for my level each time the map gets played inside unreal. Any idea on how to do that?
Cheers
CYTE
Simon_V 5 years, 8 months ago |
The Houdini plugin for Unreal engine is used for editor time only not on playtime. The Houdini helps building your levels faster and save out the result. You can save out multiple maps and load a random map on play.
CYTE 5 years, 8 months ago |
Thank you for the clarification!
alex_posto 5 years, 7 months ago |
Hey Simon, thanks for this amazing tutorial!
I'm pretty new to Houdini and I was thinking how should I modify this system to support more than one level ? For example I want to build a castle and for this I need to have more than one level so that I can build vertically as well.
Thanks a lot again! :)
alex_posto 5 years, 7 months ago |
I read the comment again and realised is not that clear :/ By "level" I mean vertically stacking stuff on top of another :)
Simon_V 5 years, 7 months ago |
Ideally the WFC node could work in 3D but at the moment it is only working in 2D space. What you can do is look over each floor/grid and in the loop use the WFC nodes and the Wang node to calculate the pieces.
alex_posto 5 years, 7 months ago |
Thanks for the reply! Will give it a try :)
grefsen 5 years, 5 months ago |
PSA to anyone fairly new to Houdin/UE4 following along, it seems like the prefabs (lava, floor, walls etc) that are referenced throughout this project are not included in the downloaded files, which makes sections like around 20 minutes where Simon is directly referencing prefab artwork in UE4 a bit of a speed bump in following along. The sample Houdini project doesn't provide much clarification either since (from what I can tell as a Houdini newbie) it uses a different approach (no splitting lava/non-lava), making it a bit difficult to fill in the gaps. I am not quite sure what the intention is here, should we source other premade artwork to follow along the tutorial or should we ignore these sections in the video and instead reference the example network in the General Demo hda?
Feoul 5 years, 5 months ago |
Hi Simon, great tutorial, but I got a quick question. When placing the walls around the outer perimeter, the objects did not orientate to the normals. So I did a bit of research and and ended up writing a simple VexExpression: "@orient = dihedral({0,0,1},@N);" which fixed the issue. I'm new to Vex, but as far as I can tell this forces the orientation to be perpendicular to the Y axis, along the Z axis?
I guess I made a mistake somewhere and this Vex line corrected it, but I can't see where, any ideas on what might have prevented the walls from orientating themselves to the normals without the Vex code?
I'm using version 18.5.462
Cheers,
James
Simon_V 5 years, 5 months ago |
So by default when copying models on a point, it will look to the Normal and Up Vector (which is @up and default {0,1,0}). So make sure these attribute are correct and not conflicting with anything, for example when using a merg node some value might be wrong after merging.
Also good to know is that if you use the @orient attribute for rotations, then this will have priority over the Normal. What I often recommend is converting the Normal to orient, you can easily to this in VOPS. ( image of that https://imgur.com/a/4IBQmvJ )
Feoul 5 years, 5 months ago |
Thanks for the info, and apologies for the slow response! This is really useful for a newbie, your tutorials are some of the best out there right now.
WackyWhisker 5 years, 2 months ago |
Great stuff.
Is this only useful for saving some time for the initial level creation or can Houdini actually be used to re-generate the layout when, let's say, the player dies and tries again?
Simon_V 5 years, 2 months ago |
Houdini is used to create levels faster and save/bake them in a scene (Only editor , not in runtime). You can generate a variation of maps with Houdini, save them and load a different map when player dies.
WackyWhisker 5 years, 2 months ago |
Thanks for the prompt reply.
That's too bad. But yeah it should be possible to make a mixture of some sort of system that spawns different rooms or levels that in turn got created with the help of Houdini.
banshay 5 years, 2 months ago |
Can you create the tiles in unreal and import them again in houdini? I intend to use Megascan assets to create the tiles, but I'm not entirely sure on how to do it.
8fdf233df9f941bf9b0dc205d 4 years, 1 month ago |
How can I get the UE texture;In the download, I have found nothing
preuss_evan 3 years, 4 months ago |
hello, thanks so much for the tutorial, at one point in the tutorial you mentioned that you could delete smaller rooms created via collapse or add bridges to them. I was wondering what the process to add bridges might look like.
Please log in to leave a comment.