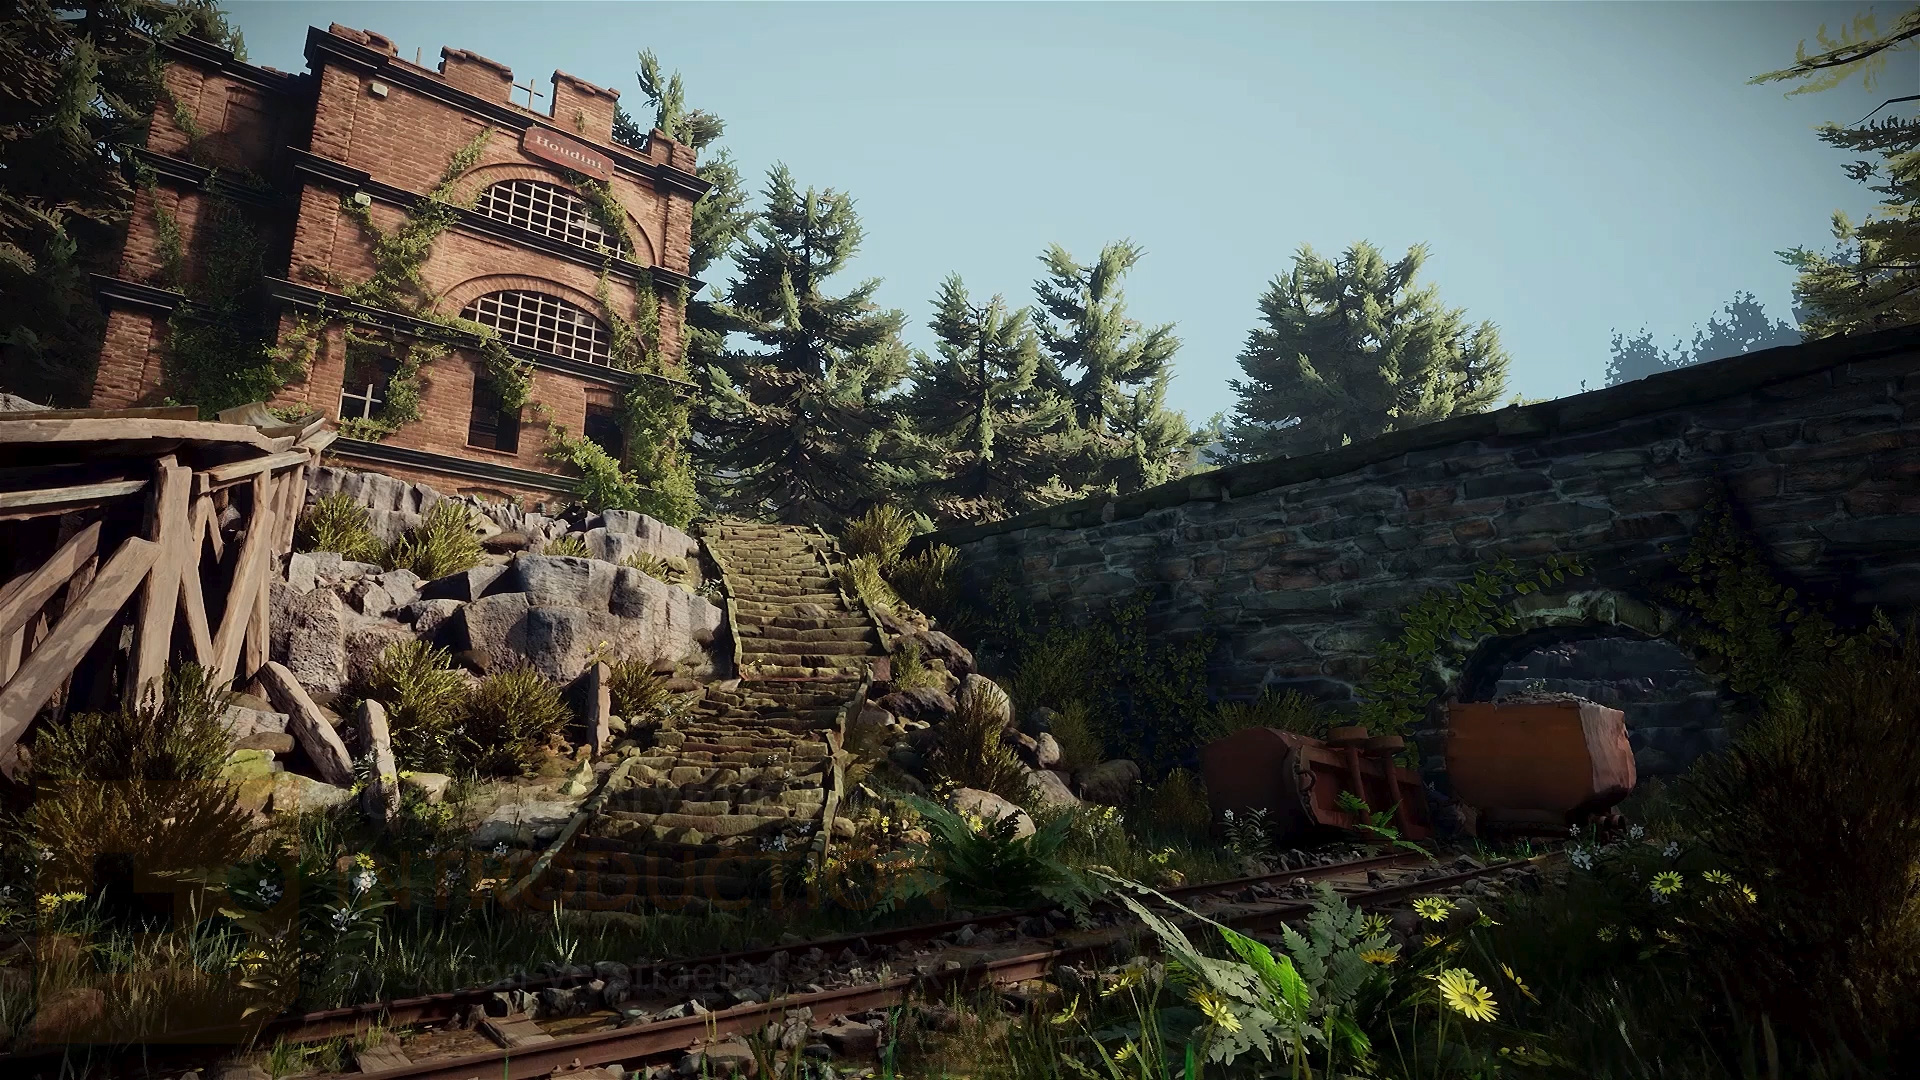
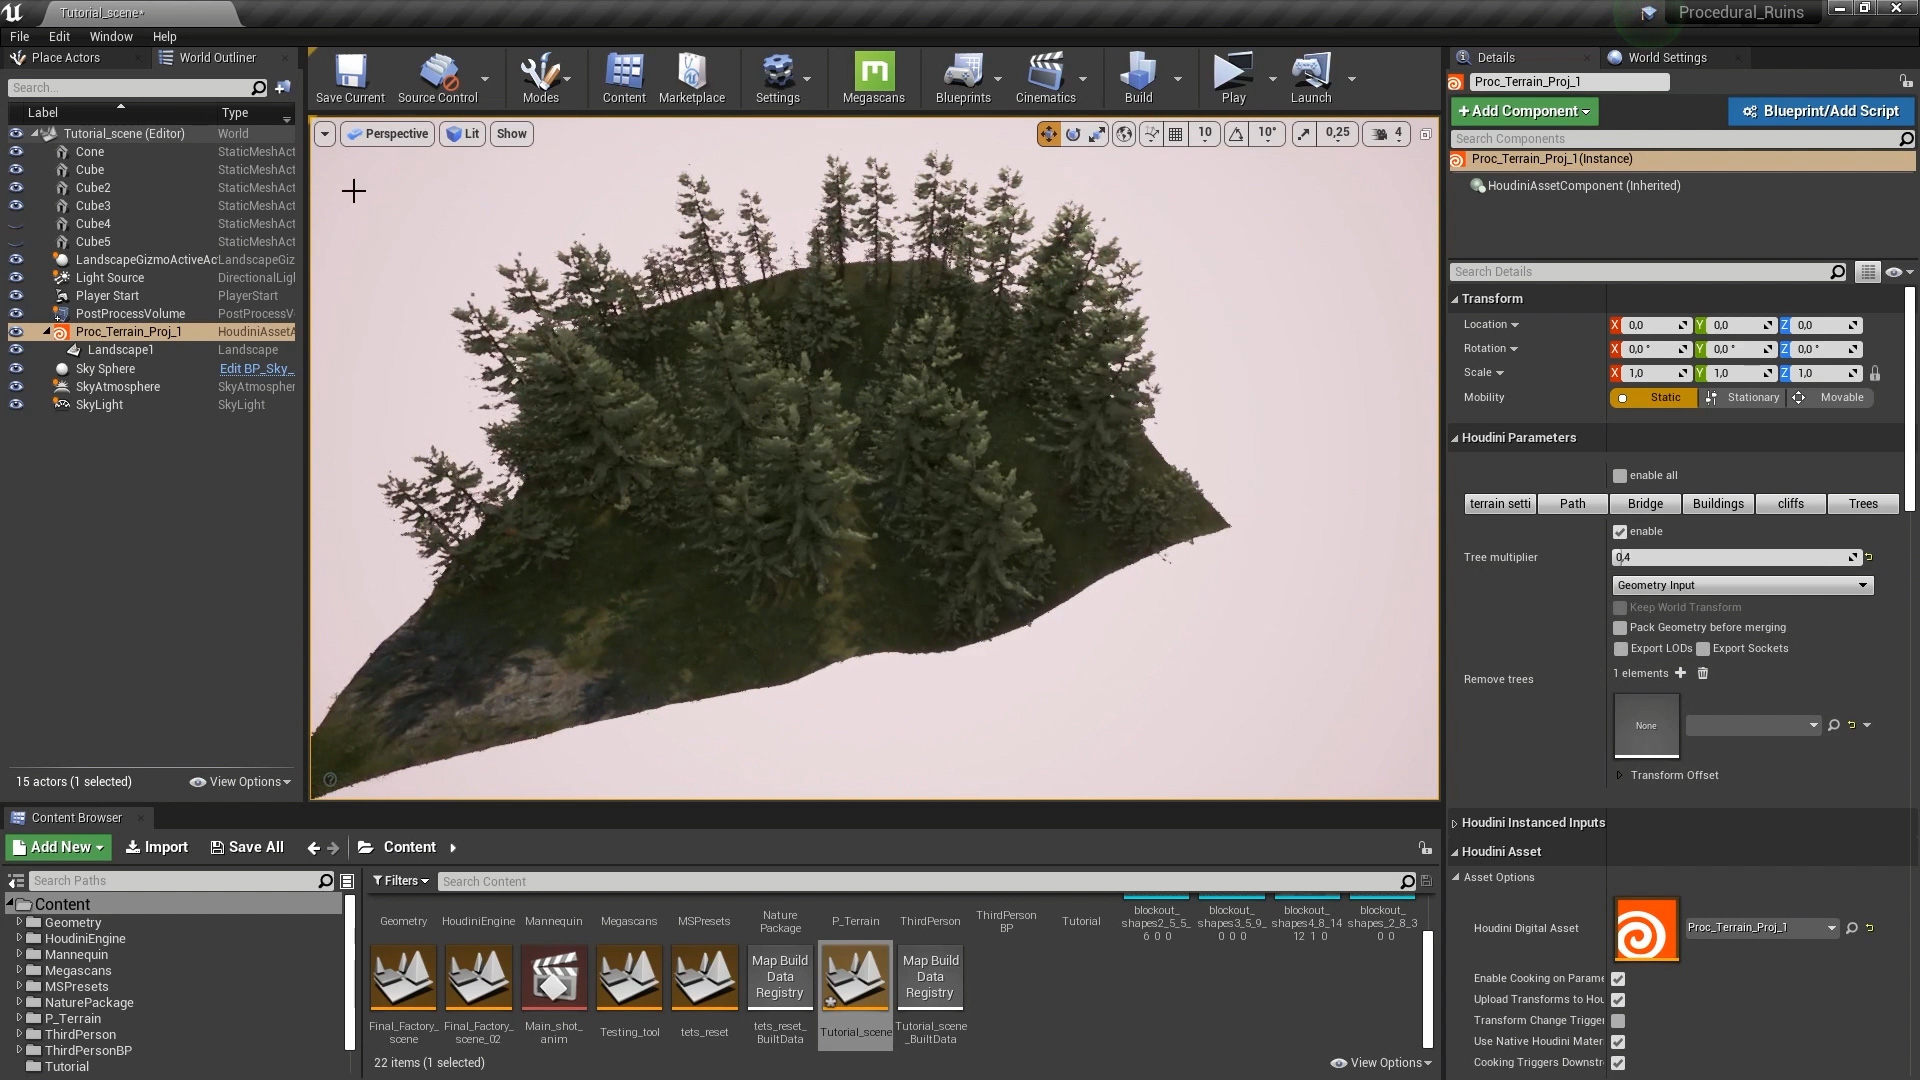
To create game levels, designers like to start with blocked out shapes then layer in more detailed game art. Using procedural techniques in Houdini, you can learn how to put your whole level design logic into a single digital asset for use in UE4. Using geometry for blocking out the level, you will build an asset that creates the terrain then adds details with a series of nested assets that define the different parts of the level. Controls will be available in UE4 to tweak the results. When you are finished, you will have a high level tool that can be used in UE4 to create many level variations. You can also scale up to create even bigger levels.
BEFORE DOWNLOADING:
These project files contain Quixel Megascan assets made available courtesy of Epic Games. By downloading these assets, you are agreeing to the terms of the UE4 EULA. These assets are intended for learning purposes only. To use Quixel Assets in your own projects, go the the Quixel website for more information such as the recent announcement that the Megascans library is completely free for use with Unreal Engine.
NOTE: These lessons use the SideFX Labs tools. Make sure the latest release (non production build) is installed when doing this lesson.
INTRODUCTION
Explore the finished Level Builder asset and see how you can use it to create complete levels using a single curve. You can then peek into the tool to better understand how it works and how all of the pieces come together to create a rich game environment.
Length: 04:44
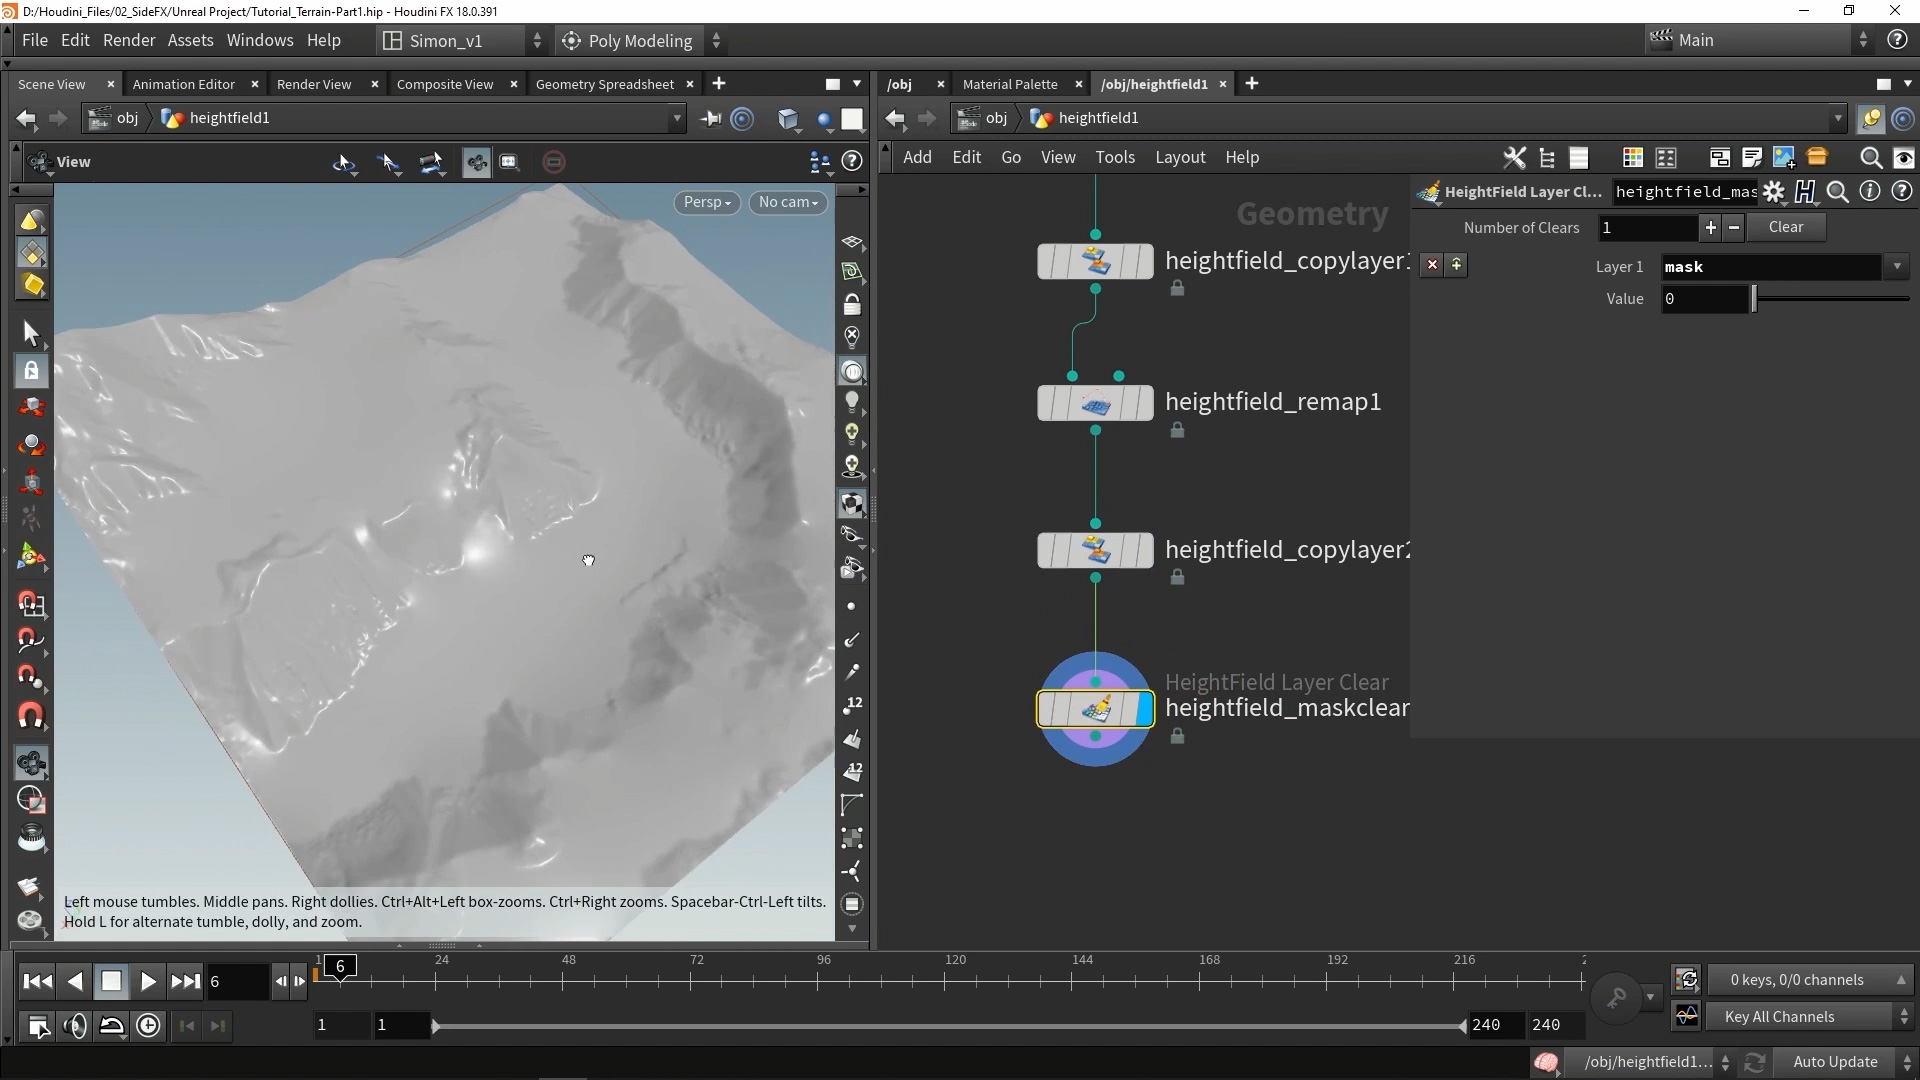
1 | Create the Base Terrain
In this video, the base terrain will be created for the project. Learn the basics of heightfields in Houdini and how they are used to make the terrain. Build a system that lets designers and artists shape their own levels quickly and efficiently.
Length: 26:06

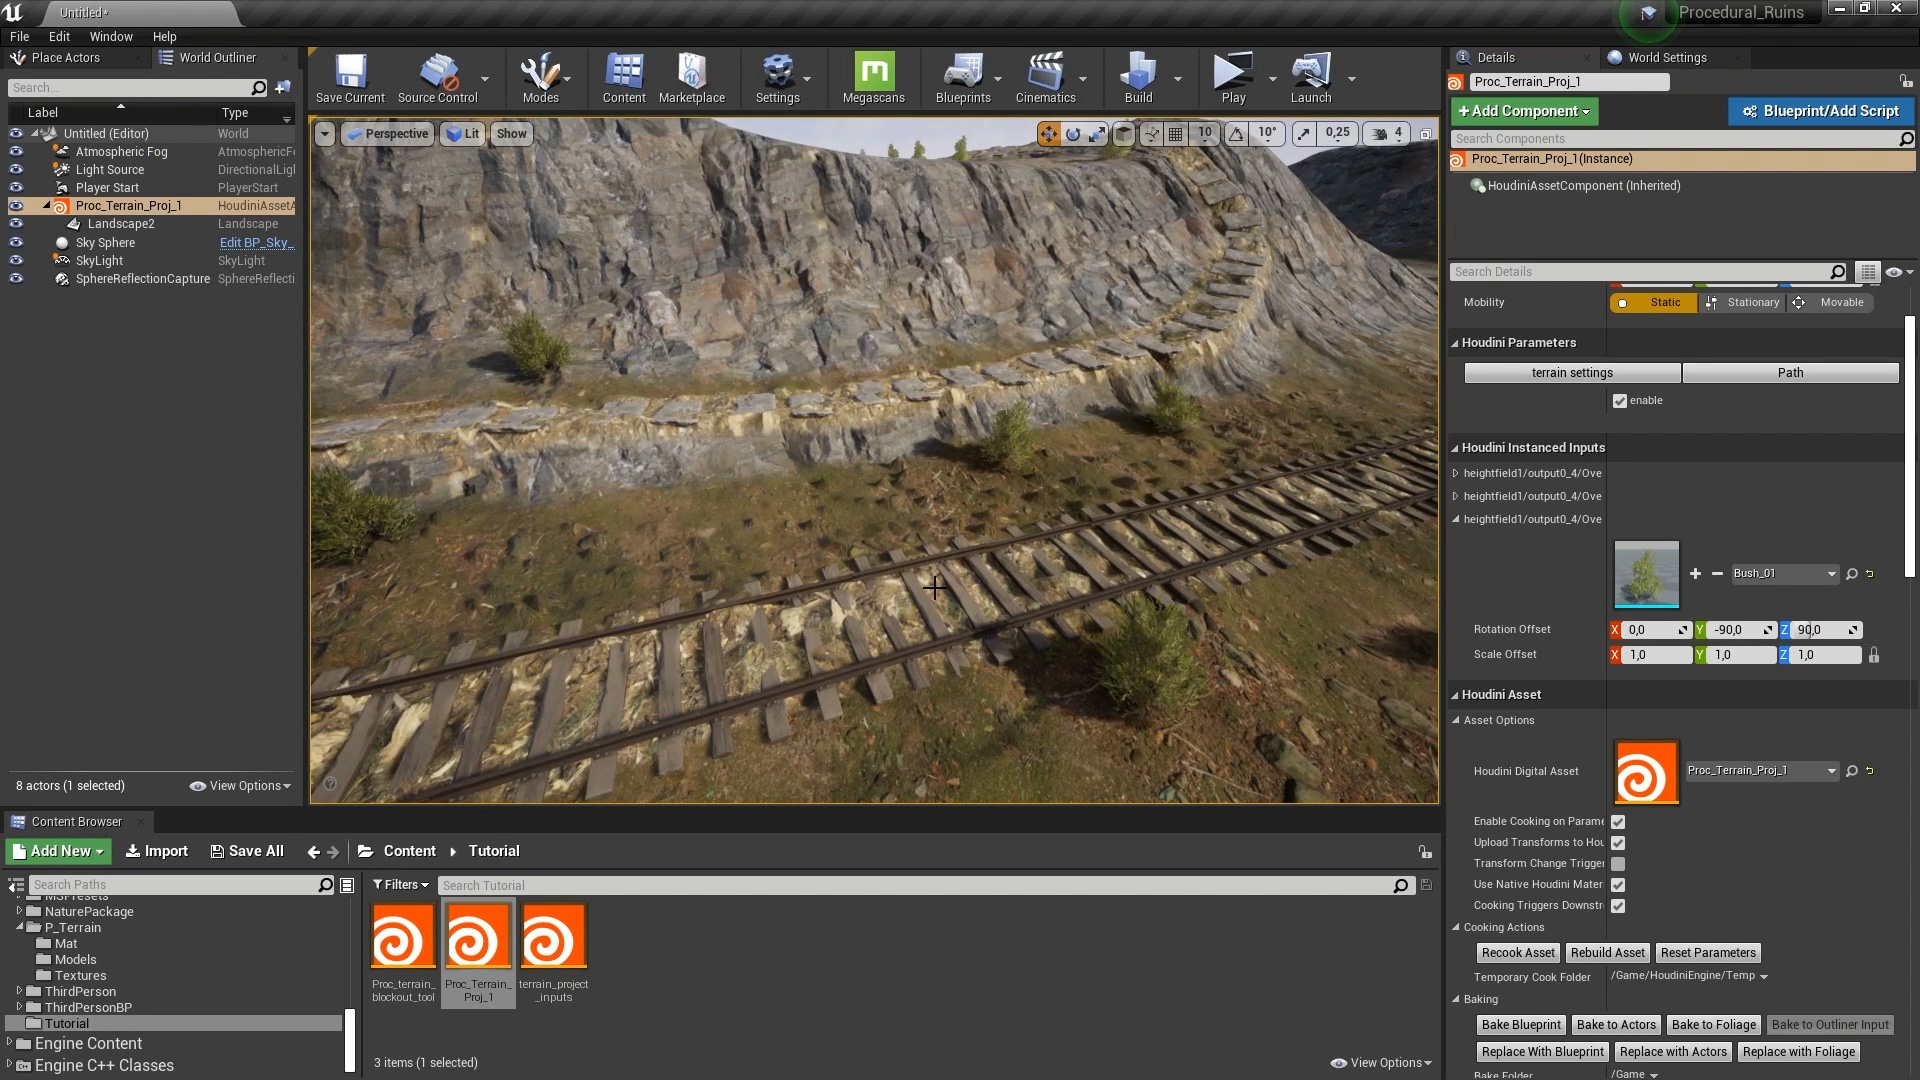
2 | Open Terrain in UE4
With the base terrain created, it is time to bring the asset into UE4. With the Houdini Engine plugin you will load in the full terrain with layers. Custom inputs will be used to add flexibility to the tool.
Length: 15:27
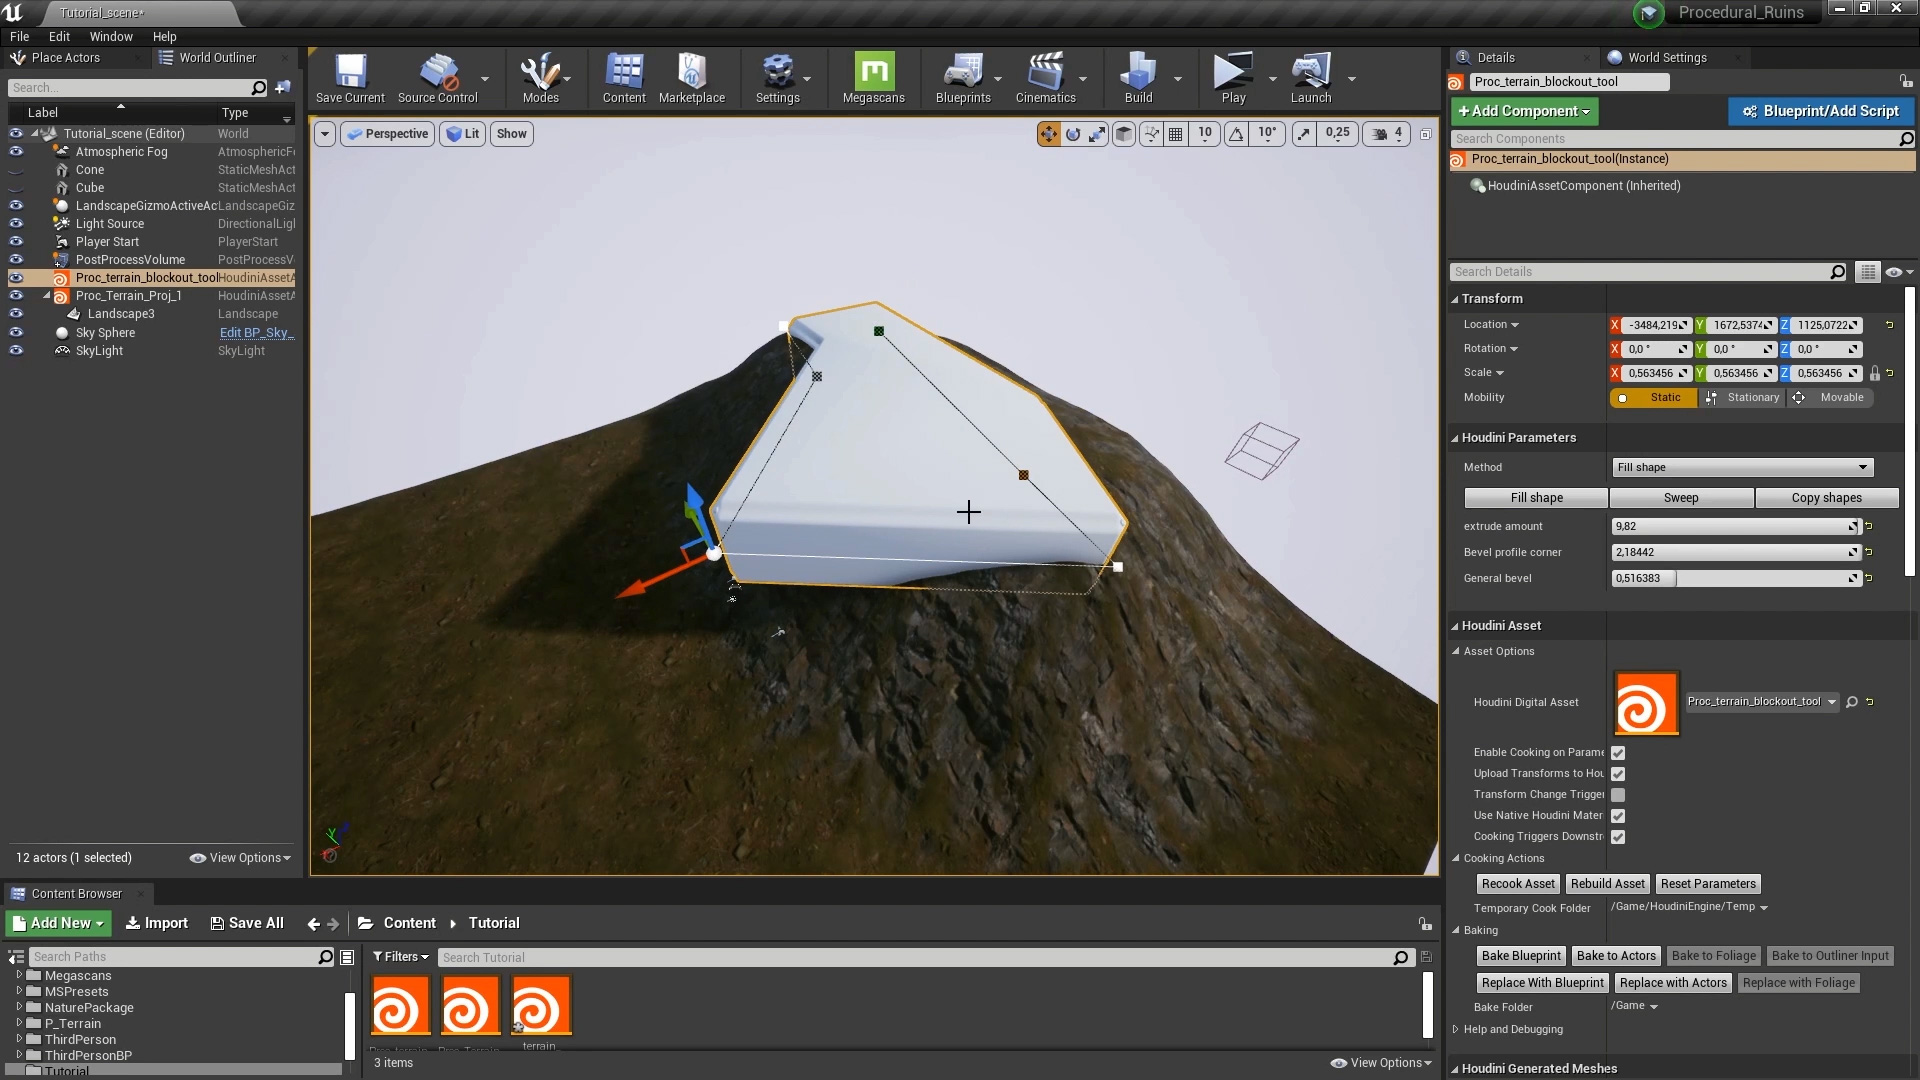
3 | Create Blockout Tool for Terrain
Now that you can use custom inputs for the terrain, you will create a blockout tool. This tool generates custom shapes based on lines. This makes it easy to add specific shapes or to scatter models around. The resulting shapes will then be used to influence the shape of the terrain.
Length: 23:14
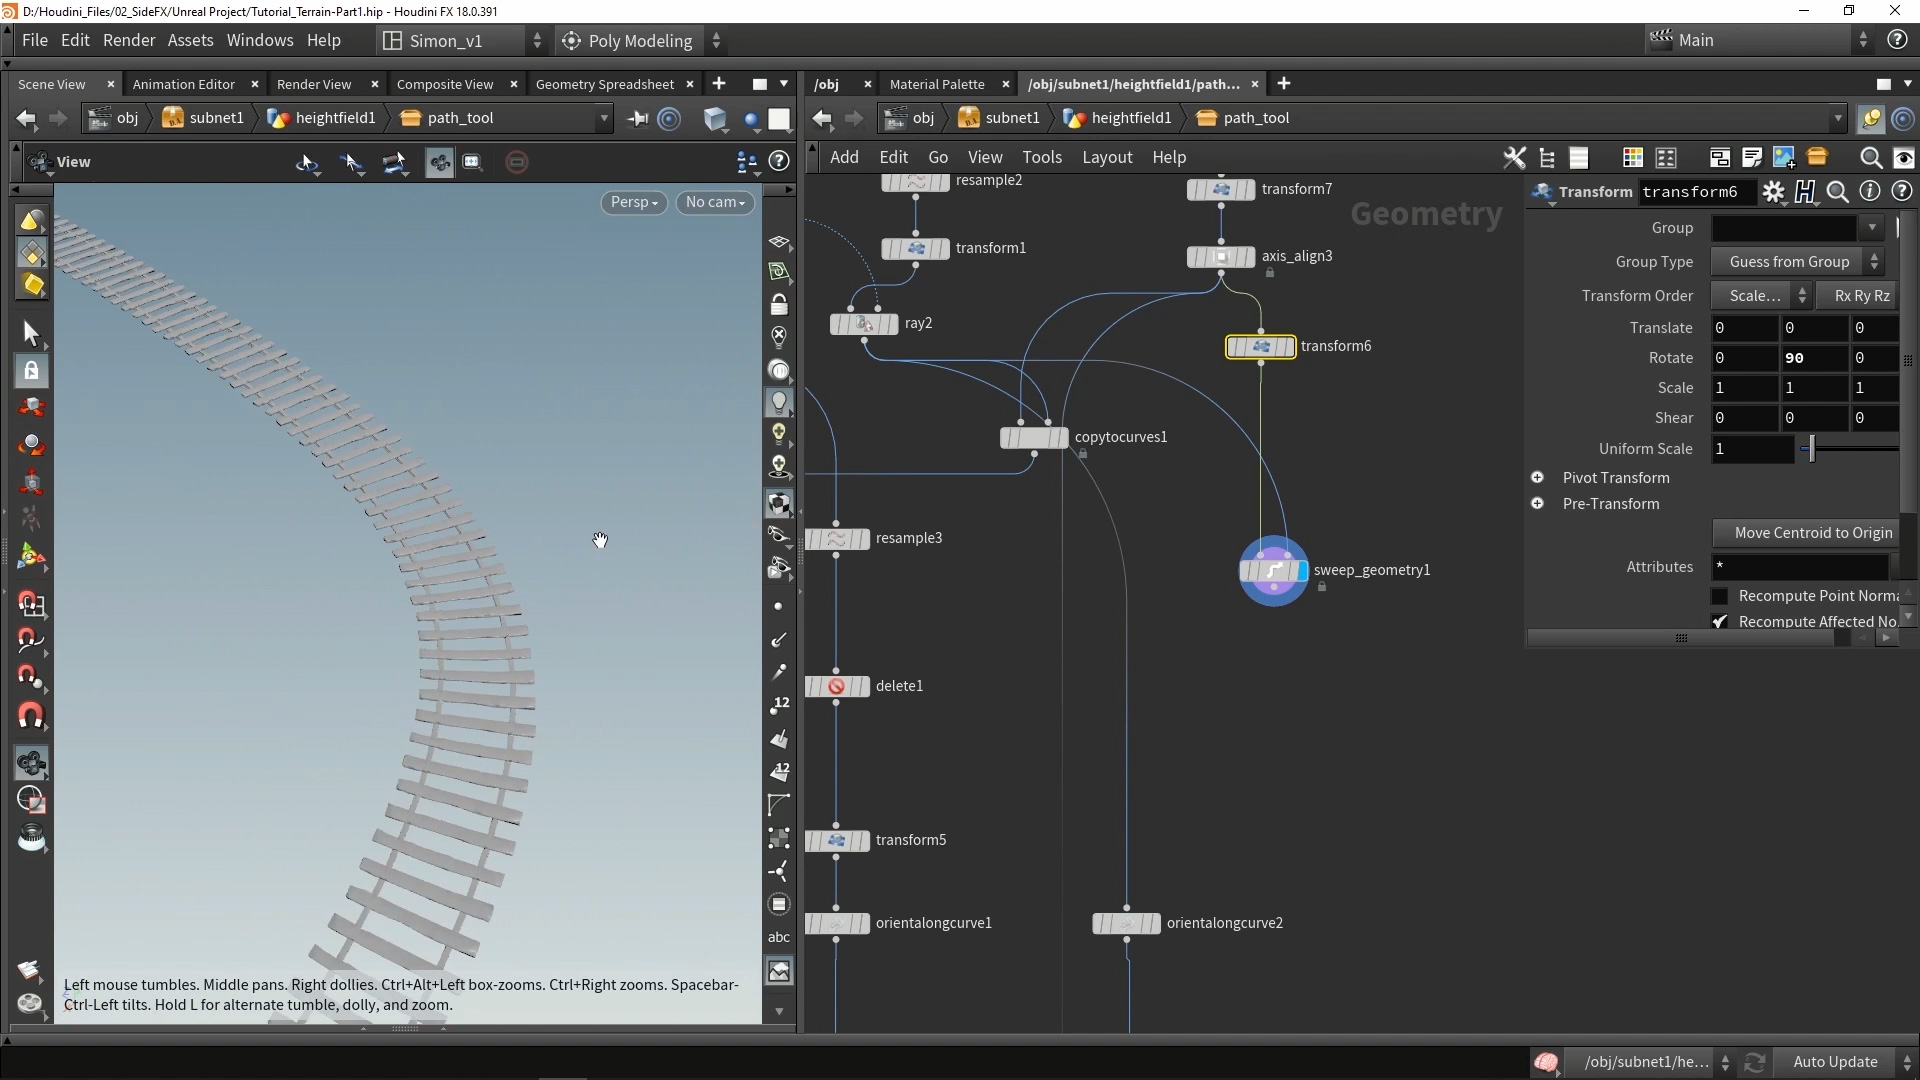
4 | Create the Path and Railway
The first detail to add to the scene will be a path and railway. This is a digital asset derived from the terrain and curves used to generate a path and railway. Learn how to integrate these models nicely into the terrain.
Length: 37:17
5 | Open the Path and Railway in UE4
Once the logic of the path and railway are set, you can bring it into UE4. Start by adding instances to the models for the path and the railway and making the curves editable. Rebuilding the asset in UE4 will display these curves and they can be used to place and control the path and railway.
Length: 13:46
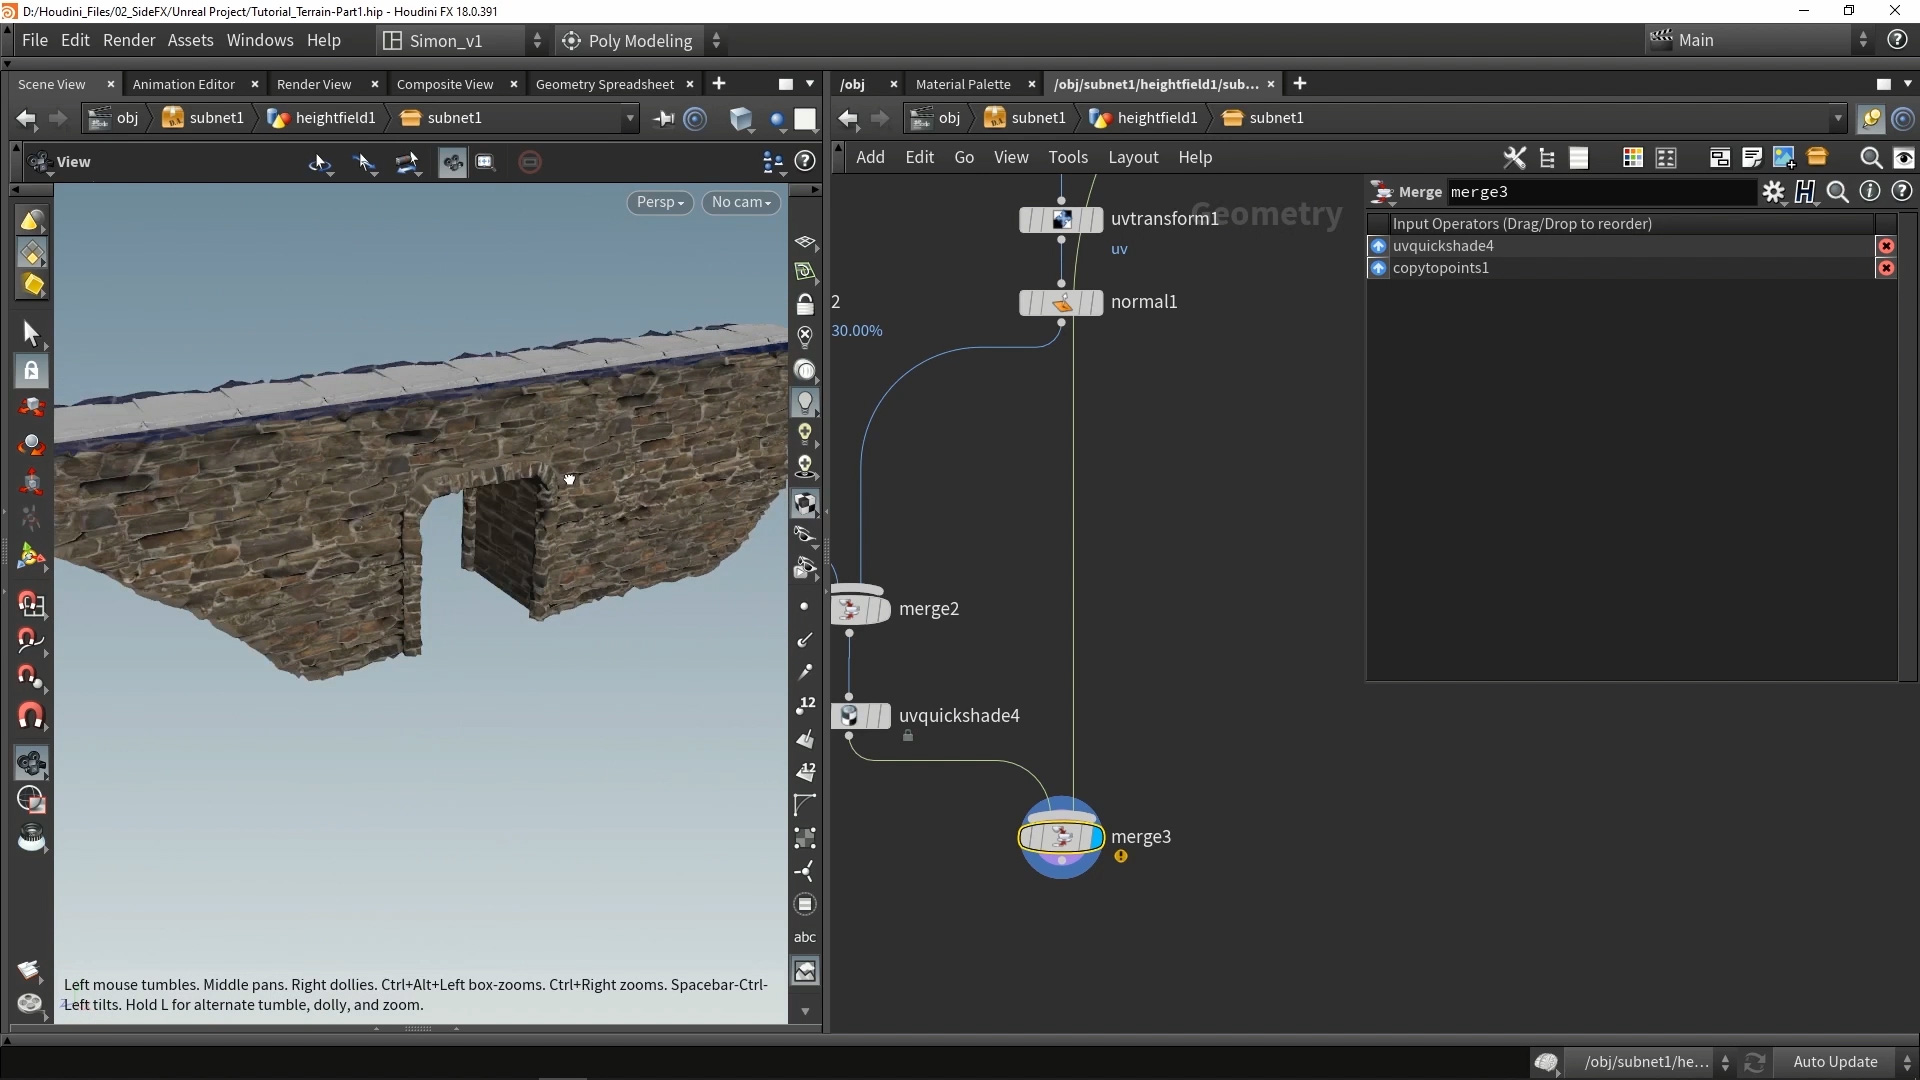
6 | Model the Bridge
The next part is to create a bridge for the level. This bridge is based on cubes which can be controlled by the level designer to place and shape the bridge. You will also learn how to add detail the bridge and ivy growing along the geometry.
Length: 35:13
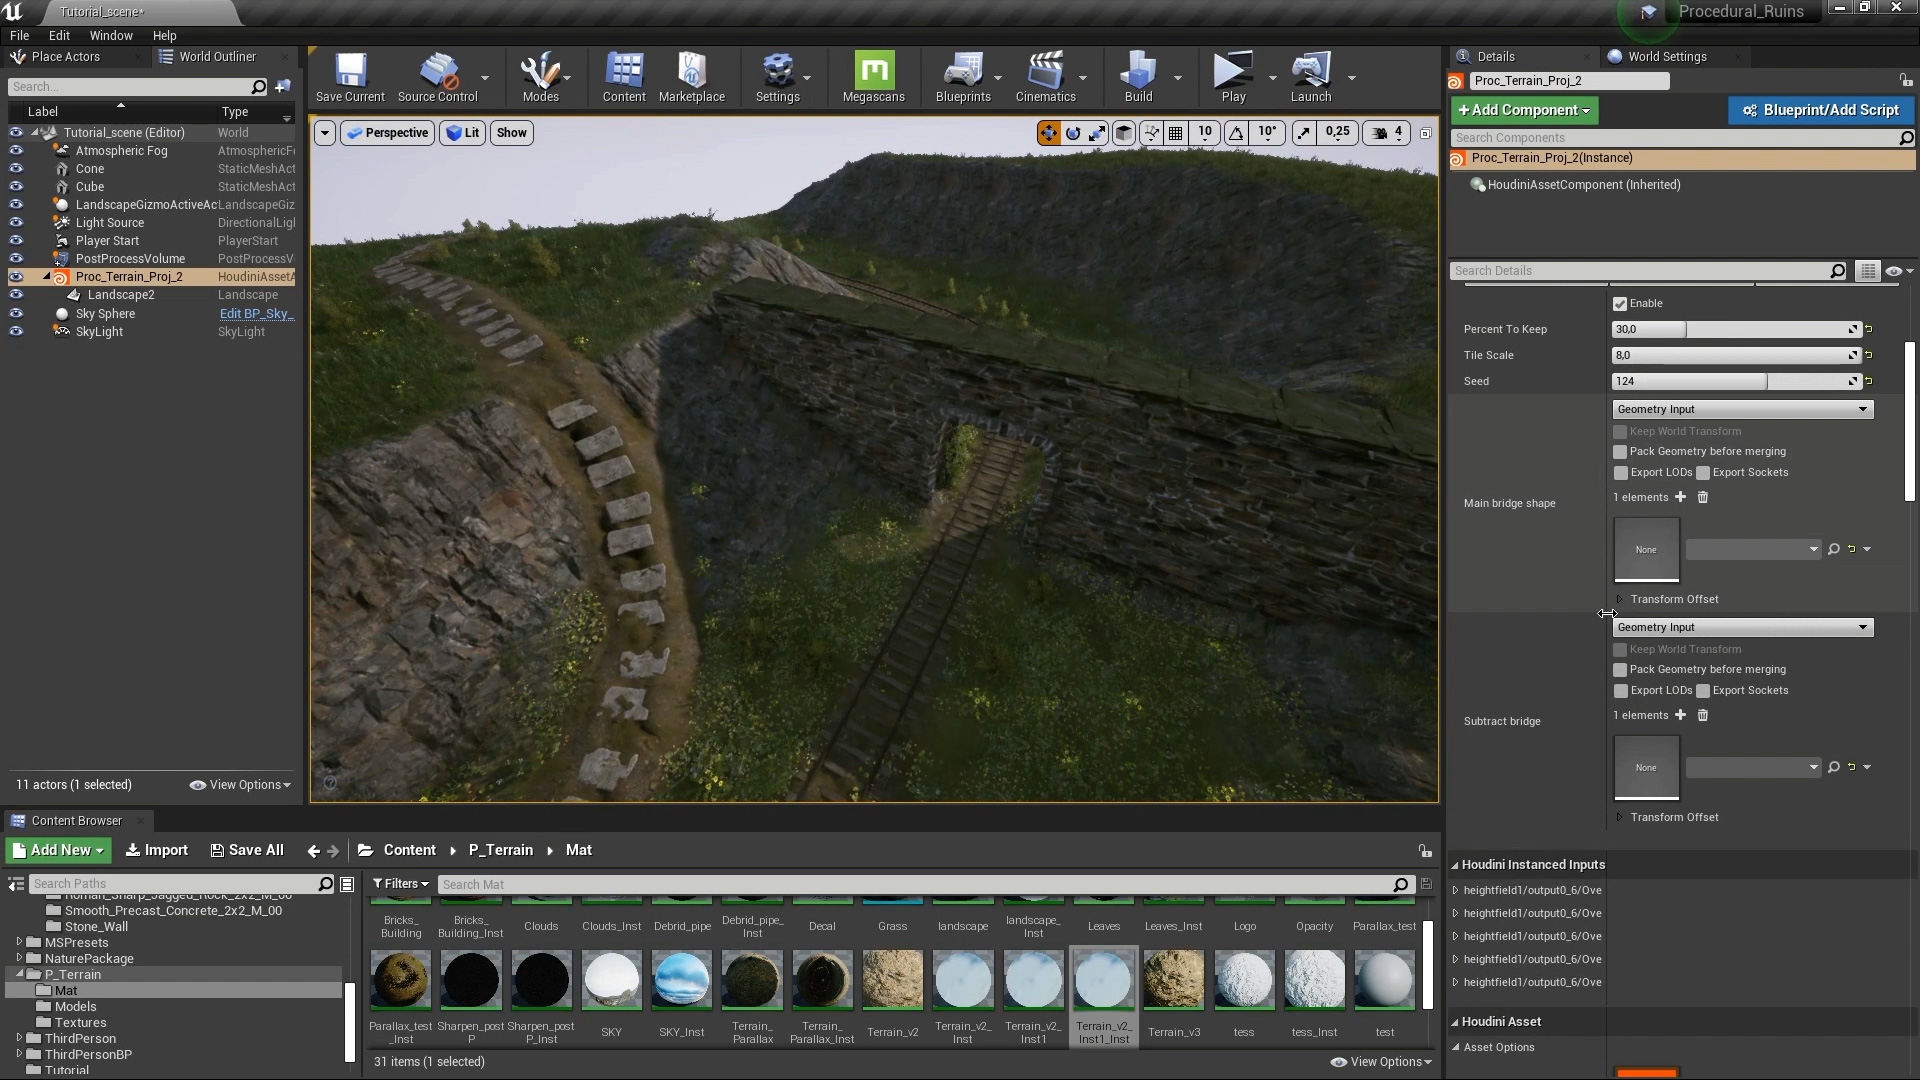
7 | Add the Bridge to the Terrain
Once the bridge is finished, it can be integrated into the terrain. The asset will be rebuilt and you can test the new features in UE4.
Length: 22:38
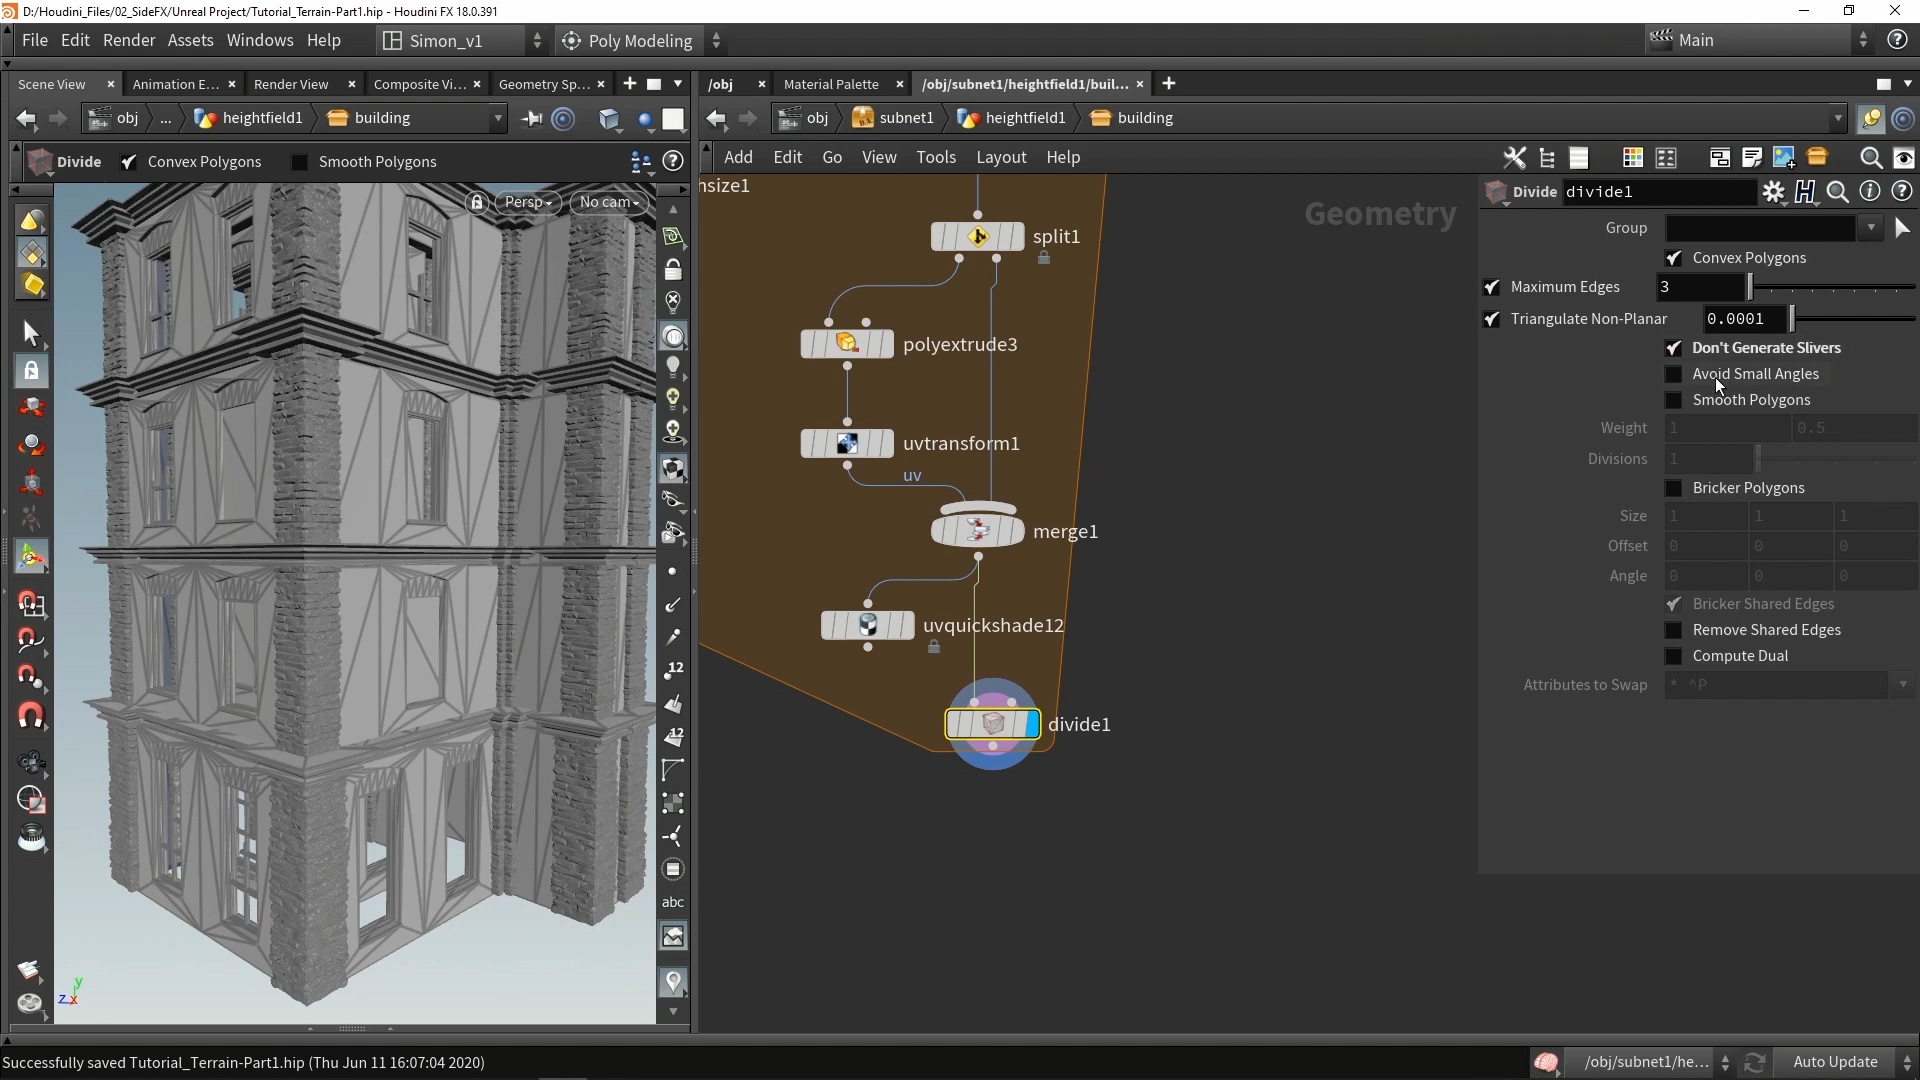
8 | Model the Building
Next you will create the procedural building. This part will start with the SideFX Labs Building Generator. You will add parts that suit your building type then the geometry will be set up for some destruction.
Length: 22:27
9 | Add Ruin and Decay to the Building
To improve the destruction of the building, a system will be created to define the ruined parts of the building then place bricks around these broken areas. These items will be set up as instances.
Length: 18:02
10 | Add Props to the Building
To finish the building you will scatter plants and ivy as well as debris. These will follow the shape of the building no matter what the shape. The terrain will be modified to integrate with the building and the whole system will be tested in UE4.
Length: 37:37
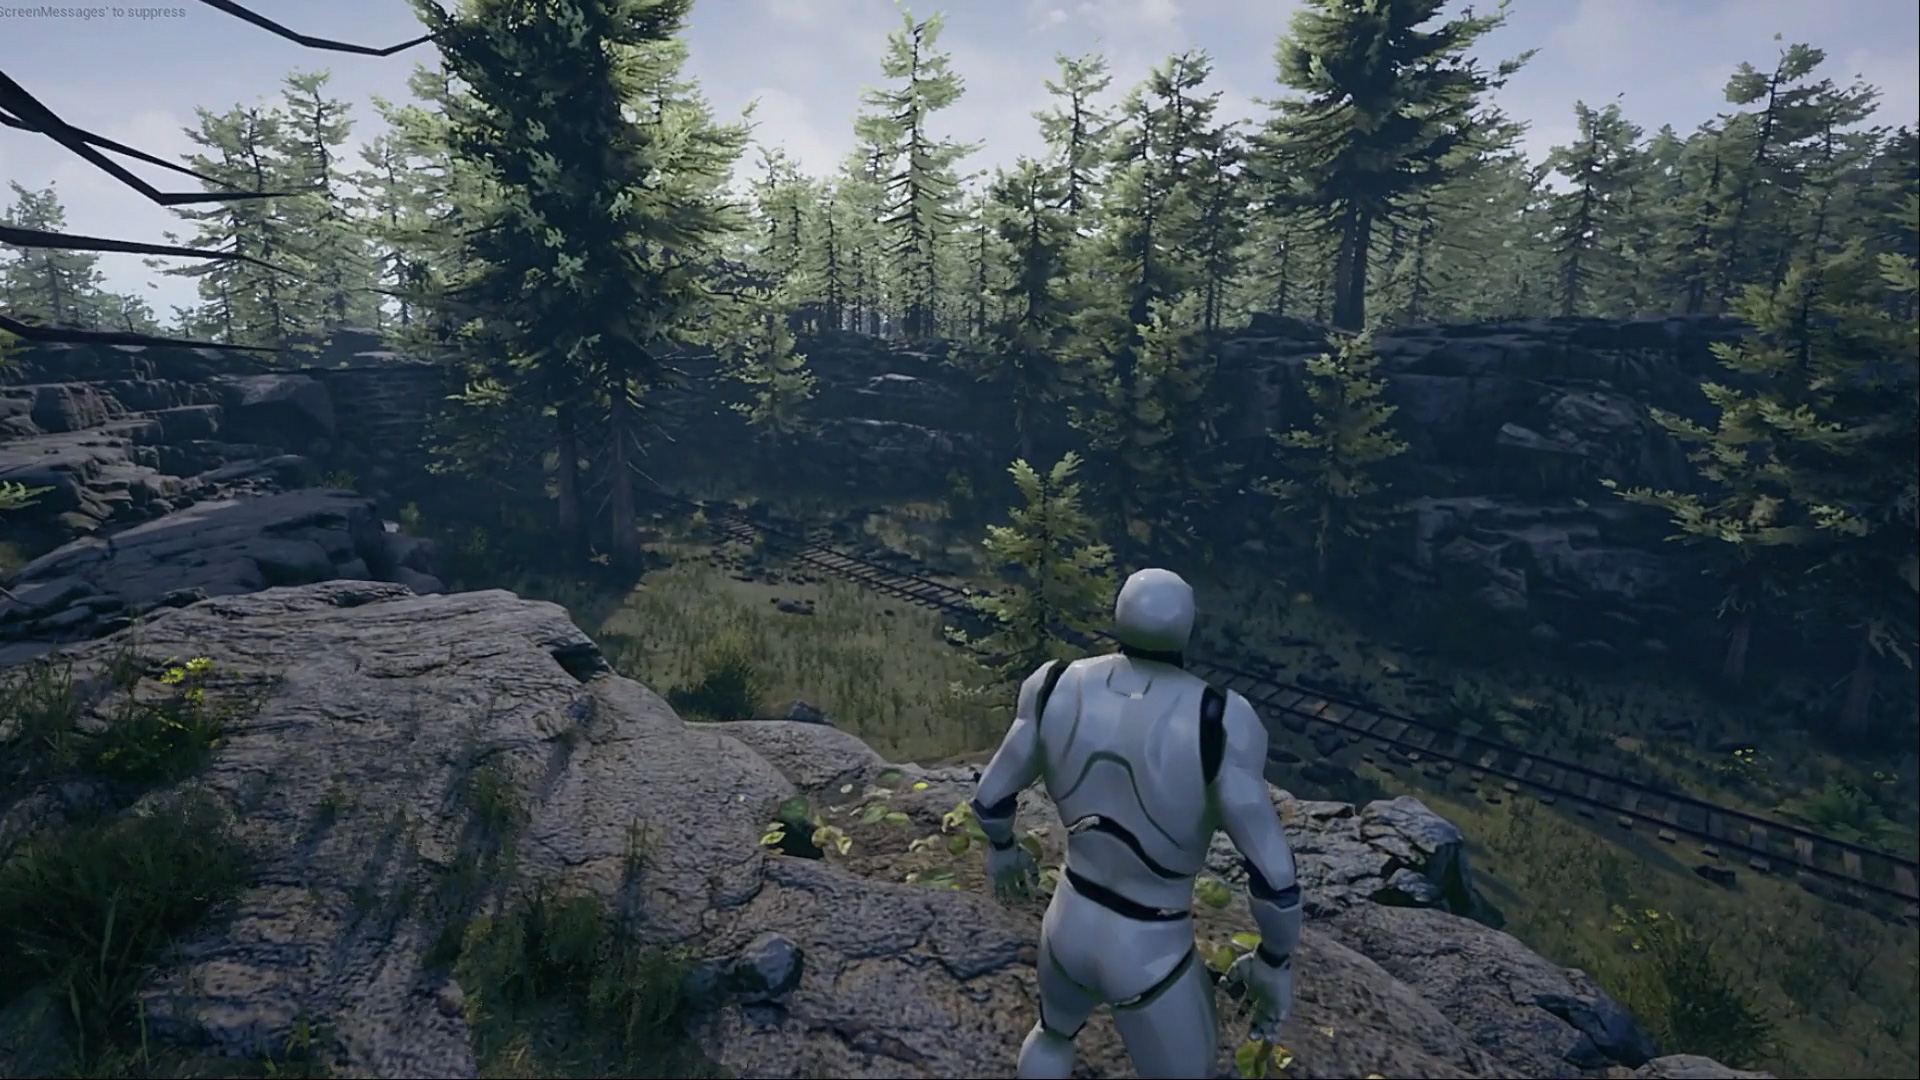
11 | Create the Cliffs
Along the side of the ravine, you will add rocky cliffs using Megascan models. This tool will place modular cliffs based on the input terrain. With the cliffs enabled, the terrain will look a lot more realistic and detailed.
Length: 25:23
12 | Add Trees and Foliage
Trees and other foliage will be added next to show enrich the look of the level. By creating a more complex mask, you will be able to scatter the trees based on occlusion, curvature, direction and noise.
Length: 29:56
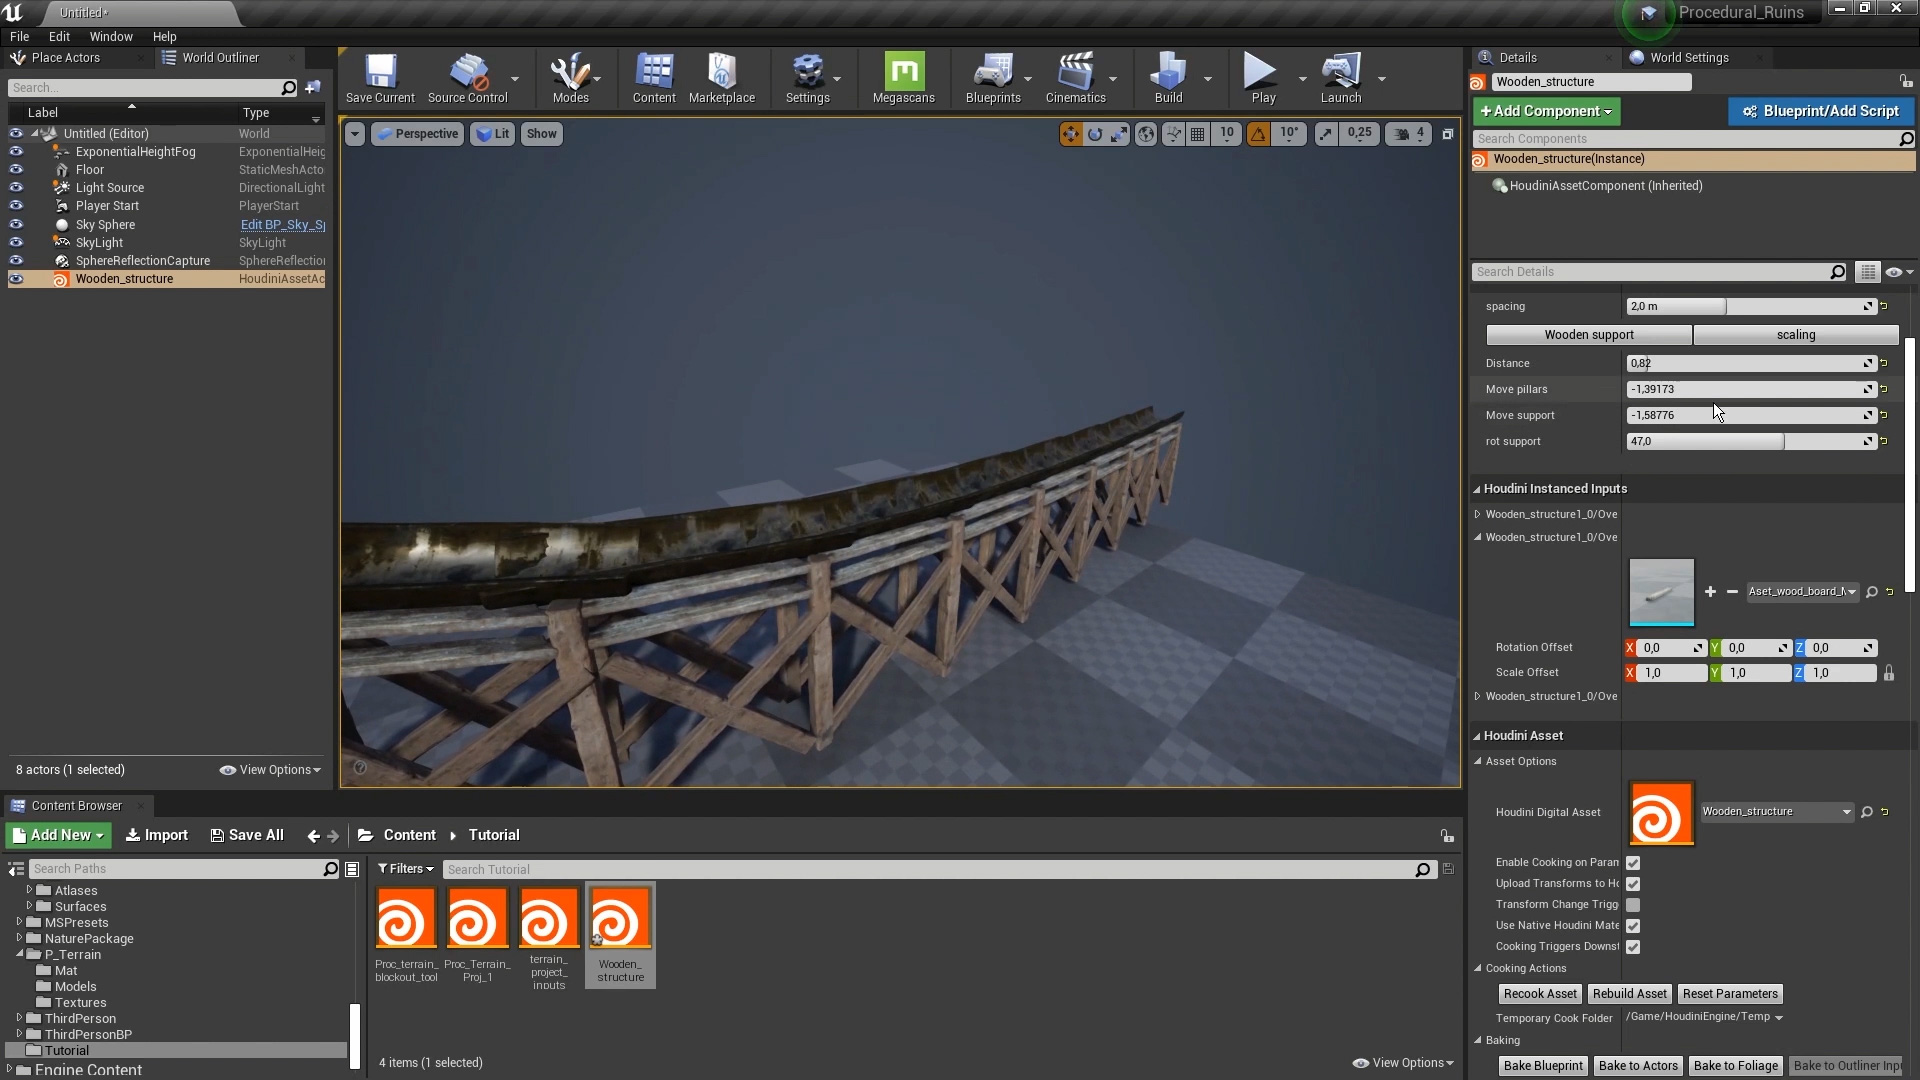
BONUS | Create Hero Prop
In this video you will learn how to create a hero prop. With this tool, a wooden construction can be generated from a curve. It can be a quick way to add more decoration to the scene.
Length: 18:42
CONCLUSION | Variations and Scaling Up
The final video shows this tool being used to create multiple level variations as well as scaled up levels. The key is that once this tool lets your designer explore multiple iterations right inside UE4 while Houdini works under the hood to general the new level. After a quick gameplay test, you can go back and make tweaks to get the level you really need for your game.
Length: 03:56
CREATED BY

COMMENTS
Sajjad 5 years, 4 months ago |
hi simon.this is an amazing tutorial.thanks
bazuka 5 years, 4 months ago |
OMG mate another great tutorial, keep it rocking ;)
cheers
pixeltrain 5 years, 4 months ago |
Hello Simon,
Great tutorial series as always.
Thanks a lot,
Helge
PeterLeban 5 years, 4 months ago |
Fantastic tutorial. Thank you, Simon!
mdsanima 5 years, 4 months ago |
WOW, great tutorial here! Thank you so much, keep going and good luck.
andrevalle 5 years, 4 months ago |
Fantastic Simon! Thank you for sharing knowledge with us.
I saw that 9 | Add Ruin and Decay to the Building has the same link of 10 | Add Props to the Building.
May you correct it for us?
Have an Enlightened Life.
burakumincgi 5 years, 4 months ago |
great tutorial.. thank you
junghee lee 5 years, 4 months ago |
Awesome tutorial!! Thanks Simon :)
hildner_ 5 years, 4 months ago |
this would not work with apprentice right?
Nerfrozen 5 years, 4 months ago |
Thank you for the tutorial,you are the best!:)
mestela 5 years, 4 months ago |
Great stuff!
AndreasNull 5 years, 4 months ago |
Amazing work! Thanks!
steafancollins 5 years, 4 months ago |
Can I follow this with Houdini Apprentice?
Simon_V 5 years, 4 months ago |
Yes, but the Apprentice does not include the plugin to game engines.
AnandaDivine 5 years, 4 months ago |
Super amazing tutorial Simon. Thank you. I was wondering how would you create a BIOME with skeletal meshes? Also how would you have UE4 talk to Houdini via python like in this video: https://www.youtube.com/watch?v=NfizT369g60&t=1413s. This would be amazing to set up. :)
AkThem 5 years, 4 months ago |
nice
kingo 5 years, 4 months ago |
hi simon I would like to ask how hf_combine_masks was created
Simon_V 5 years, 4 months ago |
You will need to install the latest Sidefx Labs tools
https://www.sidefx.com/products/sidefx-labs/sidefx-labs-tools/
reidstudio 5 years, 4 months ago |
I have labs installed for .499 and there's nothing I can find related to HF_Combine_Masks
Can you help me clarify perhaps where it's even supposed to be nested in the Labs tab? Is this a special labs installation you're using? I feel Houdini adds, removes, changes the name of features every single update so tutorial videos are easily immediately out of date.
reidstudio 5 years, 4 months ago |
Edit: I figured it out. Thank you!
GenoSmash 5 years, 4 months ago |
Hello Simon, is there a video on how you created the materials in Unreal?
reidstudio 5 years, 4 months ago |
RE The Blockout Tool: It looks like using Add to close the spline doesn't work properly. When getting to polybevel there's the error: Skipping edge(s) with nonmanifold endpoint(s) - and doesn't bevel the vertical edges. This error is present in your project files as well. Perhaps this is a bug with .499? Closing it at the curve level avoids this issue.
reidstudio 5 years, 4 months ago |
It looks like I was able to keep the curve open and use the Primitive SOP and 'Close U' on the Face/Hull level. Perhaps that's an okay work-around for the Add issue (which I feel has had rather inconsistent behavior in 18)?
Simon_V 5 years, 4 months ago |
I think this might be an issue with .499. You can report this issue here https://www.sidefx.com/bugs/submit/ .
Miguel Arribas 5 years, 4 months ago |
Hello everyone, somebody have problems with the orientation?, UE4 ignore my N, and my up attributes. anybody have this problem?
Simon_V 5 years, 4 months ago |
Hey Miguel, If you would have trouble with the orientation then double check if the terrain has a normal node set to points. Another way I recommend is converting the N to orient attribute. The orient attribute has priority over the N. here is how you could do that https://imgur.com/a/4IBQmvJ
fdslk 5 years, 3 months ago |
I'm having the same issue and this is not fixing it. Is there a turn around?
Miguel Arribas 5 years, 4 months ago |
Thanks Simon, in all my scenes i have that problem, i had thought about converting the N to orient as you say, and, that link is that i need it, thanks for your fantastic tutorials! thanks Simon!
wardedman14 5 years, 4 months ago |
Hello everyone, This is an amazing tutorial but I am getting a weird glitch when implementing my rail and path generator on part 5. Regardless if I enable or disable the rail and path there is a floating rail and shrubs. https://drive.google.com/file/d/1C6RnkO9iLmROuxKCVcyMLlwovlD-JFh6/view?usp=sharing
this clip is when I disable the railway. https://drive.google.com/file/d/1JSvhOL2CCI3N7hNg3zAcKTHZdhidjpmu/view?usp=sharing
Thanks Everyone
Abhi_Mahant 5 years, 3 months ago |
I had that issue too with there being height difference of distance of meshes relative to terrain. i will check this issue, i see it mainly in rail track, however the issue feels to resolved by not using erosion node
Abhi_Mahant 5 years, 3 months ago |
What i have done for now is i have disable erosion it does not feel that bad
Abhi_Mahant 5 years, 3 months ago |
The issue is well fixed now on the base terrain for the erosion node I did not enable freeze at frame at 10, also another mistake i did was related to blast in the path_tool, connections were not proper, I hope someone else too gains knowledge about importance of small stuff like wires and check boxes too.. :)
Simon_V 5 years, 4 months ago |
Hey, I have not seen this issue before. It looks like the models are copied on the input curve and not on the curve that is projected on the terrain. Maybe double check if the projection of the curve to the terrain with the ray node works. You showed shots from in Unreal but does everything work in Houdini as it should?
rlvelocity 5 years, 4 months ago |
When you think "Finally! The tutorial I've been waiting for to teach the Houdini to Unreal environment workflow" and then that moment when you discover the most important thing you wanted to know remains an unexplained jump cut around the 2:43 mark of part two :/
Still, great tutorial up to that point and once I find my answer elsewhere, I plan to finish this. Thanks for taking the time to make these!
Simon_V 5 years, 4 months ago |
Hey, If you are talking about how to assign a material it is shown at 3:48. I first showed the network of the material and then I show how to assign it.
maxb4690 5 years, 1 month ago |
Not the original poster, but I had a lot of issues following around that point too. I'm not too experienced with Unreal, and felt like the entire material creation process deserved a much more extensive section.
Simon_V 5 years, 1 month ago |
I can recommend this video here for the terrain material I used it as well https://www.youtube.com/watch?v=NAJhppttJgI&ab_channel=Lukas%27Ramblings .
Abhi_Mahant 5 years, 3 months ago |
What are the unreal material texture/settings you use, mine does not feel that good
Abhi_Mahant 5 years, 3 months ago |
I have issue after importing the rail track, path, bushes into unreal(#5). In houdini the points and the preview look smooth but after importing in Unreal i see sharp turns, also the bushes seem to be rotated and laying on ground.
link: https://imgur.com/a/850S6he
Abhi_Mahant 5 years, 3 months ago |
I guess the issue is with unreal. On the final terrain output in houdini I used copy to points and found out that rail placed nicely in houdini along the points. Maybe something needs to be changed with unreal_attribute thing
Simon_V 5 years, 3 months ago |
If you would have trouble with the orientation then double check if the terrain has a normal node set to points. Another way I recommend is converting the N to orient attribute. The orient attribute has priority over the N. Here is how you could do that https://imgur.com/a/4IBQmvJ
Abhi_Mahant 5 years, 3 months ago |
I did not add a normal node(with points) to terrain, but after adding it I don't see foliage, tracks, path. Also tried converting N to orient before this but still does not look that good.
Abhi_Mahant 5 years, 3 months ago |
Actually no after adding normal node foliage etc did not disappear, maybe they disappeared because the display flag was not set to output(i'm new to Houdini, is that how it works?)
Abhi_Mahant 5 years, 3 months ago |
This is what I get after converting N to orient, also it looked different on Unreal. So i dont really know what the issue is.
https://imgur.com/a/IYlK1AZ
Abhi_Mahant 5 years, 3 months ago |
I figured around a way for the issue now i use copy to points with geometry assigned inside Houdini instead of using Unreal_instance attribute however i still use unreal_material for assigning materials to the track, path and bush.
Also for the bush, material was not showing its effect so what i did was enable "build adjacency buffer" under project settings for houdini engine, maybe its a bug that's why it's happening, I use UE 4.25.3 and Houdini 18.0.532 btw
Might not be the best way but works for now.
Also might need to change location of bushes and also rotate it
Another thing i did was added normal nodes with points
BasTeunisse 5 years, 3 months ago |
I'm having the same issues. Tried using your conversion from N to Orient. But sadly it didn't fix it or did much of anything. Not sure where the issue is. I could change the tool to output geometry, but I'd rather fix it properly and use the unreal instancing.
Do you perhaps have any other idea's how this might be fixed?
Abhi_Mahant 5 years, 3 months ago |
Probably a bug
Simon_V 5 years, 3 months ago |
From that image you linked, it seems there is some issues with the orientation in Houdini, with the orient along curve. You can try forcing models to look up, by adding an up attribute with value {0,1,0} .
BasTeunisse 5 years, 3 months ago |
I've managed to fix it thanks to some help from discord. What I was doing wrong (and I'm not sure is detailed or talked about in the videos) is that the final output node must have a specific order of connection in order to work properly. The instances need to be merged first, then the terrain and finally the geometry. Reordering those fixed the problems I was having. Although I'm not sure why they need that specific order.
Miguel Arribas 5 years, 3 months ago |
still today, i have problem with the orientation in all my scene, tried to convert N to orient and no works, not only in this apocalipic scene, i have too many scenes and no work neves, no works with N, no works with Orient, but in houdini both works, N and orient with a copy to points. i tried other UE4 version and same issue. Somebody have found a solution?
Simon_V 5 years, 3 months ago |
Try debugging by outputting one type of data, for example output only one instance points like the rails or bushes and see if they work separate. Then you know that the issue happens when merging everything at the end
Miguel Arribas 5 years, 3 months ago |
this is other scene: https://ibb.co/y4YhdJD
Dean_Lv 5 years, 3 months ago |
Hi, I use the blockout curve to choose the exclusion zone, meanwhile I use the attrib randomize node to distribution different kinds of trees. But every time to edit the block curve the tree species will be redistributed in all area. Is there any way to avoid this randomness?
Simon_V 5 years, 3 months ago |
That is possible to calculate a more fixed position for the trees first. But that means that the system from the video will need a lot of changes. Like what you can do is scatter random points in the air and project them back on the terrain and then delete points that are in a bad position. You don't scatter points based on terrain because when the terrain changes the scatter changes as well.
Stories_Told 5 years, 3 months ago |
Having an issue with part 2 with adding terrain to UE4. I have everything set up perfectly and followed along as well as double checking everything like 100 times now, but no matter what I do when I try to use the method of adding a cube and cone inside unreal to layout my own areas it does nothing at all. Any help with the issue would be greatly appreciated!
Stories_Told 5 years, 3 months ago |
It is acting as if unreal is not registering with the object_merge node used inside houdini even though I have the references for the parameters all set.
Stories_Told 5 years, 3 months ago |
Figured out the issue. The xyz coordinates for my terrain .hda in unreal engine had to be reset to 0,0,0 in order for it to work.
jhonatan31415 5 years, 1 month ago |
Many thanks
david_6 5 years, 1 month ago |
It seems that I am not alone in this problem.In Part 5, a rail alignment error occurs when HDA is imported into Unreal 4.I tried convert N to Orient Attribute, but it didn't work. It was still wrong, but Houdini was good.
jhonatan31415 5 years, 1 month ago |
I am having a bit of a problem, took me some hours to debug this out, don't know if this is something that's happening on Houdini 18. But when I select the input (HDA blockout tool) as the geometry to project, when I move around with the translate tool it doesn't update the terrain, only if I move the points, but if I create a transform node and expose the XYZ translate values it works, but not so interactive as I have to use the sliders, am I missing something?
Simon_V 5 years, 1 month ago |
By default it seems like it is ignoring this translate from the handle. You can get it working by going to the object merge that inputs that model, you need to set transform parameter to " Into this Object".
jhonatan31415 5 years, 1 month ago |
Thanks! I rewatched the video and saw that the option "Into this Object" was being shown in your UE4 UI, so I tried out, now it kinda works, when I move the blockout tool it doesn't update, but when I move a point from the blockout tool, it updates the the geometry and the position of the projection
Shaun Bishop 4 years, 9 months ago |
In the asset, options turn on "On Transform Change" on in UE.
unrealzq 4 years, 11 months ago |
1 | Create the Base Terrain
how to creat hf_combine_masks. i cant find this node.
unrealzq 4 years, 11 months ago |
Finally, i find hf_combine.thank you~
18515473832 4 years, 11 months ago |
in 2 part,i add unreal material node.but in unreal the terrian material cant set to landspace.why?
Simon_V 4 years, 11 months ago |
What version of Houdini and the plugin (v1 or v2 ) are you using? In older versions this was an issue.
18515473832 4 years, 11 months ago |
I use ue4.25.3,and houdini18.5.351 ue4 plugin is v1.
i copy reference and in ue4 i press rebuild , i not work.
18515473832 4 years, 11 months ago |
and i cant pass the houdini param to ue4,is my version wrong?
Simon_V 4 years, 11 months ago |
Try using the plugin V2, you can find it in 'engine' folder where Houdini is installed. Also know that if you would be using Houdini apprentice then the plugin will not work with that version.
18515473832 4 years, 11 months ago |
i tried ,and it could pass param when i use "box", but it no useful for landscape...
hensleywt 4 years, 11 months ago |
Having problem connecting Block Out Tool to the Terrain. For some reason the shapes being made in the Block Out Tool are being projected exactly in the center of the landscape. Everything updates when I move the individual points position but the tool doesnt update when I move the shape as a while.
https://imgur.com/a/oXLJHKi
pic from UE and Houdini
Simon_V 4 years, 11 months ago |
If you use an object merge node to input the shapes, I recommend also looking into the object merge and exposing the parameter called "Transform", changing this to other values will help with the positioning of the inputs.
hensleywt 4 years, 11 months ago |
Awesome! Thank you so much!
maylennon1989 4 years, 11 months ago |
hi,teacher,in lesson4.
i enter rand(@ptnum)>(Ch("../F_delete")/100)
it not work and appear many red mark!
maylennon1989 4 years, 11 months ago |
and it same like ,i cant edit curve out of the path_tool.
Simon_V 4 years, 11 months ago |
Hey,
To get the expression working you will use this: rand(@ptnum)>(ch("../F_delete")/100)
maylennon1989 4 years, 11 months ago |
hey,sorry to trouble you,in part5. your subnet have three outputs in geo , i just have one output outside. i dont see how to add subnet's output.
i need some help!
maylennon1989 4 years, 11 months ago |
OK, i found it ,the max output.thank you sir!
FLORESDELATIERRA33 4 years, 10 months ago |
Hi Simon I had the issue too of having the railway and path floating in UE but working fine in Houdini, I re watched the video 04 and 05 again and I can't seem to find the issue. :(.
Houdini screenshot
https://imgur.com/vVNAhD9
UE4 screenshot
https://imgur.com/qq6tr97
Simon_V 4 years, 10 months ago |
Seems there is an issue with centering the instances. What could cause this is that the HDA in Unreal is not at point {0,0,0}.
FLORESDELATIERRA33 4 years, 10 months ago |
Yes!! Thank you !
Shaun Bishop 4 years, 9 months ago |
Little new to UE, I have a problem with the textures coming in the wrong scale:
https://www.dropbox.com/s/gqkyp5wprw04ukh/UE_Mine.PNG?dl=0
If I zoom in they are there just the UV tile seems to be out of scale, any clues?
CihanKenar 4 years, 9 months ago |
Hi Great Tutorial Simon!
I am stuck on Video 2, I am trying to create the Terrain Material from Scratch using Quixel Megascans assets.
I'm quite new to UE4 so not sure how to do this, does anyone have a good resource I can check out?
Cheers,
Cihan
Simon_V 4 years, 9 months ago |
There are many tutorial on terrain materials for Unreal. It can do a lot and many things you can build in the material like procedural grass.
So the video I can recommend is this one https://youtu.be/NAJhppttJgI
The main thing to know is the "layer blend" node this is then used to texture each layer based on the name you made in Houdini, like Layer01,...
Aylowe 4 years, 8 months ago |
Loving the tutorial. But I'm having an issue. I've created the terrain and saved it as a digital asset but when i drag it into Unreal all that shows up is the Houdini logo in the scene view. I have houdini engine for unreal and the plugin is enabled. No idea why my terrain isn't turning up.
Simon_V 4 years, 8 months ago |
First thing to check is if the Houdini engine is running. In Unreal go to the left top to Houdini Engine and check if you can click create session, click on it if it is there (repeat if connection would fail). If create connection is grayed out that means you are connected to Houdini Engine and tools should work.
If it is still not working then the HDA itself might have something wrong in it or wrong output.
linyiqiang2020 4 years, 8 months ago |
Hi, Can it be used in Unity?
Simon_V 4 years, 8 months ago |
Yes, this could work in Unity as well. You will have to change a couple values like instance and material attributes.
ularrarte 4 years, 8 months ago |
Hi Simon!
I am having problems with Unreal instances. In Houdini they are placed correctly but when I bring them to Unreal they have a strange translation and rotation. In this link you can see some images where you can see everything clearer. Do you know what it can be? I'm going crazy.
https://www.sidefx.com/forum/topic/78236/?page=1#post-333939
Thanks for your help!
Simon_V 4 years, 8 months ago |
This issue often happens because the Normal of the instances (points) is getting overwritten. Basically when you merge multiple nodes together, attributes can conflict like the Normal.
I recommend first try to output the instances only and see if that works.
A few this you can do:
-Double check if the terrain has a normal node set to points. So when merging nodes everyone has a normal value.
-Another way I recommend is converting the Normal to orient attribute. The orient attribute has priority over the N. Here is how you could do that https://imgur.com/a/4IBQmvJ
ularrarte 4 years, 8 months ago |
Good morning again, thanks for your reply.
I have managed to isolate the problem. The problem is in the last merge node, if I only export the points of the instances (without the terrain), they are oriented correctly. I have tried to initialize the attributes so that the merge does not conflict (https://i.ibb.co/xCMG29m/image.png) but even so they are still wrongly oriented. What can I do?
Thanks.
Simon_V 4 years, 8 months ago |
What happens in the merge node is that it will try to match attributes with each input of the merge node, so the order you merge nodes together will matter.
Like try changing the input order to for example the instances as first input and then the terrain.
As mentioned in last message here try using the @orient attribute to save the rotation of objects because orient values have priority over the normal (N).
Here is more info about it https://www.artstation.com/siver/blog/1jX7/houdini-blog-42-orient
ularrarte 4 years, 8 months ago |
Hello again,
I have been since yesterday checking the problem and trying to orient the objects with the orient attribute as you told me, but the problem persists. In addition, I have also tried to do it by VEX (p@orient = quaternion(maketransform(v@N, v@up))) in case I was doing it wrong in VOPs, but nothing, the result is still the same.I attach a couple of images where you can see the orient and the attributes that arrive to the merge:
https://i.ibb.co/xGp8ZPj/image.png -> Orient correction and checking the orientation.
https://i.ibb.co/jVvf5z9/image.png -> Before the last merge, where you can see the orient attribute created.
Also, checking your Houdini scene, I have seen that you also have the conflict in the merge, but this does not affect the final rotations.
I hope you can help me, thank you very much.
Simon_V 4 years, 8 months ago |
So you know that the last merge node causes the issue. Definitely try changing the order the inputs in the merge node since this can change this.
Further try to find what other network is causing this issue, like does it break when only using instances and terrain as output or instances and geometry.
Take a look here as well to understand what could happen https://www.artstation.com/siver/blog/1jX7/houdini-blog-42-orient so when attributes mis-match when merging it can fill in 0 as value.
r326734431 4 years, 7 months ago |
Hi Simon!
I am having problems with Unreal instances in part7. I done the instance attributes in hoidini and its looks good. But when I rebuild the HDA, the bridge ivy foliage and the top floor didn't show up. seems like its somthing wrong with this instance. I check the hda details
in UE4, I can find this two instances in Houdini outputs and they all bind correct mesh. by the way, the path instance is show when I enable the path toggle, but when I enable the bridges toggle all instances are gone
Simon_V 4 years, 7 months ago |
Maybe what can happen is that the scale (or pscale) is set to 0 when merging, with as results your models being placed with scale 0. Double check the attributes of the instances at the output.
r326734431 4 years, 7 months ago |
thanks to reply. you are right, my instance can see in my scence. I put instance to 0, terrain to 1, geo to 2, but my landscape materials blend layer comes errors. my second blend layers and third are not mapping correct. do you know how to deal with it. thanks again
r326734431 4 years, 7 months ago |
It seems like the merge node index will affects the results, I DONT know why this happen. when I change my terrain in merge index 0, my instance disappear
mayeyeye 4 years, 7 months ago |
Hi simon
I am having a problem with part 11 | Create the Cliffs. On 7:58 How to create the Cliff01 subnetwork in subnet1?
lostshun 3 years, 6 months ago |
Did you manage to find it? I am wondering too...
gcj 4 years, 1 month ago |
hi thank you for the great tourials ...when you are using extrude you set the inset without using parameter looks like you are using shortcut for inset what is it please
George Rolfe 3 years, 9 months ago |
An brilliantly executed, well thought out series covering environment content generation, highlighting the benefits of a procedural and non-destructive workflow.
EVargas 3 years, 9 months ago |
Amazing tutorial, thank you so much Simon, this is very very helpful!
sidenimjay 3 years, 8 months ago |
Hello Simon, it seems the new curve tool in H19 cannot be edited in unreal the way the previous curve sop can, is there an update for the blockout tool that will allow the use of the new curve sop2:0 ?
liquidsith 2 years, 11 months ago |
Right-click the node and select Actions > Change Type, scroll down a ways and you'll see Curve 2.0 and Curve. Select Curve and it should work just fine
lostshun 3 years, 6 months ago |
I am also looking for the Cliff subnetwork node. I don't know how to deal with it. I have a "Error Not enough sources specified"....
CGGR_Jay 3 years, 6 months ago |
Simon Thanks for this tutorial first!
But I have a problem. Whenever I rebuild the hda file in UE5, the rail and path does not show up. I think the static mesh link is something wrong but it does work in terrain material. Plz help.
yickster 3 years, 2 months ago |
I would love a tutorial how to do the materials in this! Other than that this is an amazing tutorial and very easy to follow
mamdouhfahmy 3 years, 2 months ago |
Hello Simon , i haven't watch this tutorial yet but am gonna definitely do just one thing before i start any vex was used ?
astarte_industries 2 years, 1 month ago |
Hopefully someone knows the answer to this since there seems to be a few discrepancies between the software versions Simon is using in this series and the most recent versions released by SideFX and Unreal respectively.
I am in UE5.2 and using HIL 19.5.749 and was able to get the curves to work in unreal thanks to some fix suggestions here and on youtube, however the generated geometry doesn't seem to affect the landscape HDA at all. I have to bake it out into a static mesh in order for it to work. Other generated houdini geometry also doesn't seem to affect the terrain so there is either something I'm missing with the object merge node in houdini or there is an attribute somewhere that is needed that wasn't needed before.
Please log in to leave a comment.