| On this page |
The animate state provides several convenient options for posing characters in the animation scene, including locators for rotating groups of controls, copying and pasting controls, and mirroring poses.
Locators 
A locator is an element that is added to the animate state for use as a pivot point for rotating groups of controls. It can be used to perform FK-type posing for a character. A locator is not part of the rig.
Locators are created using the Locator tool, which can be accessed by clicking ![]() on the top toolbar or selecting Locator from the radial menu (press C over the viewport).
on the top toolbar or selecting Locator from the radial menu (press C over the viewport).
| To... | Do this |
|---|---|
|
Create a locator as a pivot |
Place the mouse over the desired locator position and press H. |
|
Rotate about a locator / Perform FK-type posing |
Note If you don’t hold ⌃ Ctrl + ⇧ Shift when rotating groups of controls, all the controls will rotate about their local axes. See global transform mode. |
|
Remove a locator |
Select the locator and press ⌃ Ctrl + H or ⌦ Del over the viewport. |
|
Change the size and shape of a locator |
⇧ Shift + |
|
Change the color of a locator |
In the animate state parameters, Locator tab, set the color of the locator. |
Copying and pasting controls 
The copy and paste functionality for controls can be accessed using the following options in the ![]() context menu:
context menu:
Copy Selection
Copies the selected controls to the clipboard. You can also use ⌃ Ctrl + C to copy the controls.
Paste World Transforms
Moves the selected controls to the world position of the copied controls (from Copy Selection). The paste operation tries to match the control names that are copy/pasted. You can also use ⌃ Ctrl + V to paste the controls.
If multiple controls were selected with Copy Selection, and the paste operation is not able to match the control names between the copy and paste, the selected controls for the paste operation are moved to the Copy Selection's primary control. The primary control is the control on which the transform handle was placed during the copy operation.
Paste Local Transforms
Performs the same local transforms on the selected controls as on the Copy Selection controls. The paste operation tries to match the control names that are copy/pasted. You can also use ⌃ Ctrl + ⇧ Shift + V to paste the controls.
If multiple controls were selected with Copy Selection, and the paste operation is not able to match the control names between the copy and paste, the selected controls for the paste operation are moved to the local position of the Copy Selection's primary control. The primary control is the control on which the transform handle was placed during the copy operation.
Mirroring poses 
In the animate state, you can mirror the position, rotation, and scale of controls. To mirror controls on a single character or multiple characters:
-
Select the control(s) you want to mirror. To select multiple controls, hold ⇧ Shift or box select multiple controls.
-
There are two options for mirroring:
Mirror with Default
Hold ⇧ Shift and click
 on the top toolbar, or
  click in the viewport and select Actions ▸ Mirror with Default. This mirrors the selected controls across the same plane that the rig is mirrored across, without any additional user input. The plane that the rig controls are mirrored across is determined in the rig setup.
 Mirror with Plane
Click
on the top toolbar, or click in the viewport and select Actions ▸ Mirror with Plane. This puts you in the mirror pose state, where you can adjust any of the previously selected controls as well as the mirror plane. In the Mirror tab of the animate state settings, you can set certain configurations before mirroring is applied. Then press Enter while hovering over the viewport to apply the mirroring.Note
Only the joints that were selected before entering the mirror pose state are selectable (available for mirroring) in the mirror pose state.
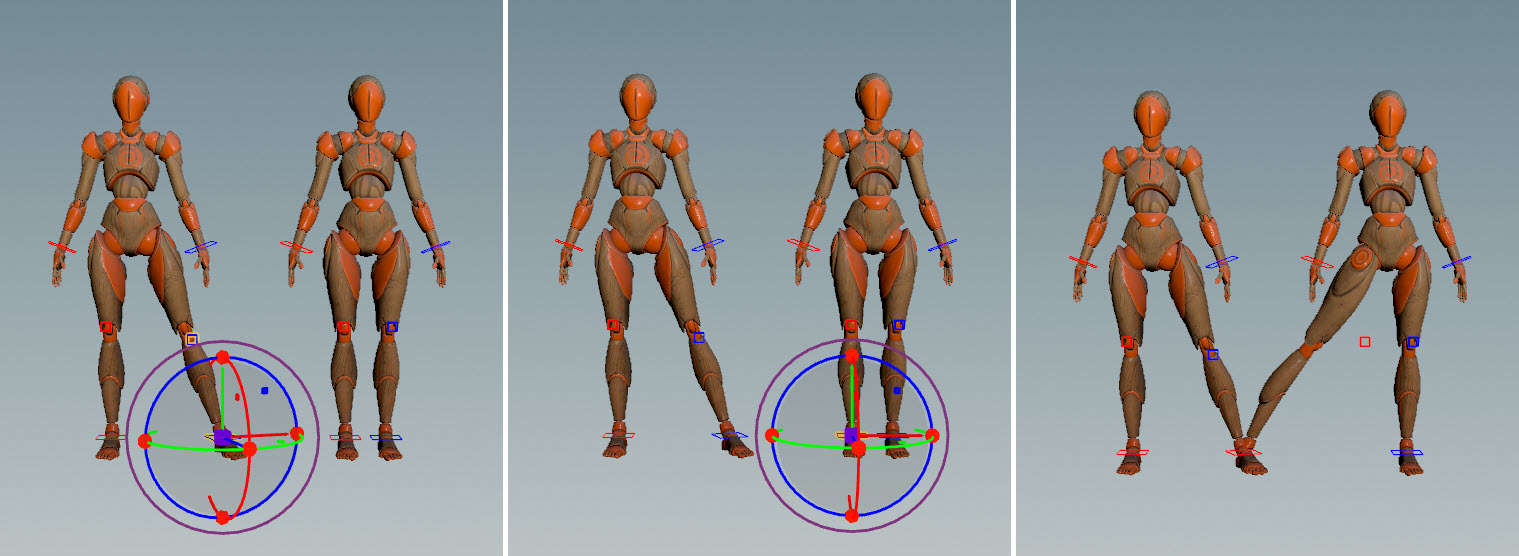
In the example below, Electra’s leg controls (left image) are mirrored to the other side of the rig (right image).
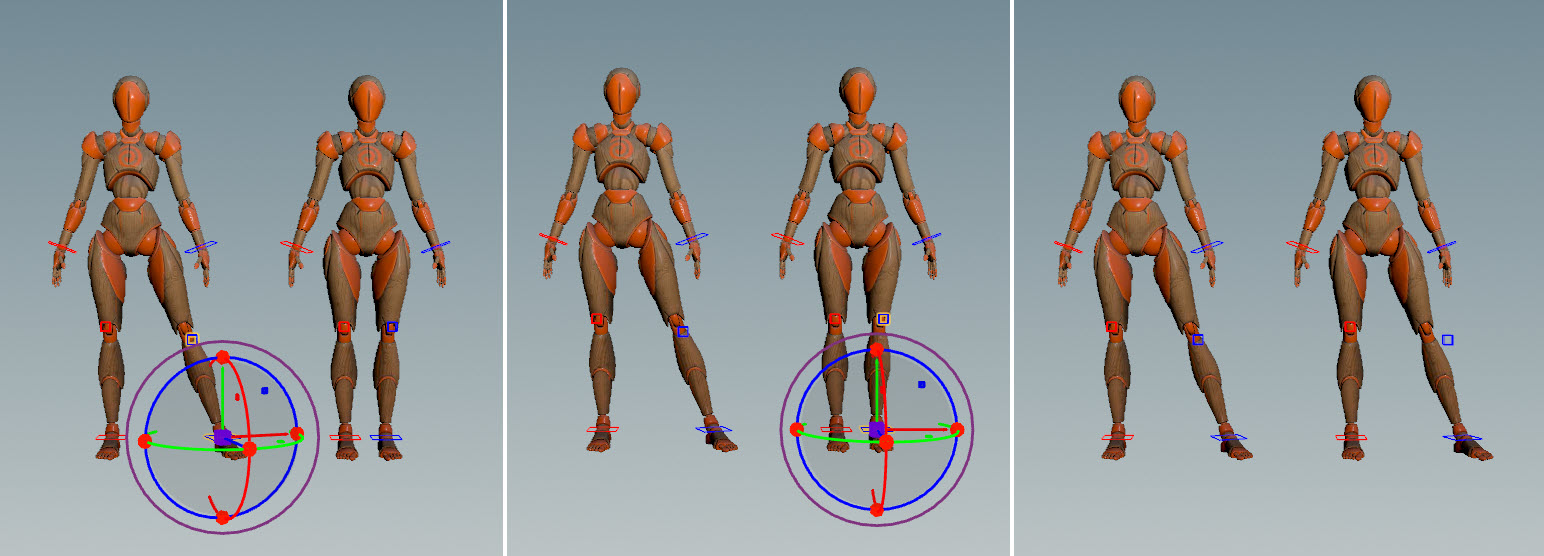
Original pose (left); mirrored pose (right) For singular controls that don’t have an equivalent control on the other side of the rig (for example, the spine and chest controls), mirroring is performed by flipping the control across the mirror plane:
Mirrored singular controls Note
By default, the mirroring operation expects the mirrored controls on the rig to be named
<control>_land<control>_r. If the controls are not named this way, use the APEX Configure Character SOP to specify how the controls on the rig are named. This information is then used in the mirroring operation. See the How-to for information on how to do this.
Adding keyframes to the mirrored controls 
To add and update keyframes on the mirrored controls:
-
Select the control(s) you want to mirror.
-
Enter the mirror pose state - click
on the top toolbar. -
In the animate state settings, Bake tab, click Bake Keys. If Bake to New Layer is turned on, the keys will be added to a new animation layer. If Bake to New Layer is turned off, the keys will be added to the current animation layer.
See the animate state settings for descriptions of the available baking options.
Mirror settings 
The mirror settings allow you to set configurations for the mirroring operation. To bring up the mirror settings:
-
Select the control(s) you want to mirror.
-
Click
on the top toolbar. -
Go to the animate state settings, Mirror tab.
Setting |
Description |
|---|---|
Mirror to Opposite Control |
When turned on, performs mirroring on the opposite control. When turned off, performs mirroring on the currently selected control. |
Components |
The tranform components to mirror - |
Flip Axes |
Use this option to fix strange rotations when mirroring. |
Mirror Plane |
The plane within the rig that the controls are mirrored across when the character is at rest position. |
Follow Joint |
When turned on, the mirror plane follows the selected joint as you move a control. This option only has an effect if the control moves the selected joint. For example, if you select the right elbow joint, and move the right hand control, the mirror plane follows the movement of the right elbow joint. However, if you select the left elbow joint, and move the right hand control, the mirror plane does not move. |
Plane Intersection |
Options for displaying the outline of where the character intersects with the mirror plane. The Hide During Playback option could result in a performance improvement during playback. 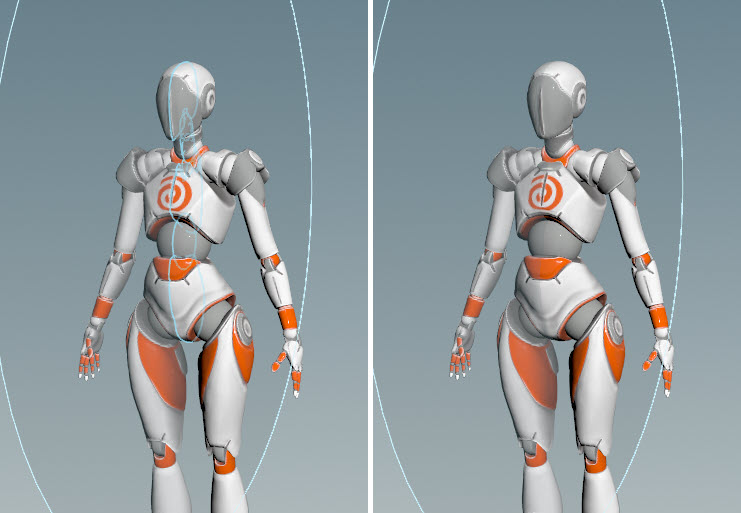
|
Live Preview |
When turned on, shows a live preview of the mirroring performed. |
Outline Overlay |
When turned on, shows a live preview of the mirroring as an overlay layer. Note When mirroring singular controls, turn on the Outline Overlay option. Using Live Preview without Outline Overlay does not work well with singular controls, as singular controls are itself mirrored, which results in the display of the rig switching between the original control position and the mirrored result every time the control is moved. |
How-to 
| To... | Do this |
|---|---|
|
Specify how the controls on the rig are named |
Use the The APEX Configure Character SOP takes in a packed character: 
For example, if the rig has controls named
To specify multiple naming configurations, turn on Bind Multiple Configurations, and click The mirror pattern is stored in the detail attribute 
The controls named with the Note If there is no |
|
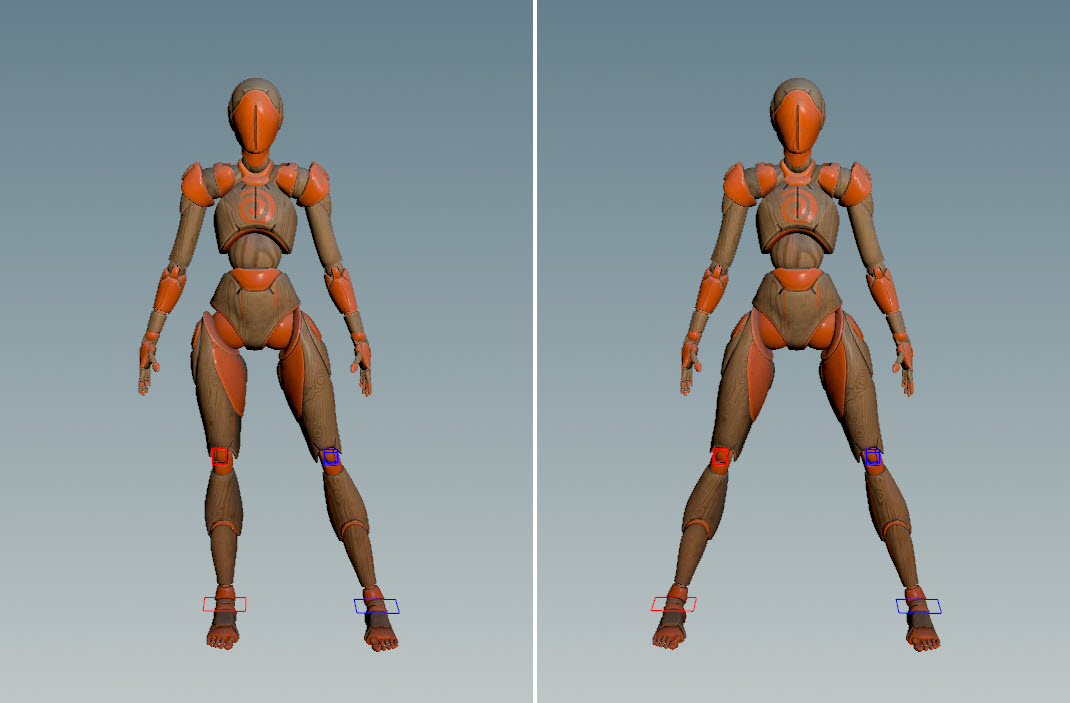
Swap the poses on the two sides of a character |
The example below displays the original pose (left image) and the swapped pose after mirroring (right image). 
|
|
Perform mirroring on the selected control |
|
|
Mirror a character in world space |

|
|
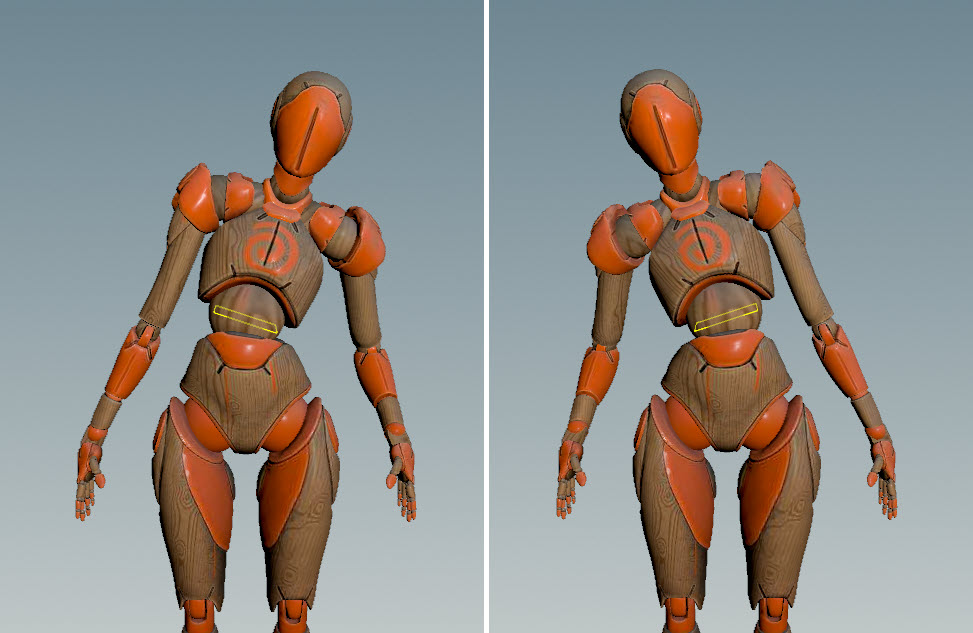
Mirror the control position while keeping the original orientation |
In the example below, only the position of Electra’s hand is mirrored. The rotation of Electra’s right hand remains unchanged. 
|
|
Mirror across a joint |
|
|
Have the mirror plane follow the movement of the selected joint |
Note This option only has an effect if the control moves the selected joint. For example, if you select the right elbow joint, and move the right hand control, the mirror plane follows the movement of the right elbow joint. However, if you select the left elbow joint, and move the right hand control, the mirror plane does not move. |
|
Change the preview options |
In the mirror settings, set the Plane Intersection, Live Preview, and Outline Overlay options. |
|
Fix strange rotations when mirroring |
In the mirror settings, try selecting different axes in the Flip Axes option, or see the how-to “Override the plane that the rig controls are mirrored across”. |
|
Override the plane that the rig controls are mirrored across |
The mirroring operation expects the controls on the rig to be mirrored across the YZ plane. This is the default rig mirror plane. If the controls are mirrored across a non-YZ plane on the rig, this must be specified in one of two ways:
Note The rig mirror plane is the plane that the controls are mirrored across within the rig. The Mirror Plane in the mirror settings refers to this rig mirror plane, not the plane that is used to perform the mirroring operation in the animate state. You should not use the Mirror Plane value to set the position/orientation of the plane for mirroring. Use the mirror plane handle in the viewport for the mirroring operation instead. |
|
Move the mirror plane back to the local rig plane |
Select the mirror plane, |