| On this page |
Terrain 
Copernicus adds new HeightField tools for building terrain. See the Terrains What’s new for the full list of new HeightField COPs, and Copernicus heightfields and terrains for how to use these COPs in your network.
Grunge maps 

-
Grunge Aurora COP creates a pattern of leaking lines to resemble aurora streaks.
-
Grunge Bark Strips COP creates a pattern of layered noises that resemble bark strips.
-
Grunge Birch Bark COP creates a pattern of layered noises to resemble birch bark.
-
Grunge Drips COP creates a pattern of layered noises that resemble drips.
-
Grunge Galvanized Steel COP creates a pattern of layered noises that resemble galvanized steel.
-
Grunge Layered Noise COP layers multiple Fractal Noises, which creates a default pattern of a stormy sky reflected in water.
-
Grunge Leaking Streaks COP creates a pattern of layered noises that resemble leaking streaks.
-
Grunge Moisture COP creates a pattern of various spots that resemble sponge-like moisture.
-
Grunge Mold Spots COP creates a pattern of layered noises that resemble mold spots.
-
Grunge Pine Bark COP creates a pattern of layered noises to resemble pine bark.
-
Grunge Rust COP creates a pattern of layered noises to resemble rust.
-
Grunge Rusty Surface COP creates a pattern of layered noises that resemble a rusty surface.
-
Grunge Sheets COP creates a pattern of layered noises that resemble sheets.
-
Grunge Wipe Trails COP creates a pattern of layered noises that resemble the trail of circular wipes.
Adjacency 

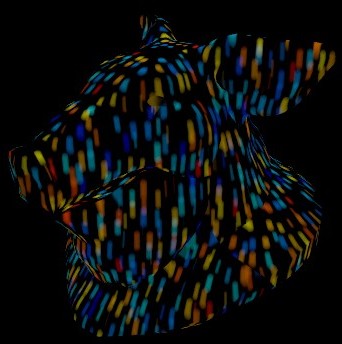
Adjacency COP nodes help with image processing over texture seams. Adjacency COP nodes can also create seamless textures from geometry attributes. The following are the new nodes for adjacency:
 Attribute Sample with Adjacency
 Distort with Adjacency
 Extrapolate with Adjacency
 Geometry to Adjacency
 Space Transform with Adjacency
The following COP nodes also support adjacency cables:
 Reaction-Diffusion Block Begin
Time-based nodes 
-
Time Blend COP blends intraframe values.
-
Time Loop COP repeats an input frame range to form a looping animation.
-
Time Pack COP takes an input and samples it at various times to produce a cable.
-
Time Shift COP cooks its input at a time that’s different from when it cooks itself.
Test geometries and files 
Copernicus adds the following test geometries, which are similar to their SOP versions:
Copernicus adds the following test images and a video to the File COP. These appear in the tab menu.
-
Test Image: Droplets
-
Test Image: Latte Fern
-
Test Image: Magnolias
-
Test Image: Railroad Crossing
-
Test Image: Stump
-
Test Image: Winter Tree
-
Test Video: Nevada Tule Fossil Grounds
Pyro 
Copernicus adds new Pyro Configure examples (available in the tab menu) and nodes. See the Pyro and Simulation What’s new for more information.
ML 
-
ML Computer Vision Inference COP applies a trained ONNX model to detect and mask objects in an input image.
-
Neural Cellular Automata Core COP runs a Neural Cellular Automata (NCA) model on an input cell state, evolving it over a number of iterations.
-
Neural Cellular Automata Decode COP takes the cell state output from a Neural Cellular Automata Core COP and decodes it into a visible pattern using a decoder neural network.
-
Neural Layer to Depth (MoGe-2) COP estimates metric-scale depth, normal, and position maps from an input image.
-
Neural Layer to Mask (SAM2) COP creates a mask based on coordinates set through prompts.
-
Recipes:
-
 ML Train Neural Cellular Automata COP recipe provides an easy to use entry point for training NCA models directly inside of COPs on COP input layers.
 -
 Neural Cellular Automata recipe drops down the NCA Core and Decode COP nodes to provide a convenient starting point.
 -
Neural Cellular Automata Block recipe configures the NCA Core and Decode COPs to be used inside of a COP block to simulate NCA updates over time.
-
Unreal 
Houdini Engine for Unreal now supports Copernicus HDAs for the asset editor and regular world. This lets you create COP digital assets similar to SOP and OBJ digital assets.
New COP nodes 

-
Paint 3D COP paints on a layer or UV-mapped geometry.
 This feature is still under development. The current functionality is unfinished and subject to change, and may have thin or no documentation. Please bear this in mind when using it.
 -
Align COP performs a 2D transformation of one layer to line up with another reference layer.
-
Align Pixels COP shifts a layer to align pixelwise with another layer.
-
Attribute COP creates a detached attribute.
-
Attribute Insert COP inserts a detached attribute into a geometry.
-
Attribute Extract COP extracts a detached attribute from a geometry.
-
Attribute from Layer COP converts a provided layer into the equivalent detached attribute.
-
Bake Geometry Textures COP is now version 2.0.
-
Bake Pre-Process COP sets up rays for baking, with a visualization state.
-
Camera COP creates a default perspective camera.
-
Camera Blend COP blends two cameras together.
-
Cell Pattern COP generates cell patterns.
-
Cellular Noise COP generates cellular patterns with controlled spacing and beveling.
-
Cellular Noise 3D COP generates cellular noise from 3D locations.
-
Compare and Blend COP compares two layers on a per-pixel basis.
-
Configure Stamps COP creates stamp and sprite attributes on points.
-
Convolve Filter COP convolves an image with an arbitrary kernel image using a Fast Fourier Transform.
-
Corner Detect COP detects corners in a layer.
-
Crystal Noise 3D COP generates a sharp and angular Worley noise type.
-
Curl COP computes the curl of a vector field.
-
Curl Noise COP generates a curl noise.
-
Curl Noise 3D COP generates a 3D curl noise.
-
Curve Animate 3D COP lets you interactively draw and animate Bézier curves using tools similar to 2D illustration programs.
-
Despill COP removes color spill from an input layer.
-
Drop Shadow COP creates an offset of the original image that you can blur, expand, and streak.
-
Fast Fourier Transform COP computes the Fourier transform of an image.
-
Filter Frequencies COP boosts or suppresses spatial frequencies in an image.
-
Fractal Sample COP generates a fractal of the input layer to which you can add randomizations.
-
Height to Caustics COP creates caustic patterns on the ground from a refractive height layer.
-
Weave COP creates a woven pattern by interlacing horizontal and vertical fibers.
-
Knit COP creates a procedural knitted fabric texture made of a grid of individual stitches.
-
Laplacian COP computes the sum of the second derivatives along a source layer’s width and height.
-
Layer Property Copy COP copies layer properties from one layer, VDB, or attribute to another.
-
Layer from Attribute COP fills in the pixels of a layer from a detached attribute.
-
Layer to Geometry COP is now version 2.0.
-
Geometry Attribute from Layer COP samples layers with a geometry’s position attribute to create attributes from those layers.
-
Logic COP applies logic operations to integer ID layers, attributes, and VDBs.
-
Mask Combine COP combines several mask layers from an input cable into a single mask.
-
Normal to Height COP converts an RGB normal layer into a mono height (displacement) layer.
-
Ocean Spectrum COP generates a set of layers that timelessly represent the evolution of ocean waves.
-
Ocean Evaluate COP converts the layers of an Ocean Spectrum COP into an animated ocean surface.
-
Planar Inflate COP creates a height layer from a 2D signed distance field.
-
Point Delete COP removes points from a point cloud geometry.
-
Point Generate COP adds additional points to a point cloud geometry.
-
Point Merge COP merges point cloud geometries.
-
Points from Blobs COP identifies blobs (islands) in a layer to create points.
-
Rasterize GSplats COP rasterizes point-based Gaussian Splats onto layers.
-
Rasterize Implicit Surface COP converts an implicit surface into image layers by raymarching from the camera toward the surface.
-
Refract from Height COP refracts an image through a height layer.
-
The Ripple solver simulates ripples propagating across an image layer using a height-based system, and consists of a
 Ripple Block Begin and a
  Ripple Block End node.
 Note
Although the Ripple solver is in COPs, you need DOP level permissions to use it. This means that it is not available in Houdini Core, but only in Houdini FX, Houdini Apprentice, Houdini Indie, and Houdini Education.
-
Sequence COP takes clips from inputs and sequences them.
-
Solve Poisson COP solves Poisson’s equation inside a 2D boundary.
-
Sphere Sample COP samples a source layer as a latitude-longitude map on a sphere.
-
Star Glow COP creates multiple streaks of an input layer.
-
Turing Patterns COP applies a filter to produce natural patterns of stripes and spots that follow the form of the original input.
-
UDIM Pack COP samples an input at various UDIMs to produce a cable.
-
USD Material COP represents a USD Material referenced from disk. See Using COPs as materials for more information about how to use this node.
-
UV Inverse COP creates the inverse of a UV distortion map.
-
UV Shape COP generates a UV layer, UV filter scale, and mask for common 2D shapes.
-
Visualize Velocity COP visualizes a 2D velocity field provided by a UV layer.

Copernicus improvements 
-
New 3D Output flag lets the 3D viewer display something different from the 2D viewer. When on, the 3D output flag marks the node whose output appears in the 3D viewer. You can also use the 3D output flag with the display flag to preview a texture on a heightfield or on a geometry that has UVs.
-
Drag COP nodes and cameras into the Scene Viewer to look through them. For more information about improvements to COP cameras, see Camera news.
-
Use op: to specify UDIMs by appending them after a question mark, for example
cop?udim=1001,1002,1003. -
Support for attribute wires on various COP nodes.
-
The Copernicus Default Settings window adds the following parameters:
-
File Cache sets the amount of megabytes to devote to File COP caches.
-
Auto-Unload discards node outputs during or after the cook to minimize RAM usage.
This feature is still under development. The current functionality is unfinished and subject to change, and may have thin or no documentation. Please bear this in mind when using it.
-
-
Improvements to the shape of COP ports to show their data type.
-
Enhanced support for cables, such as the ability to override cable input ports.
-
Improved COP-powered shading workflow to build materials using the Texture Material Library LOP (see Using COPs as materials).
-
The COP Network node and COP Network SOP add the following parameters:
-
Canvas parameters that let you set the context option
default_camera. -
Default UDIM List sets the context option
UDIM_list. When set to from Geometry, the Geometry Path sets the path to the SOP to inspect and the UDIM List Attribute sets the name of the detail attribute that contains the UDIM list.
-
-
The COP Image Filter List adds the Albedo Layer Scope and Normal Layer Scope parameters that select which AOV is wired into any
albedoornormalinput, respectively. -
The Bend COP adds the Filter parameter that sets the method used to sample the image.
-
The Blend COP adds the following parameters:
-
Space determines which pixels in the foreground and background match.
-
Clip by Data Window adds an implied mask that matches the data window of the foreground image.
-
-
The Block Begin COP adds the Rename Wires Using Output Labels parameter that sets the name of each output wire based on its respective port label.
-
The Block End COP adds the following parameters:
-
Iteration Variable sets the name of the context option that stores the current iteration.
-
Total Iterations Variable sets the name of the context option that stores the total number of iterations this block is set to run for.
-
First Pass Variable sets the name of the context option that identifies the first pass in the block.
-
Rename Wires Using Output Labels sets the name of each output wire based on its respective port label.
-
-
The Blur COP's Units parameter can now set the blur radius to use units of the local space.
-
The Bubble Noise COP and Cloud Noise 3D COP add the following parameters:
-
Noise Type that lets you choose between a simplex or curl noise.
-
Fold for post-processing.
-
-
The Camera Properties COP adds the Guide Scale parameter that sets the metadata specifying the scale of the camera that’s displayed for metadata layers.
-
The Channel Swap COP has the following updates:
-
Adds an
alternateinput and a dropdown menu for each Source parameter that sets whether the source comes from the first or second input. -
Adds Value for Red, Value for Green, Value for Blue, and Value for Alpha parameters that set a constant value as the source channel.
-
-
The Chroma Key COP adds the following parameters:
-
Method sets whether to use the legacy Chromakey or the channel separation key.
-
Invert inverts the resulting matte.
-
Screen Color sets the color to key out for the channel separation key.
-
Threshold sets the threshold of the resulting matte for the channel separation key.
-
Width sets the range on both sides of the threshold that determines the input minimum and maximum for the channel separation key.
-
-
The Chromatic Aberration COP adds the following parameters:
-
Mode sets how to compute the chromatic aberration result.
-
Number of Colors sets the number of spectral wavelength samples to use.
-
Translation parameters that let you offset the red, green, and blue channels.
-
-
The Clamp COP adds the following parameters:
-
Compute Range sets the Lower Limit and Upper Limit parameters to the minimum and maximum values of the
sourceinput. -
Soft Clip in the Clamped Values dropdown menu smoothly transitions clamped values across a range, which you control with the Soft Clip Direction and Soft Clip Range parameters.
-
-
The Combine Layers COP is renamed to Layer Merge and has the following updates:
-
Space determines which pixels in the foreground and background match.
-
Border determines the sampling behavior outside of the incoming layer’s boundaries.
-
Filter determines the method used to sample the image.
-
Clip by Data Window adds an implied mask that matches the data window of the foreground image.
-
Crop to Content crops the output layer to the size of the source layer’s transformed data windows.
-
Operation adds the Over option, which places the preceeding RGBA values over the following RGBA values.
-
-
The Crop COP adds the following parameters:
-
Method sets the method used to specify the crop region.
-
Reset Pixel Origin adjusts the pixel coordinates to match the display window.
-
Size sets the size of the crop.
-
-
The Crystal Noise COP adds the Flatten Faces parameter that applies a smoothstep function over the faces.
-
The Curvature COP adds the Space parameter that sets the space used to measure the layer’s curvature.
-
The Derivative COP adds the Space parameter that sets the space in which to compute the derivative.
-
The Dilate Erode COP adds the Units parameter that sets the units for the dilation effect.
-
The Extrapolate Boundaries COP adds the Diffuse Iterations parameter that sets the number of iterations to relax the extrapolated values to smooth them.
-
The File COP has the following updates:
-
Display Window from Input makes the file use the input’s display window.
-
Supports HEIF/HEIC images and $SHFS URIs.
-
-
The Fractal Noise COP adds the following parameters:
-
Fractal Type controls how to add successive layers of noise.
-
Octave Offset sets the amount to offset the noise for each iteration.
-
Sparse Convolution in the Noise Type dropdown menu creates a value noise that smoothly blends values on a regular grid.
-
-
The Fractal Noise 3D COP adds the following parameters:
-
Fractal Type controls how to accumulate successive layers of noise.
-
Octave Offset sets the amount to offset the noise for each iteration.
-
Sparse Convolution in the Noise Type dropdown menu creates a value noise that smoothly blends values on a regular grid.
-
-
The Height to Ambient Occlusion COP adds the Space parameter that sets the space used to interpret the height’s steepness.
-
The Height to Shadow COP adds the Space parameter that sets the space in which to interpret the light position, direction, and normal parameters.
-
The following nodes add support for the new attribute wires, and therefore add a Signature parameter that sets the layer type the source accepts or outputs.
-
The following nodes add the Type Info parameter that sets the type information for the resulting layer:
-
The Invoke Block COP adds the following parameters:
-
Iteration Variable sets the name of the context option that stores the current iteration, which starts at
0and counts up to one less than the Iterations amount. -
Total Iterations Variable sets the name of the context option that stores the total number of iterations this block is set to run for, which is equal to the Iterations amount.
-
-
The Lattice Deform COP adds the Filter parameter that sets the method used to sample the image.
-
The Layer COP and Match Camera COP add the Identity Transform parameter that resets the layer to the canonical space.
-
The Light COP adds multiple parameters and inputs that control the light’s position, radius, intensity, exposure, environment map offset, and materials.
-
The Mask from Curves COP adds the Invert parameter that inverts the outgoing mask or SDF.
-
The Mono to RGB COP adds the Compute Range parameter that sets the Input Min and Input Max parameters to the minimum and maximum values of the
sourceinput. -
The ONNX Inference COP has the following updates:
-
Supports ONNX models greater than 2GB using an external data file.
-
Support for additional tensor element data types (other than float) and content-dependent output sizes.
-
Device ID sets which GPU to use for inference when multiple GPUs are available.
-
Input Tensor Element Data Type sets the data type of the input tensor element.
-
Output Tensor Element Data Type sets the data type of the output tensor element.
-
RGBA Treatment sets whether you Preserve R, G, B and A or Discard component A.
-
-
The OpenCL COP adds the following parameters:
-
Rename Wires Using Output Labels sets the name of each output wire based on its respective port label.
-
Build BVH builds a bounding volume hierarchy around a triangle mesh with positions given by values of the bound attribute.
-
Build Point BVH builds a bounding volume hierarchy over the points of the geometry, using positions given by values of the bound attribute.
-
Point BVH Mask Attr sets an optional integer point attribute that restricts which points are added to the point BVH.
-
Context Option in the Binding’s Type dropdown menu, which lets you bind a Context Option.
-
Input Type lets you, when the Binding’s Type is Ramp, choose between a ramp parameter and raw ramp.
-
Raw Ramp sets a ramp from its raw string representation.
-
-
The Preview Material COP adds the following parameters:
-
Signature lets you use metadata to support exporting textured grids to Solaris.
-
UDIM List specifies the list of UDIM tiles that apply to the input geometry.
-
Coverage Threshold sets the minimum amount of a tile that must be covered in UV space before that tile is considered used.
-
USD parameters that support USD linking.
Note
These USD parameters don’t provide artistic controls and you should not try modifying them. The parameters are used by Solaris when incorporating the materials into USD (when used inside a Texture Material Library LOP).
-
-
The Quantize COP adds the Compute Range parameter that sets the Minimum Value and Maximum Value to the minimum and maximum values of the input
sourcelayer. -
The Ramp COP adds the following parameters:
-
Size Method lets you choose between framing the ramp to the display window or defining the ramp by points.
-
Start Position sets the ramp’s origin (for linear ramps) or center (for radial and concentric ramps).
-
End Position sets the ramp’s end (for linear ramps), radius (for concentric ramps), or crossover point (for radial ramps).
-
-
The Rasterize Curves COP adds the following parameters:
-
Width Attribute sets the attribute used to compute the width of the output rasterized curves.
-
Optional falls back to the layer defined by the
size_refinput and the Default Value parameter if the specified attribute can’t be found. -
Default Value sets the value to use for an Optional layer.
-
-
The Rasterize Geometry COP adds the following parameters:
-
Depth Mode specifies the depth sample from which to rasterize data.
-
Face Culling specifies which polygons to ignore when rasterizing.
-
Optional falls back to the layer defined by the
size_refinput and the Default Value parameter if the specified attribute can’t be found. -
Default Value sets the value to use for an Optional layer.
-
-
The Rasterize Layer COP adds the Crop to Content parameter that crops the new layer to the size of the source layer’s transformed data window.
-
The Rasterize Setup COP adds the Flatten UV Z Values parameter that flattens the Z component of float3 UV attributes to
0. -
The Ray Trace COP adds the following parameters:
-
Face Culling specifies the behavior of primary rays that interact with the geometry.
-
Cull Backface Mode updates to Visibility Culling, which specifies the behavior of secondary rays that interact with the geometry.
-
Ray Length Mode specifies the method used to set the maximum length of the rays.
-
Ray Length sets a custom maximum length for the rays.
-
lengthsinputs a mono layer of the ray lengths.
-
-
The Remap COP adds the following parameters:
-
Compute Range sets the Input Min and Input Max parameters to the minimum and maximum values of the
sourceinput. -
Use Ramp applies the Ramp parameter and any connected
rampinput.
-
-
The ROP Image Output COP has the following updates:
-
Initialize Simulation OPs forces all simulation OPs to reset.
-
DWA Compression Level sets the DWA compression level.
-
Remove Opaque Alpha Channels detects and removes opaque alpha channels when saving textures.
-
Replaces Set UDIM with a UDIM List dropdown menu that has more options for setting UDIMs.
-
Removes the Controls… parameter.
-
-
The Scatter Shapes COP adds the following parameters:
-
Treat Mono as Alpha makes the expansion from mono to RGBA occur as GGGG instead of the node’s default expansion with GGG1.
-
Post-Jitter samples the input layers using the stamps' position post-jitter.
-
Random Per Component randomizes the Stretch Variance and Min/Max Value differently for each X or Y component.
-
-
The Sharpen COP adds the Read Pixels outside Image parameter that adds contributions from pixels outside of the image.
-
The Slope Direction COP adds the Space parameter that sets the space in which to compute the slope.
-
The Stamp Points COP adds the following parameters:
-
Space sets whether to interpret the transform attributes on the
pointsinput as 2D or 3D. -
Z Falloff sets the Z-falloff for the stamp-space’s depth (the Z coordinate).
-
Filter Scale sets the amount by which to multiply the
posinput. -
Sort Stamps by Depth sorts the stamps based on their depth.
-
-
The Streak Blur COP adds the Border parameter that sets the sampling behavior outside of the incoming layer’s boundaries.
-
The Subnetwork COP adds the Rename Wires Using Output Labels parameter that sets the name of each output wire based on its respective port label.
-
The Swirl COP adds the following parameters:
-
Inner Blend Region Scale # sets the amount to scale the inner blend region of an individual swirl’s center.
-
Inner Radius Scale # sets the amount to scale the inner radius of an individual swirl’s center.
-
Filter sets the filter used to sample the source layer when the swirl deformation reads between pixels.
-
Inner Blend Region sets the size of the blended region between the undeformed center and the swirled area.
-
Inner Radius sets the radius of the undeformed center region inside each swirl.
-
-
The Tile Pattern COP adds the following parameters:
-
Shape Edge Filter sets a filter scale for filtering the edge of a stamped shape’s cutout.
-
Anti-Aliasing reduces the jagged edges by smoothing the drawn shapes and outlines.
-
-
The Transform 2D COP has the following updates:
-
Units sets the unit of measurement that determines the size of translations.
-
Pivot Translate sets the local pivot space’s translation value for transformations.
-
Crop to Content crops the new layer to the size of the original layer’s transformed data window.
-
Removes the Pivot parameter.
-
-
The Transform 3D COP adds the Crop to Content parameter that crops the new layer to the size of the original layer’s transformed data window.
-
The Triplanar COP adds the following parameters:
-
Normal Type sets the type of the input normal.
-
Filter Scale that filters the input to avoid aliasing for non-identity UV maps.
-
Filter that sets the method used to sample the image.
-
-
The Triplanar Hex Tile COP and Triplanar UV COP add the Normal Type parameter that sets the type of the input normal.
-
The UV Transform COP adds Fitting parameters that set how to fit each UV island from the
seedinput to the given size. -
The Wipe COP adds the Filter Scale parameter that scales the blended boundary between the two images.
-
The Worley Noise COP and Worley Noise 3D COP add the Round Border parameter that sets the amount of smoothing to apply when computing the exact border distance for Euclidean Worley cells.
-
The Wrangle COP adds the Rename Wires Using Output Labels parameter that sets the name of each output wire based on its respective port label.
-
The Layer Attribute Create and Layer Attribute Delete COPs are renamed to
 Layer Property Create and
  Layer Property Delete.
 -
Improvements to COP Python Handles:
-
New multi-space support for tracking, handling, and converting COP parameters across multiple coordinate spaces (Buffer, Local, Image, Pixel, and Texture).
-
New support in
drawable2D.Dragger2D(see Utilities) for operating in 3D space using a layer transform. -
New support for handling pivot operations across multiple coordinate spaces.
-
Improved undo support.
-
Improved fixed-size handle support.
-
Content library examples 

|
Learn how to create a wetmap on a model that has UDIMs. Download the file here. |

|
This procedural sci-fi panel is built in Copernicus, drawn as texture layers instead of real geometry. Download the file here. |

|
This procedural prop fan features a high-poly to low-poly baking workflow in Copernicus. Download the file here. |

|
Learn how to create a vast environment in COPs using heightfields, with additional setup and rendering in LOPs. Download the file here. |

|
Learn how to create displacement and generate tile patterns. Download the file here. |

|
Learn how to create various patterns using the  UV Shape COP. Download the file here. UV Shape COP. Download the file here.
|