| On this page |
Interactive Animation 
-
The character picker allows animators to create a 2D layout with simple buttons to select character controls in an animation scene. A picker layout can be created using an
 APEX Add Character Picker SOP or directly in an animation scene.
Character picker -
A new LOPs toolset allows you to rig and animate characters in the context of a USD stage. Included in the toolset are LOP nodes for building rigs and importing existing animation scenes from SOPs, and the
 APEX Animate LOP, a Hydra scene index plugin for render-time evaluation and deformation of APEX characters. The
  Electra test geometry is also available in LOPs as a USD asset with material and rig variants. This toolset is currently in Beta.
 -
The new Animate desktop provides a layout tailored for character animation, bringing together the scene view, animation editor, and other related panels. The animation toolbar is shown in this desktop by default, and its visibility is now saved per desktop.
-
The animate state’s parameters and settings have been combined into a single HUD and is now open in the animate state by default for better discoverability. You can still separate the parameters and settings into their own HUDs by
 clicking the combined HUD and selecting Toggle Split View. Along with this, various parameters and settings in the combined HUD have been cleaned up and reorganized.
 -
In the animate state, some of the more common actions like mirroring, adding constraints, and baking keys have been added to the top toolbar for easy access. Tool-specific functionality is also available in the top toolbar and the context menu once you enter the tool.
-
The secondary motion tool in the animate state allows you to add physically-accurate effects like lag/overshoot, jiggle, and spring to existing animation without having to manually create and key these detailed movements.
Secondary motion on the antenna and legs -
In the animate state ragdoll tool, you can add different effects to the ragdoll using forces like wind, air resistance, magnet, and turbulence. With the Impact Threshold parameter, you can set an object to become a ragdoll when it’s hit by another object.
Ragdoll affected by forces -
Additional updates to the ragdoll tool include the O hotkey, which toggles the display of the ragdoll between collision shapes and the character’s skin, and the Always Scope Parameters setting, where you can specify whether the ragdoll parameters are added to the channel list when rig controls are selected. In addition, the Show Shape Intersections and Show Shapes Outside Limits parameters have been moved from the ragdoll parameters to the ragdoll settings.
-
The MultiDriver constraint option has been replaced with a more robust method of creating multiple constraints to drive a single control. You can also create constraints that are active within a frame range and adjust the effect of those constraints using a blend parameter. In addition, you can now select constraints directly in the viewport, whereas previously, you could only select constraints using selection sets.
-
In the animate state’s full body IK tool, you can alter a character’s animation using full body IK targets. The previous functionality of full body IK posing is now done in the full body IK pose tool, where you can change, but not animate, a character’s full body IK targets.
Full body IK for repositioning a character -
The motion mixer interface has been reorganized, with the clip catalog and parameters moved from the motion mixer pane to the parameter editor. You can now group clips into nested clips, and convert a clip into an override animation layer, allowing you to continue editing the animation directly in the motion mixer. There is also a simplified workflow for bringing retargeted biped data into the motion mixer using recipes.
-
In the animate state’s dynamic motion tool, a dynamic motion path can be created for a frame range selection in the playbar timeline.
-
The Cache Animation option in the viewport state parameters window allows you to store rig evaluation results to an animation cache, speeding up playback and scrubbing of animation. Animation caching is turned on by default.
-
In the animate state, you can remove constraints, locators, and ragdoll tethers using the ⌦ Del hotkey.
-
The keymap, APEX Traditional Animation, provides alternative key mappings for the animate state.
-
There are new actions available in the animate state that are not assigned to hotkeys, including those related to animation clips, the animation catalog, and resetting elements in the animate state. You can configure hotkeys for these actions as needed.
-
The geometry channels subpane in the channel list allows you to see the animation curves in a scene without having to enter the animate state.
-
With the retime tool, you can adjust the timing of keys in the graph view.
Retime tool -
In the animation catalog, there are new options for merging in a catalog from disk (Import Catalog) and exporting specific folders to a new catalog (Export Selected Folders). When capturing thumbnails, the viewport grid, name, and camera buttons are now hidden.
-
In selection sets, you can revert controls to their default visibility (Revert Control Visibility), and filter for tags using the
%tag()or#<tag>syntax. -
In the
 graph view, you can box select across graphs in Multi Graph Display Mode and shift keyframe values using the operations
 +=,-=,*=, and/=. In Box Handle with Pivot mode, turning on
  Snap Moved Keys to Nearest Frame moves the pivot to the nearest integer frame, and you can re-center the pivot by clicking and selecting Re-center Pivot.
Animation SOPs 
-
Conveniently transfer animation from one biped skeleton to another using the
 Biped Setup and
  Biped Retarget SOPs. You can quickly create a setup that uses these SOPs with the new APEX Retarget to Rig recipe.
 -
The
APEX Scene Animate SOP’s parameter editor now displays the animation layers on the node, and the buttons that were previously in the parameter editor have been moved to a new Animation menu. The options in the Evaluate menu allow you to evaluate the scene, with the evaluated result made available on the SOP’s second output (which uses an embedded  APEX Scene Invoke). By default, the APEX Scene Animate SOP now requires the input to be an APEX scene. If you have existing recipes that pipe an APEX character into this node, turn on the Allow APEX Characters parameter.
 -
Several recipes are available to help you get up and running with rigging, animation, and retargeting setups. These include recipes for importing FBX characters, rig building for biped characters, biped retargeting, and setting up an animation scene with characters, cameras, and props.
-
On the
Electra test geometry, you can choose between high and low resolution textures for the character, and the ragdoll, motion mixer, and full body IK configurations are now turned on by default. In the animate state, Electra can be configured using a main image control, and she comes with selection sets and a character picker layout for controls and ragdoll.Main control on Electra -
The
 Otto test geometry can be configured in the animate state using a main control, which includes options for selecting LOD controls and switching between the mesh and skeleton. Eye controls have been added to Otto, and he now comes with selection sets and a character picker layout for controls and ragdoll.
 -
With the new
 APEX Scene Import Animation SOP, you can import multiple animations from files, animation catalogs, and SOPs into an animation scene.
 -
The new
 APEX Scene Merge SOP merges multiple characters and animations from input geometry and SOPs into an animation scene.
-
The new
 APEX Scene Add Camera SOP adds camera primitives to an animation scene.
Camera constrained to a character’s head -
On the
APEX Scene Add Animation SOP, you can add animation on a new layer (Layer Name) and set the new animation as the active clip in the animation scene (Set as Active Clip). -
On the
 APEX Scene Copy Animation SOP, the Set as Active Clip parameter allows you to set the new animation as the active clip in the animation scene.
 -
On the
 APEX Map Character SOP, the Rest Transforms parameter creates a new control property,
 mapping_xform. You can then use the Bind Pose parameter on the APEX Animation from Skeleton SOP to specify different methods of binding skeleton joints to their corresponding controls, including using the new
 mapping_xformproperty. -
On the
APEX Animation from Skeleton SOP, you can define the frame range to evaluate (Frame Range Mode), store the animation on a new layer (Layer Name), and display the rig controls in the viewport (Show Controls Guide). -
Version 2.0 of the
 APEX Control Extract SOP provides improved skeleton and control extraction for the rig inversion process. A full skeleton is now output by default instead of the control skeleton.
 -
On the
 APEX Configure Character SOP, there are new parameters in the Motion Mixer section for reparenting controls and specifying mocap biped preset values. In the Ragdoll section, the drop-down menu beside the Character Name parameter allows you to automatically name ragdolls relative to the primary character’s name.
 -
On the
APEX Scene Invoke SOP, you can choose the extra outputs to evaluate by toggling the Extra Outputs multiparm entries. There is also a new alias to the APEX Scene Invoke SOP - APEX Scene Evaluate. -
On the
 Channel Primitives from MotionClip SOP, you can specify the Detail Attribute to read from each frame of the MotionClip. This attribute contains the channel values to convert to channel primitive keys.
 -
On the
 Secondary Motion SOP, you can set the secondary motion to affect the joints in world space (set Mode to World Transform). In addition, the Use Rest Pose Attribute to Apply Limits parameter has been renamed to Use Rest Pose Attribute to Correct Local Transform.
 -
On the
Motion Clip SOP, the Recompute Local Transforms parameter is now turned on by default. -
On the
 Ragdoll Solver SOP, you can turn on the Solve on Creation Frame parameter to solve for newly-created objects on the timestep they were created.
Interactive rigging, APEX graphs, and APEX Script 

-
The Autorig Builder interface has been redesigned to provide visual feedback to help guide you along the rig-building process. Prebuilt rig templates are now available in the Autorig Builder, allowing you to transfer full rigs onto a character, while giving you access to the individual rig components for further customization. Other new features include auto-orientation for joints, the ability to create selection sets for rig components, and many new parameters in the
 APEX AutoRig Builder SOP.
Updated Autorig Builder interface -
Improvements have been made to the rig inversion process, resulting in more stable results when transferring skeleton animation to rig controls, such as in the placement of pole vector controls. These improvements can be seen in rigs that utilize the major biped rig components as well as in animation tools like full body IK, ragdoll, and secondary motion.
-
The updated APEX graph functionality, along with the new and updated APEX graph nodes are listed here.
-
The APEX graph debugger is a feature of the APEX network view that allows you to inspect the values of a graph’s ports as a tooltip.
-
APEX Script now supports string and array slicing, setting FloatRamp and ColorRamp values, and adding ramps to graph interfaces.
-
In the animate state’s viewport state parameters window, the Evaluate Rigs in Parallel option allows you to evaluate rigs in a scene simultaneously, speeding up playback in scenes with multiple characters. Parallel evaluation is turned on by default.
Playback in real time with 20 full character rigs -
In the animate state’s viewport state parameters window, the Open APEX Log button opens a log viewer that displays information, warnings, and error messages from APEX and Python sources.
-
You can view the properties on APEX graph nodes by
clicking the node in the APEX network view and selecting Properties. -
In the rig tree view, the
menu option Copy as Full Path copies the full path of the selected item.
Rig components 
-
With version 3.0 of the blend shape rig component, you can switch the look of the blend shape controls between 3D sliders that sit on the blend shape surface, and screen space sliders that are displayed in a 2D control panel that is locked to the viewport. You can also create patch sliders, where a NURBS surface is used to drive different blend shapes.
-
The new eye rig component sets up look at controls for one or more eyes.
Eye rig component -
The new surface deform rig component binds the points or primitives of a static geometry to a skinned surface so that the geometry deforms along with the surface as the rig is animated.
-
On the limb rig component, there are new options for the limb controls, twist functionality, and clavicle target controls. You can also parent controls to other controls in the same segment using the string “
{segment}” (see the Parent tab). -
On the multi IK rig component, the Solver parameter lets you choose the IK solver to use, and there are new options for customizing the twist functionality and promoting the controls on the IK chain. The parameter interface has also been reorganized.
-
Version 2.0 of the IK/FK blend rig component allows you to switch between IK and FK by pressing the IK/FK switch icon in the component’s
 menu. You can also use the Switch Visibility parameter to choose the controls to display.
 -
On the transform driver rig component, you can add offsets to the driver (Mode, Offset Transform, Offset Rotate, Offset Scale) and move the driven nodes around (Offset Controls, Parent Constraint).
-
On the hand rig component, the Piano Hands parameter has been renamed to Use IK Fingers. There are also new options for renaming the finger segments (Rename Subsegment) and toggling the display of the component’s
menu and finger selection handles (Always Add Config Control, Use Selection Handles). -
On the foot rig component, the Piano Feet parameter has been renamed to Use IK Toes. There are also new options for the component’s
menu in the viewport (Use Config Control, Use Foot Roll), foot controls (Rotation Order, Make Inverse Controls Locators), and renaming toe segments (Rename Subsegment). -
The look at rig component automatically creates and positions the driver, target, and up controls even if the Driver, Target, and Up parameters are not populated.
-
On the spine rig component, there are new options for toggling the display of the component’s
menu in the viewport (Always Add Config Control) and customizing the spine controls (Driver tab). -
The bone deform rig component parameter interface has been reorganized, with new parameters for blend attributes, deforming normals, deleting point colors, and specifying the points to deform.
-
On the neck head rig component, there are new options for configuring the neck and head controls (Use FK Controls, Reorient Controls, Rotation Order).
-
On the ulna rig component, there are new parameters for promoting and offsetting the controls, and reversing the twist direction (Settings tab).
-
On the root rig component, you can use the Always Add Config Control parameter to toggle display of the component’s
menu in the viewport. -
On the rename rig component, the Joins With parameter allows you to specify a string that is used to join the prefix and suffix with the new name.
-
In version 3.0 of the delta mush rig component, a prefix and suffix is no longer added to the rig graphs’s sop::deltamush node.
-
On the fk transform rig component, the Tags parameter has been moved to its own Tags tab.
-
On the joint rotate corrective rig component, the Flip Secondary Axis parameter has been renamed to Switch Secondary Axis.
Rigging SOPs 
-
With the new
 APEX Rig Pose SOP and set driven keys rig component, you can drive animation using a control’s transforms. The APEX SetDrivenKeys recipe provides an example of how to do this.
 -
On the
APEX Configure Controls SOP, you can turn images into clickable buttons that select and toggle the visibility of its associated controls, including LOD controls and shapes (Use Image section, Config Manager tab). There are also new parameters for creating procedural selection sets (Use Selection Sets section), promoting character controls (Use Promote section), and renaming character controls (Rename tab).Selecting LOD controls and shapes -
On the
APEX AutoRig Component SOP, the Automatically Reset Test Animation toggle resets the animation in the viewport when any changes are made to the parameters. The parameter interface for the Rig Builder tab has also been cleaned up and is now only available when Use with Rig Builder in the Save tab is turned on. -
The redesigned version 2.0 of the
 Orient Joints SOP supports more orientation options, provides the ability to isolate parts of the skeleton for orienting, and generates orientation recipes that can be reused and invoked downstream.
 -
The
 APEX Pack Character SOP now creates a character in a scene even if there is no Character/Scene input, as long as the Character Name parameter is specified. You can also promote the translate, rotate, and scale components of specific TransformObject nodes using parameters Translate Group, Rotate Group, and Scale Group.
 -
On the
APEX Unpack Character SOP, the Create Output Skin Name Attribute parameter adds a primitive name attribute to the skin output based on the character name.
-
On the
 Packed Folder Split SOP and
  Unpack Folder SOP, the Path Attribute parameter creates a primitive attribute on the extracted data that records the original folder path for each primitive.
 -
On the
 APEX Configure Graph SOP, you can now configure the parameters and input bindings for effect graphs (set Mode to Effects).
 -
On the
 APEX Graph SOP, there are new convenience utilities for the fuse graph operation (Fuse Graph section).
 -
On the
 Rig Doctor SOP, the Sort Hierarchy and Sort Depth First parameters allow you to sort the skeleton in depth-first or breadth-first mode.
 -
On the
 Full Body IK SOP, you have the option of using the full body IK target configuration in the new Target Config Attribute parameter, or creating a target configuration from the parameters in the Configure section. The Configuration Attribute parameter has been renamed to Joint Config Attribute, and the Blend Offset Rotates parameter allows you to control the amount of rotation to include in the solve.
 -
On the
 FBIK Configure Targets SOP, you can set a name for the created attribute in the Config Attribute parameter (previously, the attribute name was hardcoded to
 fbik_targetconfig), and the Blend Offset Rotates parameter allows you to control the amount of rotation to include in the solve. -
On the
Rig Pose SOP, the Modify Attribute parameter allows you to specify an attribute that stores a skeleton’s pose. The changes to this pose can be visualized using the Guide Color parameter. -
The parameter interface of the
 Rig Stash Pose SOP has been updated to clarify the node operation.
 -
On the
 Visualize Rig SOP, the parameter interface has been reorganized, and options have been added for customizing the display of the joint axes.
 -
On the
 Skeleton Mirror SOP, turning on the Update Existing Joints parameter helps to avoid name clashes on the mirrored side of the skeleton. Several parameter defaults have also been changed (Group, Reference Attribute, Find Tokens, Replace Tokens).
 -
On the
 Bone Deform and
  Joint Deform SOPs, the Deform Attribute parameter allows you to specify the name of the capture attribute. Previously, the capture attribute name was always set to
 boneCapture. -
The
boneCapturepoint attribute’spCaptDataproperty is now optional on theBone Deform and  Capture Mirror SOPs. These
 boneCaptureattributes can be created using a Capture Attribute Pack SOP.
Input/Output 
-
The following nodes have been renamed to reflect their application to UsdSkel characters:
-
USD Animation Import SOP →
 UsdSkel Animation Import SOP
 -
USD Character Import SOP →
 UsdSkel Character Import SOP
 -
USD Skin Import SOP →
 UsdSkel Skin Import SOP
 -
SOP Character Import LOP →
 SOP Import UsdSkel Character LOP
 -
Bake Skinning LOP →
 Bake UsdSkel Skinning LOP
-
-
On the
 FBX Animation Import SOP,
  FBX Character Import SOP, and
  FBX Skin Import SOP, the Axis System and Convert to Specified Axis System parameters allow you to convert an FBX scene to a specified coordinate system.
 -
On the
FBX Animation Import SOP, FBX Character Import SOP, USDSkel Animation Import SOP, and USDSkel Character Import SOP, you can output the rest pose as an attribute using the Rest Pose Attribute parameter. -
On the
FBX Character Import SOP and FBX Skin Import SOP, you can import FbxCamera objects as camera primitives (Import Cameras), and specify the shader type to import material property values for (Shader Type).
-
On the
 ROP FBX Animation Output SOP and
  Filmbox FBX Animation ROP, the Remove Scaling from Joint Transforms parameter removes the scaling from the global transforms of skeleton joints while preserving their translation and rotation. This helps to facilitate the export of rigs to Unreal Engine’s centimeter-based unit system.
 -
On the
ROP FBX Animation Output SOP and  ROP FBX Character Output SOP, the UEFN (Left-Up-Forward) option in the Export Presets parameter is available for users exporting animation data to the Unreal Editor for Fortnite, which has adopted the Left-Up-Forward coordinate system.
 -
On the
 GLTF Animation Import SOP,
  GLTF Character Import SOP, and
  GLTF Skin Import SOP, the Import Space parameter controls how the imported objects are transformed. Objects can be imported in world space or object space.
 -
On the
 ROP GLTF Character Output SOP and GLTF Character ROP, the Animated Pose Export and Clip Name Attribute parameters control how the animated pose input is interpreted and exported to the glTF file.
 -
The
USD Animation Import SOP now includes channels for all the blendshapes defined on skinned primitives. This allows the channels to be available on the KineFX skeleton whether or not the SkelAnimationprimitive contains animation for the channels. Previously, only blendshape channels defined on theSkelAnimationprimitive were included. -
On the
SOP Import UsdSkel Character LOP, the Topology Attributes parameter (from the  SOP Import LOP) controls whether topology attributes are authored for the rest skin geometry.
Tutorials and content library examples 

|
Learn how to model, build, and render a soccer ball. Along the way, create a classic bouncing ball animation by building an animator-friendly rig and using the set driven keys rig component to add squash and stretch to the ball. Watch the tutorial and download the file here. |
|
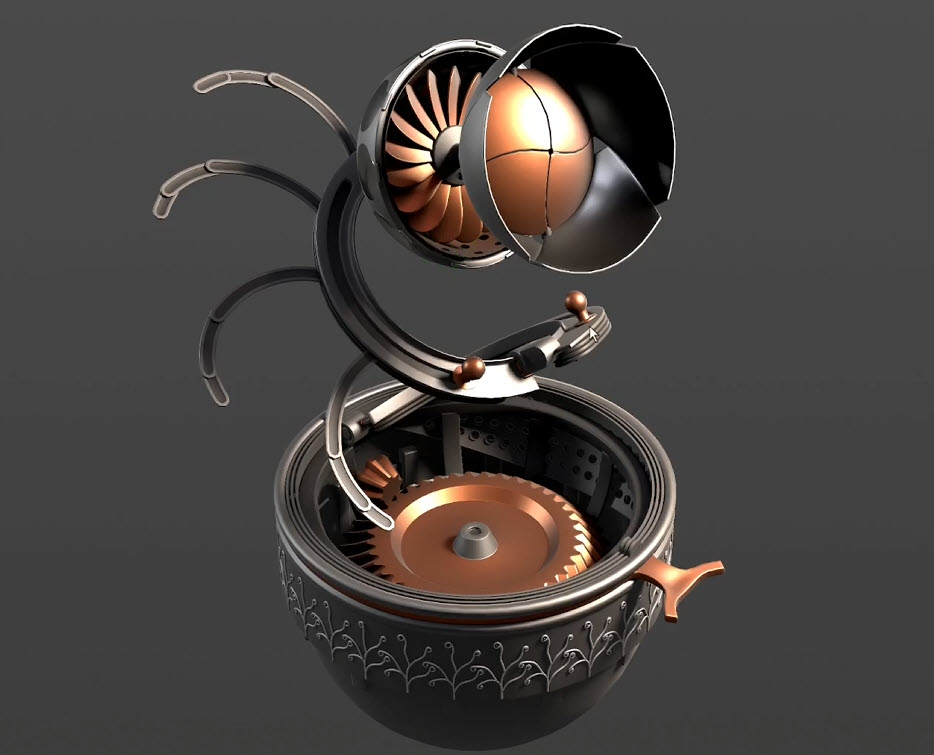
Learn how to use the APEX Pig Pose SOP and set driven keys rig component to drive animation using a control’s transforms. Download the file here. |
|
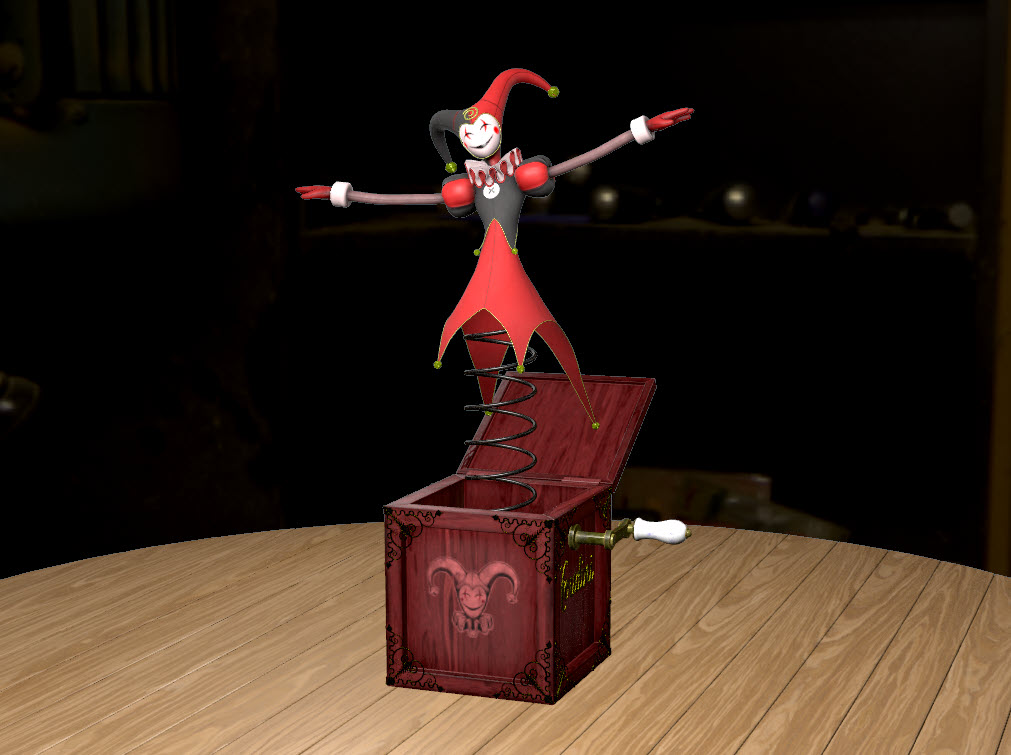
Use the set driven keys rig component and secondary motion tool to rig and animate a Jack in the Box. Download the file here. |

|
Learn how to rig a GSplat using the Autorig Builder. Download the file here. |

|
Model Goofy Goober using implicit surfaces, animate him using the animate state, use retargeted animation, and turn him into a crowd of agents. Download the file here. |