| On this page | |
| Since | 21.0 |
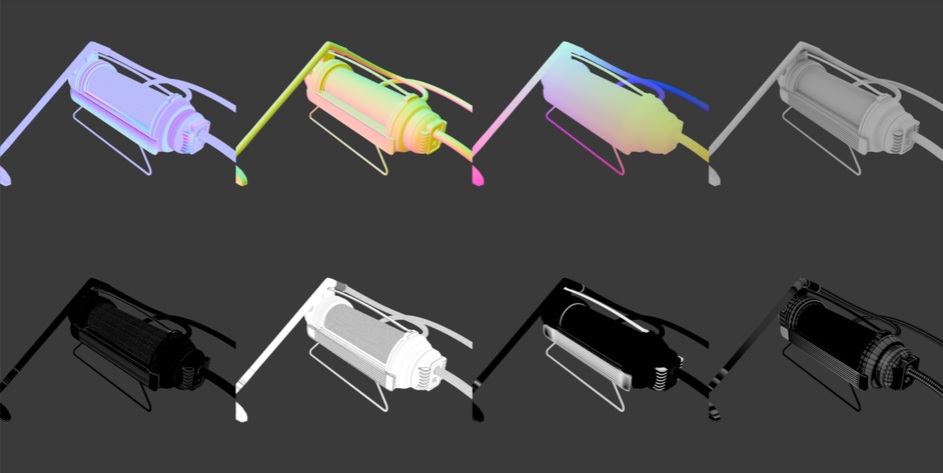
This node is a baker that transfers geometry data from one mesh to another. The node represents detailed features of the high-resolution surface as texture maps on the low-resolution.
Bake Geometry Textures is a near real-time baker that provides quick previews of baking parameters or maps. This node also provides instant access to baked maps and AOVs in Copernicus networks for further processing or manipulation to build shaders or materials.
For example, use this node to fake high detail on low resolutions for games.
Basic workflow 
-
In the Geometry (SOP) network, prepare the meshes you want to use for the bakes. See Mesh types for the types of meshes you can use and Baking best practices for how to prepare them to ensure best results.
-
In the Copernicus (COP) network, create a Bake Setup node. This creates multiple nodes that baking requires.
-
In the three SOP Import COPs (
low,high, andcage), set each SOP Path to the respective path of the prepared mesh from the SOP context. The cage mesh is optional. -
If you use a cage mesh, set Tracing Mode to Cage Mesh in the Bake Geometry Textures COP.
-
Turn on the Bake Geometry Textures COP’s display flag. After a brief wait, the baked maps appear in the viewport. Configure the settings on this node to adjust the bakes.
-
Select which maps to bake with the toggle under the Texture Maps tab in the Bake Geometry Textures COP. Click the output name in the bottom right of the node to select which map displays. The node bakes and displays only maps that are on.
-
To preview the baked maps on your low-res mesh, add a
 Preview Material COP and do the following:
-
Connect the
lowSOP Import COP’sgeometryoutput to the Preview Material COP’sgeoinput. -
Connect any map you want to preview to a corresponding input of the Preview Material COP. Typically the tangent space normal maps can connect to the
normalinput and other maps can connect to thebasecolorinput for debugging purposes.
-
-
To export your selected maps, create a
 ROP Image Output COP and do the following:
-
Connect the Bake Geometry Textures COP’s All Outputs Port (upper-right block) to the ROP Image Output COP’s input.
-
Click Add AOVs from Input in the File Layout tab of the ROP Image Output COP. This autofills the maps you have on in the Bake Geometry Textures COP.
-
Add
<LAYER>(exactly as shown) to part of the file path in the Output File of the ROP Image Output COP. This string is automatically replaced with the name of the map during the export, which lets you export multiple maps at once when you click Render to Disk.
-
Mesh types 
There are three different mesh types that are relevant for the baking process:
Low-res mesh 
The low-res mesh is the final mesh that you use for offline or real-time rendering. The output baked maps are applied to this mesh, so it must have the final UV layout intended for the textures. It’s highly recommended that the low-res mesh contains the final normals (N) and tangents (tangentu) before baking. If your target renderer or game engine performs triangulation upon import or at runtime, it’s also recommended that the low-res mesh be triangulated before baking (see Baking best practices for more information).
High-res mesh 
The high-res mesh is the source mesh that provides the geometric details to transfer to the baked maps. The baking process encodes various types of information from the high-res mesh into the low-res mesh’s texture space. The high-res mesh should contain point/vertex normals (N) if you intend to bake any type of normal maps, but if normals are not present on your input high-res mesh they're automatically generated during baking.
Cage mesh 
The cage mesh is an optional mesh you can use to more precisely control ray tracing origins and directions. The cage mesh must have the same topology as the low-res mesh, and it must fully enclose both the low-res and high-res meshes. Rays are traced from the cage surface towards topological twin positions on the low-res surface, which is more predictable, doesn’t require UVs on the cage, and ignores any potential issues with low-res normals.
Without a cage mesh, rays are traced from the surface of the low-res mesh bidirectionally along the surface normals. In some cases this can result in sampling artifacts along edges or intersections with incorrect surfaces, particularly when notable variations in feature scale, occlusion, convexity, or concavity are present in different parts of the mesh.
The cage mesh addresses these issues by providing regional controls over the tracing behavior instead of relying on global parameters. Manually adjust the cage vertices' offset distances and directions from the low-res vertices, which guides the tracing origins and directions. The cage mesh should tightly enclose different parts of the mesh without intersections with the wrong low-res and high-res surfaces.
The cage mesh may sometimes be fully or partially split along the edges. This is so the vertex offset directions provide more desirable tracing directions, as long as it still has the same vertex number and vertex order as the low-res mesh.
Baking best practices 
-
While the baker can automatically add missing normals to the low-res mesh, it’s best to create your own vertex normals that you intend to carry over to the target renderer or game engine. This is because the output tangent space normal maps are highly dependent on the low-res mesh normals during both baking and rendering. When baked textures are applied to the low-res mesh for rendering, the tangent space normals from the textures transform to world space using interpolated low-res vertex normals. Make sure that the vertex normals you use to transform the texture normals are the same ones you use to initially bake the textures.
-
For a similar reason, it’s best to add your own tangents to the low-res mesh before baking so that the tangents used for baking are what you expect. It’s often more lenient than low-res normals because, if using the MikkT tangent space, the tangent calculation is deterministic based on normals and UVs and it’s largely consistent across applications. Use the
 PolyFrame SOP to create tangents.
 -
Make sure your low-res normals and tangents are normalized and orthogonal to each other on vertices and points.
-
If your mesh will be triangulated when you use it with your renderer or game engine, it’s best to triangulate your mesh before baking. While triangulation doesn’t affect normals and tangents stored on vertices and points, the interpolated normals and tangents across faces depend on how the faces are triangulated. There’s no guarantee that Houdini and your target application will triangulate quads and n-gons in the same pattern, and this inconsistency may result in incorrect tangent space normals within faces (particularly with non-planar faces).
-
Make sure your UV layout provides enough texel density and padding between UV islands to avoid sampling artifacts.
-
If the low-res mesh has hard edges (smoothing groups), this means the vertex normals on either side of a hard edge are not continuous. In this case, make sure there are UV seams along these hard edges. Otherwise, in the texture space, the hard edges can run across the center of many texels and cause sub-texel tracing direction inconsistency that results in artifacts in the final bakes. Having UV seams and sufficient padding between UV islands pushes apart two sides of the edges that have discontinuous normals, which eliminates these artifacts.
-
If the low-res mesh has many movable components (such as parts that can be animated, attached, or detached), you should typically bake these components independently so that they don’t cast undesirable shadows or appear to be welded to other parts. To bake components independently, add a piece attribute to your low-res, high-res, and cage meshes. Assign unique values per component so that the same component shares the same value across the low-res, high-res, and cage meshes. Turn on Match Pieces by Name in the Bake Geometry Textures COP and set the Piece Attribute.
-
If your mesh is complex and has many different types of features, consider using a custom cage mesh to improve the bake results. See cage mesh for more information.
Note
Bake Geometry Textures and ![]() Karma Texture Baker use the same tracing but are fundamentally different. Bake Geometry Textures is an interactive geometry baker that bakes geometry data such as curvature and tangent normals. The Karma Texture Baker is capable of this type of baking, but also focuses on Lighting, Material, and Shader baking and should be used for those baking types.
Karma Texture Baker use the same tracing but are fundamentally different. Bake Geometry Textures is an interactive geometry baker that bakes geometry data such as curvature and tangent normals. The Karma Texture Baker is capable of this type of baking, but also focuses on Lighting, Material, and Shader baking and should be used for those baking types.
Parameters 
Tracer 
Tracer
The tracer to use. This is an automatic menu that shows only available options based on your hardware.
Note
OptiX is only available on NVIDIA hardware.
Tracing Mode
The tracing mode that the baker utilizes.
Surface Normal
Traditional baking by firing rays bidirectionally from the normals of the low-resolution geometry. Requires a low and high input.
Cage Mesh
Use a cage mesh to help improve the texture maps. It’s sometimes problematic to determine the direction of the rays from the low-resolution mesh to the high-resolution mesh.
When you specify a cage mesh, rays are sent from the position on the cage mesh towards the corresponding position on the low-resolution mesh. When you bake with a cage, the cage must be entirely outside of the high-resolution mesh.
Note
The low-resolution and cage mesh must have the same topology. Cage meshes are used only when the Tracing Mode is Cage Mesh.
Single Mesh (low)
Bakes the data of a single mesh, and uses the same mesh for the low-resolution and high-resolution mesh. Requires a low input.
UDIM Override
Select a UDIM to bake, which overrides the UDIM context option.
Face Visibility Culling
The method used to handle secondary rays that interact with the geometry. This can allow floaters on the geometry to be projected onto the low-resolution map without casting a shadow.
No Culling
Don’t ignore any secondary rays.
Backface
Ignore any secondary rays that hit the backfaces of the geometry.
Sample Multiplier
The amount to multiply against the Sample parameters, such as Occlusion Samples and Thickness Samples. This acts as a general quality scale.
For example, a Sample Multiplier of 0.5 and Occlusion Samples of 256 bakes occlusion at 128.
Auto Generate Cage 
Auto Generate Cage
Creates a duplicate mesh of the low-resolution mesh. This automatically generates a cage mesh internally instead of requiring a cage input.
Cage Offset
How far the duplicate mesh peaks out from the normals of the original low-resolution mesh.
Soften Cage
Facets the geometry before applying the Cage Offset. A soft cage isn’t faceted and ensures a seamless result across sharp edges, but can cause projection errors and skewed detail as the normals are averaged. An unsoftened cage (which is faceted) can fix this projection skewing, but can cause missing detail capture on sharp edges.
Tip
A skew input can apply projection error fixes on the output maps. It works by creating a copy of the cage mesh, but averages and softens its normals by face area. The final ray directions are then blended between the original low-resolution normals and the softened normals based on this mono map.
Setup 
Normals
How the node deals with low-resolution geometry that’s missing normals. For texture baking to work, the low-resolution mesh should have normals.
Error if Low Res Mesh Missing Normals
Produces an error if no normal attribute is present.
Warning if Low Res Mesh Missing Normals
Produces a warning if no normal attribute is present, but adds point normals weighted by vertex angle internally.
Silently Create Missing Normals
Silently adds point normals weighted by vertex angle internally.
Tangents
How the node deals with low-resolution geometry that’s missing tangent attributes. For texture baking to work, the low-resolution mesh should have tangent attributes.
Add MikkT Tangents if Needed
Adds MikkT tangents using a ![]() Polyframe SOP internally.
Polyframe SOP internally.
Add Texture UV Tangents if Needed
Adds texture UV tangents using a ![]() Polyframe SOP internally.
Polyframe SOP internally.
Error if No Tangent Attributes Present
Produces an error if tangent attributes are missing.
Advanced 
UV Attribute
The attribute to use for UV unwrapping and rasterization. This can be a vertex or point.
Ray Bias
The amount to offset a ray’s origin from the surface of the low-resolution mesh when rays are sent from the low-resolution mesh to the scene.
You can use this parameter to arbitrarily offset the low-resolution mesh along its normal without having to define a cage mesh.
Match Pieces by Name 
| To... | Do this |
|---|---|
|
Use Match Pieces by Name |
|
Match Pieces by Name
Lets you control which primitives are visible when computing ray tracing effects like occlusion and curvature. This matches primitives between the low-resolution and high-resolution geometry and isolates them in their own pocket dimension, which can be used to prevent intersection errors. If a ray hits an object that doesn’t belong to the current matched piece, it’s ignored. This causes a rebake and changes the bake results.
Note
This parameter is internally known as Trace Sets.
Piece Attribute
The primitive piece attribute to use to identify the different pieces across the low-resolution, high-resolution, and cage.
Include Pieces
The sets to always include in the bake. This uses standard Houdini pattern matching.
Exclude Pieces
The sets to always exclude from the bake. This happens after the include pieces are gathered. This uses standard Houdini pattern matching.
For example, if your include is * but your exclude is hat, the baker bakes every set available except hat.
Enable UV Boundary Filling 
Enable UV Boundary Filling
Fills empty areas of the image using colors at the edges of non-empty areas. This is a post-process that fixes darker pixel values at the edges of UV seams, and can produce better results when MIP-mapping the textures.
Note
This process can be time consuming. For faster iterations, turn this feature on only for the final baking.
Exterior
The method used to set the pixels beyond the edge padding.
Unchanged
Leave the pixels unchanged.
Black
Set the pixels to black (0).
Diffuse Fill
Run a ![]() Smooth Fill COP over the region, which smoothly interpolates the pixel values.
Smooth Fill COP over the region, which smoothly interpolates the pixel values.
Edge Padding
The distance (in image coordinates) to directly copy pixel values into the exterior.
Edge Offset
When reading the original value to copy outwards for edge padding, the value exactly at the edge padding may already have exterior color incorporated. This is the distance (in image coordinates) to backtrack and read clean values for extrapolation.
Exclude Alpha from UV Fill
Turns off UV filling on the alpha map. Adding UV filling to alpha often results in a fully white output.
Texture Maps 
Tangent Space 
Alignment 
Normal Y Direction
Determines the direction of the Y value of the tangent space normal (or rounded normal) AOVs.
Tangent Normal 
This map type is what you most probably know from assets or game engines. The colors represent the normal directions. With tangent space normal maps it’s possible to fake bumps and dents to create surface structures that are otherwise represented as true geometry.
Tangent Normal
Turns on baking of the Tangent Normal map. When off, the normal output is a ![]() Null layer.
Null layer.
Normal Space
The normal type the layer outputs as.
The natural way to represent normals and how they're represented in geometry is to use signed normals. The red, green, and blue channel can store the x, y, and z components of the normal and range from -1 to 1. However, historically GPUs and photoediting software don’t support negative ranges, so normal maps in image files are usually stored in an offset format where they have values from 0 to 1.
Signed (-1 to 1)
Signed normals where the x, y, and z components range from -1 to 1.
Offset (0 to 1)
Offset normals where the x, y, and z components range from 0 to 1.
Rounded Edge Normal 
Instead of modelling round edges, you can also simulate them by using a special type of normal map. With rounded normal maps, it’s possible to create smooth transitions between surfaces without additional geometry.
Rounded Edge Normal
Turns on baking of the Rounded Edge Normal map. When off, the edgenormal output is a ![]() Null layer.
Null layer.
Rounded Normal Space
The normal type the layer outputs as.
The natural way to represent normals and how they're represented in geometry is to use signed normals. The red, green, and blue channel can store the x, y, and z components of the normal and range from -1 to 1. However, historically GPUs and photoediting software don’t support negative ranges, so normal maps in image files are usually stored in an offset format where they have values from 0 to 1.
Signed (-1 to 1)
Signed normals where the x, y, and z components range from -1 to 1.
Offset (0 to 1)
Offset normals where the x, y, and z components range from 0 to 1.
Rounded Samples
The number of indirect rays used when computing Rounded Edge Normal. If the resulting AOV is noisy, increase Rounded Samples to reduce noise.
Mode
Whether to capture concave or convex edges in the rounded edge normal map.
Radius
The radius for the rounded normals.
Cusp Angle
Polygons that have an angle less than this threshold are assumed to be a smooth surface and not appear in the rounded normal map.
World Space 
Alignment 
World Space
Whether to record the world space position in left or right handed space with Y or Z as the up axis.
World Normal 
The World Normal map contains the interpolated normals of the surface, also known as Phong shading . Shading normals are often used for relighting purposes, but can create noise.
World Normal
Turns on baking of the World Normal map. When off, the worldnormal output is a ![]() Null layer.
Null layer.
World Normal Space
How to represent the normal map.
Signed (-1 to 1)
Signed normals where the x, y, and z components range from -1 to 1.
Offset (0 to 1)
Offset normals where the x, y, and z components range from 0 to 1.
Position 
Bakes the world position values to the RGB components of the layer. The gradient is a visual representation of an object element’s distance from the world’s origin. You can, for example, use this map to create dust or weathering effects that depend on an object’s position.
Position
Turns on baking of the Position map. When off, the position output is a ![]() Null layer.
Null layer.
Position Space
How to represent the position map.
Absolute ( Use Actual Position Values )
The position isn’t normalized and dependent on object size and world position.
Relative ( Use Position Within Bounding Box)
The position is normalized relative to its bounding box.
Bounding Box
When the Position is stored, this is how the position is represented.
Fit to Bounding Box
The shading position is fit to the bounding box of the low-resolution mesh.
Fit to Uniform Box (No Stretching)
The shading position is fit to a uniform bounding box of the low-resolution mesh. In this mode, all three axes of the bounding box have the same length.
Geometry 
Ambient Occlusion 
An occlusion map represents the amount of ambient light a 3D model receives. Ambient occlusion is what you get when you put an object inside an evenly lit room. Corners and less exposed areas receive a smaller amount of light and appear darker. Occlusion is one of the most important map types, because it can greatly enhance realism. However, the creation of occlusion maps is computationally expensive. Baking occlusion maps is an effective method to cut down render times.
Ambient Occlusion
Turns on baking of the Ambient Occlusion map. When off, the occlusion output is a ![]() Null layer.
Null layer.
Occlusion Samples
The number of indirect rays used when computing Occlusion. If the resulting AOV is noisy, increase Occlusion Samples to reduce noise.
Max Distance
The maximum distance to consider when computing Occlusion. A small distance can speed up occlusion shading at the cost of accuracy.
Curvature 
You can measure the roundness of an object and bake this information to a curvature map. Technically, the map stores the convexity and concavity of a surface. Curvature maps are often used as masks for worn edges or damages. Curvature maps are similar to cavity maps, but cavity maps mainly focus on detail while curvature maps emphasize the overall shape of a surface.
Curvature
Turns on baking of the Curvature map. When off, the curvature output is a ![]() Null layer.
Null layer.
Curvature Samples
The number of indirect rays used when computing Curvature. If the resulting AOV is noisy, increase Curvature Samples to reduce noise.
Curvature Scale
Controls the overall intensity or contrast of the curvature by amplifying the difference between convex and concave responses.
Max Distance
Smaller values (which create smaller distance) emphasize the concavity. Larger values (which represent greater distance) reveal more curvature and improve the visibility of the convex features.
Bias
Controls whether the map looks more concave or more convex. Smaller values emphasize concavity, higher values enhance convexity.
Edge 
This map type is often used as a mask to create worn edges or enhance an object’s shape by colorizing its edges. Choose whether you want to calculate the edges from the object’s convex or concave polygons, or both.
Edge
Turns on baking of the Edge map. When off, the edge output is a ![]() Null layer.
Null layer.
Edge Samples
The number of indirect rays used when computing Edge. If the resulting AOV is noisy, increase Edge Samples to reduce noise.
Mode
The types of edges (concave or convex) to smooth.
Radius
The radius of the rounded edge.
Cusp Angle
Polygons with an angle below this threshold are considered smooth and don’t appear in the Edge map.
Cavity 
Cavity maps are similar to occlusion maps, but cover more details. In conjunction with organic tissues you can, for example, enhance pores or other high-frequency structures. In contrast to occlusion maps, with cavity maps there’s no interaction between mesh parts that are close by.
Cavity
Turns on baking of the Cavity map. When off, the cavity output is a ![]() Null layer.
Null layer.
Cavity Samples
The number of indirect rays used when computing Cavity. If the resulting AOV is noisy, increase Cavity Samples to reduce noise.
Max Distance
Limits how far rays can detect nearby geometry. Smaller values (smaller distance) emphasize concavity.
Bias
Blends between a full cavity contrast (0) and a flat result (1).
Thickness 
With thickness maps you can mimic light passing through a surface when lit from behind. Light penetrates an object to a certain depth and is then diffusely scattered. A good example is candle wax or skin. The effect is similar to subsurface scattering. The map encodes thick and thin areas as grayscales.
Thickness
Turns on baking of the Thickness map. When off, the thickness output is a ![]() Null layer.
Null layer.
Thickness Samples
The number of indirect rays used when computing Thickness. If the resulting AOV is noisy, increase Thickness Samples to reduce noise.
Invert Thickness Map
Inverts the Thickness map so that thinner areas create darker values and thicker areas create brighter values.
Height 
The height map creates a map computing the displacement between the low-resolution and high-resolution meshes.
Height
Turns on baking of the Height map. When off, the height output is a ![]() Null layer.
Null layer.
Height Space
Height bakes the true displacement between the low-resolution and high-resolution. This distance may be miniscule so the output image can appear nearly entirely black, which may not be useful when used in masking or shaders so may require manual remapping later. Set this to Custom to remap the height map.
True Displacement
True displacement values. These may be visually unfriendly results, and for some bake meshes appear completely black if the geometric difference between the low-resolution and high-resolution is small.
Custom
Remap the height layer according to inner and outer distance parameters.
Inner Distance
Remaps the data within the height map from the inner distance to 0.0.
Outer Distance
Remaps the data within the height map from the outer distance to 1.0.
Alpha 
The alpha map represents the area of an object without any surface structures. Black areas are treated as invisible to any rays and white areas are fully opaque. The map’s grayscales represent semi-opaque (or semi-transparent) values.
Alpha
Turns on baking of the Alpha map. When off, the alpha output is a ![]() Null layer.
Null layer.
Mask Out High Resolution Mesh
Checks for any valid hits on the high-resolution mesh and creates an alpha mask from this, rather than the low-resolution UV map.
Custom Attributes 
Quick Setups
Add a geometry attribute to bake.
Attribute Name
Turns on the Position map’s baking, which bakes the world position values to the RGB components of the layer. When off, the position output is a ![]() Null layer.
Null layer.
Attribute Name
The name of the attribute to rasterize. This must match the attribute present on the geometry. This can be a Point, Vertex, or Primitive.
Type
The output type for the rasterized attribute. To be rasterized, an attribute must either be an integer or a float of four or less components.
Mono
Mono layer for single float attributes.
UV
UV layer for float2 attributes.
RGB
RGB layer for float3 attributes.
RGBA
RGBA layer for float4 attributes.
ID
ID layer for integer attributes.
Inputs 
size_ref
A representative layer that determines the size of the output image and controls the metadata.
low
A mesh that fires rays and has the final texture maps projected onto. The polygons are rasterized based on the mesh’s UV coordinates.
high
The mesh to bake.
cage
An optional custom cage geometry. When Tracing Mode is Cage Mesh, rays are fired from the normals of this mesh instead of the low-resolution mesh.
skew
An input map for where to apply skew correction.
Outputs 
normal
The map of the tangent space normals of the high-resolution.
edgenormal
The map of the rounded edge tangent space normals of the high-resolution.
worldnormal
The map of the world space normals of the high-resolution.
position
The map of the world position values to the RGB components of the layer.
occlusion
The map of the effect of indirect lighting and shadows from the high-resolution mesh.
curvature
The map of the concavity and convexity of the high-resolution mesh. Concave details are brighter while convex details are darker.
edge
The map of the edge details of the high poly mesh.
cavity
The map of the concave details of the high-resolution mesh.
thickness
The map based on the thickness of the high poly mesh. Thicker areas create darker values and thinner areas create brighter values.
height
The map of the displacement between the low-resolution and high-resolution meshes.
alpha
The map that outputs white where geometry exists and black where it doesn’t.
custom
A cable of custom attributes.
| See also |