-
Absolute
Computes the absolute value of the argument.
-
Add
Outputs the sum of its inputs.
-
Add Attribute
Adds a new attribute.
-
Add Constant
Adds the specified constant value to the incoming integer, float,
vector or vector4 value.
-
Add Joint
Adds a KineFX joint to the geometry.
-
Add Point
Adds points to the geometry.
-
Add Point to Group
Adds the point specified to the group given.
-
Add Primitive
Adds primitives to the geometry.
-
Add Steer Force
Multiply steerforce by steerweight attributes and normalize results by total steerweight.
-
Add Vertex
Adds vertices to the geometry.
-
Add Wind Force
Layers a wind force onto a simulation.
-
Advect by Volumes
Advects a position by a set of volume primitives stored in a disk file.
-
Agent Clip Catalog
Returns all of the animation clips that have been loaded for an agent primitive.
-
Agent Clip Length
Returns the length (in seconds) of an agent’s animation clip.
-
Agent Clip Names
Returns an agent primitive’s current animation clips.
-
Agent Clip Sample
Samples an agent’s animation clip at a specific time.
-
Agent Clip Sample Rate
Returns the sample rate of an agent’s animation clip.
-
Agent Clip Times
Returns the current times for an agent primitive’s animation clips.
-
Agent Clip Weights
Returns the blend weights for an agent primitive’s animation clips.
-
Agent Convert Transforms
Converts transforms between local space and world space for an agent primitive.
-
Agent Layer Bindings
Returns the transform that each shape in an agent’s layer is bound to.
-
Agent Layer Name
Returns the names of the current layers or collision layers of an agent.
-
Agent Layer Shapes
Returns the names of the shapes referenced by an agent primitive’s layer.
-
Agent Layers
Returns all of the layers that have been loaded for an agent primitive.
-
Agent Rig Children
Returns the child transforms of a transform in an agent primitive’s rig.
-
Agent Rig Find
Finds the index of a transform in an agent primitive’s rig.
-
Agent Rig Parent
Returns the parent transform of a transform in an agent primitive’s rig.
-
Agent Transform Count
Returns the number of transforms in an agent primitive’s rig.
-
Agent Transform Names
Returns the name of each transform in an agent primitive’s rig.
-
Agent Transforms
Returns the current local or world space transforms of an agent primitive.
-
Align
Computes a matrix representing the rotation around the axes normal to two vectors by the angle which is between the two vectors.
-
Alpha Mix
Takes two values for alpha based on the surface orientation relative
to the camera and blends between the two with a
rolloff as the bias control, effectively removing the silhouettes of the
geometry edges.
-
Ambient
Generates a color using ambient lighting model calculation.
-
And
Performs a logical and operation between its inputs and returns 1 or 0.
-
Anti-Aliased Flow Noise
Generates anti-aliased (fractional brownian motion) noise by using
the derivative information of the incoming position to compute
band-limited noise.
-
Anti-Aliased Noise
Generates anti-aliased noise by using the derivative information of the incoming position to compute band-limited noise.
-
Anti-Aliased Ramp Parameter
-
Append
Adds an item to an array or string.
-
Arctangent
Performs the atan2() function
-
Array Contains
Checks whether a value exists in an array.
-
Array Find Index
Finds the first location of an item in an array or string.
-
Array Find Indices
Finds all locations of an item in an array or string.
-
Array Length
Produces the length of an array.
-
Attenuated Falloff
Computes attenuated falloff.
-
Average
Outputs the average of its inputs.
-
Average Vector Component
Computes the average value of a vector argument.
-
BSDF Tint
Tints a BSDF with separate control over colorization and luminance.
-
Bake Exports
Export shading for use in bake image planes
-
Bias
-
Bind
Represents an attribute bound to VEX.
-
Bind Point Transform
Binds a KineFX point transform with a point index.
-
Blend Regions
Takes a float input as a bias to blend between three input
regions.
-
Blend Transforms
Blends between two KineFX transformation matrices.
-
Block Begin
Marks the start of a code block.
-
Block Begin For
Marks the start of a for loop block.
-
Block Begin For-Each
Marks the start of a for-each loop block.
-
Block Begin If
Marks the start of an if code block.
-
Block End
Marks the end of a code block.
-
Block End Break-If
Marks the end of a code block.
-
Block End While
Marks the end of a while code block.
-
Bounding Box
Returns two vectors representing the minimum and maximum corners of the bounding box for the specified geometry.
-
Box Clip
Clips the line segment defined by p1 and p2 to the bounding box
specified by the min and max corner points.
-
Boxes
Generates repeating filtered squares.
-
Bricker
Generates a brick pattern based on the parametric s and t
coordinates.
-
Brushed Circles
Outputs an angle that gives the appearance of a circular brush pattern when used with anisotropy direction.
-
Brushed Metal Shader
A basic brushed metal shader.
-
Bump Noise
Displaces surfaces along their normal using anti-aliased noise, and
returns the displaced surface position, normal, and displacement amount.
-
Bump To Normal Map
Compute a tangent-space normal map from a bump map
-
Burlap
Generates a burlap displacement pattern useful for simulating rough
cloth or weave patterns.
-
Burlap Pattern
Returns float between 0 and 1 which defines a burlap pattern useful for simulating rough cloth or weave patterns.
-
COP Input
Returns a pixel value in one of the 4 input COPs connected to the VEX
COP.
-
CVEX Shader Builder
A node that implements a CVEX shader using its children VOPs.
-
Car Paint Shader
Simulates car paint with embedded metallic flakes and a coat layer.
-
Cavities
Produces a surface displacement that simulates small surface damage
using anti-aliased noise of various frequencies.
-
Ceiling
Returns the smallest integer greater than or equal to the
argument.
-
Cellular Cracks
Generates a cellular crack displacement suitable for simulating skin,
leather, dried earth, and all kinds of crusts.
-
Cellular Noise
Computes 2D, anti-aliased cellular noise suitable for shading.
-
Character to String
Converts an unicode codepoint to a UTF8 string.
-
Checkered
Returns number between 0 and 1 which defines a checkered pattern useful for visualizing parametric or texture coordinates.
-
Clamp
Clamps the input data between the minimum and maximum values.
-
Class Cast
Downcasts a generic (anonymous) co-shader object to a specific co-shader
-
Classic Shader
Flexible material including multiple reflection layers, subsurface scattering, refractions and displacement.
-
Classic Shader Core
A powerful, highly flexible, generic surface shader with displacement.
-
Cloud Noise
Generates 1D noise used for cloud noise generation.
-
Collect
-
Collide Geometry
Collides the specified joint with the target geometry.
-
Color Correction
Provides a means to change the hue, saturation, intensity, bias, gain and gamma of the input color.
-
Color Map
Looks up a single sample of RGB or RGBA color from a disk image.
-
Color Mix
Computes a blend (or a mix) of its two color inputs, and outputs the
resulting color.
-
Color Transform
-
Combine Local Transform
Combines local and parent KineFX transforms with scale inheritance.
-
Compare
Compares two values and returns true or false.
-
Complement
Computes the complement of the argument by subtracting the argument
from 1.
-
Composite
-
Compute Lighting
Computes lighting using Physically Based Rendering.
-
Compute Normal
This node gives finer control over handling of the normal attribute in VOPs.
-
Compute Tangents
Compute surface tangents in different ways.
-
Conductor Fresnel
Outputs a physically correct reflection factor for conductive materials.
-
Conserve Energy
Clamp the reflectivity of a bsdf to 1.
-
Constant
Outputs a constant value of any VEX data type.
-
Contour
Increases or decreases contrast for values at the bottom of the input range.
-
Copy
Takes a single input of any data type.
-
Cosine
Performs a cosine function.
-
Crackle
Returns float between 0 and 1 which defines a crackle pattern useful for simulating the fine grain texture in skin or on a much larger scale dried mudflats.
-
Create Point Group
Creates a new point group with the name specified.
-
Cross Product
Computes the cross product between two vectors, defined as the vector
perpendicular to both input vectors.
-
Curl Noise
Creates divergence-free 3D noise using a curl function.
-
Curl Noise 2D
Creates divergence-free 2D noise using a curl function.
-
Curvature
Computes surface curvature.
-
Curve Solver
Positions and orients KineFX points from a curve and a list of segment lengths.
-
Decal
An OTL that performs composting of texture maps.
-
Degrees to Radians
Converts degrees to radians.
-
Delayed Load Procedural
-
Delayed Read Archive
-
Depth Map
Works on an image which was rendered as a z-depth image, returning
the distance from the camera to the pixel (or plane) in
question.
-
Determinant
Computes the determinant of a 4×4 or 3×3 matrix.
-
Dictionary Keys
Produces the keys of a dictionary.
-
Dictionary Length
Produces the length of a dictionary.
-
Direct Lighting
Internal VOP used to compute direct lighting.
-
Direction to Child
Computes the direction to a KineFX joint’s child.
-
Direction to Parent
Computes the direction to a KineFX joint’s parent
-
Dirt Mask
Masks crevices or exposed edges
-
Displace
Displaces surface position and modifies surface normals.
-
Displace Along Normal
Displaces the surface along the surface normal by a given amount.
-
Displacement Texture
Modifies normals and/or positions based on a texture map.
-
Distance
Returns the distance between two 3D or 4D points.
-
Distance Point to Line
Returns the closest distance between a point and a line segment
defined by two end points.
-
Divide
Outputs the result of dividing each input value by the next.
-
Divide Constant
Divides the incoming integer, float, vector or vector4 value by the
specified constant value.
-
Dot Product
Computes the dot product between two vectors.
-
Dual Rest
Outputs sanitized dual rest values based.
-
Dual Rest Solver
Sanitizes dual rest attribute data for easier use.
-
Edge Falloff
Creates a smooth roll-off of the input color from the center of the
geometry to the edges, based on the surface normal.
-
Eggshell Pattern
Returns a new surface normal (N) which has a slight fine grained bump on it.
-
Eigenvalues
-
Ends With
Result 1 if the string ends with the specified string.
-
Environment Map
Sets the environment map (on an infinite sphere) and returns its
color.
-
Euler to Quaternion
Builds a quaternion with the given euler rotation.
-
Exponential
Computes the exponential function of the argument.
-
Extract Local Transform
Computes a local transform for a KineFX point using its and its parent’s world transforms.
-
Extract Transform
Extracts the translation, rotation, scale or shear component of a 4×4
transform matrix.
-
Fake Caustics
Outputs and opacity value which can be used to approximate caustic lighting effects.
-
Fast Shadow
Sends a ray from the position P along the direction specified by the
direction D.
-
Fibratus
Generates a 2D, fiber like cloud pattern.
-
Field Name
Provides a fallback value for a field/attribute if the field does not
exist or the given field name is an empty string.
-
Field Parameter
Provides a fallback value for a field/attribute if the field does not
exist or the given field name is an empty string.
-
Filament Sample
-
Filter Point Transforms
Find a point in an array and return the transforms in the corresponding arrays.
-
Filter Pulse Train
Filters the input.
-
Filter Shadow
Sends a ray from the position P along the direction specified by the
direction D, a…
-
Filter Step
Computes the anti-aliased weight of the step function.
-
Filter Width
This function returns the square root of the area of a 3D input or the length of the derivative of a float input, such as s or t.
-
Find Attribute Value
-
Find Attribute Value Count
-
Find Attribute Value by Index
-
Find Point Transform
Find a point on a given geometry and return its transforms.
-
Fit Range
Takes the value in the source range and shifts it to
the corresponding value in the destination range.
-
Fit Range (Unclamped)
Takes the value in the source range and shifts it to
the corresponding value in the destination range.
-
Float to Integer
Converts a float value to an integer value.
-
Float to Matrix
Converts sixteen floating-point values to a 4×4 matrix value.
-
Float to Matrix2
Converts four floating-point values to a matrix2 value.
-
Float to Matrix3
Converts nine floating-point values to a matrix3 value.
-
Float to Vector
Converts three floating-point values to a vector value.
-
Float to Vector2
Converts two floating-point values to a vector2 value.
-
Float to Vector4
Converts four floating-point values to a vector4 value.
-
Floccus
Generates a 2D, locks of wool like cloud pattern.
-
Floor
Returns the largest integer less than or equal to the argument.
-
Flow Noise
Generates 1D and 3D Perlin Flow Noise from 3D and 4D data.
-
For Each Transform
Perform the same operation on an array of transforms.
-
Fraction
Computes the fractional component of the argument.
-
Fractus
Generates a 2D, ragged, broken up like cloud pattern.
-
Fresnel
Computes the Fresnel reflection/refraction contributions
given a normalized incident ray, a normalized surface normal, and an
index of refraction.
-
From NDC
Transforms a position from normal device coordinates to the
coordinates in the appropriate space.
-
From NDC
Transforms a position from normal device coordinates to the
coordinates in the appropriate space.
-
From Polar
Converts polar coordinates to cartesian coordinates.
-
Front Face
Returns the front facing normal of a surface, given a surface normal
(N) and an incident ray (I).
-
Fur Guide Global Variables
Provides outputs representing commonly used input variables of fur guide
shader network.
-
Fur Guide Output Variables and Parameters
Provides inputs representing the output variables of a fur guide shader
network.
-
Fur Procedural
Creates a set of hair-like curves across a surface at render time.
-
Fur Skin Global Variables
Provides outputs representing commonly used input variables of fur skin
shader network.
-
Fur Skin Output Variables and Parameters
Provides inputs representing the output variables of a fur skin shader
network.
-
Furrows
Displaces the surface along the surface normal by an amount equal to
the value of an anti-aliased cosine wave.
-
Fuzzy And
Performs a fuzzy and operation between its inputs and returns a value between 0 and 1.
-
Fuzzy Defuzz
Performs a defuzzify operation between its input fuzzy sets and returns a crisp value.
-
Fuzzy Inference
Performs a fuzzy inference operation over each input to determine the truth of the fuzzy set defined on this node.
-
Fuzzy Inference Mirror
-
Fuzzy Input
Performs a fuzzify operation that calculates a fuzzy value given a membership function and an input crisp value.
-
Fuzzy Not
This operator performs a fuzzy not operation on an integer or float value.
-
Fuzzy Obstacle Sense
Detects obstacles in an agent’s field of view.
-
Fuzzy Or
Performs a fuzzy or operation between its inputs and returns a value between 0 and 1.
-
Gain
-
Gather Loop
Sends rays into the scene and contains a subnetwork of VOPs to operate on the information gathered from the shaders of surfaces hit by the rays.
-
Gaussian Random
Generates a random number fitting a Gaussian distribution.
-
Gaussian Random UV
Generates a random number fitting a Gaussian distribution.
-
General Fresnel
Computes the Fresnel reflection/refraction contributions and vectors for objects with or without depth.
-
Generic Shader
Represents a shader.
-
Geometry VOP Global Parameters
Provides outputs that represent all the global variables for the
Attribute VOP network types.
-
Geometry VOP Output Variables
Simple output variable for Geometry VOP Networks.
-
Get Attribute
-
Get BSDF Albedo
Compute the reflectivity of a bsdf.
-
Get Blur P
-
Get CHOP Attribute
Returns a CHOP attribute value in one of the 4 input CHOPs connected to the Channel VOP.
-
Get Channel Transform
Returns a transform value built from 9 channels from one of the 4 input CHOPs connected to the Channel VOP.
-
Get Channel Value
Returns a sample value in one of the 4 input CHOPs connected to the Channel VOP.
-
Get Channel Value by Name
Returns a sample value in one of the 4 input CHOPs connected to the Channel VOP.
-
Get Descendant Transforms
Traverse the hierarchy from a given point and return their transforms.
-
Get Dictionary Element
Gets a specified value from dictionary.
-
Get Element
Gets a specified element from array.
-
Get FBIK Attributes
Retrieve configuration values for the Physical Full-Body IK solver from point attributes.
-
Get Full Body COM
Return the computed center-of-mass for the given KineFX geometry.
-
Get Joint Chain Axes
Computes a set of orthogonal axes centered at a KineFX joint.
-
Get Layer Export
Obtains a value of the export variable added to the Shader Layer struct.
-
Get Matrix Component
Extracts a 4×4 matrix component.
-
Get Matrix2 Component
Extracts a 2×2 matrix3 component.
-
Get Matrix3 Component
Extracts a 3×3 matrix3 component.
-
Get Object Transform
Gets the transform matrix of a named object in camera (current) space.
-
Get PTexture ID
-
Get Parent
Finds the parent of a joint within a KineFX skeleton.
-
Get Parent Transform
Gets the transformation of a joint’s parent within a KineFX skeleton.
-
Get Point Transform
Returns a point transform for a given point index.
-
Get Point Transforms
Returns arrays of point transforms given an array of point IDs.
-
Get Primitive ID
-
Get Vector Component
Extracts a vector component.
-
Get Vector2 Component
Extracts a vector2 component.
-
Get Vector4 Component
Extracts a vector4 component.
-
Get a CHOP Channel Value
Evaluates a CHOP channel and return its value.
-
Get a Channel or Parameter Value
Evaluates a channel (or parameter) and return its value.
-
Get an Object Transform
Evaluates an OBJ node’s transform
-
Gingham Checks
Generates anti-aliased gingham checks similar to a tablecloth
pattern.
-
Global Variables
Provides outputs that represent all the global variables for the
current VOP network type.
-
Gradient 3D
Returns the gradient of a single channel 3D texture image at a
specified position within that image.
-
HSV to RGB
Converts HSV color space to RGB color space.
-
Hair Normal
Generates a normal vector which always faces the camera, parallel to the incidence vector.
-
Hair Shader
A powerful, highly flexible, general model for hair/fur shading.
-
Has Input
Returns 1 if the specified input (0-3) is connected.
-
Has Key
Returns if a dictionary has a key.
-
High-Low Noise
Computes a mix of high and low frequency, anti-aliased noise with a
wide range of applications.
-
Houdini Engine Procedural: Curve Generate
Cooks a SOP asset for each point in the source geometry and instances the generated curves onto the point.
-
Houdini Engine Procedural: Point Generate
Cooks a SOP asset for each point in the source geometry and instances the generated points onto the point.
-
Hue Shift
Uses the shift value to move the hue of the input color along the color wheel by the amount influenced by the amplitude.
-
IK Solver
Positions and orients points from a root position, end effector position target, and twist position using KineFX Inverse Kinematics.
-
If Connected
Passes through the value of the first input if the first input is
ultimately connected.
-
Illuminance Loop
Only available in Surface VOP networks.
-
Image 3D Iso-Texture Procedural
This procedural will generate an iso-surface from a 3D texture image (.i3d file).
-
Image 3D Volume Procedural
This procedural will generate a volume from a 3D texture image (.i3d file).
-
Import Attribute
Imports attribute data from the OP connected to the given input.
-
Import Detail Attribute
-
Import Displacement Variable
Imports the value of the specified variable from a displacement
shader and stores it in var.
-
Import Light Variable
Imports the value of the specified variable from a light shader and
stores it in var.
-
Import Point Attribute
-
Import Primitive Attribute
-
Import Properties from OpenColorIO
Imports a color space property from Open Color IO.
-
Import Ray Variable
Imports the value of the specified variable sent from a trace() function and
stores it in var.
-
Import Surface Variable
Imports the value of the specified variable from a surface shader and
stores it in var.
-
Import Vertex Attribute
-
Importance Remap
-
In Group
Returns 1 if the point or primitive is in the group specified by the string.
-
Indirect Lighting
Internal VOP used to compute indirect lighting.
-
Inline Code
Write VEX code that is put directly into your shader or operator
definition.
-
Insert
Inserts an item, array, or string into an array or string.
-
Instance with Hscript Procedural
Runs hscript for each point in the source geometry and instances the generated geometry to the point.
-
Integer to Float
Converts an integer value to a float value.
-
Integer to Vector
-
Intersect
Computes the intersection of a ray with geometry.
-
Intersect All
Computes all the intersections of a ray with geometry.
-
Invert
If given a 3×3 or 4×4 matrix, this operator computes its inverse (or just returns the input matrix if it detects singularity).
-
Irradiance
Computes the irradiance (the global illumination) at the point P with
the normal N.
-
Is Alphabetic
Result 1 if all the characters in the string are alphabetic.
-
Is Connected
Outputs 1 if the input is ultimately connected, otherwise it outputs
0.
-
Is Digit
Result 1 if all the characters in the string are numeric.
-
Is Finite
Returns 1 if the number is a normal number, ie, not infinite or NAN.
-
Is Fog Ray
Returns 1 if the shader is being evaluated from within a fog
shader.
-
Is Front Face
Returns true if the normal of the surface is forward facing, and
false if it isn’t.
-
Is NAN
Returns 1 if the number is not a number.
-
Is Shadow Ray
Returns 1 if the shader is being evaluated for shadow rays.
-
Jittered Hair Normal
-
Join Strings
Concatenate all the strings of an array inserting a common spacer.
-
Joint Angle
Gets the angle at the given joint in a KineFX skeleton.
-
Karma 2D Derivatives
Generates partial derivatives of input0 variable over input1
-
Karma AOV 2.0
Creates a shading signal for output to an AOV, as well as the render vars.
-
Karma Camera Falloff
Generate a smooth roll-off between surface normal and the camera ray.
-
Karma Fur
A physically-based hair and fur material with medulla support
-
Karma Hair
A physically-based hair and fur material.
-
Karma Hexagonal Tiling Texture
Seamless texturing and normal mapping without visible repetitions based on provided UV coordinates.
-
Karma Hexagonal Tiling Triplanar
Seamless texturing and normal mapping without visible repetitions involving triplanar projections and based on P.
-
Karma Light Filter Attenuation
Karma Light Filter that controls how the light intensity/color changes over distance.
-
Karma Light Filter Barndoor
Karma Light Filter that adds barndoors to a cone light.
-
Karma Light Filter Gel
Karma Light Filter that adjusts the color, intensity, or diffuse/specular of a light source.
-
Karma Light Filter Gobo
Karma Light Filter that projects the light source through a texture.
-
Karma Light Projection
You can use this utility node in a light filter network to get the UV coordinates of the current ray in the light’s projection space.
-
Karma Material Properties
Apply Karma geometry properties via shaders.
-
Karma Melanin
A physically-based hair and fur color definition.
-
Karma OCIO Color Transform
Transforms color spaces using Open Color IO.
-
Karma Physical Lens
A pre-made lens shader implementation with controls for most common lens shader effects, such as bokeh, chromatic aberrations, and tilt/shift.
-
Karma Physical Lens Core
The stripped down version of the physical lens.
-
Karma Point Cloud Read
This node opens a point cloud file and searches for points around a source position then returns a value of geometry attribute imported from pointcloud
-
Karma Pyro Fire Color
Creates a color value used to control the emission component of volume shading used for fire.
-
Karma Pyro Fire Emission
Creates emission to control the emission component of volume shading used for fire.
-
Karma Pyro Scatter Color
Creates a color value used to control the emission component of volume shading used for explosions.
-
Karma Pyro Scatter Emission
Creates emission to control the emission component of volume shading used for explosions.
-
Karma Pyro Shader
Flexible, production-quality smoke, cloud, fire, and explosion shader.
-
Karma Pyro Smoke Color
Creates a color value used to control the scattering and absorption component of volume shading.
-
Karma Pyro Volume Mask
Creates a volume mask used for volume shading.
-
Karma Ramp Constant
Look up the color/float at a certain index in a ramp.
-
Karma Ray Hit Level Falloff
Attenuate values based on bounces.
-
Karma Ray Import
Imports the value of the specified variable from Karma.
-
Karma Ray Switch
Evaluate a color or an input based on ray-type.
-
Karma Room Lens
Generates an interior room map
-
Karma Room Map
Creates a parallax projection of a room interior onto a flat plane
-
Karma Tangent Rotate
Rotates world-space tangents for anisotropic shaders like brushed metal.
-
Karma UV Lens
This is the Karma UV rendering lens shader.
-
Karma Volume
Karma XPU compatible node for building MaterialX volume shader
-
Karma Voronoi Noise 2D
Generates Voronoi noise
-
Karma Voronoi Noise 3D
Generates Voronoi noise
-
Karma Whitewater
Karma XPU compatible node for building MaterialX-based basic whitewater shader
-
Lambert
Generates a color using the Lambert diffuse lighting model calculation.
-
Layer Composite
Combines two layers using standard compositing operations.
-
Layer Mix
Outputs a mix of the two input layers, blended using the alpha value.
-
Layer Pack
Creates a Layer from individual shading components.
-
Layer Unpack
Unpacks the individual shading components from a layer.
-
Length
Computes the length of an array
-
Length
Computes the length of a 3D or 4D vector.
-
Lens Bokeh
A VOP that can generate different kinds of bokeh.
-
Lens Chromatic Aberration
A VOP that can generates the tint and index of refraction for chromatic aberration effects.
-
Lens Coordinates
A VOP that creates the jittered coordinates for Karma lens shaders.
-
Lens Distort
A VOP that generates the offsets required to distort a Karma lens shader.
-
Lens OpenCV Distort
A VOP that generates the NDC coordinates with the OpenCV lens distortion model applied on a Karma lens shader.
-
Lens Parameters
A VOP that generates the Karma lens shader inputs.
-
Lens Rolling Shutter
A VOP that generates a time offset to simulate rolling shutter in digital lenses.
-
Lens Shutter Curve
A VOP that manipulates the time distribution of lens shutters.
-
Lighting Model
Performs a lighting model calculation to generate a color.
-
Limits
Selectively clamps values to a minimum and/or maximum value.
-
Logarithm
Computes the natural logarithm function of the argument.
-
Look At
Computes a 3×3 rotation matrix to orient the z-axis along the vector
(to - from) under the transformation.
-
Look At (KinefX)
Applies a KineFX Look At constraint to a transform.
-
Look At Constraint
Applies a KineFX Look At constraint to a transform.
-
Luminance
Computes the luminance of the RGB color specified by the input parameter.
-
Make Instance Transform
Builds a general 4×4 transform matrix derived from the
standard copy/instance attributes
-
Make Space Transform
Returns the transformation matrix to transform from a transform space such as an object’s transform space to another space, such as world space.
-
Make Transform
Builds a general 4×4 transform matrix.
-
Mandelbrot Set
Generates a Mandelbrot pattern.
-
Map Point
Creates a dictionary that maps one KineFX point to another.
-
MatCap Shader
A Material Capture shader.
-
Material shader builder
A higher-level shader that can contain one or more sub-shaders, such as surface shaders, displacement shaders, and rendering properties.
-
Matrix to Float
Unpacks a 4×4 matrix into its sixteen components.
-
Matrix to Vector4
Unpacks a 4×4 matrix into its rows.
-
Matrix2 to Float
Unpacks a 2×2 matrix2 into its four components.
-
Matrix2 to Matrix3
Converts a 2×2 matrix to a 3×3 matrix.
-
Matrix2 to Matrix4
Converts a 2×2 matrix to a 4×4 matrix.
-
Matrix2 to Vector2
Unpacks a 2×2 matrix into its rows.
-
Matrix3 to Float
Unpacks a 3×3 matrix3 into its nine components.
-
Matrix3 to Matrix2
Converts a 3×3 matrix to a 2×2 matrix.
-
Matrix3 to Matrix4
-
Matrix3 to Quaternion
Converts a matrix3, representing a rotation, to a quaternion
representing the same rotation.
-
Matrix3 to Vector
Unpacks a 3×3 matrix into its rows.
-
Matrix4 to Matrix2
Converts a 4×4 matrix to a 2×2 matrix.
-
Matrix4 to Matrix3
-
Matte
Implements a matte shader that occludes geometry behind the surface
being rendered.
-
Max Vector Component
Computes the maximum value of a vector argument.
-
Maximum
Outputs the maximum value from its inputs.
-
Meta-Loop Import
Takes a handle generated by the Meta-Loop Start operator and will
import attributes…
-
Meta-Loop Next
Takes a handle generated by the Meta-Loop Start operator and will
iterate to the …
-
Meta-Loop Start
Opens a geometry file and
initializes the handle to iterate through all metaballs at the position
specified.
-
Metaball Attribute
Returns the value of the given point attribute at the specified
position in the metaball field.
-
Metaball Density
Returns the density of the metaball field at the specified
position.
-
Metaball Space
Transforms the specified position into the local space of the
metaball.
-
Metaball Weight
Returns the metaweight of the geometry at a given position.
-
Metadata
Returns true if the specified metadata exists.
-
Metadata
Returns metadata from one of the 4 input COPs connected to the VEX COP.
-
Method
Represents a method inside a class-based shader.
-
Method Call
Invokes a given method on a given struct or co-shader object.
-
Method Input
Represents a method argument list inside a class-based shader.
-
Method Subnet
Represents a method inside a class-based shader.
-
Min Vector Component
Computes the minimum value of a vector argument.
-
Minimum
Outputs the minimum value from its inputs.
-
Minimum Position
Given a position in world space, returns the position of the closest point on a given geometry.
-
Mix
Computes a blend (or a mix) of its input values using linear
interpolation.
-
Modulo
Computes the modulo of two values.
-
MtlX Absorption Vdf
Constructs a VDF for pure light absorption.
-
MtlX Absval
-
MtlX Acescg To Lin Rec709
A new MaterialX Node
-
MtlX Acos
-
MtlX Add
-
MtlX Adobergb To Lin Rec709
A new MaterialX Node
-
MtlX And
-
MtlX Anisotropic Vdf
Constructs a VDF scattering light for a participating medium.
-
MtlX Artistic Ior
-
MtlX Asin
-
MtlX Atan2
-
MtlX Bias
-
MtlX Bitangent
-
MtlX Blackbody
Returns the radiant emittance of a blackbody radiator with the given temperature.
-
MtlX Blur
-
MtlX Bump
-
MtlX Burley Diffuse Bsdf
A BSDF node for Burley diffuse reflections.
-
MtlX Burn
-
MtlX Ceil
-
MtlX Cellnoise2D
2D cellular noise
-
MtlX Cellnoise3D
-
MtlX Checkers 2D
Checkerboard pattern.
-
MtlX Chiang Hair Absorption from Color
Calculates hair absorption from a color.
-
MtlX Chiang Hair BSDF
A BSDF node for Chiang hair shading model.
-
MtlX Chiang Hair Roughness
Calculates hair roughness for R, TT and TRT component.
-
MtlX Circle
A circle shape.
-
MtlX Circles 2D
Pattern of circles or rings.
-
MtlX Clamp
-
MtlX Cloverleaf
A cloverleaf shape.
-
MtlX Color Correct
-
MtlX Color Cubic Ramp
-
MtlX Color Ramp
-
MtlX Combine2
-
MtlX Combine3
-
MtlX Combine4
-
MtlX Conductor Bsdf
A reflection BSDF node based on a microfacet model and a Fresnel curve for conductors/metals.
-
MtlX Conical Edf
-
MtlX Constant
-
MtlX Contrast
Increase or decrease contrast of incoming float/color values using a linear slope multiplier.
-
MtlX Convert
-
MtlX Cos
-
MtlX Create Matrix
-
MtlX Create Matrix (3×3)
-
MtlX Crosshatch
A cross-hatch pattern.
-
MtlX Crossproduct
-
MtlX Deon Hair Absorption from Melanin
Calculates hair absorption from melanin parameters.
-
MtlX Determinant
-
MtlX Dielectric Bsdf
A reflection/transmission BSDF node based on a microfacet model and a Fresnel curve for dielectrics.
-
MtlX Difference
-
MtlX Directional Light
-
MtlX Disjointover
-
MtlX Disney Principled
-
MtlX Displacement
A constructor node for the displacement shader.
-
MtlX Distance
Measure distance between two points.
-
MtlX Divide
-
MtlX Dodge
-
MtlX Dot
-
MtlX Dotproduct
-
MtlX Exp
-
MtlX Extract
-
MtlX Facing Ratio
Generate a smooth roll-off between two vectors.
-
MtlX Facing Ratio
-
MtlX Float Cubic Ramp
-
MtlX Float Ramp
-
MtlX Floor
-
MtlX Fract
The fraction of a float or vector.
-
MtlX Fractal3D
Zero-centered 3D Fractal noise.
-
MtlX Frame
-
MtlX G18 Rec709 To Lin Rec709
A new MaterialX Node
-
MtlX G22 Ap1 To Lin Rec709
A new MaterialX Node
-
MtlX G22 Rec709 To Lin Rec709
A new MaterialX Node
-
MtlX Gain
-
MtlX Generalized Schlick Bsdf
A reflection/transmission BSDF node based on a microfacet model and a generalized Schlick Fresnel curve.
-
MtlX Generalized Schlick Edf
A fresnel EDF.
-
MtlX Geometry Color
-
MtlX Geometry Property Value
-
MtlX Geometry Property Value Uniform
Reads uniform, non-varying asset path and string primvars.
-
MtlX Glossiness Anisotropy
-
MtlX Gltf Colorimage
A new MaterialX Node
-
MtlX Gltf Image
A new MaterialX Node
-
MtlX Gltf Iridescence Thickness
A new MaterialX Node
-
MtlX Gltf Normalmap
A new MaterialX Node
-
MtlX Gooch Shade
-
MtlX Grid
A grid pattern.
-
MtlX HSV to RGB
-
MtlX Hcatmullrom
-
MtlX Heighttonormal
-
MtlX Hexagon
A hexagon shape.
-
MtlX Hinvlinear
-
MtlX Hsvadjust
Adjust the hue, saturation and value of a color.
-
MtlX Huniformcubic
-
MtlX Huniformramp
-
MtlX If Equal
-
MtlX If Equal (Boolean)
-
MtlX If Greater
-
MtlX If Greater (Boolean)
-
MtlX If Greater or Equal
-
MtlX If Greater or Equal (Boolean)
-
MtlX Image
Samples data from a single image, or from a layer within a multi-layer image.
-
MtlX In
-
MtlX Inside
-
MtlX Invert
-
MtlX Invertmatrix
-
MtlX Layer
-
MtlX Light
-
MtlX Lin Adobergb To Lin Rec709
A new MaterialX Node
-
MtlX Lin Displayp3 To Lin Rec709
A new MaterialX Node
-
MtlX Line
A line shape.
-
MtlX Ln
-
MtlX Luminance
Output a grayscale luminance of a color.
-
MtlX Magnitude
-
MtlX Mask
-
MtlX Matte
-
MtlX Max
-
MtlX Measured Edf
Constructs an EDF emitting light according to a measured IES light profile.
-
MtlX Min
-
MtlX Minus
-
MtlX Mix
-
MtlX Modulo
-
MtlX Multiply
-
MtlX Noise2D
-
MtlX Noise3D
3D Perlin noise.
-
MtlX Normal
-
MtlX Normalize
-
MtlX Normalmap
-
MtlX Not
-
MtlX Open PBR Anisotropy
-
MtlX OpenPBR Surface
A physically-based uber-shader.
-
MtlX Oren Nayar Diffuse Bsdf
A BSDF node for diffuse reflections.
-
MtlX Out
-
MtlX Outside
-
MtlX Over
-
MtlX Overlay
-
MtlX PBR Texture Set
Texture sets for MtlX Standard Surface.
-
MtlX Place2D
Transform incoming UV texture coordinates for 2D texture placement.
-
MtlX Plus
-
MtlX Point Light
-
MtlX Position
-
MtlX Power
-
MtlX Premult
-
MtlX RGB to HSV
-
MtlX Ramp
A ramp that supports up to 10 control points.
-
MtlX Ramp Gradiant
A helper node that handles a single control point within a ramp
-
MtlX Ramp4
-
MtlX Ramplr
-
MtlX Ramptb
-
MtlX Random Color
Random RGB color pattern.
-
MtlX Random Float
Random float pattern.
-
MtlX Range
-
MtlX Rec709 Display To Lin Rec709
A new MaterialX Node
-
MtlX Reflect
-
MtlX Refract
-
MtlX Remap
-
MtlX Rotate2D
Rotate a vector2 value about the origin in 2D.
-
MtlX Rotate3D
-
MtlX Roughness Anisotropy
-
MtlX Roughness Dual
-
MtlX Round
-
MtlX Safe Power
-
MtlX Saturate
Adjust the saturation of a color.
-
MtlX Screen
-
MtlX Separate Color 3
-
MtlX Separate Color 4
-
MtlX Separate Vector 3
-
MtlX Separate Vector 4
-
MtlX Separate2
-
MtlX Sheen Bsdf
A microfacet BSDF for the back-scattering properties of cloth-like materials.
-
MtlX Sign
-
MtlX Sin
-
MtlX Smoothstep
-
MtlX Splitlr
-
MtlX Splittb
-
MtlX Spot Light
-
MtlX Sqrt
-
MtlX Srgb Displayp3 To Lin Rec709
A new MaterialX Node
-
MtlX Srgb Texture To Lin Rec709
A new MaterialX Node
-
MtlX Standard Surface
A physically-based shader.
-
MtlX Standard Surface To Gltf Pbr
A new MaterialX Node
-
MtlX Standard Surface to USD Preview Surface
Translation shader from Standard Surface to USD Preview Surface.
-
MtlX Subsurface BSDF
A BSDF for true subsurface scattering.
-
MtlX Subtract
-
MtlX Surface
-
MtlX Surface Material
Constructs a surface shader describing light scattering and emission for closed 'thick' objects.
-
MtlX Surface Unlit
An unlit surface shader node.
-
MtlX Switch
-
MtlX Tan
-
MtlX Tangent
-
MtlX Texcoord
-
MtlX Tiled Circles
A tiled-circle pattern.
-
MtlX Tiled Cloverleafs
A tiled-cloverleaf pattern.
-
MtlX Tiled Hexagons
A tiled-hexagon pattern.
-
MtlX Tiled Image
Samples data from a single image, with provisions for tiling and offsetting the image across uv space.
-
MtlX Time
-
MtlX Transformmatrix
-
MtlX Transformnormal
-
MtlX Transformpoint
-
MtlX Transformvector
-
MtlX Translucent Bsdf
A BSDF node for pure diffuse transmission.
-
MtlX Transpose
-
MtlX Triangle Wave
A triangle-wave pattern.
-
MtlX Triplanar Projection
-
MtlX UDIM Offset
Manually set UDIM texture coordinates.
-
MtlX UDIM Patch
Extract the UDIM patch from texture coordinates.
-
MtlX USD Preview Surface
MaterialX flavor of USD Preview Surface shader
-
MtlX USD Primvar Reader
MaterialX flavor of USD Primvar Reader
-
MtlX USD Transform 2D
MaterialX flavor of USD Transform 2D shader
-
MtlX USD UV Texture
MaterialX flavor of USD UV Texture shader
-
MtlX USD UV Texture
MaterialX flavor of USD UV Texture 2.3 shader
-
MtlX Unified Noise 2D
-
MtlX Unified Noise 3D
-
MtlX Uniform Edf
An EDF node for uniform emission.
-
MtlX Unpremult
-
MtlX View Direction
-
MtlX Volume
A constructor node for the volume shader type.
-
MtlX Volume Material
A volume material.
-
MtlX Worley Noise 2D
-
MtlX Worley Noise 3D
-
MtlX Xor
-
MtlX Xxor
-
MtlX glTF Pbr
A PBR shader from glTF-2.0.
-
MtlX gltf image (vector)
A new MaterialX Node
-
Mtlx Complement
Returns complementary float value.
-
Mtlx Complement Color
Returns complementary RGB color
-
Multiply
Outputs the product of its inputs.
-
Multiply Add Constant
Will take the input value, add the pre-add amount, multiply by the
constant multiplier, then add the post-add amount.
-
Multiply Constant
Multiplies the incoming value by a constant.
-
Near Point
Finds closest point in a given geometry file.
-
Negate
Negates the incoming integer, float, vector or vector4 value.
-
Neighbor Count File
Count the number of connected points from a given point in a given geometry file (or op:path)
-
Neighbor File
Finds the nth neighbouring point for a given point in a given geometry file.
-
Neighbors
Retrieves an array of indices to the points connected to the given point.
-
Non-Deterministic Random
A non-deterministic random number generator.
-
Normal Clamp
Clamp shading normals to prevent bad reflection directions
-
Normal Falloff
Generates a falloff value based on the relationship between the normal and incident vectors.
-
Normalize
Normalizes a vector.
-
Not
This operator performs a logical not operation on an integer value,
returning 1 if the input is zero, and 0 if the input is non-zero.
-
Null
Passes the inputs to the output with an optional name change.
-
OCIO Color Transform
Transforms color spaces using OpenColorIO.
-
OCIO Color Transform View
Transforms color spaces into a View using OpenColorIO.
-
OSL Bias
-
OSL Calculate Normal
-
OSL Dx/Dy/Dz
-
OSL Environment Map
-
OSL Gain
-
OSL Generic Shader Builder
Implements an OSL shader.
-
OSL Logarithm
-
OSL Step
-
OSL Texture Map
-
OSL Transform
-
OSL Transform Color
-
Occlusion
Computes ambient occlusion at the point P with the normal N.
-
Ocean Sample Layers
Sample ocean values from layered ocean spectra at the specified position and time.
-
Offset Transform
Offsets a KineFX transformation matrix by the given transform.
-
OpenSubdiv Face Count
Returns the number of coarse faces in the subdivision hull
-
OpenSubdiv First Patch
Returns the patch of the first patch for a given face in the subdivision hull.
-
OpenSubdiv Limit
Evaluates a point attribute on the limit of a subdivision surface and all
partial derivatives with respect to the given attribute.
-
OpenSubdiv Limit Surface
Evaluates a point attribute on the limit of a subdivision surface.
-
OpenSubdiv Lookup Face
Outputs the Houdini face and UV coordinates corresponding to the given coordinates on an OSD patch.
-
OpenSubdiv Lookup Patch
Outputs the OSD patch and UV coordinates corresponding to the given coordinates on a Houdini polygon face.
-
OpenSubdiv Patch Count
Returns the number of patches in the subdivision hull
-
Or
This operator performs a logical or operation between its inputs and returns 1 or 0 .
-
Oren-Nayar
Generates a color using the Oren-Nayar diffuse lighting model calculation.
-
Orient
Reorients a vector representing a direction by multiplying it by a
4×4 transform matrix.
-
Oscillations
Returns an anti-aliased cosine or sine wave.
-
Outer Product
Computes the outer product of a pair of vectors.
-
Output Variables and Parameters
Provides inputs representing the writable output variables of
the shader network.
-
PBR Emission
Makes a shaded surface emissive.
-
PBR Hair Primary Reflection
Produce a hair BSDF.
-
PBR Hair Secondary Reflection
Produce a hair BSDF.
-
PBR Hair Transmission
Produce a hair BSDF.
-
PBR Lighting
Evaluate Lighting Using PBR.
-
PBR Metallic Reflection
Computes metallic reflections.
-
PBR Non-Metallic
Computes reflections and refractions for dielectric (non-metallic) materials.
-
PBR SSS
Creates an approximate SSS BSDF.
-
PBR Single Scatter
Creates a Single Subsurface Scatter BSDF.
-
PBR Volume Phase Function
-
Parameter
Represents a user-controllable parameter.
-
Parent Blend
Blends between KineFX transforms with an offset computed from the given bind transforms.
-
Parent Constraint
Constrains a KineFX point’s parent to a new world transform.
-
Periodic Noise
Generates 1D and 3D Perlin noise from 1D, 3D and 4D data.
-
Periodic Worley Noise
Computes 1D, 3D, and 4D tileable Worley noise, which is synonymous
with cell noise.
-
Photon Output Variables
Performs photon russian roulette.
-
Physical SSS
Outputs surface color based on a physically-based subsurface
scattering model. This node an do physically correct single scattering and/or multiple scattering.
-
Physically Based Diffuse
Produce a normalized diffuse bsdf.
-
Pixel Area
Returns the area of the current pixel after being transformed to the
new UV coordinate uvpos.
-
Pixel Derivative
Returns U and V derivatives of the current pixel.
-
Plane Clip
Clips the line segment defined by p1 and p2 against the 3D plane
defined by the following equation: plane.
-
Plane Count
Returns the number of planes in the input.
-
Plane Exists
Returns the name of the plane with the index plane_index in input input_index.
-
Plane Index
Returns the index of the plane with the name plane_index in input input_index.
-
Plane Name
Returns the name of the plane with the index plane_index in input input_index.
-
Plane Size
Returns the number of components in the plane with the index
plane_index in input input_index.
-
Point Bounding Box
Returns two vectors representing the minimum and maximum corners of the bounding box for the specified geometry.
-
Point Cloud Close
This node closes a point cloud handle opened by pcopen.
-
Point Cloud Export
This node exports point data while inside a pcunshaded loop.
-
Point Cloud Farthest
This node finds the farthest query point produced by pcopen.
-
Point Cloud Filter
This node filters the points queried by pcopen.
-
Point Cloud Find
Returns a list of closest points from a file
-
Point Cloud Find Radius
Returns a list of closest points from a file taking into account their radii.
-
Point Cloud Import
This node imports point data while inside a pciterate or pcunshaded loop.
-
Point Cloud Import by Index
This node imports point data from a pcopen.
-
Point Cloud Iterate
This node advances to the next iteration point returned by pcopen.
-
Point Cloud Num Found
This node returns the number of points found by pcopen.
-
Point Cloud Open
This node opens a point cloud file and searches for points around a source position.
-
Point Cloud Unshaded
This node advances to the next unshaded iteration point returned by pcopen.
-
Point Cloud Write
This function writes data for the current shading point out to a point cloud file.
-
Point Count
Returns the number of points for all primitives in the given
geometry.
-
Point In Group
Returns 1 if the point specified by the point number is in the group
specified by the string.
-
Point Instance Procedural
The underlying procedural when using Fast Point Instancing with the
instance render parameters.
-
Point Loop
Only available in Image3D VOP networks.
-
Point Replicate
The Point Replicate Procedural takes a number of input points and multiplies
them, and processes the result using a CVEX script.
-
Pop
Removes the last element of an array and returns it.
-
Pose Difference
Compute the difference between point transforms on two SOP skeletons.
-
Power
Raises the first argument to the power of the second argument.
-
Primitive Attribute
Evaluates an attribute for a given primitive at the specified uv parametric location.
-
Primitive Intrinsic
Evaluates an intrinsic on a given primitive.
-
Primitive Normal
Returns the normal of a primitive (defined by its number) at the
given uv parametric location.
-
Principled Shader
An artist-friendly shader that can model a large number of materials realistically.
-
Principled Shader
An artist-friendly shader that can model a large number of materials realistically.
-
Print
Generate a formatted text string.
-
Promote Layer Exports
Promotes the export variables from the Shader Layer struct to the parent
shader
-
Properties
-
Pyro Blackbody
Converts a temperature value into color (chroma) and intensity according
to the blackbody radiation model.
-
Pyro Color Correct
Provides color correction functions.
-
Pyro Color Model
Provides constant, artistic, and physically correct (blackbody) tint as
well as color correction functions.
-
Pyro Color Volume
Provides functions for editing color fields by conditioning the field
values, adding noise, filtering, and color correction.
-
Pyro Density Volume
Provides functions for editing fields such as density by conditioning
the field values, adding noise, and filtering.
-
Pyro Displace
-
Pyro Field
-
Pyro Noise
-
Pyro Shader
Flexible, production-quality smoke, fire, and explosions shader.
-
Pyro Shader - Classic
Flexible, production-quality fire and smoke shader.
-
Pyro Shader Core
Provides the core functionality needed to build a high-quality volumetric shader.
-
Quaternion
Takes an angle and an axis and constructs the quaternion representing the rotation about that axis.
-
Quaternion Conjugate
Computes the conjugate of a quaternion.
-
Quaternion Distance
Computes distance between quaternions in radians.
-
Quaternion Exponential
Computes the exponential of a quaternion.
-
Quaternion Invert
Takes an quaternion inverts it..
-
Quaternion Logarithm
Computes the natural logarithm of a quaternion.
-
Quaternion Multiply
Performs a quaternion multiplication with its two inputs.
-
Quaternion Power
Raises the quaternion to the power of the exponent.
-
Quaternion to Angle/Axis
Converts a quaternion to angle/axis form.
-
Quaternion to Euler
Converts a quaternion to a vector representing euler angles.
-
Quaternion to Matrix3
Converts a vector4, representing a quaternion, to a matrix3 value,
representing the same rotation.
-
RGB to HSV
Converts RGB color space to HSV color space.
-
RSL Gather Loop
Sends rays into the scene and contains a subnetwork of VOPs to operate on the information gathered from the shaders of surfaces hit by the rays.
-
Radians to Degrees
Converts radians to degrees.
-
Rainbow
Generates a non-repeating rainbow color ramp by modulating the hue
over the range of the parametric coordinate s and using the
given saturation and value to compute the HSV color.
-
Ramp Filter
Adds anti-aliased analytical filtering to the output of a Ramp Parameter
VOP.
-
Ramp Parameter
Represents a user-editable ramp parameter.
-
Ramps
Generates repeating filtered ramps.
-
Random
Generates a random number based on the position in one, three, or
four dimensions.
-
Random Binary Random Jitter
Generates a random number in a BRJ sequence.
-
Random Sobol
Generates a random number in a Sobol sequence.
-
Random Value
-
Ray Bounce Level
Returns the current ray-bounce level.
-
Ray Bounce Weight
Returns the amount that the current bounce level will contribute to
the final pixel color.
-
Ray Hit
This operator sends a ray from the position P along the direction
specified by the direction D, and returns the distance to the object
intersected or a negative number if not object found.
-
Ray Trace
Sends a ray starting at origin P and in the direction specified by
the normalized vector D.
-
Realistic Shoulder
Propagates rotation from the arm to the clavicle point in a KineFX skeleton.
-
Reflect
Returns the vector representing the reflection of the direction
against the normal vector.
-
Reflected Light
Computes the amount of reflected light which hits the surface.
-
Refract
Computes the refraction ray given an incoming direction, the
normalized normal and an index of refraction.
-
Refracted Light
Sends a ray starting at origin P and in the direction specified by
the normalized vector I.
-
Regex Find
Finds the given regular expression in the string.
-
Regex Findall
Finds all instances of the given regular expression in the string.
-
Regex Match
Result 1 if the entire input string matches the expression.
-
Regex Replace
Replaces instances of find_regex with replace_regex.
-
Regex Split
Splits the given string based on regex match.
-
Relative to Bounding Box
Returns the relative position of the point given with respect to the bounding box of the specified geometry.
-
Relative to Point Bounding Box
Returns the relative position of the point given with respect to the bounding box of the specified geometry.
-
Remove Index
Removes an item at the given index from an array.
-
Remove Key
Removes an item at the given key from a dictionary.
-
Remove Point
Removes points from the geometry.
-
Remove Primitive
-
Remove Value
Removes an item from an array.
-
Render State
Gets state information from the renderer.
-
RenderMan Bias
-
RenderMan Calculate Normal
-
RenderMan Deriv
-
RenderMan Du/Dv
-
RenderMan Environment Map
-
RenderMan Gain
-
RenderMan Illuminance Loop
-
RenderMan Illuminate Construct
-
RenderMan Import Value
-
RenderMan Indirect Diffuse
-
RenderMan Logarithm
-
RenderMan Occlusion
-
RenderMan Ray Information
-
RenderMan Render State Information
-
RenderMan Shadow Map
-
RenderMan Step
-
RenderMan Surface Color
-
RenderMan Texture Map
-
RenderMan Texture Map Information
-
RenderMan Transform
-
RenderMan Transform Color
-
RenderMan Z-Depth From Camera
-
Reorder
Reorders items in an array or string.
-
Report Error
Optionally report a custom VEX error or warning.
-
Reshape Value
Modulates input value using a variety of methods.
-
Resolution
Returns the pixel resolution of an input.
-
Resolve Mapping Attribute
Resolves a mapping dictionary attribute to a KineFX point number.
-
Rest Position
Checks if the geometry attribute rest is bound and, if so, uses it
as the rest position for shading.
-
Return
Generates a return statement inside a method or a function defined by the parent subnet.
-
Reverse
Adds an item to an array or string.
-
Reverse Foot
Rotates the foot around custom pivots specific to a reverse foot KineFX set-up.
-
Rings
Generates repeating filtered rings.
-
Ripples
Generates repeating ripples.
-
Rotate
Applies a rotation by 'angle' radians to the given 3×3 or 4×4
matrix.
-
Rotate by Quaternion
Rotates a vector by a quaternion.
-
Round to Integer
Rounds the argument to the closest integer.
-
Rounded Hexes
Generates repeating filtered rounded hexagons.
-
Rounded Stars
Generates repeating filtered rounded five-pointed stars.
-
Run External Program Procedural
This procedural will run an external application in order to generate geometry at render time.
-
SSS Component
Adds energy conservation functionality and additional controls to the Physical SSS VOP.
-
Sample Sphere
Samples the interior or surface of the unit circle, sphere, or hypersphere, within a max angle of a direction.
-
Scale
Scales a 3×3 or 4×4 matrix by 'amount' units along the x,y, and z
axes.
-
Scales
Generates a scale-like pattern and returns the displaced position,
normal, and displacement amount.
-
Set Agent Clip Names
Sets the current animation clips for an agent primitive.
-
Set Agent Clip Times
Sets the current times for an agent primitive’s animation clips.
-
Set Agent Clip Weights
Sets the blend weights for an agent primitive’s animation clips.
-
Set Agent Layer
Sets the current layers or collision layers of an agent primitive.
-
Set Agent Transforms
Overrides the transforms of an agent primitive.
-
Set Attribute
-
Set CHOP Attribute
Sets a CHOP attribute value.
-
Set Channel Tranform
Sets a transform value when evaluating a Channel VOP in Tranlate/Rotate/Scale mode.
-
Set Channel Value
Sets a channel value when evaluating a Channel VOP in Channel/Sample modes.
-
Set Dictionary Element
Sets the value at the specified key.
-
Set Element
Sets the element at the specified index.
-
Set Layer Component
Sets a layer’s components to new values.
-
Set Layer Export
Adds layer exports to the Shader Layer struct
-
Set Matrix Component
Assigns a value to one of the matrix’s components.
-
Set Matrix2 Component
Assigns a value to one of the matrix2's components.
-
Set Matrix3 Component
Assigns a value to one of the matrix3's components.
-
Set Point Transform
Sets one point transform at a given point ID.
-
Set Point Transforms
Sets arrays of point transforms at an array of point IDs.
-
Set Primitive Vertex
-
Set Vector Component
Assigns a value to one of the vector’s components.
-
Set Vector2 Component
Assigns a value to one of the vector2's components.
-
Set Vector4 Component
Assigns a value to one of the vector4's components.
-
Shader Output Export Variables
Represents export parameters in a shader call.
-
Shader Output Global Variables
Represents global variables that are bound as output parameters in a shader call.
-
Shading Area
Computes the shading area of the given variable.
-
Shading Derivative
Computes the derivative of a given variable with respect to the s or
t parametric coordinate.
-
Shading Layer Parameter
Creates a parameter to appear in the signature of the VEX function
defined by the VOP network (VOPNET).
-
Shading Normal
Computes the normal at the location specified by the P position.
-
Shadow
This shader calls the shadow shader inside an illuminance loop.
-
Shadow Map
Shadow Map treats the depth map as if the image were rendered from a
light source.
-
Shadow Matte
Implements a shadowmatte shader that occludes geometry behind the
surface being rendered.
-
Sign
Returns -1 if the input is less than 0, otherwise it returns 1.
-
Sine
Performs a sine function.
-
Skin Shader Core
A skin shader with three levels of subsurface scattering.
-
Sky Box
Creates a sky noise pattern with volumetric clouds.
-
Slice
Slices a sub-string or sub-array of a string or array.
-
Smooth
Computes a number between zero and one.
-
Smooth Rotation
Returns the closest equivalent Euler rotations to a reference rotation.
-
Snippet
Runs a VEX snippet to modify the incoming values.
-
Soft Clip
Increases or decreases contrast for values at the top of the input range.
-
Soft Dots
Generates repeating soft dots.
-
Sort
Returns the array sorted in increasing order.
-
Specular
Generates a color using the selected specular lighting model calculation.
-
Specular Sheen
Generates a color using a specular lighting model with a Fresnel falloff calculation.
-
Spherical Linear Interp
Computes a spherical linear interpolation between its two quaternion
inputs, and outputs the intermediate quaternion.
-
Splatter
Generates a splatter pattern and returns the splatter amount.
-
Spline
Computes either a Catmull-Rom (Cardinal) spline or a Linear spline
between the specified key points, given an interpolant (u)
in the domain of the spline.
-
Split String
Splits a string into tokens.
-
Sprites Procedural
This procedural will render points as sprites.
-
Square Root
Computes the square root of the argument.
-
Starts With
Result 1 if the string starts with the specified string.
-
Stash Transform
Stashes a KineFX transform matrix as a constant.
-
String Length
Returns the length of the string.
-
String to Character
Converts an UTF8 string into a codepoint.
-
Strip
Strips leading and trailing whitespace from a string.
-
Stripes
Generates repeating filtered stripes.
-
Struct
Creates, modifies, or de-structures an instance of a structured datatype.
-
Struct Pack
Bundles input values into an instance of an ad-hoc struct.
-
Struct Unpack
Extracts one or more values from a struct by member name.
-
Sub Network
Contains other VOP operators.
-
Subnet Connector
Represents an input or an output (or both) of the parent VOP subnet.
-
Subnet Input
Allows the connection of operators outside a subnet to operators
inside the subnet.
-
Subnet Output
Allows the connection of operators inside a subnet to operators
outside the subnet.
-
Subtract
Outputs the result of subtracting all its inputs.
-
Subtract Constant
Subtracts the specified constant value from the incoming integer, float,
vector or vector4 value.
-
Surface Color
Generates a basic color with a choice of tinting with the point color and/or a color map.
-
Surface Distance
Finds the shortest distance between a point and a source point group.
-
Switch
Switches between network branches based on the value of an input.
-
Switch Lighting BSDF
Use a different bsdf for direct or indirect lighting.
-
Swizzle Vector
Rearranges components of a vector.
-
Swizzle Vector2
Rearranges components of a vector2.
-
Swizzle Vector4
Rearranges components of a vector4.
-
Tangent
Performs a tangent function.
-
Tangent Normal
Transform an input normal to UV/tangent space
-
Tangent Normal Remap
Transform an input normal from UV/tangent to current space
-
Tangent Normals
Exports shader normals as a render plane.
-
Tetrahedron Adjacent
Returns primitive number of an adjacent tetrahedron.
-
Tetrahedron Adjacent
Returns vertex indices of each face of a tetrahedron.
-
Texture
Computes a filtered sample of the texture map specified and returns
an RGB or RGBA color.
-
Texture 3D
Returns the value of a 3D image at a specified position within that
image.
-
Texture 3D Box
Queries the 3D texture map specified and returns the bounding box
information for the given channel in the min and max corner
vectors.
-
Texture Map
-
Thin Film Fresnel
Computes the thin film reflection and refraction contributions given a normalized incident ray, a normalized surface normal, and an index of refraction.
-
Tiled Boxes
Generates staggered rectangular tiles.
-
Tiled Hexagons
Generates staggered hexagonal tiles.
-
Timing
Returns the frame range and rate of the given input.
-
Title Case
Returns a string that is the titlecase version of the input string.
-
To Lower
Returns a string that is the lower case version of the input string.
-
To NDC
Transforms a position into normal device coordinates.
-
To NDC
-
To Polar
Converts cartesian coordinates to polar coordinates.
-
To Upper
Returns a string that is the upper case version of the input string.
-
Trace
Uses the vex gather function to send a ray and return with the reflected or refracted colors.
-
Transform
Transforms a vector to or from an object’s transform space, or one of several other spaces, such as world or camera space.
-
Transform From Path
Constructs a KineFX transform matrix from a position on a path.
-
Transform From Surface
Constructs a KineFX transform matrix from a position on a geometry’s surface.
-
Transform Matrix
-
Translate
Translates a 4×4 matrix 'amount' units along the x,y,z and possibly w
axes.
-
Transpose
-
Trigonometric Functions
Performs a variety of trigonometric functions.
-
Turbulent Noise
Can compute three types of 1D and 3D noise with the ability to compute turbulence with roughness and attenuation.
-
Two Bone IK
Perform a simple two-bone IK solve
-
Two Sided
Generates a two sided surface.
-
Two Way Switch
Takes an integer input.
-
USD Global Variables
Provides outputs representing commonly used input variables for processing USD primitive attributes inside an Attribute VOP LOP.
-
USD Preview Surface
USD Preview Surface shader
-
USD Prim Var Reader
-
USD Prim Var Reader
USD Prim Var Reader shader
-
USD Transform 2D
-
USD Transform 2D
Represents a standard USD primitive for transforming texture co-ordinates.
-
USD UV Texture
Represents a standard USD primitive for looking up texture values.
-
UV Coords
Returns texture coordinates or geometric s and t, depending on what is defined.
-
UV Noise
Disturbs the incoming parametric s and t coordinates using anti aliased noise generated from the Surface Position input.
-
UV Planar Project
Computes UV co-ordinates projected along a single axis, derived from the position of an object, and generates a mask relative to the projection axis.
-
UV Position
-
UV Project
Assigns texture coordinates based on the specified projection
type.
-
UV Transform
Transforms texture coordinates by the inverse of the matrix
consisting of the translation, rotation, and scale amounts.
-
UV Tri-planar Project
Projects texture maps along X, Y, and Z axes and blends them together at the seams.
-
Undulatus
Generates a 2D, wave like cloud pattern.
-
Unified Noise
Presents a unified interface and uniform output range for all the noise types available in VEX.
-
Unified Noise Static
Presents a unified interface and uniform output range for all the noise types available in VEX.
-
Unique Value Count of Attribute
-
Unique Values of Attribute
-
VOP Force Global
Provides outputs that represent all the global variables for the
Force VOP network type.
-
VOP Force Output Variables
Simple output variable for VOP Force Networks.
-
Vector Cast
Converts between different vector types.
-
Vector To Float
Unpacks a vector into its three components.
-
Vector To Quaternion
Takes an angle/axis vector and constructs the quaternion representing the rotation about that axis.
-
Vector To Vector4
Converts a vector to a vector4.
-
Vector to Matrix3
Converts rows values to a 3×3 matrix value.
-
Vector to Vector2
Converts a vector to a vector2 and also returns the third component of the vector.
-
Vector2 To Float
Unpacks a vector2 into its two components.
-
Vector2 To Vector
Converts a vector2 to a vector.
-
Vector2 To Vector4
Converts a pair of vector2s into a vector4.
-
Vector2 to Matrix2
Converts rows values to a 2×2 matrix value.
-
Vector4 to Float
Unpacks a vector4 into its four components.
-
Vector4 to Matrix
Converts rows values to a 4×4 matrix value.
-
Vector4 to Vector
Converts a vector4 to a vector and also returns the fourth component
of the vector4.
-
Vector4 to Vector2
Converts a vector4 to a pair of vector2s..
-
Veins
Generates an anti-aliased vein pattern that can be used in any VEX
context.
-
Vex Volume Procedural
This procedural will generate a volume from a CVEX shader.
-
Visualize
Exports a vis_ prefixed attribute.
-
Volume Density to Opacity
Computes the opacity of a uniform volume given a density.
-
Volume Gradient
Calculates the gradient of a volume primitive stored in a disk
file.
-
Volume Index
Gets the value of a voxel from a volume primitive stored in a disk file.
-
Volume Index To Pos
Calculates the position of a voxel in a volume primitive stored in
a disk file.
-
Volume Index Vector
Gets the vector value of a voxel from a volume primitive stored in a disk file.
-
Volume Model
A shading model for volume rendering.
-
Volume Pos To Index
Calculates the voxel closest to a voxel of a volume primitive stored in
a disk file.
-
Volume Resolution
Gets the resolution of a volume primitive stored in a disk file.
-
Volume Sample
Samples the value of a volume primitive stored in a disk file.
-
Volume Sample Vector
Samples the vector value of a volume primitive stored in a disk file.
-
Volume VOP Global Parameters
Provides outputs that represent all the global variables for the
Volume VOP network type.
-
Volume VOP Output Variables
Simple output variable for Volume VOP Networks.
-
Voronoi Noise
Computes 1D, 3D, and 4D Voronoi noise, which is similar to Worley
noise but has additional control over jittering.
-
Wave Vector
Computes the wave vector for a given index in a grid of specified size.
-
Waves
Simulates rolling waves with choppiness of various frequencies, and
outputs the positional and normal displacements as well
as the amount of displacement.
-
Wire Pattern
Returns float between 0 and 1 which defines a wire grid pattern useful for simulating screens or visualizing parametric or texture coordinates.
-
Worley Noise
Computes 1D, 3D, and 4D Worley noise, which is synonymous with cell
noise.
-
XPU Pyro Preview
Simplified smoke, fire, and explosions shader for Karma XPU.
-
XYZ Distance
Finds closest position on a primitive in a given geometry file.
-
Xor
Performs a logical xor operation between its inputs.
-
_lensshader_common
-
argsort
Returns the indices of a sorted version of an array.
-
mtlxopen_pbr_surface_to_standard_surface
Conversion of Open PBR node to the Standard Surface Node
-
mtlxstandard_surface_to_open_pbr_surface
Conversion of Standard Surface Node To Open PBR
-
roundededge
Blends the normals between faces within specified radius.
Sky Box SOP that provides more control and supports sky fields.


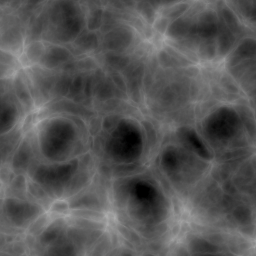
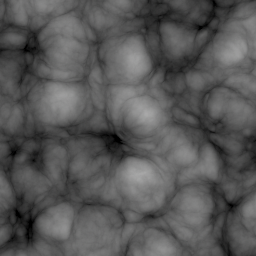
Per Component button for separate scales along each axis.
Per Component button, this lets you scale the Element Size separately across each axis.
Per Component button for separate additional offsets along each axis.
Per Component button, this lets you add the a separate offset along each axis.
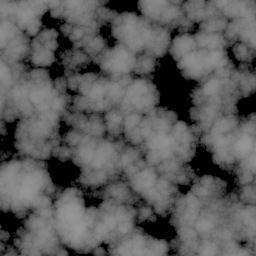


Per Component button for separate scales along each axis.
Per Component button, this lets you scale the Element Size separately across each axis.
Per Component button for separate additional offsets along each axis.
Per Component button, this lets you add the a separate offset along each axis.
Per Component button for separate amplitudes along each axis.
Per Component button, this lets you scale the Amplitude separately across each axis.
Per Component button for separate scales along each axis.
Per Component button, this lets you scale the Element Size separately across each axis.
Per Component button for separate additional offsets along each axis.
Per Component button, this lets you add the a separate offset along each axis.
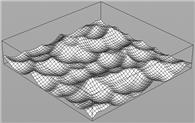
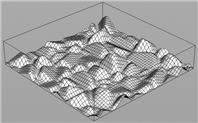


Per Component button for separate amplitudes along each axis.
Per Component button, this lets you scale the Amplitude separately across each axis.
