| On this page | |
| Since | 20.0 |
概要 
このオペレータは、メインとなる雲や空のボリュームのモデリングツールとして使用することができます。 Noise Displacement を有効にすると、クリッピング平面に沿って雲のディテールを作成し、雲の下部に面白いディテールを作成することができます。
また、クリッピング平面からの距離のマスクを出力することもできます。
これを使用すると、例えばクリップされた半分の雲に様々な強度で微かなノイズ(Cloud Wispy Noiseを使用)を適用することができます。
パラメータ 
General 
Use Mask Volume
2番目の入力からのFogボリュームマスク(名前は Mask Volume で指定)で覆われたボリュームの部分のみを維持します。 2番目の入力が空っぽの場合、これは何の効果もありません。
Invert Mask
2番目の入力にFogボリュームマスクがあった場合、それを反転します。
Invert Clipping
クリッピング選択を逆にします。 マッチしたエンティティを1番目の出力ではなく、2番目の出力に送信します。
Clipping 
Origin
クリッピング平面の原点。
Direction
クリッピング平面の法線ベクトル。
Distance
法線に沿ってクリッピング平面を移動させる距離。
Noise Displacement
クリッピング平面でディスプレイスメントノイズをオンにすると、平坦なクリッピング平面に沿って雲のような特徴部が追加されます。
Noise Type
生成するノイズのタイプ。 アルゴリズムが異なれば、ノイズの特性も異なります。
Alligator
ワニの皮のような凸凹のある出力を生成します。 このノイズはフラクタル反復によって歪むことはないですが、より細かな凸凹のある雲のディテールを作成するのに役立ちます。

Perlin
Simplex
Perlinと同様のノイズですが、このノイズラティスは、グリッド上ではなく四面体メッシュ上にあります。 これによって、Perlinノイズでよく見受けられるグリッド状のパターンを回避することができます。
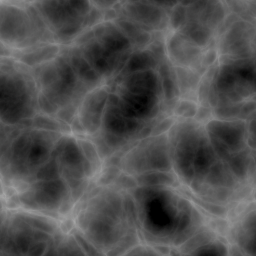
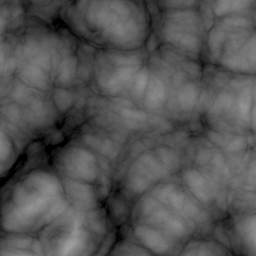
Distortion を-1(左)と+1(右)に設定したSimplexノイズ:
Fast Simplex
このSimplex系ノイズ関数は、異なるラティス構造と処理が軽い累積メソッドを使用します。
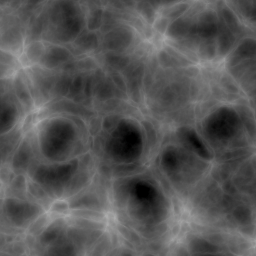
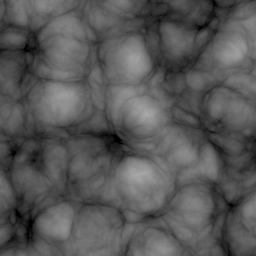
Distortion を-1(左)と+1(右)に設定したSimplexノイズ:
Amplitude
生成されるノイズの範囲は、おおよそ0からこの値までになります。
Element Size
ノイズ内のエレメントの均一スケール。
Per Componentボタンを有効にすると、軸別に Element Size をスケールすることができます。
Element Scale
Per Componentボタンを有効にすると、軸別に Element Scale をスケールすることができます。
Offset
評価されたノイズフィールドのオフセット量(各軸に追加されます)。 全体的に求めているノイズ効果が得られているものの、異なるルックを得るために異なる値を設定したい場合は、このオフセットを変更してみてください。
ここで$T * 0.25などのエクスプレッションを使用することでノイズをアニメーションさせることができます。
これは、 Animate Noise よりも計算が速いですが、ノイズフィールド全体が視覚的に“パン”したような効果になります。
Per Componentボタンを有効にすると、軸別にオフセットを追加することができます。
Offset
Per Componentボタンを有効にすると、軸別にオフセットを追加することができます。
Rest Position Bias
デフォルトでは、ノイズパターンは2Dクリッピング平面で評価されるため、ディスプレイスメントは法線に沿ってグリッド状に変位された特性を持ちます。
対照的に、値を0にすると、ノイズパターンは3D空間で評価されるため、全体的により中立的なルックになりますが、クリッピングの周囲に不要な分離したフォグの島が生成されてしまう可能性があります。
中間の値は、2つの方法の間でディスプレイスメントをブレンドします。
Add Worley Details
有効にすると、Worleyノイズが( Noise Type で指定された)ノイズパターンと結合されて、ふわふわした雲のノイズが得られます。 これを有効にすると、( Distortion で指定された)歪み効果が大幅に減少します。
Worleyノイズが追加されたノイズパターン:

Blend
( Noise Type で指定された)ノイズパターンとWorleyノイズを混ぜる量を制御します。
0の値は、ノイズパターンにWorleyノイズが適用されないことを意味します。
Erosion
ノイズパターンのエッジが0になる速さを制御します。 値が大きいほど、より多くのエッジが侵食されて、だんだん小さい雲パッチが生成されます。
Element Size Scale
Worleyノイズパターンに影響を与える Element Size パラメータの乗数。
Bias
この値は、中間グレー(0.5周辺のノイズ値)を0に寄せる( Bias が1未満の場合)、または、1に寄せる( Bias が1より大きい場合)度合いを制御します。
0.5の値は、ノイズ値をそのままにします。

Gain
0と1周辺のノイズ値を引き離しつつ、中間グレー(0.5周辺のノイズ値)を引き寄せる度合いを制御します。
0.5の値は、ノイズ値をそのままにします。

Gamma
生成されたノイズ全体のガンマを制御します。
1未満の値は、ノイズを暗くし、元々明るい領域の値の範囲が広がります。
逆に、1より大きい値は、元々暗い領域の値の範囲が広がり、ノイズ全体の明るさが増します。
Contrast
この値は、全体のトーン値の範囲を拡大または縮小させます。
特に、各ノイズ値は中間グレー(0.5のノイズ値)に寄ったり( Contrast が1未満の場合)、中間グレーから離れます( Contrast が1より大きい場合 )。
Complement
1から生成されたノイズを減算することで、ノイズの補数を計算します。
Max Octaves
基本ノイズの出力に追加するゆがみの繰り返し回数です。 追加する繰り返しが多くなると、よりきめ細かい出力になります。 なお、出力では、このパラメータよりオクターブが少なくなることがあります(つまりパラメータを大きくすると、最終的にはディテールの追加が停止する)。 これは、出力にディテールを追加するスペースがなくなった時に、ノードは最終的に停止するからです。
Lacunarity
基本出力に追加されるフラクタルノイズの繰り返し間での振動数の増分です。なお、マイナス値を使用することができます。
Roughness
基本出力に追加されるフラクタルノイズの繰り返し間でのスケールの増分です。 値を大きくすると、出力に追加される“ジャギー”が大きくなります。Roughnessにはマイナス値を使用することができます。
Distortion
Distortion が1より大きい場合はノイズ値が減少する方向で、 Distortion が1未満の場合はノイズ値が増加する方向で、ノイズが歪められる量を制御します。
Worleyノイズのディテールがノイズパターンに追加されると、この歪み効果は大幅に減少します。
Distortionの値が1:
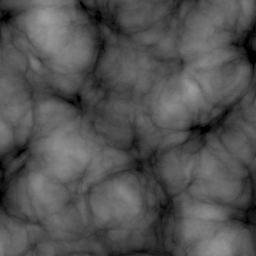
Distortionの値が-1:

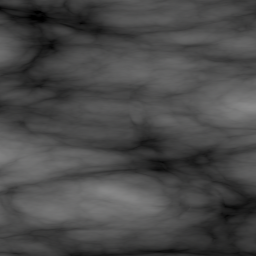
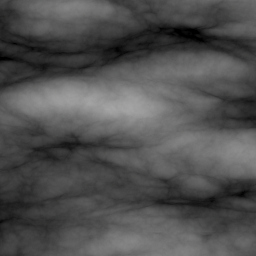
Stretch
各方向にノイズを伸ばす量。 Element Size の代わりにこれを使用するメリットは、一部のディテールは引き伸ばされずにそのまま維持され、引き伸ばされたノイズパターンはより自然な感じに見えることです。
X軸方向で Element Scale が3(左)と Stretch が3(右)の比較:
Droop
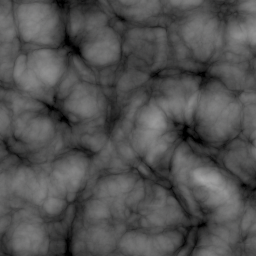
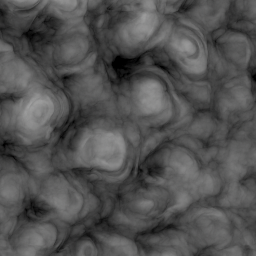
ノイズパターンが指定したDroop方向に曲がったり垂れ下がったりするように、生成されたノイズを歪めます。
Noise pattern without (left) and with droop applied (right):
Droop Direction
ノイズが歪められる方向。
Fold
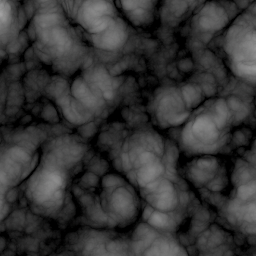
値を-1から1の間にリマップし、0未満の値をプラスの範囲に反転させるので、すべての谷が山になります。

Adjust Edge Density
クリッピング平面のエッジで、Fogボリュームの密度を滑らかにします。
Edge Thickness
クリッピング平面のエッジで、Fogボリュームをどれくらいスムージングするかを制御します。 これを使用すると、直線的なボリュームクリッピングを滑らかにすることができます。
Use Control Ramp
有効にすると、ランプを使用して、Fogボリュームへ滑らかになっていく密度を変更することができます。
Edge Density Ramp
クリッピング平面のエッジの密度をボリュームへどのようにスムージングさせるのか制御します。
Output 
Create Clip Mask
これが有効な時、各ボクセルにクリッピング平面からの距離を格納する追加マスクボリューム(名前は Clip Mask Name によって指定)を出力します。
このマスクを使用すると、このマスクに応じて強度を変化させながら、(例えば、Cloud Wispy Noiseを使用して)クリップしたボリュームをさらに修正することができます。
Volume Visualize
クリップマスクの表示を切り替えます。
Fade Range
クリッピング平面からの最小距離および最大距離。
Use Control Ramp
これを有効にすると、ランプを使用してクリッピング平面からの最小距離および最大距離間の密度を変更することができます。
Fade Ramp
このランプを使用して、クリッピング平面からの最小距離および最大距離間の密度を制御することができます。
Upper Padding
入力ボリュームから計算された境界ボックスは、これらのパディング値によって拡大されます。
このノードの後で、クリップしたボリュームにボリュームディスプレイスメントを適用する場合もあるので(Cloud Wispy Noiseを使用するなど)、このマスクの境界は、クリップした変位ボリュームを十分に覆うほどの大きさにする必要があります。
Lower Padding
入力ボリュームから計算された境界ボックスは、これらのパディング値によって拡大されます。
このノードの後で、クリップしたボリュームにボリュームディスプレイスメントを適用する場合もあるので(Cloud Wispy Noiseを使用するなど)、このマスクの境界は、クリップした変位ボリュームを十分に覆うほどの大きさにする必要があります。
Bindings 
Density Volume
密度として使用されるボリュームの名前。
通常、これはdensityのままにしておきます。
Mask Volume
2番目の入力のマスクとして使用されるボリュームの名前。
通常、これはmaskのままにしておきます。
Clip Mask Name
クリップしたボリュームをさらに処理するために、マスクとして使用するクリップマスクボリュームの名前。
通常、これはmaskのままにしておきます。
| See also |