| On this page | |
| Since | 20.0 |
概要 
このノードは、ノイズから生成された雲で満たされたボリュームを作成することができます。
また、Sky Fieldボリュームをここに接続すれば、Sky Box SOPはその2Dボリュームから3D雲を生成することができます。
様々なパラメータには、そのパラメータの設定方法を制御するポップアップメニューが用意されています。
デフォルトの Set Uniform は、Sky Boxのパラメータ値を使用します。
これを Use Sky Layer に変更することで、その接続したSky Fieldノードから関連パラメータを使用することができます。
Sky FieldをSky Boxノードに使用する方法は、How to 大空を作成するを参照してください。

入力 
Sky Volume
このノードの1番目の入力にボリュームを接続する場合、ここにはSky Boxのソースボリュームを指定します。 複数のSky Boxノードを直列で接続することで、複数の雲タイプを結合することができます。
Sky Field
Sky Fieldをこのノードの2番目の入力に接続すると、それが雲パターンのソースとして使用されます。
2番目の入力を接続しない場合、このノード側で雲のようなノイズを生成します。
Sky Fieldノードには、Sky Boxによる3D雲の生成方法に影響を与える Thickness などのパラメータが用意されています。
Bounding Box Geometry
ジオメトリを3番目の入力に接続すると、このノードは、その境界ボックスをSky Boxのサイズとして使用します。 Sky Setup タブにある Use Input If Wired チェックボックスを使用することで、これを有効/無効にすることができます。 この3番目の入力が接続されていない、または、 Use Input If Wired が無効な場合、このノードは、 Size と Center のパラメータを使用します。
パラメータ 
Sky Mask
skymaskという名前のSkyフィールドがこのノードの2番目の入力に渡されている場合、1番目の入力がそのSkyフィールドでブレンドされます。
ポップアップメニューを Use Sky Layer に設定すると、このスライダは無効になり、このノードはSkyフィールドのマスクを使用します。
ポップアップメニューを Scale Sky Layer に設定すると、このスライダは、skymaskレイヤ内の値を乗算します。
Voxel Size
Pyroシミュレーションのボクセルサイズ。 ボクセルサイズを半分にすると、メモリと計算時間が8倍必要になるので、精度と実用性の妥協が必要です。
Seed
このノードのノイズのランダムシード。この値を変更すると、異なる雲パターンが生成されます。
Coverage
大空が雲で隠される量を制御します。 値が小さいほど、密度の薄い小さな雲片が大きな間隔で生成されるのに対して、値が大きいほど、繋がった密度の濃い大きな雲の塊が生成されます。
skyという名前のSkyフィールドがこのノードの2番目の入力に渡されている場合、このパラメータの右側にあるポップアップメニューを Set Uniform から Use Sky Layer に変更すると、そのSkyフィールドを使用してパラメータの値が上書きされます。
Precipitation
大空が雲で隠される量をPrecipitation(降水量)として制御します。
precipitationという名前のSkyフィールドがこのノードの2番目の入力に渡されている場合、このパラメータの右側にあるポップアップメニューを Set Uniform から Use Sky Layer に変更すると、そのSkyフィールドを使用してパラメータの値が上書きされます。
Anvil
雲の上部を平らに広げる量を制御してAnvil(金床雲)を表現します。
anvilという名前のSkyフィールドがこのノードの2番目の入力に渡されている場合、このパラメータの右側にあるポップアップメニューを Set Uniform から Use Sky Layer に変更すると、そのSkyフィールドを使用してパラメータの値が上書きされます。
Shading
ボリュームのシェーディング方法を制御します。 雲パターンを生成する時、 Occlusion を使用すれば、全体のディテールをもっと細かく確認することができ、 Reversed Occlusion を使用すれば、もっとリアルな形式で雲を表示することができます。
Ambient Occlusion
アンビエントシャドウを使用してボリュームを表示します。
Reversed Occlusion
ボリュームのアンビエントシャドウを反転します。これを使用することで、内部の散乱を含んだもっとリアルな雲のルックが得られます。
Density Scale
ボリュームの不透明度を制御する密度フィールドに対する固定乗数。 より大きなシーンスケールを使用する場合は、Density Scaleをより小さくする必要があるかもしれません。
Note
Fog密度は、1ユニット長あたりの密度で、解像度とは関係ありません。 そのため、100または10分割の同じサイズのボックスは、同じ不透明度になるはずです。 つまり、非常に小さいボックスは、特にHDR Renderingがオフの場合、透明になります。 HDR Renderingは、Display Optionsダイアログの Scene タブの HDR Rendering をオンにすることで有効にすることができます。
3Dテクスチャの HDR Textures フォーマットに最低でも16ビットを設定することでも、低密度ボリュームの解像度を良くすることができます。 これらの設定は、Display Optionsの Texture タブ下にあります。
Ambient Shadow Scale
環境光源からの自己シャドウの強度を決めます。 このような光源からの自己シャドウの最終量は、 Density Scale 、 Shadow Scale 、 Ambient Shadow Scale を乗算して制御されます。 以下の動画では、この値を0から1まで上げています。
Note
このチェックボックスを無効にしても、環境シャドウは無効になりません。 代わりに、ジオメトリのこのプロパティを変更なしで維持します。 Ambient Shadow Scale を設定しなかった場合、Display Optionsの Geometry タブの Ambient Occlusion は、環境光源からの自己シャドウのデフォルトの量を制御します。
Note
デフォルトのヘッドライトは、フォグボリュームでは環境光源として扱われます。
Exposed Color
環境光源から直接光を受ける煙のカラー。 デフォルトの白の設定は、外部の光に露出される領域が明るいことを示します。 これを Occluded Color よりも暗く設定することで、もっと雲のようなルックが得られ、雲の奥深くの領域ほど光の散乱が多くなることでもっと明るく見えるようになります。 このパラメータを制御するには、 Set Ambient Colors を有効にしなければなりません。
Occluded Color
環境光源からどの光も受けない煙のカラー。 デフォルトの黒の設定は、光が遮られている領域が暗いことを示します。 これを Exposed Color よりも明るく設定することで、もっと雲のようなルックが得られ、雲の奥深くの領域ほど(つまり、外の光が遮られるほど)、内部散乱の度合いが大きくなることが原因で、より明るくなります。 このパラメータを制御するには、 Set Ambient Colors を有効にしなければなりません。
Sky Setup 
Size
雲で満たされた大空の領域全体のサイズを制御します。
Center
雲で満たされた大空の領域全体の位置を制御します。
Use Input If Wired
これを有効、且つ、ジオメトリを3番目の入力に接続すると、このノードは、 Size と Center のパラメータの代わりにその3番目の入力の境界ボックスを使用します。 これを無効にすると、3番目の入力の接続は無視され、代わりに Size と Center のパラメータが使用されます。
Use Convex Hull
ポイントの凸ハルをアクティベーションに使用します。
Automatic Y Bounds
Size と Center のY成分を無視し、 Altitude と Thickness のパラメータを使用してY成分を計算します。
Altitude
雲の底面が位置するY軸上の位置。 この値を上げると、雲が大気圏内でもっと高い位置に来ます。 この高度は、 Size と Center で指定された境界ボックス内に収まるようにしてください。
altitudeという名前のSkyフィールドがこのノードの2番目の入力に渡されている場合、このパラメータの右側にあるポップアップメニューを Set Uniform から Use Sky Layer に変更すると、そのSkyフィールドを使用してパラメータの値が上書きされます。
Thickness
雲の垂直方向の延長量。 より小さいかすれた雲には薄い層が必要なのに対して、大きくてもくもくした雲は通常ではもっと太い厚さが必要です。 この高度は、 Size と Center で指定された境界ボックス内に収まるようにしてください。
thicknessという名前のSkyフィールドがこのノードの2番目の入力に渡されている場合、このパラメータの右側にあるポップアップメニューを Set Uniform から Use Sky Layer に変更すると、そのSkyフィールドを使用してパラメータの値が上書きされます。
Curve Sky
生成された大空を垂直方向に変形させてスカイドームを作成することができます。 これは、遠くにある雲を地平線に合うようにずらすのに役立ちます。
Horizon Altitude
スカイドームの底面が位置するY軸上の位置を設定します。
Horizon Distance
スカイドームの半径。 この値を上げると、より大きなスカイドームが作成されます。
Horizon Offset
スカイドームの中心位置を制御します。 スカイドームを原点に配置しない場合は、このコントロールを使用します。
Curvature Ramp
このランプは、スカイドームの中心からの距離に基づいて、スカイドームの曲率を制御します。
Sample With Noise
(2番目の入力に接続されている)Skyフィールドを3D雲に変換した時、その結果の見た目が気に入らない場合があります。 このオプションを有効にすると3D Sky Box内のサンプリングポイントにノイズが加わるので、試してしてみると良いでしょう。
Amplitude
Sample With Noise が有効な時、ここには、サンプリング位置を可変させるのに使用されるノイズの大きさを指定します。 値が大きいほど、もっと千切れた形状が生成されますが、それによってSkyフィールドのルックが歪む可能性があります。
Element Size
ノイズ内のエレメントの均一スケール。
Offset
評価されたノイズフィールド内で(各軸に追加される)オフセット量。 全体的に求めているノイズ効果が得られているものの、異なる値で異なるルックを得たいのであれば、このオフセット量を変更してみてください。
Roughness
基本出力に追加されるフラクタルノイズの繰り返し間でのスケールの増分です。 値を大きくすると、出力に追加される“ジャギー”が大きくなります。Roughnessにはマイナス値を使用することができます。
Top Profile
雲の 上部 が空洞になるように、Sky Boxの Thickness を基準とした0から1までの相対値で、雲の減衰をスケールします。 1番目のフィールドの値を上げると、雲の上部の密度が減衰前よりも濃くなります。 2番目のフィールドの値を下げると、雲の上部の密度がもっと早く減衰します。
topprofileという名前のSkyフィールドがこのノードの2番目の入力に渡されている場合、このパラメータの右側にあるポップアップメニューを Set Uniform から Use Sky Layer に変更すると、そのSkyフィールドを使用してパラメータの値が上書きされます。
Flatten Top
雲の上部をどの程度平らに見せるのか制御します。
Bottom Profile
雲の 下部 が空洞になるように、Sky Boxの Thickness を基準とした0から1までの相対値で、雲の減衰をスケールします。 1番目のフィールドの値を上げると、雲の下部の密度が減衰前よりも濃くなります。 2番目のフィールドの値を下げると、雲の下部の密度がもっと早く減衰します。
bottomprofileという名前のSkyフィールドがこのノードの2番目の入力に渡されている場合、このパラメータの右側にあるポップアップメニューを Set Uniform から Use Sky Layer に変更すると、そのSkyフィールドを使用してパラメータの値が上書きされます。
Flatten Bottom
雲の底部をどの程度平らに見せるのか制御します。
Vertical Extrusion
( Thickness で指定された)雲の厚さを基準に、雲の垂直方向の厚さを上げます。
Thickness が100に設定されていて、このパラメータが1の場合、雲の垂直方向全体の厚みは200となります。
verticalextrusionという名前のSkyフィールドがこのノードの2番目の入力に渡されている場合、このパラメータの右側にあるポップアップメニューを Set Uniform から Use Sky Layer に変更すると、そのSkyフィールドを使用してパラメータの値が上書きされます。
Erode Boundary
生成された大空の領域は、指定された境界に応じて常にクリップされます。 Skyboxが十分に大きい場合、このクリップは見えないです。 しかし、小さい雲片のみが必要な場合、このコントロールを有効にすることで、空間ノイズに基づいて、もっとはるかに自然な境界を生成することができます。 この境界は常に楕円形に侵食されます。
Erosion
雲領域が境界から侵食される量を制御します。 値が大きいほど、雲のある大空の領域は小さくなりますが、境界はもっと細かく分割されます。
Element Size
侵食に使用される空間ノイズ内のエレメントの均一スケール。
Offset
評価されたノイズフィールドのオフセット量(各軸に追加されます)。 全体的に求めているノイズ効果が得られているものの、異なるルックを得るために異なる値を設定したい場合は、このオフセットを変更してみてください。
Contrast
この値は、全体のトーン値の範囲を拡大または縮小させます。
特に、各ノイズ値は中間グレー(0.5のノイズ値)に寄ったり( Contrast が1未満の場合)、中間グレーから離れます( Contrast が1より大きい場合 )。
Use Camera
これを有効にすると、カメラオブジェクトのフラスタムに基づいて、VDBのボクセルのサイズと位置が决まります。
Camera
VDBを整列させるカメラオブジェクトのパス(例えば、/obj/cam1)。
Z Far
カメラからボクセルサイズの計算に使用されるフラスタムの前面までの距離(Houdini単位)。
Z Scale
カメラからボクセルサイズの計算に使用されるフラスタムの後面までの距離(Houdini単位)。
Billowy Noise 
もくもくした積雲のような形状を作成するためにSky Box内に生成されるデフォルトのノイズ。
Noise Type
生成するノイズのタイプ。 アルゴリズムが異なれば、生成されるノイズの特性も異なります。
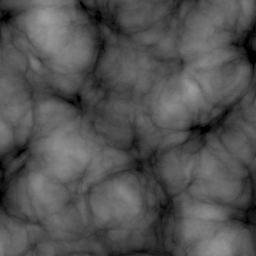
Perlin Cloud
Distortion パラメータの影響を受けるPerlinノイズベースの雲パターンを生成します。
Distortion が-1(左)、+1(右)に設定されたPerlinノイズ:

Simplex Cloud
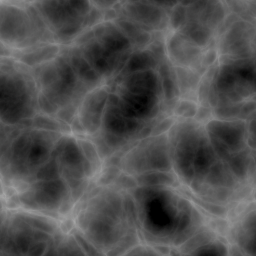
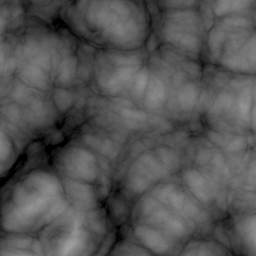
Distortion パラメータの影響を受けるSimplexノイズベースの雲パターンを生成します。 SimplexノイズはPerlinと同様ですが、ノイズラティスはグリッド上ではなく四面体メッシュ上にあります。 これによって、Perlinノイズでよく見受けられるグリッド状のパターンを回避することができます。
Distortion が-1(左)、+1(右)に設定されたSimplexノイズ:
Fast Simplex Cloud
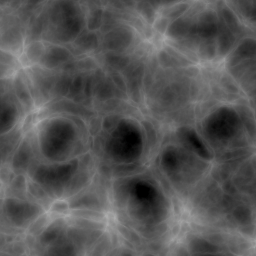
Distortion パラメータの影響を受ける高速なSimplexノイズベースの雲パターンを生成します。 このSimplex系ノイズ関数は、異なるラティス構造を使用し、処理が軽い累積メソッドを使用します。
Distortion が-1(左)、+1(右)に設定されたSimplexノイズ:
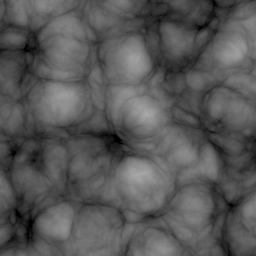
Element Size
ノイズ内のエレメントの均一スケール。
Per Componentボタンをクリックすることで軸別に Element Size をスケールすることができます。
Element Scale
Per Componentボタンを有効にすると、これは軸別に Element Size をスケールすることができます。
Offset
評価したノイズフィールドをオフセット(各軸に追加されます)します。 通常のノイズ効果が既に求まったものの、別のルックで別の値セットが必要になった場合、このオフセットを変えて試行錯誤することができます。
ここに$T * 0.25といったエクスプレッションを使用してノイズをアニメーションさせることができます。
これは Animate Noise よりも計算が速いですが、ノイズフィールド全体が視覚的に“パン”したような効果になるので好みが分かれます。
Per Componentボタンをクリックすることで軸別にオフセットを追加することができます。
Offset
Per Componentボタンを有効にすると、これは軸別にオフセットを追加することができます。
Add Worley Details
有効にすると、Worleyノイズが( Noise Type で指定された)ノイズパターンと結合されて、ふわふわした雲のノイズが得られます。 これを有効にすると、( Distortion で指定された)歪み効果が大幅に減少します。
Worleyノイズが追加されたノイズパターン:

Blend
( Noise Type で指定された)ノイズパターンとWorleyノイズを混ぜる量を制御します。
0の値は、ノイズパターンにWorleyノイズが適用されないことを意味します。
Erosion
ノイズパターンのエッジが0になる速さを制御します。 値が大きいほど、より多くのエッジが侵食されて、だんだん小さい雲パッチが生成されます。
Element Size Scale
Worleyノイズパターンに影響を与える Element Size パラメータの乗数。
Value Correction 
Gamma
生成されたノイズ全体のガンマを制御します。
1未満の値は、ノイズを暗くし、元々明るい領域の値の範囲が広がります。
逆に、1より大きい値は、元々暗い領域の値の範囲が広がり、ノイズ全体の明るさが増します。
Contrast
この値は、全体のトーン値の範囲を拡大または縮小させます。
特に、各ノイズ値は中間グレー(0.5のノイズ値)に寄ったり( Contrast が1未満の場合)、中間グレーから離れます( Contrast が1より大きい場合 )。
Max Octaves
基本ノイズの出力に追加するゆがみの繰り返し回数です。 追加する繰り返しが多くなると、よりきめ細かい出力になります。 なお、出力では、このパラメータよりオクターブが少なくなることがあります(つまりパラメータを大きくすると、最終的にはディテールの追加が停止する)。 これは、出力にディテールを追加するスペースがなくなった時に、ノードは最終的に停止するからです。
Lacunarity
基本出力に追加されるフラクタルノイズの繰り返し間での振動数の増分です。なお、マイナス値を使用することができます。
Roughness
基本出力に追加されるフラクタルノイズの繰り返し間でのスケールの増分です。 値を大きくすると、出力に追加される“ジャギー”が大きくなります。Roughnessにはマイナス値を使用することができます。
Warping 
Distortion
Distortion が1より大きい場合はノイズ値が減少する方向で、 Distortion が1未満の場合はノイズ値が増加する方向で、ノイズが歪められる量を制御します。
Worleyノイズのディテールがノイズパターンに追加されると、この歪み効果は大幅に減少します。
Distortionの値が1:

Distortionの値が-1:

Stretch
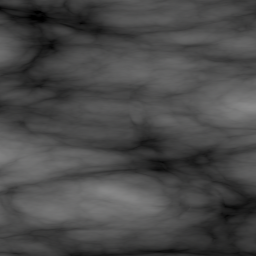
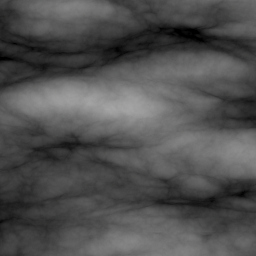
各方向にノイズを伸ばす量。 Element Size の代わりにこれを使用するメリットは、一部のディテールは引き伸ばされずにそのまま維持され、引き伸ばされたノイズパターンはより自然な感じに見えることです。
X軸方向で Element Scale が3(左)と Stretch が3(右)の比較:
Droop
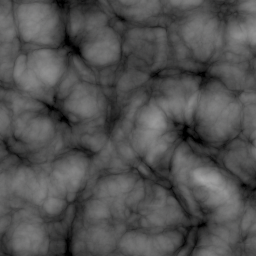
ノイズパターンが指定したDroop方向に曲がったり垂れ下がったりするように、生成されたノイズを歪めます。
Noise pattern without (left) and with droop applied (right):
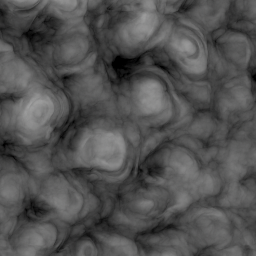
Droop Direction
ノイズが歪められる方向。
Alligator Noise 
もくもくした積雲のような形状を作成するためにSky Box内に生成されるデフォルトのノイズにさらにAlligatorノイズを適用します。
Add Alligator Noise
デフォルトのBillowyノイズにさらに結合されるAlligatorノイズを生成します。 Masking セクションの Vertical Profile Mask を使用することで、このノイズの垂直方向のブレンドを制御することができます。
Amplitude Scale
デフォルトのBillowyノイズに影響を与えるAlligatorノイズの量を制御します。
Element Size Scale
ノイズ内のエレメントの均一スケール。
Per Componentボタンをクリックすることで軸別に Element Size をスケールすることができます。
Element Scale
Per Componentボタンを有効にすると、これは軸別に Element Size をスケールすることができます。
Offset
評価したノイズフィールドをオフセット(各軸に追加されます)します。 通常のノイズ効果が既に求まったものの、別のルックで別の値セットが必要になった場合、このオフセットを変えて試行錯誤することができます。
ここに$T * 0.25といったエクスプレッションを使用してノイズをアニメーションさせることができます。
これは Animate Noise よりも計算が速いですが、ノイズフィールド全体が視覚的に“パン”したような効果になるので好みが分かれます。
Per Componentボタンをクリックすることで軸別にオフセットを追加することができます。
Offset
Per Componentボタンを有効にすると、これは軸別にオフセットを追加することができます。
Gamma
生成されたノイズ全体のガンマを制御します。
1未満の値は、ノイズを暗くし、元々明るい領域の値の範囲が広がります。
逆に、1より大きい値は、元々暗い領域の値の範囲が広がり、ノイズ全体の明るさが増します。
Contrast
この値は、全体のトーン値の範囲を拡大または縮小させます。
特に、各ノイズ値は中間グレー(0.5のノイズ値)に寄ったり( Contrast が1未満の場合)、中間グレーから離れます( Contrast が1より大きい場合 )。
Max Octaves
基本ノイズの出力に追加するゆがみの繰り返し回数です。 追加する繰り返しが多くなると、よりきめ細かい出力になります。 なお、出力では、このパラメータよりオクターブが少なくなることがあります(つまりパラメータを大きくすると、最終的にはディテールの追加が停止する)。 これは、出力にディテールを追加するスペースがなくなった時に、ノードは最終的に停止するからです。
Lacunarity
基本出力に追加されるフラクタルノイズの繰り返し間での振動数の増分です。なお、マイナス値を使用することができます。
Roughness
基本出力に追加されるフラクタルノイズの繰り返し間でのスケールの増分です。 値を大きくすると、出力に追加される“ジャギー”が大きくなります。Roughnessにはマイナス値を使用することができます。
Vertical Profile Mask
このランプは、Sky BoxのVertical Profileに対するAlligatorノイズ関数の強度を制御することができます。 この横軸は、垂直高さを示します(左側が最小値、右側が最大値)。 この縦軸は、ノイズ関数がこの範囲内でそのポイントを生成する時の出力の強度を示します。
Wispy Noise 
もっと千切れた雲の形状を作成するためにSky Box内にWispyノイズを生成します。
Add Wispy Noise
デフォルトのBillowyノイズで結合または上書き可能な薄い羽毛のような細かなWispyノイズを生成します。 Masking セクション内にあるコントロールを使用することで、Billowyノイズとのブレンド量を変更することができます。
Amplitude
Wispyノイズの強度を制御します。 値を大きくすると、より細かくてより分割された形状が生成されるのに対して、値を小さくすると、より滑らかなかすれたディテールが生成されます。
Attribute Type が Vector の場合、 Per Componentボタンを有効にすることで、軸別に強度を制御することができます。
Amplitude Scale
Attribute Type が Vector 且つ Per Componentボタンが有効な時、これは軸別に Amplitude をスケールすることができます。
Element Size Scale
ノイズ内のエレメントの均一スケール。
Per Componentボタンをクリックすることで軸別に Element Size をスケールすることができます。
Element Scale
Per Componentボタンを有効にすると、これは軸別に Element Size をスケールすることができます。
Offset
評価したノイズフィールドをオフセット(各軸に追加されます)します。 通常のノイズ効果が既に求まったものの、別のルックで別の値セットが必要になった場合、このオフセットを変えて試行錯誤することができます。
ここに$T * 0.25といったエクスプレッションを使用してノイズをアニメーションさせることができます。
これは Animate Noise よりも計算が速いですが、ノイズフィールド全体が視覚的に“パン”したような効果になるので好みが分かれます。
Per Componentボタンをクリックすることで軸別にオフセットを追加することができます。
Offset
Per Componentボタンを有効にすると、これは軸別にオフセットを追加することができます。
Add Turbulence
有効にすると、デフォルトのWispyノイズを変位される乱流ノイズが生成され、さらに細かいかすれたディテールが生成されます。
Noise Type
生成するノイズタイプです。アルゴリズムを変更すると異なる特性のノイズが生成されます。
Fast
デフォルト。より高速でもっと面白いPerlinノイズのバリエーションです。
周波数は1.25倍でスケールされます。
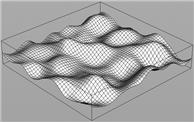
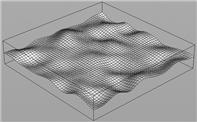
Sparse Convolution
Sparse Convolutionノイズは、Worleyノイズに似ています。グリッドポイントでの乱れはありません。
周波数は1.25倍でスケールされます。
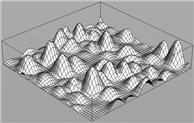
Alligator
でこぼこの多い出力を作成します。ワニ革に似ているということで、この名前になりました。
周波数は1.64倍でスケールされます。
Perlin
視覚的ディテールが同じサイズのノイズです。 Wikipedia を参照してください。
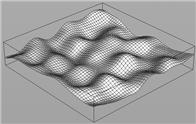
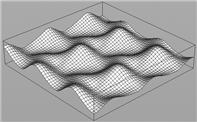
Perlin Flow
回転するPerlinノイズのように時間が経過しても安定したノイズ。これは、時間の経過とともに滑らかに渦巻いて流れるようなノイズを作成するのに役立ちます。 以下の Flow Rotation パラメータを使用して回転を制御します。
Simplex
Perlinノイズに似たノイズですが、そのノイズラティスはグリッドではなく四面体メッシュ上に乗っています。 これによって、Perlinノイズでよく見受けられるグリッドパターンを回避することができます。
Worley Cellular F1
植物の細胞や海の波、ハチの巣、クレーターのある景色などに似た細胞特性を作成します。 Wikipedia を参照してください。
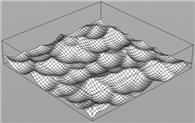
Worley Cellular F2-F1
Worleyノイズのバリエーションで、鈍化させたり、角を付けたりする特性を作成します。
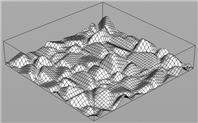
Manhattan Cellular F1
マンハッタン距離の計算法を使用したWorley F1ノイズのバリエーション。独特なルックのノイズが必要な時に役立ちます。
Manhattan Cellular F2-F1
マンハッタン距離の計算法を使用したWorley F2-F1ノイズのバリエーション。独特なルックのノイズが必要な時に役立ちます。
Chebyshev Cellular F1
チェビシェフ距離の計算法を使用したWorley F1ノイズのバリエーション。独特なルックのノイズが必要な時に役立ちます。
Chebyshev Cellular F2-F1
チェビシェフ距離の計算法を使用したWorley F2-F1ノイズのバリエーション。独特なルックのノイズが必要な時に役立ちます。
Perlin Cloud
Distortion パラメータの影響を受ける雲パターンに基づいて、Perlinノイズを生成します。
Distortion が-1(左)と+1(右)のPerlinノイズ:


Simplex Cloud
Distortion パラメータの影響を受ける雲パターンに基づいて、Simplexノイズを生成します。 このSimplexノイズはPerlinノイズに似ていますが、そのノイズ格子はグリッド状ではなく四面体メッシュ状になっています。 これは、Perlinノイズでよく見受けられるグリッド状のパターンを回避することができます。
Distortion が-1(左)と+1(右)のSimplexノイズ:


Fast Simplex Cloud
Distortion パラメータの影響を受ける雲パターンに基づいて、高速Simplexノイズを生成します。 この高速Simplexノイズ関数は、異なる格子構造と処理が軽い累積メソッドを使用します。
Distortion が-1(左)と+1(右)の高速Simplexノイズ:


Amplitude
乱流ノイズの強度を制御します。 値を大きくすると、より細かくてより分割された形状が生成されるのに対して、値を小さくすると、より滑らかなかすれたディテールが生成されます。
Attribute Type が Vector の場合、 Per Componentボタンを有効にすることで、軸別に強度を制御することができます。
Amplitude Scale
Attribute Type が Vector 且つ Per Componentボタンが有効な時、これは軸別に Amplitude をスケールすることができます。
Attenuation
ノイズを平坦にして値を減衰させることで、極端なスパイクを回避することができます。 値が大きいほど、より滑らかなルックが生成されます。
Value Correction 
Gamma
生成されたノイズ全体のガンマを制御します。
1未満の値は、ノイズを暗くし、元々明るい領域の値の範囲が広がります。
逆に、1より大きい値は、元々暗い領域の値の範囲が広がり、ノイズ全体の明るさが増します。
Contrast
この値は、全体のトーン値の範囲を拡大または縮小させます。
特に、各ノイズ値は中間グレー(0.5のノイズ値)に寄ったり( Contrast が1未満の場合)、中間グレーから離れます( Contrast が1より大きい場合 )。
Max Octaves
基本ノイズの出力に追加するゆがみの繰り返し回数です。 追加する繰り返しが多くなると、よりきめ細かい出力になります。 なお、出力では、このパラメータよりオクターブが少なくなることがあります(つまりパラメータを大きくすると、最終的にはディテールの追加が停止する)。 これは、出力にディテールを追加するスペースがなくなった時に、ノードは最終的に停止するからです。
Lacunarity
基本出力に追加されるフラクタルノイズの繰り返し間での振動数の増分です。なお、マイナス値を使用することができます。
Roughness
基本出力に追加されるフラクタルノイズの繰り返し間でのスケールの増分です。 値を大きくすると、出力に追加される“ジャギー”が大きくなります。Roughnessにはマイナス値を使用することができます。
Distortion
Distortion が1より大きい場合はノイズ値が減少する方向で、 Distortion が1未満の場合はノイズ値が増加する方向で、ノイズが歪められる量を制御します。
Worleyノイズのディテールがノイズパターンに追加されると、この歪み効果は大幅に減少します。
Distortionの値が1:

Distortionの値が-1:

Stretch
各方向にノイズを伸ばす量。 Element Size の代わりにこれを使用するメリットは、一部のディテールは引き伸ばされずにそのまま維持され、引き伸ばされたノイズパターンはより自然な感じに見えることです。
X軸方向で Element Scale が3(左)と Stretch が3(右)の比較:


Droop
ノイズパターンが指定したDroop方向に曲がったり垂れ下がったりするように、生成されたノイズを歪めます。
Noise pattern without (left) and with droop applied (right):


Droop Direction
ノイズが歪められる方向。
Mask Center
閾値範囲を使用して、デフォルトのBillowyノイズの密度に基づいてWispyノイズをマスクします。
Mask Center と Mask Width は、そのマスク範囲を制御します。
デフォルトでは、Billowyノイズの密度がこの範囲の最小値と最大値にある場合、そのWispyノイズの強度の乗数は、それぞれ1と0になります。
Wispyノイズは、マスク値が小さい領域で減少します。
Sky BoxをWispyノイズで満たすには、この値を1に、 Mask Width を0に設定します。
Mask Width
Mask Center と組み合わせてWispyノイズをマスクするのに使用される値の範囲を制御します。
マスク値の実質的な範囲は、Mask Center - Mask Width * 0.5からMask Center + Mask Width * 0.5までです。
Vertical Profile Mask
このランプは、Sky BoxのVertical Profileに対するWispyノイズ関数の強度を制御することができます。 この横軸は、垂直高さを示します(左側が最小値、右側が最大値)。 この縦軸は、ノイズ関数がこの範囲内でそのポイントを生成する時の出力の強度を示します。
Animation 
Pulse Duration
生成されたノイズを時間で可変させます。 これは、ノイズパターンの変化の速さを制御します。
Time
雲ノイズを評価する時間。
Enable Directional Offset
有効にすると、評価されたノイズパターンがオフセットされ、ノイズフィールド全体が視覚的に“パン”したような効果になるので、風のような効果をシミュレーションすることができます。
Speed
Direction で指定された方向にノイズパターンを移動させる速さを制御します。
Direction
ノイズパターンのオフセットに使用される方向。
Upward Bias
有効にすると、これは、( Direction で指定された)方向とY軸をブレンドする量を制御することができます。 このコントロールを使用することで、方向に少し上向きの動きを追加することができます。
Cloud Top Offset
Sky Boxの底部と上部の間のオフセット差を制御します。
Output 
Normalize Density
( Coverage で指定された)大空が雲で隠される量を減らすと、Sky Boxから出力される密度も下がります。
これを有効にすると、密度の範囲が0から1の範囲にさらに近くなります。
Maximum Density
このチェックボックスを有効にすると、密度値がこの値より大きくならないようにクランプされます。
Billowy Scale
Billowyノイズが生成される領域の密度をこの値で乗算します。
Wispy Scale
Wispyノイズが生成される領域の密度をこの値で乗算します。 通常では、Wispyノイズは、満たされたBillowy Cloud(もくもく雲)よりも不透明です。
Enable Remap Ramp
これを有効にすると、ランプを使って密度の出力の形状を変えることができます。
Density Remap Ramp
Enable Remap Ramp が有効な時、このランプは、密度出力を制御することができます。 この横軸は、入力の密度範囲を示します(左側が最小値、右側が最大値)。 この縦軸は、密度値がこの範囲内のそのポイントでの値の時に出力される値を示します。
Scale Along Vertical Profile
これを有効にすると、Sky BoxのVertical Profileに沿って密度の出力の形状を変えることができます。
Vertical Density Ramp
このランプは、Sky BoxのVertical Profileに対する出力密度を制御することができます。 この横軸は、垂直高さを示します(左側が最小値、右側が最大値)。 この縦軸は、ノイズ関数がこの範囲内でそのポイントを生成する時の出力される密度スケールを示します。
Deactivate
背景値を持つボクセルを非アクティブにします。 これは、なんとなく広い帯域でボクセルをアクティブ化したものの、すべてのボクセルが背景値以外の値にならなかった処理の結果をクリーンアップするのに役立ちます。
例えば、ボリュームを変位させる余裕代を持たせるために、Volume SOPの後に
VDB Activateを追加して Expand を有効にしたとします。
その後に、このノードの Deactivate を使用すれば、使用する必要のなかったボクセルを空けることができます。
Compute Max Density
Density Volume で指定されたDensityボリュームの最小値と最大値を計算します。
Bindings 
Density Volume
Sky Boxの密度として使用されるボリュームの名前。通常では、ここをdensityのままにしてください。
| See also |